Backdrop: Yoshihisa Maitani and the Olympus Compact SLR
Olympus came late to the 35mm SLR. When the original OM-1 appeared in 1972, the established makers had been building reflex cameras for more than a decade, and Olympus was not seriously regarded as a contender among them. What it had instead was a chief designer, Yoshihisa Maitani, the man behind the half-frame Pen and later the pocket sized XA.
The resulting OM-1 shows the leadership of a designer who viewed compactness as an engineering discipline rather than a styling exercise. Controls were repositioned to make better use of available space, unnecessary weight was stripped from components, and attention was paid to details often overlooked, such as mirror shock and operating noise. Naturally, as the soul of the camera, these ideas extended into the Zuiko lens range, which followed the same principle of reducing size without compromising performance.
Galloper (Carousel Horse), Herne Bay pier, shot with 100mm f2.8 Zuiko lens/Olympus OM-1n
Zuiko Lenses
The name Zuiko means light of the gods and has been applied to Olympus lenses since 1936. They have a stellar reputation, illustrated by articles such as Are Olympus lenses the GOAT vintage lenses?
The OM system offers a wide range of compact lenses (from 8mm to 1000mm in primes), some of which are legendary. The 21mm f2 is often regarded as one of the finest ultra-wide lenses ever produced for a manual-focus SLR and is rare and expensive today. The 90mm f2 Macro is also extremely highly sought after for its extraordinary sharpness, macro capability and portrait performance. The lenses I use are listed below.
Olympus OM 24mm f2 A great wide angle lens. Prices are relatively high.
Olympus OM 28mm f2.8 One of the best value lenses in the OM system. It’s extremely small, lightweight, optically solid and produces sharp images from moderate apertures.
Olympus OM 35mm f2. A versatile lens with attractive rendering. Not at at its best wide open, but it compensates with character.
Olympus OM 50mm f1.2 Atmospheric art lens, soft wide open. Obviously larger and heavier than the f/1.8, but still small for a 1.2. There is an interesting review of this lens with a Sony Alpha by Phillip Reeve.
Olympus OM 85mm f2. An outstanding portrait lens.
Olympus OM 100mm f2.8. Can be overlooked in favour of the better known 85mm, but it is one of the sharpest lenses in the OM range and its compact for its focal length.
Zuiko Lenses on Digital Cameras
The use of Zuiko lenses on contempory ‘mirrorless’ cameras (horseless carriages) is described very well in this Quora post, which I have reproduced in full below.
Olympus OM Zuiko lenses from the 1980s are heavily favored by contemporary digital photographers and videographers for several distinct reasons:
Exceptional compactness: Modern mirrorless camera bodies are prized for being small, but attaching a massive modern autofocus lens often defeats the purpose. Because the OM system was built around making gear as small as physically possible, lenses like the Zuiko 50mm f/1.8 or 28mm f/3.5 are remarkably tiny. They balance effortlessly on compact mirrorless bodies from brands like Sony, Fujifilm, or Panasonic without making the setup front-heavy.
Distinct optical character: Modern digital lenses are engineered to mathematical perfection, which can sometimes result in images that feel somewhat sterile. Vintage Zuiko lenses offer a softer micro-contrast, organic lens flares, and a gentle transition into out-of-focus areas. This provides a highly sought-after “cinematic” or analog rendering straight out of the camera, while still retaining excellent center sharpness.
Tactile manual focus: Built before the widespread adoption of plastic autofocus housings, OM lenses feature all-metal and glass construction. Their heavily damped, smooth manual focus rings were designed exclusively for human hands, not autofocus motors. Because modern mirrorless cameras feature digital tools like focus peaking and viewfinder magnification, manually focusing these vintage lenses is actually faster and more precise today than it was on the original analog film bodies.
Seamless adaptability: The original Olympus OM mount has a flange focal distance of 46 millimeters. Mirrorless cameras typically have flange distances under 20 millimeters. This structural difference leaves plenty of room to mount a simple, inexpensive metal adapter ring to bridge the gap. Because the adapter is just an empty tube spacing the lens correctly from the sensor, it requires no corrective glass elements that might degrade the image quality.
For photographers seeking the analog soul and mechanical build quality of vintage glass without paying the massive premiums commanded by classic rangefinder lenses, the Olympus OM Zuiko lineup hits an ideal sweet spot of character, price, and scale.
The Story of Two Newrick Brothers: Thomas William Newrick (1835–1895) & Henry Valentine Newrick (1832–1915)
The Suffolk Coast
On the eastern edge of England, where the county of Suffolk meets Norfolk at the mouth of the River Yare, there is a cluster of coastal towns and villages: Great Yarmouth, Gorleston, Belton, Pakefield, Lowestoft, which face the North Sea across marshes and sand dunes. It was here, in the 1830s, that two brothers were born into the Newrick family: boys who would grow up to cross an ocean, live through a civil war, and build lives on the American frontier.
Henry Valentine Newrick was born on 14 February 1832, Valentine’s Day, in Pakefield, a fishing village just south of Lowestoft. His brother Thomas William Newrick followed on 31 October 1835, born a few miles inland in the market town of Beccles, in the Waveney valley. Their father was John Henry Buttifant Newrick, born in 1806 in Great Yarmouth, just across the river from Pakefield. Their mother was Susanna Weavers, who was born around 1810.
The Newrick name had roots in this corner of East Anglia. John H.B. Newrick’s father, James, had been born in 1772 in Belton, a village close to Pakefield. In fact, the Newrick family tree extends back to James Newark (1695-1171) of Burgh Castle, Suffolk, the writer’s 8th great-grandfather.
At some point, James Newrick (b. 1772) migrated north to County Durham, where he died in 1830 at Wearmouth, near Sunderland, on the River Wear. This northward move planted the Newrick name in the industrial Northeast of England and established a line of ironworkers and engineers who would later move to Woolwich. Other branches of the family would seed their own emigrant lines to New Zealand and Australia, but John H.B. Newrick’s branch stayed in the Suffolk–Norfolk borderlands until they left for good.
There is one more Suffolk connection to note. In the tiny parish of Sotterley, barely four miles from Beccles, a girl named Louisa Clutten was baptised on 4 January 1839, the daughter of William Clutten and Hannah. She would become Thomas’s wife, thirty years and an ocean later. The proximity of the Newricks of Beccles and the Cluttens of Sotterley, who were close enough to share a market day, makes it all but certain that the families knew one another before either crossed the Atlantic.
Departure
By the late 1840s, the Newrick family had left Suffolk for Croydon, on the southern outskirts of London. The move was part of a broader pattern: Croydon was growing rapidly, its population swelling after the railway arrived in 1839, and it drew workers from across southern England. Thomas was baptised on 8 April 1849 at the parish church of St John the Baptist, Croydon — a strikingly late baptism at the age of thirteen, which may have been due either to the family’s move to a new parish or to a requirement for confirmation.
Two years later, the 1851 census recorded Thomas, now fifteen, as a servant in a Croydon household headed by one Harrietta Nanes, aged sixty-five. He was the only male among six residents, apparently serving as a general domestic in a gentlewoman’s establishment. His birthplace was given as Beccles, Suffolk, and his surname was rendered as “Newick”—a phonetic variant. Of Henry, there is no trace in the 1851 English census. He may already have been in America, or may have been enumerated elsewhere and not yet found.
The family emigrated around 1852. Henry’s 1910 census return lists his year of immigration as 1852 and records 61 years of American residence in 1900. His obituary, published in a Parsons, Kansas, newspaper, stated that he “was born in England and moved to America with his parents when but a small boy” — a description coloured by the passage of decades, since he was, in fact, about twenty. Thomas would have been sixteen or seventeen: old enough to have completed his service in Croydon and to join the family’s crossing. Their sister Caroline, about fifteen, presumably accompanied them. Their parents, John and Susan Newrick, are recorded as “both buried in England,” suggesting they either returned to England at some point or never emigrated—a discrepancy that remains unresolved.
Michigan in the 1850s
The Newrick brothers settled in Michigan, specifically in the central part of the Lower Peninsula, in the country drained by the Saginaw River and its tributaries. This was still largely frontier territory in the 1850s.
Isabella County, where Thomas would be recorded in 1863, had been formally organised only in 1859; its first permanent white settlers had arrived as recently as 1854. Its county seat, Mount Pleasant, was established at the geographic centre of the county in 1860, when the total population was approximately 1,441; roughly half American settlers and half Native Americans of the Saginaw Chippewa nation. The neighbouring county of Saginaw, to the east, was more developed, its economy driven by the lumber trade that would make the Saginaw Valley one of the great timber-producing regions of nineteenth-century America.
Henry married first. In 1858, in Saginaw, he wed Caroline Wilcox, born in 1837 in New York to Oziel Wilcox, a peddler from Connecticut, and Lucy Leete, also of Connecticut. It was a marriage that joined an English immigrant to a woman of old New England stock. Their first child, William H Newrick, was born around 1859; a daughter, Florence, followed around 1862.
Thomas’s movements in this period are less clear. He was recorded in the Third Ward of Mount Pleasant, Isabella County, in July 1863, when the Civil War draft enumerators came calling. He was listed as “married,” aged twenty-seven, born in England. Whether he had married by this date or whether the record is in error remains an open question. No wife or children have been identified for Thomas before his 1868 marriage to Louisa Clutten.
The Civil War
The American Civil War reached the Michigan frontier through the Enrollment Act of March 1863. This was the first national conscription law in United States history, and it required the enrolment of every male citizen and declarant alien between twenty and forty-five. Those aged twenty to thirty-five, married or unmarried, were placed in Class 1 and liable to be called first if a congressional district’s volunteer quota was not met.
On 1 July 1863, Thomas was enrolled in the draft. He appeared in the Consolidated Lists under the name “Thomas Newick”; the dropped-R spelling that American clerks naturally produced. He was classified as Class 1, resident in the Third Ward of Mount Pleasant, within Michigan’s Sixth Congressional District. This sprawling district encompassed Isabella, Saginaw, Bay, Gratiot, Genesee, and numerous other counties stretching into the Upper Peninsula.
The draft was deeply unpopular. Men felt, one contemporary account noted, that being drafted “robbed them of their patriotism and branded them as unwilling defenders of the nation.” In practice, the 1863 draft produced remarkably few soldiers. Of 292,441 names drawn nationally, roughly 190,000 were exempted for disability or hardship, over 52,000 paid the $300 commutation fee (equivalent to roughly $5,000 in an unskilled worker’s wages), and 26,000 furnished substitutes. Only 9,881 men, barely three per cent, actually entered the army through the draft process. In Michigan, “very few were drafted,” as most quotas were filled by volunteers, often incentivised by substantial bounties.
Thomas, it appears, was among the majority who did not serve. No record of military service under any spelling variant of his name has been found. Whether he paid commutation, furnished a substitute, or was exempted, we do not know.
Henry’s path was different. On 26 February 1864 — seven months after Thomas’s enrollment — Henry walked into the recruiting office at Corunna, in Shiawassee County, and enlisted as a Private in Company D of the 3rd Michigan Cavalry. He gave his age as twenty-eight, understating it by about 4 years; he was actually 31, married, and the father of 2 young children.
The timing suggests that Henry may have enlisted as Thomas’s substitute. The Enrollment Act explicitly permitted substitution, and brothers doing so for one another was not unknown. However, there is no evidence to support this.
The 3rd Michigan Cavalry had been organised at Grand Rapids in late 1861 and served primarily in the Western Theatre — Tennessee, Mississippi, Alabama, and the Gulf states. By the time Henry joined Company D, the regiment had already seen hard fighting. Henry served through the final year of the war and was mustered out on 17 June 1865 at Baton Rouge, Louisiana, having held the rank of Private throughout. He came through the war alive and, so far as the records show, physically intact.
Thomas: The Saginaw Entrepreneur
Figure 1: Thomas W Newrick with daughter Nellie and Frank Brooks Cole
After the war, the brothers’ paths diverged. Thomas remained in Michigan. At some point in the mid-to-late 1860s, he moved, or prepared to move, from Isabella County toward the Saginaw area. On 28 January 1868, he married Louisa Clutten in Detroit, Wayne County. The marriage record named him as “Thomas William Newricke,” aged thirty (slightly understated), and his bride as “Louisa Clutte.”
Louisa had been baptised on 4 January 1839 in Sotterley, Suffolk, just four miles from Thomas’s birthplace of Beccles. Both were children of the same stretch of English countryside.
Thomas and Louisa settled in Saginaw County, where the 1870s and 1880s were the peak years of the great Michigan lumber boom. The Tittabawassee River, which flowed through the county into the Saginaw River and on to Lake Huron, was the principal highway for floating logs to the sawmills. By 1872, thirty-six mills, some of the largest in the country, operated along the Saginaw River. Thomas positioned himself at the intersection of this economy and the emerging farming country as forests were cleared.
His obituary, published in the Saginaw Evening News on 26 January 1895, recorded three distinct enterprises: he “once conducted a ferry across the Tittabawassee River,” “owned a grocery on S. Porter in Saginaw,” and had business interests “also in Hemlock.” Operating a river ferry in the lumber era was significant work, requiring a county licence and serving the constant traffic of loggers, farmers, and goods. The grocery on South Porter Street placed him in the commercial heart of old Saginaw City, on the west bank of the river.
Figure 2: Downtown Saginaw, about a decade after Thomas’s death
The 1880 Federal Census captured Thomas at the height of his business activity. On 5 June 1880, he was enumerated in Saginaw City as a retail grocer, aged about forty-two, living with Louisa, whose birthplace was confirmed as England and whose parents were English-born. Four days later, the agricultural census recorded his farm in Saginaw County — shopkeeper and farmer simultaneously, a common enough combination in rural Michigan. His neighbours on the agricultural schedule bore German surnames — Schilds, Knaile, Bytte, Meier, Engel- reflecting the mixed Anglo-German character of the Saginaw Valley’s settler population.
Thomas and Louisa had a child, Nellie Louise Newrick, in March 1874. Nellie was born in Saginaw City and baptised there, probably at St John’s Episcopal Church, the parish where Thomas would later be buried.
By 1887, Thomas had added another role: he was appointed Postmaster of Hemlock City, a small lumbering community in Richland Township, Saginaw County, about fifteen miles west of Saginaw. Hemlock was first settled in 1865, and its post office was established in 1869; by the 1880s, it was a modest but established village along the plank road connecting Saginaw with the farming country of Gratiot County. The postmaster’s compensation of $159.30 reflected a small rural office, probably run from Thomas’s own premises alongside his grocery. In this era, a postmaster appointment was a federal patronage position that signified civic standing.
By 1890, a directory placed Thomas at 1008 Adams Street, west side, Saginaw — probably his grocery, having moved from or supplemented the South Porter Street location. The “west side” placed him on the old Saginaw City bank of the river, consistent with his established roots. He was a man of substance: farmer, grocer, ferry operator, and postmaster.
Henry: Cavalryman, Farmer, Livery Man
Henry’s war ended at Baton Rouge in June 1865. Within five years, he had left Michigan entirely. In 1870, the census found him in Fort Scott, Bourbon County, Kansas — deep in the southeast corner of the state, close to the Missouri border. He was farming, with real estate valued at $1,000. His household comprised his wife Caroline (née Wilcox), son William and daughters Florence and Sarah. The family was joined later by a fourth child, Laura, born around 1872.
Fort Scott was a natural destination for a Union veteran. The town had been a military post since 1842 and played a significant role in the “Bleeding Kansas” conflicts of the 1850s. After the war, it became a railhead and agricultural centre, drawing settlers from across the Midwest. Kansas actively recruited veterans with offers of cheap land and the westward-expanding railroad.
By 1880, Henry had moved from farming into a business that suited a cavalry veteran: he was keeping a livery stable on Carroll’s Plaza in Fort Scott.
His sister, also named Caroline (born 1837), may have been in the household at various times, potentially contributing to the census confusion that listed his wife’s surname as “Newrick” rather than “Wilcox”.
Tragedy struck in March 1885 when Caroline Wilcox Newrick died, aged forty-eight, and was buried in Fort Scott. Henry, now fifty-three, was left a widower with adolescent and young adult children. His daughter Sarah, then about seventeen, appears to have assumed the role of housekeeper and companion — a position she would hold for the rest of Henry’s life.
On 4 August 1890, Henry filed for a Civil War pension in Kansas, for service with Company D, 3rd Michigan Cavalry. The timing coincided with the Dependent Pension Act of that year, which expanded eligibility to any Union veteran unable to perform manual labour, regardless of whether the disability was service-related.
In 1896, Henry moved from Fort Scott to Parsons, in neighbouring Labette County, where he would spend his final years. He lived for a time on the Plaza, then near the old county fairgrounds south of the city. By 1900, he was a widowed farmer, renting on Johnson Avenue with Sarah as his sole companion. By 1910, he owned his home outright at 2421 Main Street, making him a man of modest but secure means, living on his own income.
Henry was a member of the Grand Army of the Republic, the veterans’ organisation that served as a fraternal society, political lobby, and mutual aid network for Union veterans. A 1906 GAR muster roll records him as a member of the Parsons post, aged seventy, born in England, resident at Rural Free Delivery #4.
His funeral service in August 1915 was conducted at home by the Reverend P. H. Chappelear of the Washington Avenue Methodist Church. However, the veterans escorted his body to the cemetery and conducted the service at the graveside. This was a fitting farewell for a man who had ridden with the 3rd Michigan Cavalry half a century earlier.
Henry Valentine Newrick died on 8 August 1915 at his home in Parsons, after a lingering illness, at the age of eighty-three. He was buried in Oakwood Cemetery, Parsons. His obituary noted that he was survived by two daughters: Miss Sarah, who lived with him, and Mrs Morris (née Florence) of Joplin, Missouri, and one son, W. H. Newrick, an engineer on the Missouri-Kansas-Texas Railroad, known as the “Katy.” He was, the newspaper recorded, “well known to all of the older residents of this city.”
Thomas: Last Years
Thomas William Newrick died on 25 January 1895 in Saginaw, Michigan, at the age of sixty-one, twenty years before his elder brother. His funeral service was held at St John Episcopal Church, the American counterpart to the Church of England, where he had been baptised in Croydon nearly half a century earlier. He was buried at Oakwood Cemetery, Saginaw, a municipal cemetery established in 1868. His grave, the cemetery records note, has no marker.
His obituary appeared the following day in the Saginaw Evening News. It was a brief notice — recording the ferry, the grocery, and the Hemlock connection — but its appearance in the city’s daily newspaper reflected a man of standing in his community.
Louisa died on 14 November 1892, three years before Thomas, making him a widower at the time of his own death. Their daughter, Nellie Louise, remained in the Hemlock area. In 1893, she married Frank Brooks Cole, the son of another Civil War family. Frank’s father, Captain Frank J. Cole, had enlisted as a Private in Company G, 13th Illinois Infantry, at Dixon, Illinois, on 6 June 1861, mustered in by his own father, Captain George M. Cole. The elder Cole rose from Private through the ranks of the 13th Illinois and the 6th Missouri Cavalry to Captain: Frank’s mother, Susan L. Brooks Cole had been the public librarian at East Saginaw. The Cole and Newrick families had been neighbours in the Saginaw area since at least the early 1870s.
Frank Brooks Cole served in the Navy during the Spanish-American War, was a concert soloist at leading American hotels in early life, and went on to become the first president of the Pasadena Chamber of Commerce and Mayor of Pasadena in 1926. He died around 1943 at their home in Hermosa Beach.
Nellie outlived him by three decades. She moved north to Pismo Beach, San Luis Obispo County, to be near their daughter, Susan O’Connor, and died there on 12 October 1974 at the remarkable age of one hundred. Born nine years after the Civil War ended, she lived to see men walk on the moon and was the last link in Thomas and Louisa’s Suffolk-to-Michigan story. She and Frank had five children: Thomas (1894-1984), Maxine Ruth (1896-1985), Franklin Brooks Jr. (1901-1987), Susanna L. (1905-1987), and a daughter who became Mrs Lloyd C. Bauer.
Two Brothers, Two Oakwoods
The brothers’ final resting places were both in Oakwood. Thomas at Oakwood Cemetery in Saginaw, Michigan; Henry at Oakwood Cemetery in Parsons, Kansas. Both men left the same small corner of Suffolk, settled in the same part of Michigan, lived through the same war, and ended their days a thousand miles apart, in cemeteries that share a name.
Thomas was the settler-entrepreneur who put down roots, built businesses, and became a prominent member of his community: grocer, farmer, ferry operator, postmaster, and churchman.
Henry was the soldier-pioneer who moved west, kept a livery stable, and spent his last decades in the company of fellow veterans who had shared the same experience.
Both were ordinary men, but with extraordinary stories.
Sources
Parish Register, Pakefield, Suffolk — Baptism of Henry Valentine Newrick, 19 March 1832. FHL Film 918521.
Parish Register, St John the Baptist, Croydon, Surrey — Baptism of Thomas William Newrick, 8 April 1849. FHL Film 994333.
1851 Census of England and Wales — Thomas Newick, servant, Croydon. Piece 1601, Folio 122, Page 29.
U.S. Civil War Draft Registrations, 1863 — Thomas Newick, Isabella County, Michigan. Series Nm-65, Entry 172.
Record of Service of Michigan Volunteers in the Civil War, 1861–65 — Henry V Newrick, Pvt, Co. D, 3rd Michigan Cavalry.
NPS Civil War Soldiers & Sailors Database — Henry V. Newrick, Pvt, Co. D, 3rd Michigan Cavalry. NARA Film M545 roll 30.
Michigan Marriage Records — Thomas William Newricke to Louisa Clutte, 28 January 1868, Detroit. FHL Film 001377622.
Suffolk County Baptism Register — Louisa Clutten, 4 January 1839, Sotterley. FHL Film 918543.
1870 U.S. Federal Census — Henry Valentine Newrick, Fort Scott, Bourbon County, Kansas.
1880 U.S. Federal Census, Population Schedule — Thomas William Newrick, Saginaw City, Michigan. ED 315.
1880 U.S. Federal Census, Agricultural Schedule — Newrick, Thomas William., Saginaw County. ED 313.
1880 U.S. Federal Census — Henry Newrick, Fort Scott, Kansas (livery stable, Carroll’s Plaza).
The Postal Service, 1887 — Post-Offices and Postmasters, Michigan, p. 539: Hemlock City, T. W. Newrick.
Directory listing, 1890 — Thomas William Newrick, 1008 Adams, w S, Saginaw.
U.S. Civil War Pension Index — Henry V Newrick, D 3 Mich Cav, filed Kansas, 4 August 1890.
Michigan Death Records; Saginaw Evening News, 26 January 1895 — Obituary of Thomas W. Newrick.
Find A Grave — Thomas William Newrick, Oakwood Cemetery, Saginaw (biography present).
Find A Grave — Henry Valentine Newrick, Oakwood Cemetery, Parsons, Kansas.
Church Register, Saginaw — Baptism of Nellie Newrick, 30 March 1874. FHL Film 967179.
Michigan Marriage Records — Nely L. Newrick to Frank B. Cole, 23 January 1900, Merrill. FHL Film 000967190.
Death Record — Nely L Cole, 30 March 1874 – 12 October 1974, San Luis Obispo, California.
U.S. Social Security Applications — Thomas Newrich (father), Louisa Clutten (spouse), Nely Louise Cole (child).
1900 U.S. Federal Census — Henry Newrick, Parsons, Kansas (widowed, farmer).
1900 U.S. Federal Census — Cole household, Hemlock Village, Saginaw County, Michigan.
Grand Army of the Republic Muster Roll, Parsons, Kansas, June 1906 — Henry V Newrick.
1910 U.S. Federal Census — Henry B [sic] Newrick, 2421 Main Street, Parsons, Kansas.
Obituary — “Death of Henry V. Newrick,” Fort Scott or Parsons newspaper, August 1915.
Caroline Wilcox Newrick — born 1837, New York; married Henry V. Newrick, 1858, Saginaw; died March 1885, Fort Scott, Kansas. Research records.
Imperial Publishing Co., The County of Saginaw, Michigan: Topography, History, Art Folio (Saginaw, 1896). Portrait plate, Richland Township: “12. T. W. Newrick, deceased.” University of Michigan Digital Collections; Library of Congress (LC item 2007626770).
Imperial Publishing Co., The County of Saginaw, Michigan: Topography, History, Art Folio (Saginaw, 1896). Land ownership map, Richland Township, p. 25: “Newrick Est.”
Record of Service of Michigan Volunteers in the Civil War, 1861–1865, Vol. 36 (Cavalry), p. 124: Henry V. Newrick, Co. D, 3rd Michigan Cavalry.
Illinois: Roster of Officers and Enlisted Men — Frank J. Cole, Pvt, Co. G, 13th Illinois Infantry. Enlisted 6 Jun 1861, Dixon, Illinois. Transferred to the 6th Missouri Cavalry.
NARA, Compiled Military Service Records — Frank J. Cole, Co. G, 13th Illinois Infantry. Film M539 roll 17. Physical description: age 22, 5’8¼”, brown hair, black eyes, light complexion. Residence: Fenton, Whiteside Co., Illinois. Occupation: clerk. Promoted Adjutant, 6 Mo. Cavalry, by order Gen. Halleck, 15 Feb 1862.
U.S. Civil War Pension Index — Susan L. Cole, widow of Franklin J. Cole. Application 410599, Certificate 323539. Filed from Michigan, 14 Oct 1889.
Ancestry.com — Susan L. (Susie) Brooks Cole (Feb 1843 – 18 Nov 1919). Born in Illinois; married Franklin J. Cole, 30 Oct 1862, Whiteside, Illinois; died in Los Angeles, California.
Ancestry.com — Nellie Newrick (30 Mar 1874 – 12 Oct 1974). Born in Saginaw; married Frank Brooks Cole, 1893; died in Pismo Beach, San Luis Obispo, California.
Obituary — Franklin B. Cole, aged 70, former Mayor of Pasadena. Newspaper clipping (undated, c. 1943). Hermosa Beach, California.
1880 U.S. Federal Census, Agricultural Schedule — Tittabawassee Township and Buena Vista Township, Saginaw County, Michigan. Page 9.
Researched by Nigel Williams, 2026. The writer is a first cousin five times removed of Thomas and Henry, through the Newrick line of his mother, Yvonne Patricia Newrick.
Many families have a story that describes former prosperity or an aristocratic connection that isn’t exactly true but isn’t completely false, either. The ancestor who owned half the village, for example, turns out to have been the proprietor of a modest farm.
My grandmother ‘Grandma Williams’ (Gwendoline Frances 1903-1991) told my sister and me just such a story sometime in the early 1970s, when we were small children.
In it, our ancestor, The Squire of Nettlebed, had a wife named Annie Andrews and gambled and drank the family fortune away. He died penniless and was buried in a pauper’s grave. Grandma insisted that we would have been a wealthy family if he had been more abstemious and was strongly opposed to gambling.
I was curious about this, and after my father died in 1979, his brother, Uncle Peter, a large, loud man who never married, helped me search the graveyard in Nettlebed. We found nothing to confirm the story.
This is unsurprising, given there was never a squire in the family, and the man who died a pauper was not from Nettlebed. However, there were some facts behind my Grandmother’s story.
The Andrews
Frederick Andrews (my 3rd great-grandfather) appears to be the man who inspired the story. He had a wife called Ann, and he died as a pauper, having spent time in at least two Poorhouses. This is his story.
Frederick Andrews and his twin sister Ann were born in 1827 in Bucklebury, Berkshire, to George (b. 1796), a shoemaker, and Jane (b. 1806, née Lindsey).
His future wife was also named Ann (née Dinch). She came from the village of Ogbourne St. George, Wiltshire. They married in October 1847. Five generations of Dinch lived in the tiny Wiltshire village: Ann, her father, Edward, and three previous generations named John. John the Elder was born in 1706.
Ogbourne St. George is best known for its role in deceiving the Germans during World War II: the manor house’s address was used in a letter from a fictitious ‘Pam’ to an equally fictitious but also deceased ‘Major Martin’. The rationale was that ‘no German could resist the Englishness of such an address’.
Frederick and Ann Andrews had five children in 13 years: George (1848), Clara (1853), Emma, my 2nd great-grandmother (1855), William (1858), and Henry (1861).
In 1861, Frederick was working as a ‘Grocer and Poulter’, Ann as a charwoman, and his eldest son George was a 13-year-old errand boy. George would go on to work at the Huntley and Palmer Biscuit Factory in Reading for over 20 years.
Destitution
In 1871, Frederick was working as a ‘Servant Groom’. His son William was working as a Labourer at a Mill, and Henry was still at school.
Ann died in 1880. Where Frederick was on census night in 1881 is unknown, as he does not appear in the returns. What is certain is that within fifteen months he was in London, sick, and on the parish – as an inmate in the infirmary of Islington Workhouse. The record states: ‘Andrews, Frederick, aged 55, admitted 8 July 1882, discharged 20 July 1882. Twelve days.’ There is no ‘See old reg.’ against his name, which may mean it was his first time in the institution. Many entries above him have no leaving date but are marked ‘dead’.
The census of 1891 finds Frederick in The Reading Union Workhouse. This opened in 1867 on Oxford Road in Reading, to consolidate several local parish poorhouses. It comprised receiving blocks, an infirmary and a fever block.
For its time, it was considered clean and well run, though the rule was that the conditions of the pauper relieved at public expense were that they should be ‘less eligible’ than those of the lowest-paid independent labourer. Eligible is used here in its older sense, meaning desirable or worth choosing.
Frederick was in Reading Union ten years later at the next census, in 1901. He died on the 10th June 1904, aged 76, once again, or still in the Workhouse, of cardiac disease and exhaustion. Whether he remained within its walls throughout all those years, or passed in and out of them, destitute, we do not know.
The Nettlebed Connection
Frederick Foster (1855-1942) married my 2nd-great-grandmother, Emma Andrews, in 1880. He was born in Nettlebed, as was his mother Emma Dyer (1819-1896). This is the connection to Nettlebed.
The Real Squire of Nettlebed
Ironically, there was a squire of Nettlebed who endured financial woes during Frederick Andrews’ life. 1894, the manor was bought from the ancestral owners, the Stonors, by H. H. Gardiner, a wealthy London businessman. He was forced to sell in less than a decade after suffering financial losses . Robert Fleming, the Scottish financier and grandfather of Ian Fleming, then bought the estate in 1903.
Bromley and Hackney Workhouses
As I did more research, I found that he was not the only ancestor to have resided in the workhouse.
James Smith (1807-1885), my 4th great-grandfather, an agricultural labourer, was in the Bromley Union Workhouse in 1881 and died there four years later.
Mary Turkington (1845-Bef.1911), my 3rd-great-aunt, was a soldier’s daughter born in South Africa. Her husband William Turkington (1843-1901) was one of the many men in the family tree who served in the Royal Artillery serving in China during the Second China War from Jan 1860 to April 1861.
At the 1881 census, Mary and William were living in Streatham. Sometime between then and 1885, William and Mary appear to have separated, and she spent time in Hackney Workhouse in June 1885. In 1891 she was supporting herself by working as a dressmaker and living as a lodger without him. She had a further spell in Hackney Workhouse in March 1902.
From Workhouse to Hospital
Finally, I found that the vaccination records of my cousins in the Williams branch of the family from Usk, Wales, were in the Pontypool Union. This was beginning was the beginning of a transition of the institution from Poor Law workhouse to Panteg County Hospital and finally to a free NHS hospital in 1948.
Sources
England, Select Births and Christenings, 1538–1975 (baptism, Bucklebury, Berkshire, 23 December 1827)
England & Wales, Christening Index, 1530–1980
1841 England Census (Thatcham, Berkshire)
London, England, Church of England Marriages and Banns, 1754–1938 (marriage to Ann Dench, St Sepulchre, London, 3 October 1847)
England, Select Marriages, 1538–1973
1851 England Census (St Bartholomew the Great, Middlesex; lodger)
1861 England Census (St John, Greenham, Berkshire; grocer and poulterer)
1871 England Census (Greenham, St John the Evangelist, Berkshire; servant groom)
London, England, Poor Law Hospital Admissions and Discharges, 1842–1918 (Islington workhouse infirmary, admitted 8 July 1882, discharged 20 July 1882)
London, England, Workhouse Admission and Discharge Records, 1764–1921
1891 England Census (Reading Union Workhouse, Oxford Road, Reading; general labourer)
1901 England Census (Reading Union Workhouse, Reading)
Death certificate, General Register Office (died Reading Union Workhouse, 10 June 1904, aged 76, cardiac disease and exhaustion)
England & Wales, Civil Registration Death Index, 1837–1915
England, Select Deaths and Burials, 1538–1991
Web: UK, Burial and Cremation Index, 1576–2014 (burial, Reading, 14 June 1904)
England & Wales, Civil Registration Death Index, 1837–1915 (Ann Andrews, 1880)
Victoria County History, Oxfordshire, volume eighteen, Nettlebed (British History Online)
Peter Higginbotham, The Workhouse: The Story of an Institution, workhouses.org.uk (Reading Union workhouse)
British Medical Journal, report on Reading Union workhouse infirmary, 1894 (Nursing Commission on Provincial Workhouses
Newrick is a relatively rare English surname. This is primarily because, unlike the name Smith for example, which developed thousands of times, independently, it probably descends from a small number, or perhaps only a single, founder family in East Anglia.
The order for the gravestone of James Newrick, (1772 Belton, Suffolk, 1830 Wearmouth, Durham), a miller, and my 5th great-grandfather
The surname is generally regarded as an East Anglian variant of Newark. In Norfolk and Suffolk, the forms Newark and Newrick were historically used for members of the same families, apparently reflecting local pronunciation at a time when surname spelling was not fixed. The underlying name is locational and derives from Old English elements meaning “new work” or “new fortification”. Its linguistic roots are therefore Anglo-Saxon, although hereditary surnames developed considerably later.
Origins: The East Anglian Coastal Belt
The Newrick family’s story begins on the East Anglian coast in the late seventeenth century. The earliest traceable ancestor is James Newark, born in 1695, whose line descends through William Newark (1716–1791) and Robert Newark (1742–1810) before the surname variant Newrick appears in the next generation, with James Newrick born at Belton, Suffolk, in 1772.
Robert Newark’s son James married Elizabeth Butterfont, born at Toft, Norfolk, in 1774, and it is their children who carry the story north to Wearmouth; Elizabeth died at Sunderland in 1843, having made the journey with her family. The Butterfont name was preserved as a middle name by two of her sons, William Cooper Butterfont Newrick, born at Great Yarmouth in 1800, and John Henry Buttifant Newrick, born there in 1806, a deliberate marker of maternal descent across a generation where parish records were unreliable. The family’s roots in the Suffolk and Norfolk coastal strip thus span at least five generations before the move north.
The First Recorded Newrick
The first recorded Newrick is James, born in 1772 at Belton, Suffolk, a parish a few miles inland from Great Yarmouth. Another branch emerges at Great Yarmouth itself, this time bearing the distinctive middle name Buttifant, likely a local Norfolk surname, with William Cooper Butterfont Newrick born there in 1800 and John Henry Buttifant Newrick in 1806.
Still further inland, Thomas William Newrick, who would emigrate to Michigan in the 1850s, was born at Beccles in 1835, while Henry Valentine was born at Pakefield, near Lowestoft, in 1832. Bringing these threads together, the family’s roots lie in the Suffolk and Norfolk coastal strip: a zone of mixed arable farming, fishing, and small-scale craft trades.
This was also one of the regions most severely affected by the parliamentary enclosure movement. Between 1790 and 1815, successive Enclosure Acts extinguished common grazing rights across East Anglia, driving agricultural labourers off land they had worked for generations. E.P. Thompson, in The Making of the English Working Class (1963), traces the resulting drift of displaced rural labour toward the industrial north; and John Langton and R.J. Morris, in Atlas of Industrialising Britain (1986), map the flow of that migration along the east coast corridor, from the Norfolk and Suffolk lowlands toward the Durham and Northumberland coalfield. James Newrick’s move from Belton to Wearmouth before 1830 follows that route precisely.
The Durham Interlude: Wearside and the Industrial North
Wearmouth in the first decades of the nineteenth century was undergoing rapid expansion in coal, glass, and above all, shipbuilding. For a rural labourer from Suffolk, the wages on offer represented a transformation in circumstances. After James Newrick died at Wearmouth in 1830, a second generation was already established at Sunderland and North Shields. Charles C Newrick was born at North Shields in 1807, and Nathaniel Aaron in 1814. Later, James Archibald, born at Sunderland in 1826, would move on again to Darlington, where a further branch of the family put down roots and eventually dispersed to New Zealand and New South Wales.
This north-eastern phase set the pattern for further movement within industrial Britain. The Durham generation did not stay put. James Newrick, born in Sunderland in 1832, was a moulder, a foundry worker who cast metal components in sand or clay moulds, and his trade followed the railway frontier. The great railway building booms of the 1840s and 1850s created insatiable demand for iron moulders and engine fitters.
Crewe had been purpose-built by the Grand Junction Railway from 1843 as an engineering and locomotive works town, its population of barely two hundred growing to over eight thousand within two decades, almost entirely dependent on the railway. Oswestry, where James and his family were settled by 1871, was the headquarters of the Cambrian Railways from 1864, with locomotive workshops drawing skilled men from across the north and midlands. Raphael Samuel, in his essay “The workshop of the world” in History Workshop Journal (1977), documents this pattern of skilled iron workers following the railway frontier westward; James Newrick’s trajectory from Sunderland moulder to Oswestry moulder maps directly onto it.
From Oswestry to Woolwich, and the Arsenal
Charles Owen, James’s eldest son, took the next step. Already working as a moulder at sixteen in 1871, he had advanced to engine fitter by 1881, and by the mid-1880s, he had brought his family south to Plumstead, where he found employment at the Royal Gun Factory within the Royal Arsenal complex. To understand why Charles moved, it is important to note that the Arsenal had expanded dramatically from the 1850s onward; the Royal Gun Factory, established in its modern form in 1856, was by the 1880s recruiting specifically for engine fitters and skilled metalworkers, often targeting men with railway engineering experience.
The pull from the Welsh Marches to Woolwich therefore followed an established recruitment pipeline from the industrial midlands and north. By the 1890s, the Arsenal employed over ten thousand workers, making it the largest single industrial employer in Britain.
What is striking about the Plumstead household is how the Arsenal shaped the next generation. Charles Owen’s sons George, moved north to help establish the Royal Ordnance Factory at Blackburn. He was awarded the MBE for his work there. George’s brother, Richard Oswald, served in the Royal Artillery during the first World War and his sister Mary Ethel married a gunner, Albert Victor Wraight. Frank and Oscar Brown, first cousins and sons of Elizabeth Newrick, rose to Chief Inspector of Ordnance Machinery. The world of armaments and ordnance drew James Newrick’s descendants south from Sunderland and held them for three generations.
Emigration
While Charles Owen’s branch moved toward Woolwich, other members of James’s family emigrated in the final decades of the nineteenth century.
Four of James’s children settled in British Columbia: Elizabeth at Wellington, William also at Wellington, Mary Jane at Comox, and Ada, whose husband, Thomas Balderston, was a coal miner at Fernie in the Kootenay district in 1911, the year after his arrival from England. Elizabeth, William, and Mary Jane settled within a few miles of one another on Vancouver Island, in communities built around the Dunsmuir collieries; the tight cluster has the character of chain migration, one sibling following another to familiar faces and known work.
James, the fifth sibling to emigrate, went to Queensland rather than British Columbia, settling in Brisbane and marrying there around 1901. Queensland’s Assisted Immigration Act of 1869 had specifically targeted agricultural and skilled industrial workers from Britain, and its emigration agents were active in the north of England through the 1870s and 1880s.
The James Archibald branch at Darlington produced its own emigrant generation. Sarah Ann Newrick went to Dunedin , New Zealand in the 1870s, dying there in 1898; William Malcolm ended his days in Hawke’s Bay, also in New Zealand. Frederick Charles, a photographer, died in Granville, New South Wales, in 1928.
The Suffolk branches went to North America: Thomas William to Saginaw, Michigan, in the 1850s, and Henry Valentine eventually to Kansas. These movements belong to the broader story of mid-Victorian emigration to the United States, driven by industrial recruitment in the Great Lakes iron and steel belt rather than by colonial land settlement.
Summary
The Newrick migration across four generations fits a pattern well documented in literature on British internal and overseas migration (see Secondary Sources below). The first move, from East Anglian agriculture to Wearside industry, was driven by enclosure and industrial wages. The drift through the industrial north and midlands tracked the railway frontier. Moving to Woolwich was driven by Arsenal’s recruitment. Overseas dispersal, to Vancouver Island, Queensland, New Zealand, and New South Wales, followed organised colonial recruitment and chain migration, characteristic of late nineteenth-century British working-class emigration. It is notable that much of the migration was toward known work in established communities, along paths laid down by those who had gone before.
Sources for Newrick Origins and Migration
Parish registers and church records
England and Wales, Christening Index, 1530–1980
England, Select Births and Christenings, 1538–1975
England, Select Marriages, 1538–1973
England and Wales Marriages, 1538–1988
England, Select Deaths and Burials, 1538–1991
Norfolk, England, Church of England Baptism, Marriages and Burials, 1535–1812 (Burgh Castle; Caistor-next-Yarmouth; Great Yarmouth)
Norfolk, England, Bishop’s Transcripts, 1579–1935
Northumberland, England, Church of England Baptisms, Marriages and Burials, 1538–1938 (baptism of Charles Chicken Newrick, Christ Church, Tynemouth, 3 July 1808)
Durham, England, Church of England Baptisms, Marriages and Burials, 1538–1919 (Bishopwearmouth; burial at Nile Street, 19 December 1830)
Censuses of Canada, 1891, 1901, 1911, and 1921 (Nanaimo, Wellington, and Comox districts, Vancouver Island)
British Columbia Vital Statistics: births, marriages, and deaths registrations
Archives New Zealand passenger lists; New Zealand electoral rolls, 1853–1981; New Zealand Births, Deaths and Marriages historical records (Dunedin and Hawke’s Bay)
New South Wales Registry of Births, Deaths and Marriages (Frederick Charles Newrick, Granville, 1928, registration 11860)
Australia Electoral Rolls, 1903–1980 (Reid division, New South Wales)
United States Federal Census, 1860 onward (Saginaw, Michigan; Kansas)
Apprenticeship, directories, newspapers, and maps
Indenture of James May Butterfunt Newrick, 8 February 1834, Newcastle upon Tyne
Durham County Advertiser, January 1834, insolvency notice for James May Butterfunt Newrick, grocer, Bishopwearmouth
Ward’s Directory of Sunderland and District
Kelly’s Directory of Kent, Woolwich and Plumstead sections
Ordnance Survey town plans, Woolwich and Plumstead, 1:500 and 1:2500
Trove, for Queensland and New South Wales newspapers; Papers Past, for the New Zealand press
Royal Arsenal Woolwich records, The National Archives (verify the SUPP series in the catalogue before citing)
Compiled trees and indexes
Ancestry Family Trees
Geneanet Community Trees Index
Secondary works
E. P. Thompson, The Making of the English Working Class (London, 1963)
Arthur Redford, Labour Migration in England, 1800–1850, 2nd edn, ed. W. H. Chaloner (Manchester, 1964)
Dudley Baines, Migration in a Mature Economy: Emigration and Internal Migration in England and Wales, 1861–1900 (Cambridge, 1985)
John Langton and R. J. Morris (eds), Atlas of Industrializing Britain, 1780–1914 (London, 1986)
Colin G. Pooley and Jean Turnbull, Migration and Mobility in Britain since the Eighteenth Century (London, 1998)
John Douglas Belshaw, Colonization and Community: The Vancouver Island Coalfield and the Making of the British Columbian Working Class (Montreal, 2002)
Marjory Harper and Stephen Constantine, Migration and Empire (Oxford, 2010)
My great-grandfather Edward Williams was born on 10 April 1870 in Usk, Monmouthshire. He was the youngest of seven children of Abraham Williams (1826-1905), a sawyer from Llanfihangel-juxta-Usk and Ellen Rebecca Williams (née Lucas, and also from Usk). Abraham’s father John (1791-1862) had been a cordwainer (bookmaker), and Abraham worked at that trade for the first few years of his working life before becoming a sawyer.
Usk is an old market town in Monmouthshire, set on the river of the same name about ten miles north-east of Newport. A Norman castle stands above it, overlooking an ancient bridge that still stands. The town had prospered in the first half of the nineteenth century, but by the time Edward was born in 1870, its prosperity had faded, and the population had declined due to the agricultural depression.
Edward had two sisters, Elizabeth (b.1850) and Frances b.1868), and four brothers: Henry (b.1853). George (b.1859), Blandford (b.1861) and Abraham (b. 1866).
Abraham and George became sawyers like their father. Through most of the nineteenth century, the sawyer’s trade was heavy manual labour. A log was rolled onto trestles above a saw pit and cut lengthwise by two men working a long framed saw. Abraham senior was probably a pit sawyer. From the 1850s onwards, steam and water driven mills began to take the work, first in the towns and the ports and later in the country districts. Edward’s brothers probably worked in a commercial mill.
George James Priddy and my 3rd great aunt Frances Priddy (née Williams), seated. George’s father Edward was also a wood turner.
Blandford moved to Richmond, Surrey, where he became a bricklayer. Henry made a similar move to Camberwell in the same trade. Elizabeth is difficult to trace, but it appears she moved to London and became a cook, whilst her sister Frances married George James Priddy (1868-1940), a wood turner, and stayed in Wales. Edward grew up in Usk and trained as a tailor. However, sometime in the late 1880s, he left Usk and moved to London, where he joined the Police.
By this time, policing had become a sought-after occupation, with only about one applicant in five gaining acceptance. Senior Metropolitan Police officers preferred recruits from the countryside to Londoners, believing them healthier, more disciplined, and less likely to face conflicting loyalties when policing their own neighbourhoods. Consequently, only around one in ten Metropolitan Police constables was London-born. A young Welshman newly arrived from Usk would have fitted the profile of an ideal recruit.
Edward was appointed as a constable on 28 January 1889. By 1891, he was living within the police station establishment at West Hill, Wandsworth (V Division), as a serving constable.
Wandsworth was an expanding and socially varied London district whose crime was predominantly ordinary urban crime: theft, burglary, drunkenness, assault, domestic disturbance, juvenile offending and public-order offences. For the constable on the beat, policing consisted of continuous patrol, preventing theft, controlling disorder and managing the daily frictions of a growing population.
Edward married Alice Bowler in 1896, and over the following decade, they had four children: Lawrence (1898), Louisa (1901), Francis (1905), and my Grandfather, Leonard Alfred (1906). By the time Leonard was born, the family was living in Newington, Surrey. In December 1898, Edward transferred to L Division(Lambeth), which became his final police posting.
Lambeth was a tougher beat, as its densely populated streets were subject to far more drunkenness, assaults and public-order offences, and its police court was among the busiest in London. Street robbery, prostitution, drunken disorder and pickpockets were all likely to have been more common in Lambeth than in Wandsworth.
After 20 years of service, Edward retired from the Metropolitan Police in April 1909 on medical grounds and was awarded a pension of £33 14s 4d per annum. At the time of his retirement, the family was living in Walworth.
Edward Williams police medals. As I was a small boy when my grandfather gave them to me, he asked me not to swap them.
By the 1921 census, Edward was still living in London with Alice and their children, within a working household as the children moved into clerical and commercial work. Leonard worked as a clerk at Scotland Yard, while Lawrence Edward held a similar post at the Ministry of Agriculture in Whitehall. Louisa, Ellen and Francis all worked as shop assistants. Later in life Francis would also become a policeman.
The one photograph we have of Edward appears to be a post-retirement portrait, probably taken in the last decade of his life (1916-1926). I have the original, and it was the first example I have seen of a portrait that uses pencil retouching over a photographic base. It was proably a Bromide enlargement reworked with pencil, a technique popular in the early 20th century. Photographers used enlargements on light-sensitive bromide print paper and manually enhanced them with graphite to add artistic depth, fix imperfections, or mimic the painterly look of the Pictorialist movement.
Edward died of pulmonary tuberculosis in 1926 at the family home in Archway Street, Barnes, aged 56. Whilst this condition was not uncommon at the time, it was a particular threat to men who spent years outdoors in all weathers. The policeman’s beat both shaped and perhaps hastened the end of his life.
Sources
General Register Office: birth (Usk, 1870), marriage (St George Hanover Square, 1896), and death (Barnes, 1926) entries.
Census returns, 1871 to 1921 (Wales and England).
Church of England parish registers (marriage and baptisms), London and Surrey.
Metropolitan Police service and pension records, The National Archives (MEPO).
Compiled by Nigel Williams, January 2026. Edward Williams was my great-grandfather.
The children of Charles Owen Newrick (1855-1911) and Mary May Hiles (1855-1935)
Introduction
Growing up, I knew the Newrick family leaned towards the scientific and mathematical. My mother, Yvonne Patricia Newrick (1941-2024), was proficient at maths and enjoyed it. My Uncle and Grandfather, both named George, were engineers by trade.
Figure 1:The erecting shop at George Clark’s Southwick Works, Sunderland, photographed in the early years of the works. Joseph M. Newrick worked here as Foreman Marine Engineer in 1921. Photograph preserved by Thomas Olsson.
As I learned more about the family history, I found this pattern repeated. Many Newrick men were engineers. Several Newrick women also married into the profession, marrying engine fitters, toolmakers, turners and machinists.
As I went deeper into the records, a particular engineering specialisation emerged; the world of ordnance and artillery. Charles Owen’s cousins, Frank and Oscar Brown, sons of his aunt Elizabeth Newrick, both rose to the rank of Chief Inspector of Ordnance Machinery in the Army Ordnance Department, Oscar holding the DSO. George, Charles Owen’s own son, was awarded the MBE for his engineering work, initially at Woolwich and later at the Royal Ordnance Factory at Blackburn. In turn, his son, my Grandfather, also worked at the Woolwich Arsenal.
Another recurring theme in the Newricks also emerged: life at sea. The Newrick line had produced seafarers before Charles Owen’s children were born, and the Merchant and Royal Navies would figure heavily in the life of this branch of the family.
The intersection of engineering and the sea was marine and maritime engineering, encompassing work in the engine room, at sea, and in constructing the huge engines that powered ships crossing the oceans.
Figure 2: James Newrick (1861-1945), who arrived in Australia on the SS Sirsa in 1884.
The pull of the sea ran through the wider family too. Of my 3rd great-grandfather James’ children (by his two wives), five emigrated in the decades around the turn of the century.
His son James (1861-1945), settled in Queensland and married there around 1901. Four others, Elizabeth, Mary Jane, William, and Ada, made for British Columbia, three of them ending within a few miles of one another on Vancouver Island, at Wellington, Comox, and Nanaimo. That cluster on the island, with its coal mines and harbour traffic. Charles Owen, by contrast, went south to Woolwich.
From Sunderland to Plumstead
Charles Owen Newrick was born in Sunderland in 1855, the eldest surviving son of James Newrick, an iron moulder who moved his family across the north and midlands of England for work. By 1871, they were settled in Oswestry, Shropshire, at Tower Works Street, where Charles Owen, then sixteen, worked alongside his father as a moulder; a foundry worker who cast metal in sand or clay moulds to produce components for industrial machinery.
He married Mary, née Hiles, a Shrewsbury woman, in 1877; the Hiles family had worked the mills on the Rea Brook since the late eighteenth century, acquiring Abbey Mill and several others along its lower reaches.
Their first two children, James William and Emily May, were born there in the late 1870s. By 1881, he had advanced from moulder to engine fitter, a step reflecting both his growing skills and the demands of the railway and engineering works that then dominated Oswestry.
It was at this point, during their years on Middleton Road while raising their young family, that they relocated south, Charles and Mary welcomed Edith, their fourth child, in Plumstead around 1884, signalling the family’s establishment in Kent by the early 1880s. James Newrick, Charles Owen’s father, would later die in Grantham in 1900.
After arriving in Kent, Charles worked at the Royal Gun Factory, part of the Royal Arsenal complex. The family first lived on Elm Street, later moving to 36 Purrett Road, Plumstead. By the 1891 census, the Elm Street household had nine children, five of whom were born in Plumstead. (Mary was born in Shrewsbury in 1858.)
Purrett Road, Plumstead
The family at 36 Purrett Road in Plumstead was large. Between 1878 and 1898, Mary and Charles had fourteen children, thirteen of whom survived infancy, and two of whom perished in WWI. In 1890, Mary was briefly admitted to Cane Hill Asylum but returned home in January 1891.
The adult children of Charles and Mary were: James William (eldest son), Emily May (eldest daughter), Charles Hiles, Frederick Arthur, Irwin Owen, George, Harold, Edith, Richard Oswald, Agnes Elizabeth (youngest surviving daughter), and Florence (who died at five). By 1911, Charles (the father) was fifty-five and still at the Royal Gun Factory. Frederick and George were then working at the Western Electric Factory in North Woolwich, and the Purrett Road household had thinned as older children left.
This article is the story of the Newricks of Purret Road, Plumstead.
James William Newrick 1878-1952
Figure 3: The RMS Albania
The eldest son, James William, born in January 1878, went to sea as a Marine Fireman and later Marine Engine Driver. He served many years in the merchant navy, earning a medal for wartime service. In 1925, he served aboard the SS Albania on a voyage to New York.
His personal life was complicated: he lived with Emily Elizabeth Clark, a Plumstead woman whose husband was in the Royal Navy, and had two sons with her before her husband died in the catastrophic November 1914 explosion of HMS Bulwark off Sheerness.
Emily Elizabeth Clark was herself a child of the Arsenal world: her father, John William Clark, had worked as a labourer in the Laboratory, the ammunition production arm of the complex, until his death in tragic circumstances in 1889, when Emily was eight. She grew up in Plumstead, married, was abandoned by her husband when he joined the Royal Navy, and was living with her children when James William entered her life.
James married Emily the month after her first husband’s death in late 1914. He outlived her—she died in Lambeth in 1952, and James himself died the following year at the age of seventy-five.
Emily May Newrick 1879-1969
Emily May, the second child and eldest daughter of Charles and Mary, was born in July 1879. In 1901, she had left Plumstead and worked as a nurse in a household in Leyton. In 1921, she was working as a private nurse for Colonel W. W. Chitty, an Indian Army officer who commanded the 119th Infantry of the Indian Expeditionary Force (The Mooltan Regiment) in the First World War. The Chittys lived at a fashionable address; Lansdown Crescent, Notting Hill.
In the 1920s, Emily travelled widely, appearing on P&O and Blue Funnel Line passenger lists to India, South Africa, and Japan, always listed as a nurse. A second-class passage to Bombay in 1923 cost about thirty-two pounds, a significant sum for a nurse, which suggests these were working voyages. Her trip to Yokohama, a hub for British expatriates, may have meant caring for a naval or colonial family. Emily never married. In the 1950s, after decades in London, she moved to Sussex and died in Chichester in January 1969, aged eighty-nine, outliving most of her siblings.
Edith Newrick 1884-1921
Edith, born in 1884, married David Vince in 1921. David, born on 16 October 1885 at East Wickham Road, Welling, was the son of Job Vince, a general labourer, and Esther Emma, née Harris. That same year, 1921, the couple were living at 10 Graham Road, Bexleyheath, with their young son, George Frederick. Prior to the First World War, David had worked as a nurseryman and was listed as a labourer in 1921. By 1939, he had become a Naval Ordnance Examiner—a role connecting him, occupationally, to the world of armaments and inspection that had defined Edith’s father’s career at the Royal Gun Factory. By 1939, Edith was a patient at the Kent County Mental Hospital in Maidstone. Her mother, Mary, had herself been briefly admitted to Cane Hill in 1890.
Charles Hiles Newrick 1887-1952
Charles Hiles Newrick, born in 1887 to Charles and Mary, enlisted in the Royal Navy at Portsmouth in April 1905, aged seventeen. His long career spanned both world wars; he served aboard Impregnable, St George, Victory I, Bellerophon, Agamemnon, Venerable, and others. He advanced from Ordinary Seaman to Leading Seaman and passed his Petty Officer exam in March 1909.
He served in the First World War and, in January 1920, transferred to the Royal Australian Navy. In 1930, he married Ann Elizabeth Lyall, an Australian, in Victoria and settled at HMAS Cerberus, the RAN’s main training base. He served through the Second World War and was discharged as a Petty Officer in 1947. Ann died in September that year. Charles died in Heidelberg, Victoria, in 1952 at sixty-five, and was buried at Springvale.
Frederick Arthur Newrick 1889-1915
Frederick Arthur, born in January 1889, also went to sea, but as an engineer rather than a deck or engine-room rating. By July 1915, he held the specialist role of First Refrigerating Engineer aboard the SS Durham, a London-registered vessel making a voyage from Southampton to Sydney. By August 1919, he was rated as Second Engineer. In June 1924, he was serving as Acting Engineer aboard the SS Hororata of the New Zealand Shipping Company, which arrived in New York from Newcastle. By 1934, his Continuous Certificate of Discharge again listed him as Second Engineer, on the SS British Hussar. Frederick married Florence Hardy in 1913, and they had two children, Queenie and Frederick. He died in 1984 in Hastings, Sussex, at the age of ninety-five.
Irwin Owen Newrick 1892-1915
Figure 4: The letter from Mary to the authorities, thanking them for the return of his effects
Irwin Owen Newrick, born in 1892, enlisted as a Special Reservist at Woolwich in February 1908, giving his trade as Electrical Engineer. He served with the 6th Battalion, The Buffs (East Kent Regiment), as Private L/9108. Before the First World War, he saw postings to India and Singapore; after the war broke out, he returned to England in 1914 and was posted to France with the British Expeditionary Force. He died on 9 November 1915. He has no known grave and is commemorated on the Loos Memorial, Panels 15-19. In April 1916, his mother, Mary, wrote to the War Office to acknowledge receipt of his effects, signing herself Mary M. Newrick of 36 Purrett Road.
Harold Newrick 1895-1915
Harold, born in 1895, served as Gunner 40955 in the Royal Garrison Artillery, 108th Heavy Battery. During the First World War, he was wounded in France and died of his wounds on 24 May 1915, six months before his brother. On 9 July 1915, Mary wrote to the War Office asking which hospital Harold was in, as she had heard nothing since a report dated 7 June. She did not yet know he was dead. He is buried at Bailleul Communal Cemetery Extension, Nord, grave I. F. 88.
George Newrick 1894-1968
George, my great-grandfather, was born in April 1894 and worked as an engineer. He started with Vickers and later worked at Woolwich Arsenal. In the late 1930s, he moved north to help establish the new Royal Ordnance Factory at Blackburn, a wartime armaments facility of strategic importance. He was awarded the MBE in the 1958 New Year Honours for his work there. He married Rose Ann Mayes in April 1915, the same spring Harold died of his wounds. They had four children: George, Joyce, Margaret Rose, and Brenda. George died in Blackburn on 25 January 1968, aged seventy-three. My mother Yvonne Newrick recalled that he enjoyed repairing watches and clocks, which seems a fitting hobby for a man who, as his son, my Grandfather, told me, ‘could work to the very tightest of tolerances’.
RichardOswald Newrick 1897-1961
Figure 5: Richard Newricks CR2 record showing the name change
Richard Oswald enlisted in the Royal Field Artillery and served in France starting in 1915, the year both his brothers Irwin and Harold were killed. In 1917, he was listed as a deserter. Somehow, he reached a port, joined the merchant marine under the name George Hiles (using his mother’s maiden name), and went to sea. In 1934, he resumed his birth name and continued his maritime career through the 1930s. He later returned to Plumstead, dying there on 24 May 1961 at the age of sixty-four. The date of his death matched Harold’s, forty-six years earlier.
Agnes Elizabeth Newrick 1900-1973
Agnes Elizabeth, the youngest surviving daughter, married Herbert Joseph Matthews at Greenwich Register Office on 1 January 1910 and settled in Wanstead, Essex. Herbert served in the First World War as a Sapper with the London Electrical Engineers, a specialist Royal Engineers unit, and was stood down from colours in March 1917. He returned safely, and the couple were still at Wanstead in 1939, Herbert working as a Stockbroker’s Clerk and serving as an ARP warden. They had two daughters, Agnes and Kathleen.
The Parents, Charles Owen and Mary
Charles Owen Newrick died in 1911, before the world war that would take two of his sons. Mary lived until 1935, long enough to have buried Irwin and Harold, to have seen Richard vanish into the sea under a borrowed name, and to have watched Frederick, Charles Hiles, and James William pursue their careers across the world’s oceans. Her letter, thanking the authorities for the return of Irwin Owen’s effects, was strikingly poignant. Mary died at seventy-seven. She was the last living member of a household that had scattered from Purrett Road to Hasting, Bailleul, Melbourne and Yokohama.
Researched and written by Nigel Williams. Charles Owen Newrick (1855–1911) was the writer’s great-great-grandfather.
I knew nothing about the Boston family whilst my Grandmother, Eleanor Victoria Newrick (née Tremble), was alive. My mother, Yvonne Patricia Newrick, spoke of ‘Ernie and Ada’, her grandparents, but that was all I knew of the Boston family until I started to research the family tree.
Figure 1: My Great Grandparents Ernie and Ada Tremble (nee Boston)
It was during that research that I first glimpsed the deep family connection with the Royal Artillery. Ernie (Ernest Alfred) Tremble (1889-1961) served in the regiment, as did his wife’s father, William, the subject of this article. So did Ada’s brothers, James and Joseph Boston. From there, I found that the Chapmans (William Boston’s second wife’s family) included two generations of Artillerymen and that they had married into another artillery family, the Stubbs.
And so it went on. On the same (maternal) side of the family I also found gunners in the Browns, Fairburns, Hiles, Newricks, Trotter and Wraight families. On the paternal side I found them in the Baileys and the Bowlers. Many had served abroad and fought in Britain’s Imperial wars (principally Afghanistan, China, India and South Africa), and the death toll in action was substantial, particularly in the First World War. Many of these families had a connection to Woolwich, the birthplace and spiritual home of the Royal Artillery for nearly 300 years.
Later, I learned of the Bostons’ origins in Ulster and their migration to Australia and America, including their service in the American Civil War, but the story began with William.
Early Life and Military Service
William Boston was born in 1850 in Magheralin, County Down, Ireland, to James (1806-1879) and Ellen (née Plunket). He came from a weaving community: the greater Magheralin, Lurgan, and Waringstown areas were known worldwide as the “Cambric Trade” center, famed for high-quality hand-woven damask and linen cambrics. However, we know nothing more about his life before the army.
William enlisted in the Royal Regiment of Artillery at Lisburn on 6 July 1868; his profession was listed as ‘weaver’. He was medically examined and passed fit at Belfast the following day, and formally approved by Colonel Grant, Commanding 3rd Brigade Royal Artillery, on 11 July. From Belfast, he was posted to Woolwich, the administrative base of the Royal Artillery, arriving there on 29 July 1868.
Figure 2: oval-vignette studio portrait of Sergeant William Boston in dress tunic, probably taken between 1885 and 1888.
William’s early years of service were spent at home stations. After initial postings to Woolwich and Shoeburyness, where an accident on fatigue duty put him in hospital for six days, he served at Guernsey from late1871.
His first confirmed Good Conduct Pay award, at the rate of one penny per day, was granted on 1 July 1870. A second increment followed on 2 July 1871.
He returned from Guernsey in 1873, serving at the Curragh, in Ireland, then Shoeburyness and Portsmouth.
He was appointed Bombardier on 4 September 1874. On 12 October 1875, he married Elizabeth Chapman at the Register Office in Portsmouth. Elizabeth, born in 1854 to William Chapman and Mary Kingsbury, was twenty-one; William was about twenty-five at the time of their marriage.
Posting to India
Within weeks of marriage, William was posted to India. He arrived in Bombay (Mumbai) in December 1875 and was in Delhi by 30 December.
Elizabeth did not remain in England, but followed William to India as an army wife. She joined him at Gwalior, where their son John George Boston was born on 7 April 1877.
Perched atop a sheer sandstone plateau rising over 300 feet above the surrounding plain, Gwalior Fort is an ancient hill fort described by Mughal Emperor Babur as the “pearl amongst the fortresses of Hind.” In the late 19th century, it was a symbol of British imperial authority and regarded as the “key to Hindustan”. Following the Indian Rebellion of 1857, Britain retained a permanent military presence there, with detachments of the Royal Artillery responsible for manning the fort’s guns.
On 28 September 1877, William re-engaged at Gwalior to complete 21 years of service. The Boston family would most likely have lived in the British cantonment at Morar, around three miles to the east of the fort. Established in the 1840s and substantially rebuilt after the Indian Rebellion of 1857, Morar was intended to be the principal British military station in Central India. By the 1870s it contained barracks for European and Indian troops, officers’ bungalows set within spacious compounds, parade grounds, gun parks, magazines, hospitals, churches, messes and administrative buildings, all laid out along broad, tree-lined roads in accordance with British cantonment planning.
Life in the cantonment was highly ordered. Reveille, drill, artillery practice, inspections and maintenance filled much of the working day, whilst evenings might include mess dinners, sport, church parades or concerts organised by regimental bands. Soldiers lived in large barrack rooms, while married men usually occupied modest family quarters nearby. Although the imposing walls of Gwalior Fort dominated the skyline, the cantonment itself was a self-contained British community, deliberately separated from the surrounding Indian towns and villages.
Figure 3: Gwallior Fort, Central India, c.1870s. Elizabeth Chapman, wife of Bombardier William Boston, died within the fort garrison on 26 August 1878, aged twenty-four. Their son John George died here the following April.
The posting, which was so damaging to William’s health, proved fatal for Elizabeth. She died at Gwalior Fort, India, on 26 August 1878, aged twenty-four, and was buried there the following day.
William was in hospital in the same garrison at the time, one of a succession of admissions attributed to the climate. Their son John George survived his mother by seven months, dying at Gwalior on 1 April 1879.
The Afghan Campaign
The Second Afghan War brought William into active service. He reached Kandahar in January 1879. In the spring of 1880, he marched north with Sir Donald Stewart’s division towards Kabul, and on 19th April the column was attacked at Ahmed Khel by several thousand Ghazi tribesmen, who charged downhill upon it at close quarters. The guns fired at almost point-blank range. The action was over within an hour. William was awarded the clasp for the Battle of Ahmed Khel, and he reached Kabul with the division on 2nd May.
William was promoted to Corporal on 10 March 1880 and was awarded Good Conduct Pay at three pence per day on 4 July 1880. The Afghan Campaign medal roll (WO100/54) confirms his entitlement to the Afghanistan Medal with the clasp for Ahmed Khel.
Further postings at Morar, Delhi, and Agra in the early 1880s were marked by recurring illness, treated with cinchona, a source of quinine.
William was promoted to Sergeant on 15 March 1882 at the 1st Brigade, Eastern Division. He later endured ninety-four days of erysipelas (a bacterial skin infection) at Landour Hill Station in 1883. Landour was a hill cantonment and military sanatorium, located in the Himalayan foothills above Dehradun.
In September 1885, an Invaliding Board at Landour recommended a change of climate to England. He returned to Woolwich that November.
Return to England and Second Marriage
Back in England, William served at Alderney, Plymouth, and Sandown in 1886 and 1887.
In February 1886, William married for the second time. Confusingly, his second wife, Eliza Ann, born in 1867, shared the Chapman surname with his first wife, Elizabeth, and her father bore the same Christian name, though they were not related. Eliza Ann’s father, William, also served in the Royal Artillery. He was born in 1844 in New London, Canada, and whilst there is no record of his father, his birthplace makes it highly likely that he was also a soldier in the British Army.
William was awarded the Long Service and Good Conduct Medal on 1 January 1887 and promoted to Battery Sergeant Major on 1 September 1889. This was the senior warrant officer grade in a Royal Artillery battery and marked the culmination of a career that began as a teenage gunner at Woolwich. As BSM, he was responsible for discipline, drill, training and the day-to-day efficiency of the battery. He was then transferred to the Banffshire Artillery, almost certainly as a drill and gunnery instructor to the volunteer artillery stationed there.
He was permitted to continue service beyond his twenty-one-year engagement on 4 July 1889, and entitled to Good Conduct Pay at five pence per day from 7 July 1889.
The 1891 Scotland census shows the family at No. 32, Seatown, Cullen, Banffshire. Eliza Ann was aged 23; daughters Elizabeth and Ellen Amelia were aged 3 and 2, respectively; and the Bostons’ baby son, William, was aged 7 months.
Discharge and Civilian Life
William Boston was discharged on 20 March 1894 in Cullen after twenty-five years and two hundred and fifty-seven days. He was awarded a pension of two shillings and eightpence per diem for life, and his character on discharge was recorded as Very Good.
He settled at 61 Kingsman Street, Woolwich, where he lived for the rest of his life. The 1901 census lists him there with Eliza Ann and the children: Elizabeth, Ellen Amelia, William, Ada Mary, James Richard, and Joseph Henry. William was working as Assistant Manager in the Royal Artillery canteen in Woolwich.
Kingsman Street was laid out during the rapid expansion of Woolwich in the second half of the nineteenth century. It lay close to the Royal Arsenal and was built largely to house the thousands of people employed there. Residents would typically have included arsenal workers, dockyard labourers, soldiers and their families, skilled tradesmen and railway workers. The houses were modest two-storey Victorian terraces built very close together, often with tiny backyards and outside toilets. By the early twentieth century the area was extremely densely populated.
By 1911 William and Eliza Ann were running a confectionery business. There were still six children at their Kingsman Street home, including the new baby, Annie Isabel, and Albert Edward, aged 9. Ellen Amelia, aged 12 in 1901, had left home and married. Three of William’s sons would later serve in the British Army: James Richard Boston and Joseph Henry Boston in the Royal Artillery and Albert Edward Boston in the Royal Army Ordnance Corps.
The 1921 census, taken in June of that year, records William at the same Kingsman Street address, occupation: Army Pensioner, Royal Garrison Artillery. Joseph Henry, now twenty-two, was living at home with his wife, Ethel Victoria, and their infant daughter, Joan Ethel, William’s first confirmed grandchild. Albert Edward Boston, aged nineteen, and Annie Isabel, aged eleven, completed the household.
Death
Six months after that census was taken, on 28 December 1921, William died at home. The cause of death was cerebral haemorrhage following influenza (four days) and bronchitis (five days).
The death was registered by his daughter, Ellen Amelia Huish, Plumstead, who had married a fireman, Fred Huish, and was recorded, with a certificate as present at the death. Administration of his estate was granted to his widow, Eliza Ann, in January. William’s effects were valued at £220 16s. 2d.
Afterword
William Boston left Magheralin at seventeen and never returned. The regiment took him to Woolwich, Guernsey, the Curragh, Bombay, Gwalior, Kandahar and Kabul, and it took from him a wife and a son within eight months, in a garrison where he was himself repeatedly in hospital. He came home invalided, married again, rose to Battery Sergeant Major, and spent his last years of service on the Banffshire coast teaching gunnery to volunteers. He was discharged with a character of Very Good and a pension of two shillings and eightpence a day, and he lived out the next twenty-seven years in a terraced house a few hundred yards from the Arsenal.
The Royal Artillery did not leave the Bostons with him. James Richard and Joseph Henry followed their father into the regiment. Albert Edward joined the Royal Army Ordnance Corps, and Ada married a gunner. The connection with Woolwich, which began with William’s arrival from Belfast in July 1868, would endure.
Sources
WO97 (Chelsea Discharge Board and Service Records); Medical History Forms F (pages 3–7);
Statement of Services; Record of Services;Regimental Registry of Marriages
Afghan Campaign Medal Roll WO100/54
Long Service and Good Conduct Medal Register, WO102/8
1891 Scotland Census (CSSCT1891_42)
1901 England Census RG/571 f.190
1911 England Census RG/2867; 1921 England Census
Probate Record, Principal Registry, January 1922
Ireland, Select Births and Baptisms, 1620-1911
India Select Deaths and Burials, FHL Film 510857
Researched by Nigel Williams, March 2026. William Boston was the writer’s great-great-grandfather.
James Frederick Newrick was born in 1839 in Durham to Nathaniel Aaron Newrick, a miller, and Charlotte (née Dawson Maddy), who was 24. James was baptised at the church of St. Mary The Less, which was founded in the 12th century as a garrison chapel for soldiers stationed on the nearby city walls.
The family lived in Durham Lane (1841) and South Johnson Street (1851), in Sunderland. Though his father was a miller, there were seafarers in the family through his Uncle Charles Newrick (1807-1858), who married Isabella Blythe in 1829. Her father, William Blythe (1788-1855), and brother, Robert Robson Blythe (1822), were both Master Mariners. William was also a shipowner.
Apprenticeship
James first appears in naval records in September 1855, when he was bound as an apprentice at the age of sixteen. This is the same route as Robert Robson Blythe took at the same age in 1838.
On 22 September 1855, he entered into a five-year indenture, enrolled at Sunderland, to serve aboard the vessel Margaret, a ship of about 247 tons. A vessel of that tonnage in the 1850s was modest in size by ocean-going standards, probably a brig or small barque, and crewed by about a dozen men. Ships like this commonly traded across the North Sea and Baltic, carrying coal outward and returning with timber, grain, or naval stores.
Apprenticeship was the recognised starting point for a serious maritime career: a period in which a boy learned the work of seamanship; handling sails and rigging, standing watches, learning shipboard routines, and gradually being introduced to the navigational knowledge that separated an ordinary sailor from a future officer.
James’s indenture expired in September 1860, by which time he would have been about twenty-one years old and ready to move beyond apprentice status into the ranks of fully competent seamen.
Sunderland
Sunderland in the 1850s was one of Britain’s most active shipbuilding and exporting ports. The River Wear was lined with yards constructing wooden brigs and barques, many engaged in the coal and Baltic trades. To be apprenticed there meant immediate immersion in a tough maritime environment shaped by North Sea crossings, timber imports from Scandinavia, and the outward coal trade from County Durham.
The years following the completion of his apprenticeship were the formative middle stage of his career. Between 1860 and 1865, he would have served as an able seaman and, increasingly, as a man being prepared for responsibility on deck.
These were the years in which he accumulated the sea time and experience required under the Merchant Shipping Act framework to present himself for examination. Promotion in the merchant service was not automatic: advancement depended on proven competence, recorded service, and success in formal testing.
Transition to Officer
By January 1865, at about twenty-five or twenty-six years of age, James had achieved a major professional milestone. On 14 January 1865, the Board of Trade issued him a Certificate of Competency as Second Mate. This qualification marked his transition from the forecastle into the officer ranks.
The Second Mate was a navigational officer responsible for watchkeeping, assisting with chartwork, and taking on duties that required literacy, numeracy, and technical skills. His certificate was formally entered into the General Register and Record Office of Seamen two days later, confirming his standing within the official national system of certificated merchant officers.
Shortly after his promotion, James married Julia Lewis at St George in the East, located in the docklands fringe, close to the River Thames, London, on 11 April 1866.
First Mate
James continued his upward progress over the next three years. Having served as a Second Mate and gained further experience, he advanced again through examination and certification. On 22 September 1868, the Board of Trade granted him a Certificate of Competency as First Mate, which was entered in the register the following day. This was an even higher rank, placing him as the chief officer under the master.
A First Mate carried major responsibility for the ship’s daily management, discipline, cargo operations, and the safe running of the vessel, and was legally qualified to assume command if required.
By 1871, James and his wife Julia were living with Julia’s mother in Poplar, London.
Final Chapter – The Dreadnought Seaman’s Hospital
In the final months of his life, James Frederick Newrick reappears in the records of the Dreadnought Seamen’s Hospital at Greenwich, the institution for the care of merchant sailors arriving in the Port of London. Set against the backdrop of the Royal Naval College and the great river traffic of steamers and sailing vessels, it was a familiar institution to seafarers of every rank.
From1821-1870, the Dreadnought was a floating hospital, based in three successive converted warships, one of which, HMS Dreadnought, veteran of the battle of Trafalgar, gave the hospital its name. It then moved onto land and, until 1986, occupied the buildings that are now a student hub for the University of Greenwich.
By May 1896, he was fifty-seven years old. An admission on 9 May 1896 records him as “James Fred Newrick,” aged 57, born about 1839 in England. A second entry, dated 2 June 1896, refines his birthplace to Durham.
The Dreadnought treated seamen who were currently serving or who could demonstrate a legitimate connection to the merchant marine. His admission there therefore confirms that, more than forty years after being bound apprentice in 1855, he was still recognised within the maritime system.
At the time of his admission, James was serving as an Able Seaman on the Loch Lomond, a coastal role on a Glasgow-registered barge owned by Aitken Lilburn & Co. Seafarers often continued in the short-sea and coastal trades as they aged.
Death
The hospital records his illness as “Abd. Aneurysm” (Abdominal aortic aneurysm, a dilation and eventual rupture of the main abdominal artery). This condition was uncommon but recognised in late Victorian medical practice, particularly among older men engaged in physically demanding occupations. In 1896, there was no effective surgical treatment, and rupture was often fatal. James died at the Seaman’s Hospital on 20 June 1896.
More than forty years after beginning his apprenticeship aboard the Margaret in Sunderland, he remained part of the merchant marine system, his working life concluding under the care of the seamen’s hospital at Greenwich.
Sources
1841 England Census (Bishopwearmouth, Durham)
1851 England Census (Bishopwearmouth, Durham)
1871 England Census (All Saints, Poplar, London)
England, Select Births and Christenings, 1538–1975 (baptism, St. Mary-the-Less, Durham, 23 June 1839)
England & Wales, Civil Registration Birth Index, 1837–1915
England & Wales, Civil Registration Marriage Index, 1837–1915
London, England, Church of England Marriages and Banns, 1754–1938 (marriage to Julia Lewis, St George in the East, 11 April 1866)
England & Wales, Civil Registration Death Index, 1837–1915
UK, Apprentices Indentured in Merchant Navy, 1824–1910 (indenture, Sunderland, 22 September 1855, the Margaret)
UK and Ireland, Masters and Mates Certificates, 1850–1927 (Certificate of Competency, Second Mate, 14 January 1865)
UK and Ireland, Masters and Mates Certificates, 1850–1927 (Certificate of Competency, First Mate, 22 September 1868)
England, Dreadnought Seamen’s Hospital Admissions and Discharges, 1826–1930 (admission, 9 May 1896)
England, Dreadnought Seamen’s Hospital Admissions and Discharges, 1826–1930 (admission, 2 June 1896)
UK and Ireland, Find a Grave Index, 1300s–Current
Web: UK, Burial and Cremation Index, 1576–2014 (burial, Greenwich)
Ancestry Family Tree
Researched by Nigel Williams.
James Frederick Newrick was the writer’s 1st cousin 5 times removed.
Ship’s Carpenter, Milburn Fleet. Lost at sea, North Atlantic, January 1885
Introduction
During my research into the Newrick family (my mother, Yvonne, was born a Newrick), the initial date I found regarding the SS Clandon’s (ON 77105) disappearance was January 22nd 1885. This gave me an unpleasant start, as it was the same day and month as my father, Laurence Williams, disappeared in an aircraft crash at sea in 1979.
My father’s body was never discovered, and I have been wary of the date ever since. As it turns out, that date was not material to the Clandon’s disappearance, as she actually set sail on her final voyage two days later, and the date of her sinking is not known. However, that connection, between two men lost at sea in January in unexplained circumstances, has stayed with me. As I write this, it occurs to me that this might explain the work I have put into the research for this account of Albert Newrick’s life and the vessel on which he lost his life, which is the most extensive I have written about any of my ancestors.
Early Life and Family
Albert Newrick was born in 1848 in Bishopwearmouth, Sunderland, County Durham. He was the fourth son of Nathaniel Aaron Newrick (1814–1865), a miller from North Shields, and Charlotte Dawson Maddy (1815–1898), who came from London.
The family lived at 19 South Johnson Street, Sunderland. By 1851, the household included Albert’s three older brothers: James Frederick (b.1839), Aaron Henry (b.1842), and Joseph Maddy (b.1845). Albert, aged three, was the youngest. More children followed: Mary (born 1851), Charles William (b.1851, died 1854 in infancy), Mary Emma (b.1855) and Charles Septimus (b.1857). By 1861, the family had at least seven surviving children.
Nathaniel was a miller by trade, but the family’s connection to the sea ran through Albert’s uncle, Charles Newrick (1807–1858), who had married Isabella Blythe in 1829. Isabella’s father, William Blythe (1788–1855), and her brother, Robert Robson Blythe (1822–1872), were both Master Mariners from Sunderland; William was also a shipowner. It was through the Blythe connection that Albert and his brother James found their way to the maritime world.
Albert’s eldest brother, James, entered the merchant service in September 1855, apprenticed at the age of sixteen aboard the Margaret, a vessel of about 247 tons. He would rise through the ranks, gaining his Certificate of Competency as Second Mate in January 1865 and as First Mate in September 1868. James married Julia Lewis in 1866 at St George in the East, in London’s docklands. He remained in the merchant service until his death at the Dreadnought Seamen’s Hospital, Greenwich, in June 1896, aged fifty-seven. James story is told in the article James Frederick Newrick’s Life at Sea. Albert would follow a different path to the sea; through the shipyard.
Apprenticeship
By the time of the 1861 census, Albert was thirteen years old and already bound as a shipwright apprentice. His brother Aaron, aged eighteen, had followed their father into milling; James, at twenty-one, had already been at sea for six years; Joseph, at fifteen, was absent from the household, possibly apprenticed elsewhere. Two younger siblings, Mary Emma and Charles, were still children at home.
Sunderland in the 1860s was one of the world’s greatest shipbuilding centres. The River Wear was lined with yards, Laing’s, Doxford’s, Thompson’s, and many smaller concerns, turning out wooden and increasingly iron-hulled vessels for the merchant trades. A shipwright’s apprenticeship meant learning the practical craft of building ships: working with timber, iron, and the complex geometry of hull construction.
A shipwright apprenticeship typically lasted five to seven years, taking Albert through to about 1866 or 1868. Here he acquired the skills of a ship’s carpenter, including caulking, structural repair, and an understanding of how a ship’s hull worked under stress.
Marriage and Life Ashore
In the fourth quarter of 1869, Albert married Mary Dent in the registration district of Sunderland. He was about twenty-one years old.
By 1871, Albert and Mary were living at Chapel Row, Shildon, County Durham. He was working as a joiner, and Mary was twenty years old. They had a baby daughter, Charlotte Anna, who, it seems likely, was named after Albert’s mother, Charlotte.
Shildon was an inland railway town, not a port. It was the home of the Stockton and Darlington Railway’s works, and there would have been ample employment for a man with carpentry and woodworking skills. At this point in his life, Albert appeared settled: a young husband and father, working a skilled trade ashore, some distance from the sea.
However, the family had suffered loss by this time. Albert’s brother Joseph had died in 1870, aged just twenty-five, leaving a widow, Matilda Patterson.
Going to Sea
Sometime between 1871 and 1878, Albert left his life ashore and went to sea as a ship’s carpenter. What prompted the change is not known. The agricultural depression of the 1870s affected inland towns; the pull of better wages at sea may have been a factor, or perhaps the example of his brother James, by then a certificated First Mate, drew him back to the sea.
A ship’s carpenter held a specialist and responsible position aboard a merchant vessel. He was not part of the deck or engine room hierarchy, but stood apart as a skilled tradesman charged with the ship’s structural integrity: maintaining the hull, decks, hatches, masts, and boats; sounding the bilges; caulking leaks; and making emergency repairs in heavy weather. On an iron vessel, the carpenter’s work also encompassed the wooden fittings, hatch covers and derrick gear.
Albert found employment with W. Milburn & Co. of Newcastle and London, one of the substantial tramp shipping firms based in the North East. The Milburn fleet operated iron cargo steamers across the world’s trade routes — to the Americas, to Australia via the Suez Canal, and wherever freight could be obtained. It was within this fleet that Albert would spend most of his years at sea, moving between vessels as the company’s needs and the trades demanded.
The SS Clandon 1878-1885
The SS Clandon (Official Number 77105) was an iron screw steamship built by Charles Mitchell & Co. at their Low Walker yard on the Tyne, Yard Number 358. She was launched on 4 April 1878 and completed the following month.
Her dimensions were 285.0 feet in length, 35.0 feet beam, and 24 feet depth of hold, with a gross tonnage of 1,970. She was powered by a compound inverted two-cylinder engine (32 and 62 inches in diameter, 42-inch stroke) rated at 200 nominal horsepower, built by R & W Hawthorn of Newcastle, driving a single screw. In addition to steam power, she was rigged as a half brigantine, carrying fore-and-aft sails as an auxiliary in case of engine failure.
Figure 1: There is no known photograph of the Clandon. The closest visual representation is probably the Tyne (1878) which had similar dimensions and tonnage.
The Clandon was registered on 29 May 1878 to Watts, Milburn & Co., London, and transferred in 1879 to W. Milburn & Co. At the time of her loss, her owner was Mr John Davison Milburn, shipowner, of Newcastle-on-Tyne, with Mr Milburn as the managing owner. She had cost about £30,000 to build.
During her construction, she was built under special survey at Lloyd’s, inspected three or four times a week by Mr Moverly, then Lloyd’s surveyor at Newcastle. Many of her plates were tested in his presence by bending and punching. The materials and workmanship were considered of the best quality, fully up to Lloyd’s requirements for a first-class ship.
She was classed 100 A1 from her launch and retained that classification until her loss. Her plating averaged 2/16ths thicker amidships than at the extremities, and on one or two strakes, 3/16ths thicker. She was treble-riveted amidships and double-riveted at the ends. She was built with five transverse bulkheads and was of the water-ballast type.
Her first master was Captain Dinsdale, who would later testify that she had carried two cargoes of grain and one of cotton across the Atlantic, and that on all occasions she had proved herself a good sea boat. She was, in the language of the day, an “ocean tramp”; a cargo vessel with no fixed routes, running between ports wherever freight could be found. Her trade took her across the Atlantic and far beyond.
The Cardenas Incident
The Clandon’s Atlantic trade was not without incident. In the summer of 1883, on a voyage from Montreal to Cardenas — the sugar port on the northern coast of Cuba — she ran aground at Cardenas. The casualty was reported to Lloyd’s by cable through Matanzas: the British steamer Clandon, from Montreal for Cardenas, had gone ashore, and attempts were being made to get her off. The Board of Trade’s register of wrecks and casualties recorded the stranding against her official number, 77105, and closed the file that June.
The attempts to refloat her evidently succeeded. She was got off, repaired, and returned to service, retaining her 100 A1 classification to the end.
That is the ship’s record, from her launch on the Tyne to the eve of her last voyage. Albert Newrick’s part in it begins earlier, in the autumn of 1880, with a crew agreement signed in London.
Figure 2: The Board of Trade register of wrecks and casualties. Official number 77105 appears twice — the 1883 stranding at Cardenas, reported by cable via Matanzas, from which she was refloated; and, lower, the 1885 loss with all hands, noted among the missing vessels on 10 April 1885.
1880–1881: Albert Newrick’s Eastern Voyage
On 4 November 1880, Albert Newrick signed the crew agreement for the SS Clandon in London. He was thirty-two years old. His previous ship was recorded as the Clandon herself; he was not joining fresh but rolling over from an earlier agreement, having already served aboard her for at least one previous voyage and possibly since her maiden year of 1878. He signed on as a carpenter at six pounds per month.
Figure 3: The 1881 Crew Agreement.
The agreement, signed by Captain Ralph P. Walton of Sunderland, gave the Clandon liberty to trade from London to Cardiff and thence to Malta, the Mediterranean and Black Seas, the Red Sea and Persian Gulf, the Indian and China Seas, the Cape and Australian Colonies, the Atlantic and Pacific Oceans, and the coasts of the Americas; a standard worldwide tramping charter, not exceeding three years. An additional clause provided that all hands would receive an extra two pounds per month while employed to the eastward of Suez. This was a bonus that would be earned.
The crew that assembled in London in early November was international, typical of the merchant service. Alongside Albert from Sunderland, the Mate J. Harvey from Sunderland, and the 2nd Mate Wm. Frank Reynolds from Cardiff, there was a Boatswain and five Able Seamen from Malta — Frank Bonello, Salvatore Ferrugia, John Shambrey, Joseph Caparo, Richard Mousie, and the brothers G.E. and Joseph Portelli — a seaman from Elsinore in Denmark, one from Dominica, a Donkeyman from Stockholm, and engineers from Maryport, Manchester, and Glasgow.
Twenty men signed on at London on 4 and 5 November, and the voyage commenced on the 5th. From London, the SS Clandon proceeded to Cardiff, almost certainly to load coal; South Wales steam coal being the standard outward cargo for tramp steamers bound east. She then set course for the Mediterranean.
Through the Canal
The consular certificates stamped on the crew agreement record the ship’s progress with bureaucratic precision. On 3 December 1880, the agreement was deposited and returned at the British Consulate in Port Said, at the northern entrance to the Suez Canal. Three days later, on 6 December, the ship arrived at Suez at the canal’s southern end. The transit had taken the standard three days.
From Suez, the Clandon entered the Red Sea. Eight days later, on 14 December 1880, she arrived at Jeddah, the ancient port on the Arabian coast that served as the gateway to the holy city of Mecca.
The Pilgrim Trade
At Jeddah, the nature of the voyage becomes clear. The British Consul’s certificate records that Richard Mousie, Able Seaman, was discharged and left behind on the grounds of sickness. The Consul investigated, found the grounds genuine, paid Mousie his wages of four pounds six shillings, delivered his effects, and made arrangements to send him home to Malta at the ship’s expense.
But it is the Singapore certificate, dated 20 January 1881, that reveals what the Clandon was doing in those waters. The 2nd Mate, William Frank Reynolds, was left behind at Singapore in hospital, suffering from “smallpox sustained while employed on board in the Pilgrim trade.”
The Clandon was carrying Hajj pilgrims. The annual pilgrimage to Mecca drew tens of thousands of Muslims from across Southeast Asia, from the Malay Peninsula, the Dutch East Indies, British India, and beyond, to Jeddah and back. The return traffic, carrying pilgrims home after the Hajj, ran through December and January. British and Dutch cargo steamers were routinely hired into this trade for the season, their holds temporarily converted to carry human passengers in conditions that were often overcrowded and insanitary. Smallpox outbreaks were a known and feared hazard. Quarantine regulations existed, but enforcement was uneven, and the pilgrim ships were notorious for violating them.
Singapore and Rangoon
The Clandon cleared Jeddah on 18 December 1880 and, with her pilgrim passengers, crossed the Indian Ocean to Singapore, arriving by mid-January 1881. It was here that the smallpox struck the 2nd Mate. Reynolds was hospitalised ashore; the ship’s agents, Messrs John Meyer & Co., guaranteed his expenses and passage home. His wages were settled partly in sterling and partly in Singapore dollars.
Singapore brought further trouble. A crew member named William Lake, who had joined at an intermediate port, was discharged on the grounds of imprisonment. Whether this was a local criminal matter or a shipboard offence referred to the authorities is not recorded. Two replacement seamen, Thomas Taylor and Robert Bevan, were signed on at Singapore to fill the gaps in the crew.
From Singapore, the Clandon proceeded to Rangoon, arriving by 2 February 1881. The agreement was deposited at the Mercantile Marine Office there and returned on 15 February. Rangoon, modern Yangon, was one of the great rice-exporting ports of the British Empire, so the Clandon was probably loading rice for the homeward voyage. This was a pattern typical of a tramp steamer of the period: coal outward from Cardiff, pilgrims from Jeddah to Singapore and rice homeward from Rangoon.
Homeward
The homeward voyage took the Clandon back through the Indian Ocean, the Suez Canal, and into the Mediterranean. On 21 March 1881, she called at Malta, where the Boatswain Frank Bonello and the Able Seaman Salvatore Ferrugia were discharged by mutual consent; Maltese men stepping off at their home island, as had plainly been arranged. Two replacements, Michele Abela and Natale Randich, signed on for the remaining leg. The certificate was issued by Edward Cassolani, Superintendent of the Ports at Malta.
On the night of Sunday, 3 April 1881, a census was taken of all persons in England and Wales, including those aboard merchant vessels. Albert Newrick appears on the return for the Clandon (RG 11/5286), listed as entry number 3: “A. Newrick, Married, aged 32, Carpenter, born Sunderland, Durham.” The ship was at sea, nearing home. Albert was the only man listed as married among the first fifteen entries. Somewhere ashore, Mary and young Charlotte Anna were waiting for him.
On 10 April 1881, the Clandon arrived at Liverpool, and the crew was discharged. Albert received a balance of wages of 12 pounds, 4 shillings, and 5 pence. His character was recorded as Very Good for both General Conduct and Ability in Seamanship; the highest marks a merchant seaman could receive. Captain Walton, who had commanded the ship throughout, remained aboard for the next agreement.
1881: The Huntingdon
Albert did not stay long ashore. Less than four months after his discharge at Liverpool, on 29 July 1881, he appears on the inward crew list of the SS Huntingdon (Official Number 82874), arriving at Sydney, New South Wales, from Melbourne. He is listed as “Albert Newrick, Carpenter, aged 34, Sunderland.” The Huntingdon was a newly built steamer of 1,464 tons, registered in London, under the command of Captain William John Haynes, with a crew of twenty-six.
The Huntingdon appears in contemporary shipping notices alongside other vessels managed by W. Milburn & Co. from their offices at Billiter-avenue, London, trading to Australia via the Suez Canal. Albert had not left the Milburn fleet; he had simply moved between the company’s ships, as merchant seamen routinely did.
At this point in his career, Albert was a skilled tradesman employed within a fleet, moving between vessels worldwide as opportunities arose. The Milburn company operated their tramps on whatever routes offered freight: the North Atlantic grain trade, the Australian run, the pilgrim traffic, and routes to the Far East and beyond. Albert’s world was not one ship but many, and his horizons were not the North Sea but the oceans.
1881–1884: The Middle Years
Between his appearance on the Huntingdon in July 1881 and his return to the Clandon in October 1884, Albert’s movements are only partly known. When he signed on the Clandon at North Shields on 28 October 1884, his previous ship was recorded not as the Huntingdon but as the Marcia, of London. There may have been other vessels in between; the Marcia was simply the last before his return to the Clandon.
There are several vessels named Marcia, but only one fits: an iron screw steamer, Official Number 70611, registered at London, built in 1874 and of about 1,060 tons gross. She was the sole London steamer of the name afloat in the years Albert was at sea.
Whether she was a Milburn vessel is less certain. She does not appear in the surviving lists of Milburn ships, and neither her name nor her modest tonnage fits the company’s pattern of the 1880s; this suggests that the Marcia, unlike the Clandon and the Huntingdon, belonged to another owner. The registered ownership can only be confirmed by physically inspecting her Board of Trade registration file, but on the evidence so far, Albert’s last berth before he returned to the Clandon appears to have lain outside the Milburn fleet.
What is clear is that Albert remained at sea throughout this period. He was a career ship’s carpenter by now, a man in his mid-thirties with at least six years of deep-sea service behind him. The Marcia was simply one more ship in a working life that took him wherever the freight trades led.
1884: The Penultimate Voyage
On 28 October 1884, Albert Newrick signed the crew agreement for the Clandon at North Shields. He was thirty-six years old. The master was Captain Thomas Pittick, aged thirty-four, who had succeeded Ralph Walton at some point during the intervening years. The agreement was for a voyage from the Tyne to Newport News, Virginia, and thence to any port within seventy-two degrees North and sixty degrees South latitude. This was another worldwide tramping charter, not exceeding three years.
The crew that assembled at North Shields in late October 1884 included several men who would remain with the ship to the end. William George Kirkaldy, aged thirty-five, of London, signed on as Mate. John Hunter, forty-nine, of Forfar, was 2nd Mate. L.H. Nicholson, just twenty, of Leeds, was 3rd Mate. Daniel Woowat, thirty-four, signed as Cook. John George Thoburn, twenty-six, of North Shields, was 2nd Engineer, and John Scholfield, twenty-six, of Newcastle, was 3rd Engineer.
The Able Seamen were an international crew: men from Birkenhead, Germany, Sweden, Norway, and Shetland, drawn from a dozen different ships.
Albert’s wages had fallen since 1881, from six pounds to five pounds ten shillings per month. The early 1880s had been hard years for the merchant shipping trade; freight rates were depressed, and seamen’s wages had fallen with them. But the Carpenter still earned more than the 3rd Mate and well above the Able Seamen at three pounds ten shillings.
The Clandon sailed from North Shields on 29 October. By 22 November, she was in New York, where the crew agreement was deposited at the British Consulate General and returned on the 29th. She then proceeded to Newport News to load cargo before recrossing the Atlantic to Avonmouth, where the crew was discharged on 22 December 1884.
Albert signed the discharge, with what may be the last record of his signature. He received a balance of six pounds five shillings and eightpence halfpenny. Captain Pittick did not discharge but remained aboard.
Figure 4: A page of the 1884 Crew Agreement showing Albert’s signature.
It was three days before Christmas. Albert had been paid off at Avonmouth, far from Sunderland. Whether he travelled home to see Mary and Charlotte Anna, or stayed near the ship is not known. The turnaround was tight. Within weeks, the Clandon would be in New York again, loading for her final voyage.
The SS Clandon’s Final Voyage
Albert’s discharge at Avonmouth on 22 December 1884 gave him only the briefest spell ashore. Five days later, on 27 December, he signed on again for the Clandon at Newport, in Monmouthshire, where the ship had moved round to load. The new agreement, signed by Captain Thomas Pittick as master, was for a voyage from Newport to New York and thence to any port within seventy-five degrees North and sixty degrees South latitude, to end in the United Kingdom, with a maximum term of one year. It was the familiar worldwide tramping charter, and it carried the master’s standard endorsement: no spirits allowed.
Much of the crew signed at Newport in the days after Christmas, and many were Newport men, or men lodging in the town. Albert’s address on the agreement was given as 4 Mill Side, Newport — the same address entered for Arthur Williams, the ship’s cook. Whether this was a genuine lodging or one of the boarding-house addresses that seamen so often gave in place of a home is impossible to say. But it suggests that Albert spent that last Christmas not in Sunderland with Mary and the children, but in the Welsh coal port beside his ship.
The Clandon sailed from Newport on 28 December 1884 and crossed to New York, arriving in January 1885, where she began loading for the homeward voyage to Leith. She was under the command of Captain Pittick.
She had loaded a large and varied cargo for the Atlantic crossing to Leith: 23,333 bushels of wheat, 25,541 bushels of corn, 10,343 sacks of flour, 1,000 barrels of sugar, 790 cases of canned goods, 200 barrels of lubricating oil, 2,400 staves, 68 packages of woodware, 40 packages of manufactured wood, 1 package of hardware, 4 packages of furniture, 16 wheels, 8 cases of agricultural implements, 227,887 pounds of lard, 1 case of drugs, 131,168 pounds of tallow, 100 barrels of pork, and 45 bags of clover seed.
In all, she carried 2,394 tons of cargo, 74 tons of dunnage, 30 tons of stores, and about 300 tons of coal; a total dead weight of 2,798 tons, some 42 per cent above her gross tonnage. Her draft on leaving, as recorded in the official notice left by the captain with the British Consul at New York, was 21 feet 3 inches forward and aft, giving a freeboard of about 5 feet 6 inches. In salt water, with the ashes and ice on board consumed, she would have risen a few inches, giving a freeboard of about 5 feet 9 or 10 inches — just within the limits prescribed by Lloyd’s and the Board of Trade for a winter North Atlantic crossing. She was, as the subsequent inquiry would note, as deeply laden as she could be with safety to those on board.
The crew numbered 27 hands all told.
The New York Crew
The complement that finally carried the SSClandon to sea was not quite the crew that had signed at Newport. New York, a great port, with higher wages to be had on American ships and a constant demand for hands, was notorious for tempting men to desert, and the Clandon lost several.
On 16 January 1885, two able seamen slipped the ship at New York: Antonio Ferrari, aged thirty-two, of Trieste, who had joined from the Austin Friars, and Lewis Beale, aged forty-six, late of the Universal. Two others who had signed at Newport — the able seaman M. Bargross, a Greek, and the fireman James Bunnion of Sunderland — are marked in the account as having failed to join at all. The first engineer, Arthur Petton of North Shields, had been discharged sick at Newport on 23 December, before the ship even crossed, leaving her to make the Atlantic passage with only her second and third engineers.
To fill the gaps in the forecastle, two able seamen were engaged at New York on 22 January 1885: A.G. Olsson, aged twenty-three, and K.A. Lundgren, aged twenty, both signing on from the Burswell of Newcastle. They joined the ship two days before she sailed.
Whatever chance, or trouble, or better offer drew the deserters off the ship saved their lives; and whatever need drove the two replacements aboard cost them theirs, forty-eight hours later, when the Clandon put to sea for the last time.
Figure 5: List C, the Account of Crew delivered at the end of the voyage. Antonio Ferrari and Lewis Beale are marked “deserted” at New York on 16 January 1885; M. Bargross “did not join”; and the first engineer, Arthur Petton, was discharged sick at Newport.
Before sailing, the vessel was surveyed by Mr Jenkins, the marine surveyor to the Bureau of Inspection of the Board of Underwriters at New York, who found her fit for the voyage. Mr McCaldin fitted her for the reception of her cargo. The stevedore, Mr Hogan, oversaw the loading. Mr Chapman, the pilot, took her to sea. All would later testify that she left in a thoroughly good and efficient state.
On 24 January 1885, the pilot left her outside the bar at Sandy Hook, at about one or half past one in the afternoon. The Clandon headed out into the North Atlantic, bound for Leith. She was due to arrive on or about 14 February.
Three Missing Steamers
Terrible gales struck the North Atlantic between 28 January and 1 February 1885. It had been hoped that the overdue vessels might have put into Fayal in the Azores for shelter. But the steamer Cremona, arriving at Liverpool after coaling at Fayal on the 16th of February, brought no news of any of the missing craft.
By late February, the fears were turning to certainty. On 23 February, the North British Daily Mail in Glasgow reported that the Clandon, twelve days overdue at Leith, was supposed to be lost in the Atlantic with all hands. The agents at Leith had received no news of her since she left New York. Seventy-five guineas had already been paid for re-insurance on the steamer.
Figure 6: Newspaper report — San Francisco Chronicle, California, Wednesday 25 February 1885.
On 25 February, the Dumbarton Herald carried the news among its shipping disasters: “Among other casualties mentioned is the supposed foundering of the Clandon, a large ocean steamer bound for Leith. The steamship Preston, of West Hartlepool, is also thought to have gone to the bottom with all hands.”
On 28 February, the St James’s Gazette in London listed five overdue Atlantic steamers by name: the Guiston, the Preston, the Fernwood, the Hundard, and the Clandon. Three of them were owned by Messrs William Milburn and Co. of London. Their total value, including freight, was nearly 500,000 pounds. Their crews would number two hundred men in all.
The New-York Tribune reported from the American side that, in all probability, the officers and crews of at least three ocean steamers that sailed from New York the previous month would never relate their experiences. The story was picked up by newspapers across the United States, including the San Francisco Chronicle on 25 February.
By mid-March, the shipping agents and underwriters had reached a final conclusion. The Aberdeen Weekly Journalreported on 14 March under the headline “Loss of Four Steamers: One Hundred Men Missing.” Mr Spence, of the agents Simpson, Spence & Young, offered his opinion: the steamers, running at eight or nine knots during the fearfully tempestuous week ending 31 January, had likely disabled their steering gear and, broaching to, were left with all on board to the mercy of the waves.
No wreckage from the Clandon was ever reported to have been found, and no bodies were recovered.
The Inquiry
On 13 June 1885, a formal investigation was held at the Sessions House, Westminster, under the authority of the Merchant Shipping Acts, before H.C. Rothery, Esquire, Wreck Commissioner, assisted by Captain C.Y. Ward, Captain James Kiddle, R.N., and W.B. Robinson, Esquire, Chief Constructor R.N., as Assessors. The case was numbered 2577.
Mr Mansel Jones appeared for the Board of Trade. Mr Roche appeared for the owners. Four witnesses were examined by the Board of Trade, and the depositions of five witnesses taken at New York were produced and read. Mr Roche produced four further witnesses from New York, Newcastle, Liverpool, and Newport. The Fernwood inquiry, involving the same owners, the same dimensions, the same port, and a departure only two days earlier, had been heard immediately before. Mr Mansel Jones noted that the evidence applicable to one was, for the most part, equally applicable to the other.
The Court examined Clandon’s construction, her condition when she left New York, whether she was overladen, whether she had sufficient stability, and the insurance effected upon her. On every point, the evidence was satisfactory. She had been built under special survey at Lloyd’s, classed 100 A1, and had retained that classification until her loss. Her plating was thicker amidships than the minimum required, treble-riveted at the centre and double-riveted at the ends. Her boilers, built by Messrs Hawthorn of Newcastle, were seated so securely that even if the vessel had turned bottom up, they would not have become unseated. She was properly stowed, not overladen, though as deeply laden as she safely could be, and her stability was considered sufficient.
Mr Milburn had valued her at £22,000, about £11 per ton on the gross tonnage. She was insured for that amount: £11,210 at Lloyd’s, £6,120 in Mutual Clubs, and £4,670 by the owners themselves. The Commissioner noted with satisfaction that, unlike in the Fernwood case, the owners had insured her at what appeared to be a fair value and had taken a large portion of the risk themselves.
The Verdict
The Court’s verdict was clear. The newspapers had blamed the January storms. The shipping agents had spoken of disabled steering gear, and vessels left to the mercy of the waves. But the Wreck Commissioner, having heard the evidence of ice and icebergs in the North Atlantic lying across the course the SS Clandon would naturally have taken, reached a different conclusion: “The only conclusion to which we can come is that she may have come into collision with some of these icefields or icebergs and have foundered.”
The Dead
The Register of Deaths of Masters and Seamen in British Merchant Vessels (BT 334) records the official deaths of the SS Clandon’s crew for the half year ending 30 June 1885. The cause of death for every man is entered as “D.W.”: Drowned and the place of death as “Sea.” The official date of death is given as 24 January 1885, the day the pilot left her at Sandy Hook. This is an administrative date, the last date the vessel could be accounted for, rather than the actual moment of loss, which came sometime in the days that followed.
Albert Newrick appears at line 16, page 410, sheet 1193: “A. Newrick, aged 36, Carpenter, D.W., Sea.”
The register names twenty-seven men. The youngest was W. Penfold, aged just sixteen. The full complement, as recorded in the death register, was: T. Pittick (Master, aged 30); Wm. G. Kirkaldy (1st Mate, 36); John Hunter (2nd Mate); L.H. Nicholson (3rd Mate, 20); J. Wright (Boatswain, 32); A. Newrick (Carpenter, 36); Daniel Woowat (Steward, 34); Arthur Williams (Cook, 22); Joseph Furness (A.B., 40); William Howard (A.B., 23); Henry Sykes (A.B., 34); H. Jones (A.B., 29); John McAlister (A.B., 27); A.G. Olsson (A.B., 23); K.A. Lundgren (A.B., 20); J. Powell (A.B.); Jno. Geo. Thoburn (2nd Engineer, 26); John Scholfield (3rd Engineer, 26); E.F. Nelson (Donkeyman, 25); W. Fisher (Fireman, 35); John Vernica (Fireman, 31); Michael Kavanagh (Fireman, 29); Alexander Grassie (Fireman, 21); William Makarovsky (Fireman, 24); W. Penfold (16); W. Haswell; J. Sutton (Fireman).
Aftermath
Albert’s wife, Mary, and their six children survived him. The youngest, Lily Marion, had been born in March 1884 and was not yet a year old when her father sailed from New York for the last time. She would have had no memory of him.
Charlotte Anna, the eldest, was about fifteen at the time of the loss. She later married George Walker and lived until 1932. Joseph Maddy, the eldest son, born in 1872 and named after Albert’s brother, Joseph Maddy Newrick, entered the marine engineering trade. By 1921 he was working as Foreman Marine Engineer at Messrs G. Clark, Southwick Engine Works, Sunderland, one of the Wear’s foremost marine engine builders, living with his wife Isabella at 68 Ormonde Street. He died in 1941. Ada, born in 1874, married Daniel Krimpen and lived until 1954. Jane Anne Atkinson, born in 1879, married John Humble and died in 1944.
John James, born around 1875, followed his father towards the sea, though through the engine room rather than the carpenter’s shop. A newspaper notice of the marine engineers’ examinations held at North Shields records him as one of the successful candidates for a 2nd– class certificate in July 1900. By 1911, however, he is recorded as an inmate at Sunderland Borough Lunatic Asylum at Cherry Knowle, Ryhope, aged thirty-four, with his occupation given as “formerly Engineer.” What brought him there is not known. He died in 1925.
Lily Marion, the youngest, married William Davison Ramsay in New Zealand in 1906, having emigrated from Sunderland sometime after the 1901 census. She died at Linwood, Christchurch, on 2 August 1920, aged thirty-six, with her youngest child not yet two years old.
Mary Dent survived her husband by forty-four years, dying in 1929.
The Milburn company itself had suffered a catastrophic loss. In the space of weeks, W. Milburn & Co. lost the Clandon, the Fernwood, and the Coniston; three steamers and the best part of a hundred men. The Plainmeller, another Milburn vessel of similar dimensions, would also go missing the following year. Despite the losses, the company carried on. The ocean tramp trade required ships and men, and there was no shortage of either in the ports of the North East in the 1880s.
Figure 7: The erecting shop at George Clark’s Southwick Works, Sunderland, photographed in the early years of the works. Joseph Maddy Newrick worked here as Foreman Marine Engineer in 1921. Photograph preserved by Thomas Olsson, formerly draughtsman at the works.
Sources
Crew Agreements
SS Clandon (ON 77105), Crew Agreement 1880–1881. Maritime History Archive, Memorial University of Newfoundland. Agreement commenced in London, 5 November 1880; terminated in Liverpool, 10 April 1881. Master: Ralph P. Walton. Albert Newrick, Carpenter, entry 4.
SS Clandon (ON 77105), Crew Agreement 1884. Maritime History Archive, Memorial University of Newfoundland. Agreement commenced at North Shields, 29 October 1884; terminated at Avonmouth, 22 December 1884. Master: Thomas Pittick. Albert Newrick, Carpenter, entry 5.
SS Clandon (ON 77105), Agreement and Account of Crew (Foreign-Going Ship, Form Eng.1) and Account of Crew (List C), final voyage. Office copy forwarded to the Registrar General of Seamen. Signed at Newport, 27 December 1884; sailed 28 December 1884; New York to Leith, 24 January 1885. Records the master (T. Pittick, aged 34, of Essex), the crew’s Newport addresses, desertions of two able seamen at New York (16 January 1885), the first engineer discharged sick at Newport (23 December 1884), and two able seamen engaged at New York (22 January 1885).
Census Records
1851 Census: HO 107/2395, Bishopwearmouth, St Michael’s Parish Church, Sunderland. Entry 95, 19 South Johnson Street.
1881 Census: RG 11/5286, aboard SS Clandon, at sea. Entry 3.
1911 Census: RG 14, Bishopwearmouth and Ryhope, ED 12–13, Piece 30259. John James Newrick, inmate, aged 34, formerly Engineer, born Bishop Auckland, Durham. Sunderland Borough Lunatic Asylum, Cherry Knowle, Ryhope.
Marriage Record
GRO Marriage Index: Albert Newrick, Q4 1869, Sunderland registration district, Volume 10a, Page 712.
Death Records
Register of Deaths of Masters and Seamen in British Merchant Vessels, half year ending 30 June 1885 (BT 334). FHL Film 1483317, sheet 1193, page 410, line 16.
Great Britain, Select Deaths and Burials, 1778–1988: A. Newrick, aged 36, death date 24 January 1885, Merchant Marine, At Sea.
Board of Trade Inquiry
Formal Investigation No. 2577: “Clandon” (S.S.), The Merchant Shipping Acts, 1854 to 1876. Sessions House, Westminster, 13 June 1885. Before H.C. Rothery, Wreck Commissioner. L. 367. 2354. 180.—6/85. Wt. 408. E. & S.
Board of Trade Casualty Registers
Board of Trade / Registry of Shipping and Seamen, Registers of Wrecks and Casualties: SS Clandon, ON 77105, London. Stranding at Cardenas, reported by cable via Matanzas, 1883 (vessel refloated and returned to service); loss with all hands, entered among “Missing Vessels”, 10 April 1885, twenty-seven crew lost. Managing owner J.D. Milburn, Newcastle.
Tyne Built Ships: SS Burswell(1878), the vessel from which A.G. Olsson and K.A. Lundgren joined the Clandon at New York.
Crew List Index Project (CLIP): SSClandon, ON 77105, crew agreements 1878–1884 held at Maritime History Archive, Newfoundland.
Crew List Index Project (CLIP): Huntingdon, ON 82874, London, Steam, 1,464 tons, built 1881. TNA registration record BT 110/150/46 (not yet digitised).
Australian Records
New South Wales, Australia, Unassisted Immigrant Passenger Lists, 1826–1922: SS Huntingdon, Melbourne to Sydney, arrived 29 July 1881. Albert Newrick, Carpenter, aged 34, Sunderland.
Newspaper Reports
“Supposed Loss of an Atlantic Steamer and All Hands,” North British Daily Mail, Monday 23 February 1885.
“Ocean Tramps Believed to Be Lost,” New-York Tribune, Tuesday 24 February 1885.
“Trade Notes: Shipping Disasters,” Dumbarton Herald and County Advertiser, Wednesday 25 February 1885.
“Missing Steamers,” St James’s Gazette, London, Saturday 28 February 1885.
“Three Missing Steamers,” San Francisco Chronicle, Wednesday 25 February 1885, page 3.
“Loss of Four Steamers: One Hundred Men Missing,” Aberdeen Weekly Journal, Saturday 14 March 1885, page 6.
“Feared Loss of a Liverpool Steamer and 28 Lives,” Liverpool Mercury, Thursday 12 March 1885 (SS Coniston crew list).
“Marine Engineers’ Examinations at North Shields,” Shields Daily Gazette, Friday 7 July 1900. John J. Newrick named among successful candidates for 2nd class certificate.
Consular Certificates (from Crew Agreements)
H.B.M.’s Consulate, Port Said: Agreement deposited and returned, 3 December 1880.
H.B.M.’s Consulate, Suez: Ship arrived 6 December 1880.
British Consulate, Jeddah: Steamer entered 14 December 1880; cleared 18 December 1880. R. Mousie discharged sick; repatriation to Malta arranged.
Shipping Office, Singapore: 20–26 January 1881. Wm. Reynolds hospitalised (smallpox, pilgrim trade); Wm. Lake discharged (imprisonment); Thos. Taylor and Robt. Bevan engaged.
Mercantile Marine Office, Rangoon: Agreement deposited 2 February 1881; returned 15 February 1881.
Port Department, Malta: 21 March 1881. Frank Bonello and Salvatore Farrugia discharged (mutual consent); Michele Abela and Natale Randich engaged. Signed: Edw. Cassolani, Superintendent of the Ports.
British Consulate General, New York: Agreement deposited 22 November 1884; returned 29 November 1884.
Researched by Nigel Williams.
Albert Newrick was a first cousin five times removed of the writer, through his mother, Yvonne Patricia Newrick (1941–2024).
My great-grandfather George Newrick (1894-1968) worked as an engineer at Woolwich Arsenal and moved to Blackburn to help establish the new Royal Ordnance Factory (ROF) Blackburn in the late 1930s. He was awarded the MBE for his work there in 1958. His son, my grandfather, George William Newrick (1915-2004), also worked at Woolwich Arsenal.
Four generations earlier, the Newricks were living in the North East of England, and my 3rd great-aunt Elizabeth Newrick (1835-1926) married Thomas Dixon Brown (1831-1902), a Foreman Fitter from Bishopwearmouth. Thomas moved south to work at the ‘Royal Gun Factory’ (Woolwich Arsenal) and raised two sons who both became Chief Inspectors of Ordnance Machinery for the British Army during WWI. Frank Brown was appointed in December 1914, and his brother Oscar in December 1915. Those sons in turn raised two Brigadiers, Duncan in the RAOC and Cecil in the Royal Marine Artillery.
By a curious coincidence, Brigadier Duncan Brown died in Victoria Hospital, Deal, Kent, where my mother, Yvonne Patricia Newrick, had her last spell in hospital before her death in 2024. He was buried at the Churchyard of the Blessed Mary, Walmer, near Deal, known locally as ‘Old St. Mary’s ’, which is located just a few hundred yards from where I lived in as a boy in the 1960s and early 1970s. This is Brigadier Brown’s story.
Early Life
Duncan Brown was born on 27 August 1896 in Karachi, Sindh, India (now Pakistan). He was the eldest son of Oscar Brown of the Army Ordnance Department and his wife Alice Mary Ann Stephenson.
Duncan’s grandfather, Thomas Dixon Brown (1831–1902), was an engineer originally from Bishopwearmouth, Durham, who worked as a Foreman Fitter in the Royal Gun Factory at the Royal Arsenal, Woolwich, the heart of British weapons manufacture. Thomas married Elizabeth Newrick (1835–1926), whose own family became closely associated with the manufacture of ordnance. Elizabeth’s grandnephew, Charles Owen Newrick (1855–1911), was a munitions fitter at the Royal Arsenal, and Charles’s son George Newrick (1894–1968) would later be awarded the MBE for his work helping to establish the Royal Ordnance Factory at Blackburn during the Second World War.
Thomas and Elizabeth’s two sons both entered the Army Ordnance Department as officers, each with six years’ prior regimental service. The elder, Frank Brown (1862–1944), a Member of the Institution of Mechanical Engineers, rose to Lieutenant-Colonel and received the OBE. He progressed through the ranks of Inspector of Ordnance Machinery and was appointed Chief Inspector of Ordnance Machinery on 8 December 1914, barely four months after the outbreak of war.
Duncan Brown’s Father
The younger brother, Oscar Brown (8 November 1864–1932), Duncan’s father, followed a parallel path: Inspector of Ordnance Machinery 2nd Class from 1897, 1st Class from 1906, and temporary Chief Inspector from 31 December 1915 before being confirmed in the post on 20 February 1917. He was awarded the Distinguished Service Order that same year. As Chief Inspectors, the two brothers were jointly responsible for ensuring that the Army’s heavy weapons and the machinery used to manufacture them were properly designed, inspected, and fit for service — a remarkable concentration of expertise within a single family.
Oscar’s career took his growing family across the breadth of the British Empire. Duncan’s younger brothers were born in a succession of imperial postings: Stuart in Colombo, Ceylon, in 1901; Ivor Granville in Queenstown, Cork, around 1906; and Mervyn in Hong Kong around 1910. By 1911, Alice had borne seven children, of whom six survived — suggesting at least one sibling died in infancy, a common sorrow among families following the flag to tropical stations.
By 1911, with Oscar now a Major stationed near Dover, the family was settled at Roslyn, Salisbury Road, in the town. Duncan, then fourteen, was a pupil at Dover College, the school perched above the harbour whose buildings had once formed the Priory of St Martin. From Dover College, he proceeded to the Royal Military Academy at Woolwich. This was the same Arsenal complex where his grandfather had worked as a fitter in the Gun Factory. He joined in 1914 as war engulfed Europe.
The First World War
Duncan was commissioned as a Second Lieutenant in the Royal Garrison Artillery, Special Reserve of Officers, on 27 August 1915, his nineteenth birthday. He was posted to the 91st Anti-Aircraft Battery, Royal Field Artillery, and in September 1915 crossed to France with the British Expeditionary Force. He served on the Western Front in France and Belgium until 16 October 1916, when he returned to England.
His second deployment came in October 1917, this time as an Acting Captain attached to a Territorial Force Royal Artillery unit. He served continuously until the Armistice in November 1918, and was promoted to Acting Major on 25 October 1918, just weeks before the guns fell silent. During this second tour, he was wounded twice — both wounds occurring in the intense fighting of 1918, the year of the German Spring Offensive and the Allied Hundred Days. His Army List entry carried the double wound marker (××), official confirmation of his injuries.
For his services, he was Mentioned in Despatches, gazetted on 7 July 1919, and was awarded the Military Cross — one of eighty-nine Old Dovorians to receive that decoration during the Great War.
Duncan Brown was not the only member of his generation to serve. His younger brother Stuart (1901–1971) joined the Royal Navy, qualifying as a Torpedo Officer and serving aboard HMS Enterprise among other ships; by the Second World War he had risen to Acting Commander. His cousin Cecil Thomas Brown (1894–1942), son of Uncle Frank, was commissioned into the Royal Marine Artillery in November 1914 and served aboard several capital ships during the war. Cecil was appointed OBE for his command of HMS Glory‘s Royal Marine detachment during the Allied intervention in North Russia in 1918–19.
Between the Wars: Iraq and Kurdistan
Duncan’s war did not end with the Armistice. In 1919–20, he took part in operations in Mesopotamia (Iraq), for which he received the Iraq Medal with clasp. He relinquished his Acting Major rank in July 1919 and, after a period of peacetime soldiering, joined the Royal Army Ordnance Corps in 1923.
The year before, on a Wednesday in late July or early August 1922, he had married Miss Hilda Edith Birch at the Church of St Peter and St Paul, River, near Dover. Hilda was the daughter of Edwin Birch, an Assistant Overseer and Rate Collector, and his wife Edith Rebecca, of “Beechgrove,” Kearsney, Dover. The couple had met through the Dover connection — Duncan’s years at Dover College and the Brown family’s residence in the town. The 1921 Census had captured him as a “visitor” at the Birch family home, a young officer courting the daughter of the house. His best man was Lieutenant Gordon Brown, R.N., a relative serving in the Royal Navy.
Royal Air Force Service
On 14 October 1927, now a Major in the RAOC, Duncan was seconded to the Royal Air Force in the Middle East as a Temporary Ordnance Officer, 3rd Class. From 9 September 1929, he served with the Iraq Army as Inspector of Ordnance Services. It was in this role that he saw what would prove to be the most distinctive active service of his inter-war career.
From March to July 1932, Duncan took part in operations in the Barzan area of Northern Kurdistan, aimed at suppressing the revolt of Sheikh Ahmed of Barzan, a Kurdish tribal and religious leader who had risen against the Iraqi government. The operations covered a wide area from Diana to Erbil, Aqra, and Suri, extending north to the Turkish frontier. No British Army units were present as formed bodies; British personnel served with Iraqi forces, making those who qualified for campaign awards a particularly small group. Brown’s ordnance expertise was called upon in difficult mountain terrain far from established supply lines.
For these services, he received a rare combination of honours: the clasp “Northern Kurdistan” to his General Service Medal, one of only a small handful of Army recipients, and the Iraq Active Service Medal with clasp “Barzan 1932,” of which only nine British servicemen were recipients. The Iraqi government awarded him the 4th Class of the Order of Al Rafidain, gazetted in the London Gazette on 20 January 1933. His father, Colonel Oscar Brown DSO, died that same year, 1932, having last been recorded living at The Thatch, Dolvin Road, Tavistock, Devon.
The Second World War
Duncan was promoted to substantive Lieutenant-Colonel on 6 June 1939, three months before the outbreak of war. On 24 October 1939, he was appointed Assistant Director of Ordnance Services at the War Office in London, where he served through the fall of France, the Blitz, and the vast expansion of Britain’s wartime forces. He was promoted to Acting Colonel in March 1940 and Temporary Colonel that September.
In August 1941, he was appointed Deputy Director of Workshop Services at the War Office, a key role overseeing ‘the maintenance and repair of warlike equipment’. With this appointment came the rank of Acting Brigadier, confirmed as Temporary Brigadier in February 1942. From October 1942 to March 1944, he served as Deputy Director of Ordnance Services with Anti-Aircraft Command, responsible for ordnance supply to Britain’s entire air defence network; a fitting appointment for an officer who had begun his career in an anti-aircraft battery on the Western Front nearly three decades earlier.
British Army of the Rhine (BAOR) Service
A brief appointment as Deputy Director of Clothing and Stores at the War Office followed in early 1944, before Duncan was assigned to his final and most senior role. By the war’s end, he was serving as Director of Ordnance Services with the British Army of the Rhine (BAOR), the force responsible for the occupation of Germany. For his wartime services as a senior Ordnance Officer, he was created a Commander of the Most Excellent Order of the British Empire (CBE), Military Division, gazetted on 10 April 1945. The Gazette entry recorded him in his substantive rank of Lieutenant-Colonel (temporary Brigadier), Army number 13981, Royal Army Ordnance Corps.
Duncan’s cousin Cecil had not lived to see the end of the war. Brigadier Cecil Thomas Brown OBE, Royal Marine Artillery, had risen to command all anti-aircraft defences in Ceylon during the critical period of the Japanese advance into the Indian Ocean in early 1942. On 24 July 1942, he was killed when his aircraft, a Douglas DC-2 of No. 31 Squadron RAF, crashed in the Nandi State Forest in North Mysore, India. He was forty-seven years old. The two cousins, both Brigadiers, both engaged in anti-aircraft and ordnance work, had carried the family tradition forged in their grandfather’s Gun Factory workshop into the highest levels of military service.
Death and Burial
Brigadier Duncan Brown, CBE, MC, died on 19 October 1946 at the Victoria Hospital, Deal, Kent, at the age of fifty. He was still serving as Director of Ordnance Services with BAOR at the time of his death. His death certificate records the cause as marasmus resulting from a subphrenic abscess caused by a duodenal ulcer — a prolonged and debilitating illness suggesting he had been unwell for some time, most likely invalided home from Germany. Brown had given 31 years of continuous military service, from his commission on the Western Front at the age of 19 to his death, barely a year after the end of the Second World War.
He was buried at the Churchyard of the Blessed Mary, Walmer, near Deal, known locally as ‘Old St. Mary’s. This churchyard is just a few miles along the Kent coast from Dover, where he had gone to school, met his wife, and been married. His widow, Hilda Edith Brown, was living at 7, The Beach, Walmer, at the time of his death. His mother, Alice, survived him by twelve years, dying in 1958.
Duncan Brown’s medal group, accompanied by detailed research, was subsequently sold through a specialist dealer. The rarity of his Barzan 1932 clasp, one of only nine to British recipients, and the breadth of his service across two world wars, Iraq, and Kurdistan, make it one of the more notable RAOC groups of the period.
Honours, Awards and Medals
Commander of the Most Excellent Order of the British Empire (CBE), Military Division — London Gazette, 10 April 1945
Military Cross (MC) — date of gazette to be confirmed; likely 1918–1919
Mentioned in Despatches — London Gazette, 7 July 1919
Order of Al Rafidain, 4th Class (Kingdom of Iraq) — London Gazette, 20 January 1933
1914–15 Star; British War Medal; Victory Medal
General Service Medal with clasps “Iraq” and “Northern Kurdistan.”
Iraq Active Service Medal with clasp “Barzan 1932” — one of only nine British recipients
Plus Second World War campaign medals
Sources
London Gazette, Sixth Supplement, No. 37025, 10 April 1945 (CBE announcement)
Medal Index Card, The National Archives (WW1 service and medal entitlements)
Army List: Gradation List of Officers (multiple editions, c.1918–1920)
Army List: Army Ordnance Department, p. 1754 — Chief Inspectors of Ordnance Machinery (showing Frank Brown and Oscar Brown DSO)
Generals.dk — British and Commonwealth general officers database
Census of England and Wales, 1911 (Brown family household, Dover)
Census of England and Wales, 1921 (Birch family household, Dover)
Dover Express, 4 August 1922 (wedding announcement)
Biographical summary (from medal auction catalogue, with detailed research)
Family tree research (Ancestry.com)
Find A Grave, Memorial No. 35307074 (burial at Blessed Mary of Walmer Churchyard, Walmer, Kent)
Wikipedia: General Service Medal (1918) — Northern Kurdistan clasp details
Wikipedia: Dover College — WW1 honours context
1891 Census: Thomas D. Brown, Foreman Fitter, Gun Factory, Plumstead (TNA, RG12/539)
Death Certificate: Duncan Brown, 19 October 1946, Entry 157, Victoria Hospital, Deal; General Register Office, England and Wales. Certified by R.C. Aitchison, M.B.; registered 21 October 1946.
Research by Nigel Williams on Brigadier Cecil Thomas Brown OBE, Royal Marine Artillery (family and ordnance heritage details)
Researched February 2026 by Nigel Williams. Duncan Brown was the writer’s second cousin three times removed through Elizabeth Newrick (1835–1926). George Newrick MBE (1894–1968) was the writer’s great-grandfather.
Olympus OM-2n with 50mm f1.2 lens. Shot on Deal Beach on a blustery day.
When I picked up an Olympus OM-1n SLR the first thing that struck me was how compact it was. Looking through the viewfinder it seemed to defy physics as it appeared to be bigger on the inside than the outside, due to the viewfinder’s massive size.
Fast forward to today and I own three Olympus OM bodies and an assortment of lenses. The cameras are the OM-1n, OM-2n and OM-2SP (Spot). As a confirmed Nikon SLR shooter it seemed an odd move to adopt another system. Fellow Nikon shooters certainly thought so…
But the OM-1 is just so compact – as are the lenses. It is also a remarkably good looking camera, the original compact SLR and a great film camera. This, and an attractive purchase price, was the justification for my OM-1n acquisition. An OM-2n, a camera responsible for a major milestone on how cameras measure light, beckoned a year later at a camera fair. The later, clever but slightly awkward OM-2SP appeared at the same event a year later and gives me most of the more sophisticated OM-4, which I do not own. This is the story of those three cameras, with a postscipt on the rest of the Olympus compact SLR series. There is a companion article on Zuiko lenses.
I love diminutive film cameras, especially when their lenses are equally compact. This, for me, is a large part of the appeal of Leica – and the leading reason for its genesis. But rangefinders are an entirely different breed to SLRs and by moving into Olympus I was duplicating what I already had in the Nikon system.
Yoshihisa Maitani and the Olympus Compact SLR
Olympus came late to the 35mm SLR. When the original OM-1 appeared in 1972, the established makers had been building reflex cameras for more than a decade, and Olympus was not seriously regarded as a contender among them. What it had instead was a chief designer, Yoshihisa Maitani, the man behind the half-frame Pen and later the pocketable, capless and caseless, XA.
Yoshihisa Maitani approached camera design from an unusual angle. Although trained as an automotive engineer and obsessed with photography from an early age, he was less interested in preserving established practice than in questioning it.
At Olympus he first made his name with the half-frame Pen, a camera conceived around the idea that high optical quality should not be reserved for expensive equipment. This he expressed as the lens is the soul of the camera.
Maitani was a visionary, but it took him a year to convince his superiors that a smaller SLR was a viable proposition, not least because it was technically challenging. In his own words:
However, every manufacturer had tried to develop smaller SLRs, and I was asking the production staff to do something that others had been unable to do. It was a challenge for the designers as well as for those in production. They wanted us to add 1 millimeter here and 3 millimeters there. There was a battery compartment in the bottom of the camera, and we wanted to insert packing to make it at least splash-proof, if not waterproof, but there was not enough space. When I yielded and gave them 1 millimeter, they immediately produced a design. They were so happy! People were competing for millimeters of space.
Maitani’s design brief was uncompromising: his insistance that the new camera had to be substantially smaller and lighter than contemporary rivals, was accompanied by an uncompromising view of its durability. He insisted on a shutter life of 100,000 cycles at a time when a tenth of that figure was acceptable.
The resulting OM-1 shows the leadership of a designer who viewed compactness as an engineering discipline rather than a styling exercise. Controls were repositioned to make better use of available space, unnecessary weight was stripped from components, and attention was paid to details often overlooked, such as mirror shock and operating noise. Naturally, as the soul of the camera, these ideas extended into the Zuiko lens range, which followed the same principle of reducing size without compromising performance. Maitani’s contribution was to demonstrate that careful engineering could achieve what many considered impossible.
Olympus claimed roughly a 35 per cent reduction in both volume and weight against the average SLR of the day, whilst still handling like a robust camera. The OM bodies were also notably quiet.
The Olympus OM-1n – The Compact Revolution
Cropped Deal beach scene, shot with the OM-1n
Development
The camera that started the compact SLR revolution was launched in 1972 as the M-1, in Maitani’s honour. Leica objected to the name, since its rangefinders had long carried the M designation, and Olympus renamed it the OM-1 in 1973. From there it evolved in stages: the OM-1MD of 1974 added a motor-drive coupling on the baseplate, enabling five frames per second; and the OM-1n of 1979 gathered a long list of refinements.
Operation
When anyone picks up an OM-1n the first thing that strikes them beyond its diminutive form is the size of the viewfinder. This, of course is what made the camera famous in the first place. Its 97% coverage was good, but not unique. It was the 0.92× magnification was extraordinary, and the real engineering achievement was combining both.
This is because they result from two competing design goals. Making the image appear large to the photographer (high magnification) and showing as much of the image as possible (high coverage) collide in camera design. Olympus quoted a 0.92× magnification with a 50mm lens and about 97 per cent coverage, and the view is something like 30 per cent larger than most SLRs of the period.
The second is the placement of the shutter-speed ring around the lens mount rather than on the top plate. It’s a logical design choice to put the aperture and shutter speed on concentric rings on the lens, though some photographers found the change irritating at the time.
Outstanding Manual Focus
One of the great strengths of the OM-1, and all the Olympus compact SLRs, is the ability to achieve crtical focus. Whilst the viewfinder image is unusually large and immersive, the standard Olympus focusing screens are equally important.
I have found the combination of a coarse microprism collar, a highly visible split-image rangefinder and a bright matte field provides exceptionally strong focus discrimination. Rather than just maximising brightness, Olympus prioritised the photographer’s ability to see the exact point of focus. As a result, many photographers find that OM SLRs exhibit a pronounced “focus snap”, with a very clear transition between in-focus and out-of-focus subjects. In short, the OM-1 and its successors are perhaps the easiest manual focus cameras to achieve good results with. I have tried many different focusing screens on Nikon SLRs, including the F3HP with a K screen, FM3a and FE2, and the Olympus still comes out slightly ahead.
The isolated church at Hampton Gay, shot in reflection with the OM-1n
Internals
Internally, the OM-1n is fully mechanical, with a cloth focal-plane shutter running from 1 second to 1/1000 plus B. The meter is full-aperture TTL using two CdS cells either side of the eyepiece, with a simple match-needle display, and it is the only thing on the camera that needs a battery. The mirror is an oversized, air-damped design, which is why these cameras are so quiet and low on vibration, and the OM-1n is the only OM body with a mirror lock-up. The interchangeable focusing screens drop in through the lens mount.
There is one drawback for modern owners: the OM-1 meter was designed around a 1.35V mercury cell that is now unavailable. The workarounds are a Wein zinc-air cell, an MR-9 voltage-reducing adapter, or by metering externally and accepting a small offset. I use the Weincell.
Reception and legacy
TThe OM-1 was immediately recognised as a breakthrough in industrial design. It didn’t add new features but it proved a professional SLR could be made small, quiet and beautifully integrated. Maitani and Olympus had created a masterpiece that changed the course of camera production in the 20th century. From then on, the race to build smaller, more-capable SLRs was on.
As a result, the compact bodies that followed from Pentax, Nikon and others all owe a debt to the OM-1. Today it is widely regarded as the defining OM camera and one of the great mechanical SLRs.
The Olympus OM-2n – Off the Film
Development
The OM-2 prototype appeared at the 1974 Photokina in Cologne, and it shipped in late 1975. From the outside it is similar to the OM-1: with same dimensions of 136 × 83 × 50mm, only slightly heavier at around 520g. The OM-2n of 1979, my version, refined the formula with improved TTL flash support for the new T-series flashes and longer automatic exposures.
Folkestone harbour arm, shot with the Olympus OM2-SP
Operation
The OM-2 added an electronic shutter and aperture-priority automatic exposure. Flicking the selector to manual invokes a match-needle scale.
The OM-2 was the first production camera with off-the-film (OTF) TTL direct metering. Before the exposure it reads light bouncing off a patterned first shutter curtain; during the exposure it reads light reflected from the film surface itself adjusting as it goes and without needing a memory circuit. That is why the camera can meter automatically out to around 60–120 seconds. Olympus marketed the system as TTL Direct, or Auto Dynamic Metering. However, unlike the OM-1, the OM-2 does not offer mirror lock-up.
I have had problems with my OM-2n, with two lots of films partially spoiled by incomplete shutter movement. The second repair sorted it, and it’s been reliable since.
Reception and legacy
The Olympus OM-2 was received very positively when it launched in late 1975, although the enthusiasm came more from photographers and the specialist press than from the wider consumer market. The trick the OM-2 had up its sleeve was that the same OTF principle that ran the ambient meter also controlled TTL flash. That neatly solved the fiddly business of flash exposure and virtually every other manufacturer adopted the idea. OTF ambient metering had fewer imitators, the Pentax LX of 1980 being the most notable, but TTL OTF flash became the industry standard for the rest of the film era.
The Olympus OM-2SP (Spot)
Development and naming
The OM-2SP is short for OM-2 Spot/Program. Confusingly, it is not a variant of the OM-2, but is based on the OM-4. It arrived in 1984, the year after the OM-4, despite the lower model number, and production ran to 1988.
Operation
The OM-2SP keeps the OTF aperture-priority and manual modes of the OM-2 and adds a programmed auto mode, where the camera chooses both aperture and shutter speed, and a spot meter which reads a small central patch from the focusing screen. This was a single spot meter, not the multi-spot system of the OM-4. The program mode was advanced for its day and worked with older lenses not built for shutter-priority automation.
The OM2-SP Meter
To engage spot metering on the OM-2SP the photographer turns the selector to Manual/Spot which changes where the reading comes from. In program and aperture-priority mode the camera reads off the patterned shutter curtain and the film surface, whereas in Manual/Spot it reads a small central patch from the focusing screen. This is not the exact centure, but the outer portion of the microprism.
The display is vertical strip down the left of the viewfinder, with a shutter speed scale marked alongside. In the automatic modes a bar rises to the speed the camera has chosen. Warnings use same strip. OVER blinks for overexposure, and in program mode it blinks to indicate that the lens must be stopped down. A plus and minus symbol at the foot of the display blinks whenever exposure compensation is engaged.
The camera warns audibly as well. An electronic beeper backs up the finder display, sounding for overexposure and underexposure.
Auto is extremely straightfoward to use, but I found Manual/Spot metering counterintuitive at first. The metering bar on the left is still used, but it changes to a null indicator. Here, the tip of the bar now shows how far the current settings sit from the metered value currently set, moving in third-stop steps against a fixed point marked between two small triangular indicators. The photographer turns the aperture ring, the shutter speed ring, or both, until the tip of the bar meets that fixed point. This is perfectly straightforward, but what confused me intitally was that the bar extends right to the bottom of the viewfinder, where if you have exposure compensation engaged, as I did, there is a flashing +- symbol.
Other OM-2SP Considerations
Where the OM-1 and OM-2 have a smooth wind and a quiet mirror, the OM-2SP uses a double mirror whose secondary mirror produces a slightly louder, less refined sound. It’s still a tough, dependable body, but not quite as refined as it’s predecessors. It also has a long-standing reputation for heavy battery drain. This is because their is no ‘off’ position, as such. The meter deactivates after a short period, but leaves the circuitry slightly active, which is a problem early OM-4 models also suffered from. There is a alleged fix of setting the camera to B (Bulb) or 60 (mechanical 1/60th sec), but that’s an internet myth – the 1/60th setting is a fail-safe, not a power control.
Speaking of which, whilst the OM-2 stops when the battery gives out, the Spot does offers that 1/60th of a second mechanical backup.
Reception and legacy
At launch, the OM-2SP’s biggest problem was timing. By 1984 program AE was already commonplace, and multi-segment evaluative metering, first seen on the Nikon FA of 1983, had made a single spot meter look dated. The camera had also arrived just as autofocus was beginning to reshape the market. Minolta’s Maxxum/7000 would appear in 1985 and rapidly change buyer expectations.
Olympus Camera Comparison
OM-1n
OM-2n
OM-2SP
Introduced
1979 (OM-1 line from 1972)
1979 (OM-2 line from 1975)
1984
Shutter
Mechanical, 1–1/1000 + B
Electronic, auto to ~120s; manual 1–1/1000
Electronic to 1/1000; 1/60 + B mechanical
Exposure modes
Manual
Aperture-priority, Manual
Program, Aperture-priority, Manual
Metering
Centre-weighted TTL CdS meter
OTF centre-weighted (first OTF camera)
OTF + single spot
Mirror lock-up
Yes (OM only)
No
No
Works without battery
Yes (meter excepted)
No
Only 1/60 + B
Body weight (approx.)
~500g
~520g
~540g
Legacy
Between them these three Olympus compact SLRs carry a decent share of the OM system’s importance. The OM-1 set the stage for the compact SLR and proved a small camera could be extremely competant. The OM-2 gave the world OTF metering and TTL OTF flash, the single most widely copied idea to come out of the system and the basis of film-era flash automation.
The OM-2SP’s is a bit of an oddball, but it is undoubtedly a very good camera, giving you the best of the OM-4, Olympus’s peak professional OM body, in an easier to use package. It lacks the OM-4’s famous multi-spot metering system, which was one of the most advanced metering systems of any manual-focus SLR, but I would argue that features such the 8 spot readings stored in memory and averaging of multiple spot readings are infrequently used.
The OM-3, OM-4 and titanium variants, which I have not shot with, are covered in the postscript below the section on Zuiko lenses.wn 85mm, but it is one of the sharpest lenses in the OM range and its compact for its focal length.
Flash: TTL auto with T-series flash, 1/60 sync or slower; permanent hot shoe
Finder: pentaprism, ~0.86× at infinity (50mm), ~97% coverage, interchangeable screens
Film speed: ASA 12–3200
Power: two SR44 silver-oxide or LR44 alkaline cells
Dimensions / weight: 136 × 84 × 50mm; ~540g body
Postscript: The OM-3, OM-4, and the Titanium Variants
I have not shot with these cameras (yet), but am including a note on them for completeness. The OM-3 and OM-4 both arrived in 1983 and shared the same advance, a multi-spot meter that could take up to eight readings from around the frame and average them, with highlight and shadow buttons to place a tone deliberately. An LCD replaced the match needle, and top shutter speed rose to 1/2000. The difference between them is that OM-4 is electronic, whilst the OM-3 is fully mechanical.
The OM-3 did not sell well sold, as the cheaper OM-1n was still in production, and Olympus discontinued it in 1986, which is why the OM-3 is a more expensive body to buy today. Both were later reissued with titanium top and bottom plates. The OM-4Ti of 1986 cured the battery drain that had afflicted early OM-4 bodies and added Super FP synchronisation, giving flash out to 1/2000 with the F280 unit. The OM-3Ti followed about eight years later, in very small numbers, and it is the last true OM camera; it is also the most expensive of them all to buy today (£1,100-£3,000 as I write this in 2026). The OM-4Ti stayed in production until about 2002 and is far more affordable (£230-£1,500).
If I were to acquire another Olympus compact SLR it would probably be the OM-Ti, for its faster shutter and better battery life.
OM-3
OM-3Ti
OM-4
OM-4Ti
Introduced
1983
1994 (sources differ: 1994–1995)
1983
1986
Shutter
Mechanical, 1–1/2000 + B
Mechanical, 1–1/2000 + B
Electronic to 1/2000; 1/60 + B mechanical
Electronic to 1/2000; 1/60 + B mechanical
Exposure modes
Manual
Manual
Aperture-priority, Manual
Aperture-priority, Manual
Metering
Centre-weighted + multi-spot (to 8 readings), highlight/shadow control
As OM-3, plus TTL flash and Super FP
OTF centre-weighted + multi-spot, highlight/shadow control
The M6 and M6 TTL are both regularly eulogised as the greatest rangefinders, and sometimes the greatest film cameras of all time. This accolade is usually reserved for the 0.85 viewfinder version, primarily because it handles critical focusing with fast lenses better than the other models. This was the M6 TTL model I decided to buy.
However, the M6 TTL that arrived from the dealer was the 0.58, which was an unwelcome surprise. This is a wide-angle variant, equipped with the lowest magnification finder on a Leica M film body, and aimed at wide-angle shooters and spectacle wearers who found it difficult to see the full framelines on higher magnification models. It is a model that has its fans, but is not typically the subject of the same degree of reverence.
A return was going to prove to be expensive due to import charges. So, after some negotiation with the dealer, I reluctantly agreed to keep the 0.58 at an advantageous price, with the intention of getting a 0.85 M7 to accompany it later. Surprisingly, and partly due to the influence of the Leica Q and Q2 (more of which later), it is the M6 TTL that has become my favourite Leica film camera.
I enjoy researching the background to the cameras I use, so this is the story of the M6 TTL, the development of the Leica M viewfinder variants, and why the 0.58 model has earned my affection.
Background: From the M3 to the M6
To understand the evolution of the Leica M series leading up to the M6 TTL, it is important to add a little context on two developments: the introduction of a built-in light meter and viewfinder magnification options.
A Note on Rangefinder Optics
Unlike SLRs, which show the scene directly through the taking lens via a mirror and prism, rangefinders cannot present what the lens ‘sees’ in the finder. Instead, the Leica M and other rangefinders use a separate viewfinder window for composition, which shows a wider field than the lens records. To frame what will actually be captured, bright framelines are projected into the finder. These change according to the lens that is mounted, sometimes as a single frame and sometimes in pairs. SLRs avoid this issue because the finder image comes directly through the lens, eliminating the need for framelines.
Rangefinders are also limited to lenses of a maximum of 135 mm focal length because of the combined constraints of viewfinder scale and focusing accuracy. As the focal length of the lens increases, the view through the finder represents a narrower angle, so the corresponding frameline shrinks within the viewfinder. This makes composition progressively more difficult.
At the same time, longer and faster lenses demand increasingly precise focusing, and the rangefinder’s Effective Base Length reaches its practical limit around 135 mm. Beyond this point, accurate framing and focusing become too difficult for practical use.
Finder Magnification
The Leica M3 of 1954 used a 0.91× finder, which was ideal for 50 mm and longer lenses but required auxiliary optics for wider focal lengths.
With the M2 (1957), Leica settled on 0.72× magnification as the best compromise, a standard carried through the M4 (1967), the M5 (1971), and the Canadian models, the M4-2 (1977) and M4-P (1980–1986).
Light Meter Development
The M5 (1971) introduced through-the-lens (TTL) light measurement, but the design was poorly received. Leica abandoned a meter with the M4-2 and M4-P, leaving users to rely on the shoe-mounted Leica-meter. By the early 1980s, however, virtually every professional SLR offered TTL metering as standard, making this omission increasingly untenable.
Leica realised the M needed to be brought up to date while retaining its core identity of a compact form, mechanical reliability, and longevity – without incurring prohibitive development costs.
TTL metering was the least intrusive upgrade Leica could make, requiring only a modest change to the body design (adding light metering diodes and LEDs in the finder) and preserving the fully mechanical shutter and manual exposure control.
Predecessor: The Leica M6 “Classic” (1984–1998)
The result was the Leica M6 (now known as the ‘M6 Classic’ – never an official designation). A prototype was developed in 1981, and the model was launched in 1984, becoming the first M with built-in TTL light metering. This was a centre-weighted system that reads from a 12mm spot on the shutter curtain and displays the exposure with a pair of LEDs in the finder. The M6 featured a die-cast zinc body with zinc top and bottom plates, and was offered only in a black finish.
The M6 was updated in 1986 with the addition of plastic protective inserts above the strap lugs and the addition of a chrome finish alongside black. In 1987, the top plate engraving was simplified to a large “M6” without “Leica” above it. Further stylistic changes occurred in 1988 when production moved from Wetzlar to Solms – the engraving changed to “LEICA GMBH GERMANY and the red dot changed from “Leitz” to “Leica.”
Later, there were numerous limited edition versions for collectors of both the M6 and M6 TTL, the most important of which was the M6J special edition in 1994, which introduced the 0.85× finder.
The M6J – 1994
After the M3, with its tele-friendly 0.91 magnification, 0.72× magnification became the defining standard for Leica M rangefinders. The M2, M4, M5, M4-2, M4-P, M6 Classic, all used the 0.72× finder exclusively, as did the 2014 M-A.
The lower magnification struck a balance: it preserved sufficient focusing accuracy for 50 mm and longer lenses, while making 35 mm framelines visible without auxiliary “goggles,” which was increasingly important for photojournalists and documentary photographers.
Whilst 0.72× might offer the best balance, a tele viewfinder is useful with 50 mm lenses, especially fast ones like the Summilux or Noctilux, where the higher magnification improves focusing precision, and it becomes essential for longer focal lengths, not least because it offers framelines for tele lenses.
Accordingly, Lecia added a tele option with the M6J in 1994, a Special Edition 40th Anniversary Leica M. This introduced the 0.85× finder, a first since the M3’s 0.91×. It also excluded the 28 mm frameline, reinforcing its focus on longer lenses, though, unfortunately for 75/1.4 Summilux users, a 75 mm frameline was not added as well.
The M6J generated demand for regular M6’s to be converted to the .85 M6J finder. Once the M6J production run of 1640 cameras (40 cameras for each year of the 40 years of M production) has sold out, unsurprisingly, Leica received many requests for a regular M6 with the higher magnification finder. Thus, the .85 finder M6 finder was introduced in the Leica M lineup four years later in 1998.
Leica M6 TTL (1998–2002)
By the late 1990s, TTL flash metering had become standard even in mid-range SLRs from Nikon, Canon, and Minolta, which set expectations for both professional and enthusiast photographers. Leica’s rangefinders were primarily used by photojournalists, street photographers, and documentary shooters, many of whom avoided flash entirely. However, a subset of users, particularly those doing event or portrait photography, wanted more accurate flash results than manual flash offered.
Leica responded by adding TTL off-the-film flash metering to the M6 design, while also addressing the ergonomics of the shutter dial and metering display. Here is a rundown of the most significant differences between the M6 and the M6 TTL:
LEICA M6 TTL 0.58
M6 TTL Changes
TTL Flash Control
Hotshoe engraved with “TTL” and a flash bolt.
Four contacts in the shoe instead of one.
Finder now included a flash-ready LED in addition to the three meter LEDs.
Revised Meter Display
From two LEDs (> and <) to three LEDs (> o <)
Shutter Speed Dial
Enlarged for easier use at eye level.
Rotated in the logical direction matching meter arrows (opposite to M6 Classic).
Body Height
2.5mm taller than the Classic to accommodate the TTL circuitry
Advance Lever
Now with an articulated plastic tip, often criticized but useful in cold climates
There were three variants of the M6 TTL, two of which were introduced at launch, which are shown in the table below.
M6 TTL Version
Introduced
Frameline Configuration
M6 TTL 0.72×
1998
28 + 90 mm 35 + 135 mm 50 + 75 mm
M6 TTL 0.85×
1998
35 + 135 mm, 50 + 75 mm 90 mm
M6 TTL 0.58×
2000
28 + 90 mm 35 mm 50 + 75 mm
Wide Angle Shooting – and External Viewfinders
My Leica M3 28mm setup, with an external 28mm viewfinder and light meter mounted on dual shoe. A 3rd party winder completes the ruin of the camera’s clean lines.
Before Leica introduced wide-angle framelines into the M viewfinder, photographers relied on external viewfinders mounted on the accessory shoe to compose with lenses wider than 50 mm. The Leica M3, with its high-magnification 0.91× finder, had framelines only for 50, 90, and 135 mm lenses. To use the then-new 35 mm Summicron, Leica supplied “goggles” (optical adapters) that modified both view and rangefinder, or an external 35 mm finder such as the SBOOI. As Leica added 35 mm framelines in the M2 (1957), external finders became primarily associated with 28 mm, 24 mm, and 21 mm lenses, which were too wide for the in-camera framelines of the time.
These finders allowed accurate composition but required separate focusing through the camera’s rangefinder, then recomposing with the accessory finder. Even into the M4-P and M6 era, when 28 mm framelines were added, lenses of 21 mm and wider still required an external finder, making them a distinctive part of Leica rangefinder shooting.
A Lightweight Film Camera
The M6 TTL isn’t the lightest manual focus metered 35mm camera. That distinction, in my collection at least, goes to the featherweight Olympus OM-1m, closely followed by the Nikon FM2N. The table below shows the leaders for that type of camera in my collection.
However, it is the lenses that make it such a great choice for landscape photography when weight is at a premium, as you can carry the highest quality glass without much of a weight penalty.
My first real shooting opportunity with the M6 TTL came at a friend’s 60th birthday, which he hosted near his home in Belap, Switzerland. It was a spectacular setting as the high-altitude resort overlooked the Great Alestch Glacier, the longest and largest glacier in the Alps. On the day we were leaving, low clouds rolled in, and it was an unforgettable experience to walk amongst them, with the scenery appearing and disappearing as the clouds rolled past.
Belalp, Valais, Switzerland.
Along with the 28mm Elmarit-M lens that I use so often, I took the Summicron-M 50mm and Elmarit-M 90mm f2.8 that I used with the M7. I included these on the basis that I was likely to be focused at infinity, so focusing accuracy with the 0.58 wouldn’t be an issue – an assumption that proved to be correct.
The M6 TTL is a pleasure to shoot with. Loading was trouble-free, and rewinding was quicker than with the M3. The framelines and rangefinder patch are bright, and I never encountered the path flare that some users find so troublesome.
Walking amongst the clouds, Belalp, Switzerland
The camera has a very solid tactile mechanical feel with a quiet shutter. Accurate, usable exposures are easily obtained by metering from a mid tone or shadow with texture, and the three-dot exposure display is intuitive. Perhaps best of all, those jewel-like miniature lenses are a joy to use. The body, film and lenses took up little space in my pack, and given the exertions of the hiking, I was glad they weighed so little.
The Great Alestch Glacier, Belalp
Aftermath: Leica M7, MP M-A and The Return of the M6
In 2002, the M6 TTL was succeeded by the M7, which introduced an electronically controlled shutter and aperture-priority auto-exposure and retained the same choice of viewfinder magnifications (0.58×, 0.72×, and 0.85×).
A year later, in 2003, Leica launched the MP (‘Mechanical Perfection’), which was a return to a mechanical shutter and the M3’s elegant, clutched but slow film winder. It also offered upgraded viewfinder optics to reduce flare. The MP was originally offered in all three magnification options, but is now only offered in 0.72 form.
In 2014, Leica introduced the M-A, a stripped-back, all-mechanical film body with no meter, positioned as the spiritual successor to the M3 and M2. It was produced only with the 0.72× finder, reaffirming that magnification as Leica’s universal standard.
Nearly two decades after the original, Leica revisited the M6 (2022): a modernised interpretation of the 1984 M6 Classic, with brass top and bottom plates, improved coatings in the finder, and 0.72× magnification. The model sported the three-LED light meter display of the M6 TTL but omitted both the larger shutter dial and TTL flash metering.
Final Word
A year or so after I acquired the M6 TTL 0.58, I purchased a black 0.85 M7. This late-model film camera, which features a few additional refinements I appreciate, including Aperture-Priority Auto-Exposure (AE), an exposure compensation dial (±2 EV in 1/3-stop increments), and DX coding with manual override. On the last point, the one control that lets the M6 TTL down is the fiddly ISO dial on the back. The M7 does introduce a battery dependency, but has two manual backup speeds of 1/60s and 1/125s, and I always carry spares.
In theory, I should prefer the M7. In practice, the M6 TTL has become my go-to Leica. I think this is for two reasons. The first, and most important, is that I now shoot with a 28mm lens most often for landscapes and street photography, rather than a 35mm lens. This is a focal length I came to really appreciate with the Leica Q and subsequently the Q2, and for that, it is ideally suited.
Secondly, I prefer the M6 TTL’s manual exposure display to the Auto Exposure mode on the M7, despite the promise of higher accuracy offered by the quartz-timed stepless speeds in that mode. The M7 offers the same manual focus display as the M6 TTL, though limited to the engraved shutter speeds in manual exposure.
Much praise has been heaped on the Q series with its built-in 28mm Summilux, whilst its tele and standard siblings shade the wide-angle Ms. I can understand why that is the case, but for me, the 0.58 has proved to be a very happy accident, and I wouldn’t swap it.
The gelatin dry plate, introduced in the 1870s, was a major milestone in photographic history. Unlike the wet collodion process, which required plates to be sensitized, exposed, and developed while still wet, dry plates were factory-prepared and could be stored for months before and after exposure.
Each dry plate consisted of a sheet of glass coated with a light-sensitive gelatin emulsion of silver halides. This made photography far more practical as exposures were dramatically shorter and cameras became more portable.
Development
An homage to the gelatin dry plate era and the pictorialists. The ruin of Hampton Gay in Oxfordshire. Shot with a long (30 second) exposure in 2017.
The gelatin dry plate emerged in the 1870s as a solution to the limitations of the wet collodion process, which demanded swift preparation and immediate development. In 1871, English physician Richard Leach Maddox proposed using a gelatin emulsion of silver bromide on glass as a more stable light-sensitive coating.
His idea was refined over the next decade by inventors such as Charles Bennett, who in 1878 discovered that heating the emulsion increased its sensitivity, making much shorter exposures possible. For the first time, photographers could purchase factory-prepared plates that remained sensitive for months, eliminating the need to carry portable darkrooms into the field.
Printing
A variety of printing processes became available during the dry plate era, which are summarised in the table below.
Camera design began to shift dramatically in response to the introduction of the gelatin dry plate. Earlier wet-plate photography had tied cameras to bulky tripods and portable darkrooms, but the new plates, which were sensitive, durable, and ready-made, freed photographers from those constraints.
The 1870s saw the refinement of the folding field camera, with bellows for portability and interchangeable lenses for versatility. Lighter wooden bodies, and more precise shutters made cameras easier to transport and quicker to operate. With reduced exposure times, photographers could capture instantaneous images of movement, street scenes, and everyday life far more easily.
A very late Gelatine Dry Plate Print from 1909. British battleships HMS ‘Dominion’ with HMS ‘Hibernia’ in distance, Source: Wikipedia Commons
The gelatin dry plate era bridged the gap between the era of handcrafted photography and the age of mass production, paving the way for the roll film and snapshots of the late nineteenth century.
For more on early photography you might consider these articles, which also be found on this site:
The Miners’ Bridge, on the Llugwy, North Wales, Roger Fenton, 1853, collodion/albumen (Source: Wikipedia Commons)
The collodion process of 1851 transformed how images were made, shared, and preserved.
It was also known as wet-plate photography and involves coating a piece of glass with a collodion emulsion, sensitising it in silver nitrate and then taking the picture immediately so that it can be developed whilst the plate is still wet.
Collodion ushered in a new standard of clarity and reproducibility compared to earlier processes, while albumen prints brought a mass-produced format into family albums and parlours.
However, during the collodian era, there was an extensive range of methods to create images, including direct positives as well as prints.
I found the easiest way to get to grips with the various media types made from the collodion process was to put them in a table, which you can see below.
Each medium had its strengths and limitations and collectively they shaped a photographic era that bridged the artisanal origins of photography and its industrialized roll-film coming of age.
Medium Introduced
Description
Positive/ Negative Main Uses
Pros
Cons
Albumen Print 1850
Paper coated with egg white (albumen) and silver salts, contact printed from negatives.
Positive (print) Dominant 19th-century print process
High-gloss surface, fine detail, warm tonal range; could be mass-produced.
Faded easily without good fixing/washing; labor-intensive coating process.
Ambrotype 1854
Under-exposed collodion negative on glass backed with black to appear as positive.
Negative used to make a unique Positive Studio portraits; popular keepsakes.
Cheaper and faster than daguerreotypes; sharp detail; less reflective.
Unique image (no copies); fragile glass; limited tonal depth.
Tintype (Ferrotype) 1856
Under-exposed collodion negative on black-lacquered iron, exposed as direct positive.
Negative used to make a unique Positive Working class portraits, itinerant/carnival photographers.
Durable, cheap, quick to produce; popular for portraits/traveling photographers.
Lower image quality; usually small format.
Salt Print 1839
Paper soaked in salt and silver nitrate, contact printed from a negative.
Positive (print) Early landscapes, architecture, scientific documentation
Soft tonal range, relatively easy to produce, allowed multiple prints.
Survived in low volume into collodion era, but prone to fading; less detail than albumen prints.
Collodion Positives on Paper 1850s
Direct collodion image on paper to serve as a unique positive.
Positive Experimental niche process
Lightweight inexpensive positives.
Rare; lacked popularity and longevity.
Carte de Visite (albumen format) 1854
Multiple small albumen prints from collodion negatives mounted on card.
Positive (print) Mass social phenomenon; portraits of family/celebrities
After the collodion era gave way to more convenient dry plates, photographers began experimenting with more artistic printing methods. These “exotic” processes were less about sharp detail and more about mood and craftsmanship. Platinum and palladium prints created soft, velvety tones; gum bichromate and carbon printing added painterly layers of pigment; oil and bromoil let artists brush ink directly onto the image; and photogravure gave photographs the richness of fine art prints. Together, they defined the Pictorialist movement of the 1890s–1910s, when photography strove to look and feel like art.
Further Reading
For more on early photography you might consider these articles, which also be found on this site:
For a camera maker of such influence, Thomas Ottewill is biographically elusive. We have examples of his cameras, but we know little about his business, less about his family life and nothing at all about his final years and death. In this article I have attempted to assemble what is known and research what is not.
Much remains unknown, but what follows is a timeline of his life and cameras, based on the many sources that can be found online, followed by a summary of his legacy. The main source for the cameras is the excellent British Camera Makers, an A-Z Guide to Companies and Products.
Context: Photography 1851-1865
Thomas Ottewill was a leading figure in the shift from opticians and instrument-makers to a specialised manufacturing and retail industry, with British firms scaling up the production of cameras, lenses and sensitised materials. During that period, much else changed.
An 8 x 12″ Ottewill Sliding Box Camera – Source Peter Coeln Photography
It is the collodion era. Frederick Scott Archer’s wet collodion (1851) rapidly displaces the daguerreotype and calotype because its glass negatives offer an improvement over the calotype process, which relies on paper negatives, and the daguerreotype, which produces a one-of-a-kind positive image. By the International Exhibition of 1862 the catalogue could state that, “with some few exceptions, all [exhibits] were produced by the collodion process.”
Albumen paper, developed by Blanquart-Évrard in 1850, becomes the dominant print, pairing with collodion negatives and enabling large-scale production.
The period witnesses mass adoption via new formats: the carte-de-visite (patented in 1854) turns portraiture into an affordable, collectible commodity and stereoscopy becomes a household entertainment after its 1851 Crystal Palace showing.
Photography professionalises and institutionalises. The Photographic Society (RPS) is founded in 1853 with the explicit mission to promote the art and science of the medium, publishing the Journal of the Photographic Society from the same year.
It also expands in purpose, illustrated by Roger Fenton’s 1855 Crimean War campaign, one of the earliest systematic documentary projects of conflict.
1821 Thomas Ottewill is born in Maidstone, Kent, a town where many nineteenth-century Ottewills originated from, moving to London for work as the century progressed. The surname itself is a rare southern variant of Ottewell/Ottiwell/Otwell from the Norman personal name Otuel. (Sources: 1861 Census, Government Records Office, Geneanet.com)
1842 Thomas marries Jane Dyson, daughter of Robert, Coachman, at St. Pancreas in May. Thomas is working as a Cabinet maker and living at Clark’s Place Islington. (Source: marriage record)
1844 Thomas and Jane’s first child, Henry is born. The couple went on to have four sons and three daughters, as shown in 1861 census. Sarah Jane, 1846; Alfred, 1848; Amelia, 1851; Herbert 1853; James 1856; Emily 1858. (Source: 1861 Census)
Early Career
Pre 1851 Ottewill works at London optical and photographic firm Horne, Thornthwaite & Wood (‘Horne & Co.’) prior to starting his own firm. (Sources: Early Photography, Advertisement 16th July in Notes & Queries)
1851 Ottewill launches a business at 24 Charlotte Terrace, Islington, initially specialising in daguerreotype apparatus, as Thomas Ottewill. (Source: Company Details, Early Photography)
Daguerrotype apparatus. Source: Post Office London directory 1854.
As can be seen in this listing, Ottewill was both early and unusual as a specialist camera-maker in 1851. The table above shows that most London suppliers in the daguerreotype era came out of optics (e.g., Shew, Gogerty) or “philosophical/instrument” shops (Horne, Thornthwaite & Wood; Hobcraft), with only “Thomas Ottewill, camera manufacturer” listed as a dedicated maker.
This listing was made only a dozen years or so after photography’s 1839 debut, and in the same year collodion breaks through, which puts Ottewill in the first-wave of camera makers, and distinct from the opticians who typically focused on lenses and retail and often jobbed out wooden bodies.
Over the 1850s–60s the trade would diverge. Opticians like Ross concentrated on lenses/branding while specialist cabinet-shops (Ottewill, later Hare, Meagher and Garland) built the cameras. These were frequently rebadged for the opticians and other retailers. Ottewill sits right at that pivotal point: he trained hands from cabinet-making, sold under his own name, and also manufactured for optics houses, helping move camera production from the bench of the general “instrument maker” into dedicated camera workshops.
Cameras
Thomas Ottewill started by producing Dagurrotype cameras. Whilst his first cameras are likely to have been sliding box cameras, his first identifiable camera model is the folding sliding-box of 1853.
Ottewill folding box camera. 1990-5036/7299 Science Museum Group Collection Online.
1853OTTEWILL’S DOUBLE FOLDING CAMERA (1853): sliding box (registered design), for 10 × 8 inch wet-plates. Once the lens panel and focusing screen frame had been removed the inner and outer boxes folded inwards on side hinges. (Lewis Carroll, the author, is said to have been a user of one of the Double Folding models). (Source: British Camera Makers, Channing & Dunn)
This wet-plate camera featured a collapsible design, where the front and back panels could be detached and placed flat on the baseboard to create a compact, field-portable package. The design is described in detail on the Early Photography site:
Ottewill’s design combined the folding principle with the sliding box design. Both the inner and outer boxes carry hinges on their sides so that they can fold inwards and collapse. The outer box folds from a little way above the baseboard, this leaves space for the folded inner box. To collapse the camera remove the dark slide, remove the front panel, open the door on the top of the outer box, with the inner box drawn back a frame can now be seen at the front of the inner box, this is removed, both boxes will now collapse.
Ottewill advertises the camera in Notes and Queries in June that year: T. OTTEWILL (from Horne & Co.’s) begs most respectfully to call the attention of Gentlemen, Tourists, and Photographers, to the superiority of his newly registered DOUBLE-BODIED FOLDING CAMERAS, possessing the efficiency and ready adjustment of the Sliding Camera, with the portability and convenience of the Folding Ditto. Every description of Apparatus to order.
The reaction to the camera at the time was effusive. Photographic Journal (then Journal of the Photographic Society, December 21, 1853) praised its combination of strength and portability writing “there is none which more fully combines the requisite strength and firmness with a high degree of portability and efficiency.”
The Role of the Simple Sliding Box Camera
Whilst Ottewill’s folding double-body was aimed at field work where bulk and weight mattered, a good deal of photographic work, such as portrait studios and copying, prized body rigidity and alignment over compactness. A plain sliding-box has fewer joints, less flex, and is therefore potentially more rigid, which was important when mounting the heavy lenses of the time.
Partnerships Form and Dissolve
1854 The business becomes a partnership: Ottewill & Morgan, with William Morgan, about whom nothing else seems to be known.
1855 The partnership of Ottewill & Morgan is dissolved on the 12th April. The business rebrands to Thomas Ottewill & Co, a partnership between Thomas Ottewill and photographer/artist Frederick Aaron Gush (1817-1869). Gush was the brother of Victorian portrait painter William Gush (1813-1888).
Bellows and Stereoscopic Cameras
1856CAPTAIN FOWKE’S CAMERA:one of the first to use bellows: the front (fixed), and rear (moving) standards secured to a baseboard. The front standard carried a tapered wooden, four-sided extension to hold the lens panel. This model was still being advertised, with improvements, in 1858, and shown as available in teakwood
Captain Fowke’s Camera was one the first camera with concertina-pattern pleated bellows, designed by Capt. Francis Fowke, R.E., patented No. 1295 (31 May 1856). Ottewill built the production examples.
Ottewill’s advert for Fowke’s Portable/Bellows Camera described it as “Invented for and used by the Royal Engineers… the most portable as well as the lightest camera in use.” (Source: National Science & Media Museum blog)
By 1856 Ottewill claimed to ‘have erected extensive workshops adjoining their former shops, and having now the largest manufactory in England for the making of cameras, they are enabled to execute with dispatch any orders they may be favoured with’ (source: Advertisement, Photographic Notes, no. 14,vol. 1, 1November 1856, p. 229.)
Ottewill continues to advertise in Notes and Queries: OTTEWILL’S REGISTERED DOUBLE-BODY FOLDING CAMERA, with Rack-work Adjustment, is superior to every other form of Camera, and is adapted for Landscapes and Portraita, – May be had of A. ROSS, Featherstone Buildings, Holborn and at the Photographic Institution, Bond Street.
1857SINGLE LENS STEREOSCOPIC CAMERA: required two pictures to be taken in succession; the camera being slid along a slightly curved track on a mounting platform to make the two exposures. (Source: British Camera Makers, Channing & Dunn)
Charles Dodgson immortalises Ottewill’s double-folding camera in a parody of Longfellow’s poem ‘Hiawatha’, in which he describes the camera, the wet-collodion process and the process of making a photograph.
Architect-photographer C. G. H. Kinnear’s designs a tapered-bellows field camera. The introduction of bellows was a milestone in camera design as it provided a lightweight method of extending body sections. Kinnear’s tapered bellows enabled the camera to fold into a very compact form because each pleat nested into the next, larger pleat. Ottewill and other manufacturers would later make improved versions of the camera.
Ottewill & Co. expands operations, occupying adjacent properties and “extensive workshops.” The company claimed to be the largest camera maker in England at the time.
1858STEREOSCOPIC BOX CAMERA: a folding/collapsible box; much the same as the designs of Meagher and Hare. In 1859 advertised as the NEW STEREOSCOPIC BOX CAMERA. (Source: British Camera Makers, Channing & Dunn)
A ‘Monster camera’, an oversized, large-plate version of Captain Francis Fowke’s folding bellows camera built by Ottewill, is shown at the 1858 Photographic Society exhibition. I can’t locate its dimensions, but period price lists show Ottewill selling very large formats (≥24×22 up to 30×30 inches), which is likely the class to which the 1858 “monster camera” belonged. For example, C. E. Clifford’s illustrated catalogue (National Art Library/RPS copy; ca. 1860–63) lists the sizes of “Improved Double-Body Folding Camera” in a table, which runs to 30×30 inches.
On the 18 May 1858 The Ottewill Gush partnership dissolves by mutual consent. Ottewill assumes all debts and continues the business alone; Gush moves on to other partnerships.
An Early Swing Back
1859IMPROVED KINNEAR’S CAMERA: conventional design; optionally with swing back. The sizes in which this model was made have not been traced specifically but they are known to have been made in a range, or to special order. (Source: British Camera Makers, Channing & Dunn – they suggest 1860s for the introduction)
The “Improved Kinnear Camera”, was derived from the design of architect-photographer C. G. H. Kinnear’s tapered-bellows field camera of 1857. A Christie’s lot essay says Ottewill made an Improved Kinnear-pattern camera in 1859 and “claimed [it] was the first to introduce a swing back.”
A swing back is an adjustable rear standard: the ground-glass/plate frame pivots on one (or sometimes two) axes so the sensitized plate needn’t stay square to the baseboard. The swing back was used chiefly for plane-of-focus control and small compositional refinements.
Whilst Ottewill’s swing back was undoubtedly early, some sources state that the movement was introduced earlier:
Tilt and Swing to the Back. These movements are found on studio cameras as early as the 1840s. Cameras fitted with tilt and swing are shown in Knight’s catalogue (1853) and described in Willats’s catalogues of 1849 and later. The 1849 catalogue claims it was introduced by Dr Leeson in 1845. (Source: Early Photography)
Meagher shows a Kinnear-derivative with a swing back described at a Photographic Society meeting in 1860.
Regardless of who introduced it first, by the mid-1860s the movement is routine on studio cameras, becoming a standard control on professional models through the1870s.
The Early 1860s, Growth and Bankruptcy
1860 OTTEWILL’S MINIATURE CAMERAmahogany, with a brass lens mount and very similar in appearance (apart from the material) to the Skaife Pistolgraph… even to the wooden box and ball-mounted stand. Simple flap-type shutter (Source: British Camera Makers, Channing & Dunn)
1860s OTTEWILL’S DOUBLE-BODY FOLDING CAMERAS; and the SUPERIOR SLIDING-BODY FOLDING CAMERAS: made in a range of (unspecified) sizes — the latter in vertical/horizontal format, or in a square pattern; optionally in mahogany or teak (Source: British Camera Makers, Channing & Dunn)
This 1860s “double-body” and “superior sliding-body” models are an evolution of the 1853 model offering more formats (vertical/horizontal/square), materials (including teak), and working features like repeating backs, while staying within the sliding-box-folding tradition that distinguished Ottewill’s field cameras.
1860sSTUDIO CAMERAS and PORTRAIT CAMERAS: several types and sizes of sliding-box cameras; some with sliding/repeating backs (Source: British Camera Makers, Channing & Dunn)
1861 The census of that year shows Ottewill employs 21 men and 3 boys. On the 31 December Ottewill files for bankruptcy. The court requires Ottweill to surrender himself to Henry Philip Roche, esq, a Registrar of the said Court, at the first meeting of creditors, on the 15th of January the following year. (Source: London Gazette)
1862 On the 15th of March, the Bankrupty Court grants Ottewill an Order of Discharge. (Source: London Gazette)
The Collis Partnership and Debtors Prison
1863 The firm evolves into Ottewill & Collis & Co., with James Collis (formerly with Ross & Co.) as partner. Ross was a leading London firm of “manufacturing optician.” that had introduced an influential doublet portrait lens in 1841, placing the firm among the earliest English manufacturers of photographic lenses. Ottewill made much of the connection. An 1867 advertisement stated that they had been manufacturing for Ross for 15 years and that Mr Collis was previously working for Ross for 13 years.
1864 In October Ottewill is adjusged bankrupt for a second time, and is held as a Prisoner for Debt in the custody of the Sheriff of Middlesex, at No. 1, Breams’-buildings, Chancery-lane. (Source: London Gazette).
The Breams’ buildings were not a prison like Newgate , but a Sheriff’s officer’s “sponging-house” (lock-up) used to hold debtors after arrest on a writ while they tried to settle or arrange terms. A debtor was seized by a sheriff’s officer and taken to a sponging-house, and only if no arrangement was made would he be brought before the court and committed to prison.
Contemporary descriptions of Chancery-Lane lock-ups paint a picture of closely supervised rooms, fees for everything, and constant pressure to pay. Debtors could receive visitors and have food sent in, but at their own expense, while officers’ charges mounted. (Sources: The National Archives and The Spectator Archives)
Last Mention
1865 Ottewill faces creditor hearings and examination. The last mention of him appears late in that year in the London Gazette relating to his bankruptcy material.
1867 James Collis, a former employee of Ross in the accounts department, is accused by Ross of embezzlement and £20 is offered for his apprehension. (Source: Early Photography).
Late 1860s:OTTEWILL’S PLATE CHANGER: one of the earliest designs; carried eighteen plates and could be used on any suitable camera taking a conventional plate carrier. (Source: British Camera Makers, Channing & Dunn – no date for introduction provided)
43 Barbara Street Islington
A note that Ottewill was “possibly living at 43 Barbara St., Islington” in 1870 from the Early Photography site, is the last mention I can find of Thomas Ottewill.
The 1871 census shows Jane Ottewill living in 43 Barbara Street, working as a dressmaker with her daughter Sarah (also working as a dressmaker), James (aged 15, working as a stationer) and Emily (aged 12, scholar). Jane is listed as married, not as a widow.
After domestic service, needlework (dressmaking, millinery, shirt-making) was the default resort for urban women, mostly piece work done at home, often working extremely long hours in poor conditions. Henry Mayhew’s London Labour and the London Poor records peak-season extremes with women “working frequently their 20 hours a day… often sitting up all night”. These were the conditions later reformers would call the “sweating system.”
Given Thomas’s first bankruptcy was a decade earlier (31 Dec 1861), and that his financial troubles continued on-and-off from then on, It is likely that Jane to begin taking in paid work well before the 1871 census records it. Michael Pritchard’s The development and growth of British photographic manufacturing and retailing 1839-1914 notes that “the business stopped completely for a period of months” when Thomas Ottewill was made bankrupt in 1864, which would necessitate anohter income to feed the family.
It is quite likely that Jane’s work shifted from supplemental to principal income as Thomas’s finances collapsed the second time.
I have not been able to find any records to confirm Thomas’s death. Jane appears to have died in 1889 in Islington (Oct-Dec 1b/173) aged 70.
Legacy
At the 1862 International Exhibition the work of ‘the photographic cabinet-makers’ George Hare, Patrick Meagher and Thomas OttewiIl drew much attention. One reviewer, Samuel Highley, noted that their cameras ‘are of the very best of English workmanship, and contrast very favourably with the productions of our foreign neighbours’. All three businesses were specialist camera makers with photographic manufacturing being the major part of their businesses. (Source The development and growth of British photographic manufacturing and retailing 1839-1914, Michael Pritchard)
Looking back, the British Journal Photographic Almanacin 1898 noted that Ottewill ‘may be regarded as the source to which the best school of English camera-making traces its origin’
From these reviews we can conclude that both as a maker and mentor, Thomas Ottewill helped set the course of early British camera manufacture. His workshop trained a small group who went on to lead the trade, including George Hare, Patrick Meagher and John Garland, T. Mason and A. Routledge so that his influence propagated through their later firms.
In design terms, he showed innovation with the double-folding field camera and Captain Francis Fowke’s bellows camera marked a key transition from sliding boxes to bellows. By the mid-1860s his workshop helped popularise Kinnear’s tapered-bellows idea with “Improved Kinnear” models, while continuing to supply leading optics houses. His equipment was praised by Charles Dodson (Lewis Carroll) and reached royal hands. The Royal Archives preserve bills from Ottewill & Morgan and Ottewill & Co.
Ottewill’s legacy is one of refined, durable cameras that helped define British field and studio work, and a training pipeline that seeded excellence across the London trade.
Rather infrequently, a photograph just stops my world for a moment, and the image totally absorbs me. This has happened most frequently at exhibitions, but sometimes it just takes a single photograph. Waterloo Place (1899) by Leonard Misonne (1870-1943) is one of those. Definitely a photograph, but almost a painting, it seems to me a practically miraculous work. This article is the result of the impact of that photograph.
Rain, Belgium (1936)
Leonard Misonne was a pictorialist photographer. Pictorialism was a photographic movement from the late 19th to early 20th century that emphasised artistic expression and beauty over factual documentation. The pictorialists were a talented group of people who, in addition to having the skill to take pictures with the cumbersome and slow equipment of the time, realised their vision through a complex end-to-end process that required considerable skill.
They employed extensive darkroom manipulation, sometimes using paintbrushes; they often created their own photographic emulsions and experimented with alternative printing methods. Some even made their own paper. Physics, chemistry and art all played a part in creating a photograph that often looked more like a painting.
Among the pictorialists, Leonard Misonne is remembered for his mastery of light and atmosphere. Amongst the subjects he photographed, he applied these capabilities to the cities of the late nineteenth and early twentieth centuries, and the results are captivating.
His urban work, such as Waterloo Place (1899) and Sortie de la garede Namur (1938) showcases his talent to best effect. That’s an opinion, not a fact, but this post reviews his life, work and techniques, with particular emphasis on his urban work.
Waterloo Place (1899)
Early Life and Background
Leonard (Léonard in French) Misonne was born in 1870 in Gilly, near Charleroi, a major coal-mining centre, into a wealthy family whose affluence afforded him the freedom to pursue his interests.
His father, Louis Misonne, was an industrialist and lawyer who made his fortune from coal mining, and Leonard trained as a mining engineer at the University of Leuven. He quickly abandoned the profession, as his inclinations lay elsewhere.
From an early age, his asthmatic condition, though a physical hindrance, instilled in him a fascination with the movement and condition of air and the weather.
He became a keen cyclist, travelling through the countryside and cities of Belgium with a sketchbook or camera to hand. These journeys contributed to his careful observation of light, cloud, and shadow, which would later help to define his photographic work.
Artistic Influences
Although not a painter-turned-photographer like Edward Steichen, Misonne’s photographic vision was influenced by 19th-century painters who emphasized light, atmosphere, and mood.
The most well-known of these today is Gustave Doré, from whose engravings Misonne absorbed chiaroscuro, the dramatic use of light and shadow to create depth and volume, famously exemplified by Caravaggio.
However, The most historically important of his influences was French landscape painter Jean-Baptiste-Camille Corot. A national treasure in his lifetime, he is known more to curators and art historians than the general public today. At the time, however, parallels with his work earned Misonne the nickname the Corot of photography which was a huge endorsement.
Misonne was also influenced by at least two artistic movements. The Barbizon School was a group of French painters who painted directly from nature, and the later Tonalists were American artists who created paintings awash in mist or atmospheric fog.
Philosophy and Techniques
With these influences, Leonard Misonne rejected the realism of much early photography and sought to elevate the medium to the level of fine art. This was the Pictorialist mission. He subscribed to the Pictorialist belief that photography should evoke rather than record, capturing more than just the facts of a scene.
To this end, he employed a variety of alternative printing processes, often modifying them to suit his needs.
One of Misonne’s preferred techniques was the bromoil process, which allowed him to suppress detail and selectively control tone. The method began with a traditional silver bromide print that he then bleached, hardened, and inked with lithographic brushes. This created the painterly textures needed for his misty streetscapes and glowing landscapes. He learned the process from Émile Constant Puyo, a key figure in French Pictorialism, during a visit to Paris around 1910.
Misonne also experimented with the Fresson process, a secretive carbon print technique developed by the Fresson family, known for its matte finishes and tonal control. Another favoured method was mediobrome, a hybrid of silver gelatin and pigment-based printing which allowed for both photographic realism and artistic manipulation. Misonne’s prints made with mediobrome exhibit a haunting, diffused light, which was a hallmark of his style.
Hybrid Techniques
Sortie de la gare de Namur (1938)
He also developed his own hybrid techniques, most notably photo-dessin and flou-net. Photo-dessin (“photo-drawing”) blended charcoal or pencil sketches with photographic precision, often resulting in images that hovered somewhere between a drawing and a photograph. Flou-net combined softness (flou) with select sharpness (net), creating clarity amidst fog.
All of these methods were in service of what Misonne considered essential: light. His photographs are suffused with mist, low sun, and glowing haze. These were natural elements that were amplified, not fabricated, through his darkroom techniques. Misonne made light itself the subject of his photography. He often placed figures and scenes against the light, backlit by early morning sun or streetlamps in fog, so that their forms became silhouettes or halos within a luminous atmosphere.
One of his most famous quotes is ‘The subject is nothing, light is everything.’
Urban Atmosphere
While his images of the countryside, especially those of the Belgian Ardennes, were widely praised at the time, it is Misonne’s urban works, which captured the industrial beauty of cities like Brussels, Liège, and London, that I find unique and most appealing. Across all of his work, atmosphere was not a secondary consideration to Misonne; it was the subject itself. He was less concerned with what was seen than with what was felt.
A Lynchian Parallel
Despite the cultural and aesthetic contexts being worlds apart, there is something about the dreamlike, foggy ambiguity in industrial settings that reminds me of the work of David Lynch, whom I also greatly admire. Lynch was another great artist who was also less concerned with what was seen than with what was felt. Another parallel between the two artists is decribed in an article in Open Culture. The Art of David Lynch points out that the term ‘Lynchian is necessarily tied to a painterly sensibility’. In Lynch’s case, the painterly influences were René Magritte, Edward Hopper,Arnold Böcklin, and Francis Bacon. Hopper’s Nighthawks and Böcklin’s Isle of the Dead, both of which I’ve been lucky enough to see up close, both come to mind here.
The intent behind their work was, of course, very different; Misonne was in pursuit of an idealised vision, even when melancholy. Lynch’s work, with its industrial darkness, dream states, and fog, emphasises decay and is famous for producing substantial quantities of anxiety and existential dread.
Notable Urban Works
Several of Leonard Misonne’s photographs stand out for their urban atmosphere. Many make use of rain and fog as part of the effect. These works seem to me to be some of his most accomplished:
Waterloo Place Perhaps his most celebrated urban image (certainly by me, and shown in this post)
Sortie de la gare de Namur (also an accompanying image) A view of a departing train in dense steam. The tracks recede into haze, and figures blur into shadows
Rain, Belgium, also known as Effet de Pluie (the third image in this post) A rainy street with umbrellas and glowing reflections
La Grand Place de Bruxelles The famous square, seen through a filter of diffused winter light.
Le Voile (The Veil) A foggy street scene where pedestrians seem to vanish into opacity
Rue de Village A quiet city street at dusk, with horse-drawn carriages and gaslight just beginning to show.
Leonard Missone
The Legacy of Leonard Missone
Leonard Misonne died in 1943. He had suffered from severe asthma throughout his life and complications related to this condition led to his death.
His works were celebrated in his own time, but today his reputation today is more specialized, and he is better known in the context of the history of early art photography – a similar fate to his artistic influence, Corot.
Among the Pictorialists, he is usually ranked just below the most internationally recognised figures like Alfred Stieglitz, Edward Steichen and Edward Weston and so falls out of public consciousness.
To my mind, Leonard Misonne is the most accomplished of the Pictorialists in conjuring urban atmosphere, and there is real magic in his work. On this site Leonard Missone joins Brassaï, Fan Ho, Vivian Maier, Cindy Sherman, Saul Leiter and William Klein (so far) – all of whom had the same effect on me – their work moved me, so much so that I felt compelled to learn and write about their work.
I shoot with both the Leica rangefinders and the Nikon SLRs. The most frequently used are my Leica M6 TTL 0.58 and Nikon F3, which is the camera that got me back into shooting with film. They are both legendary cameras, but very different to shoot with.
I’ve found the key to knowing them better is to gain an understanding of their metering systems. These, I learned, are separated by design philosophy and intended user as well as the underlying camera technology.
Nikon: SLR TTL Metering Through the Focusing Screen
Let’s start with the SLR. The Nikon F3 is a single lens reflex (SLR)of 1980 in this example. It was built for professional photojournalists, sports photographers, and anyone needing fast, reliable exposure in unpredictable environments. The F3 has a TTL (through-the-lens) metering system. It works like this:
Nikon F3 HP
Light enters through the lens.
It reflects off the mirror up to the focusing screen.
The focusing screen diffuses the light, spreading brightness across a visible field.
A silicon photodiode sensor reads this averaged light.
The focusing screen acts like a diffuser, helping the camera analyse brightness across a broad field.
This system allows the meter to “see” what the lens sees – including vignetting and out-of-focus area, making it perfect for delivering quick, intuitive exposures, and ideal for changing light and fast subjects.
For the F3, Nikon chose an 80/20 bias for the F3’s light meter. 80% of the metre’s emphasis is on a 12mm circlein the center of the frame. The remaining 20% averages the rest of the screen. The result is a broad center-weightedpattern.
From the F4 onwards, Nikon offered Matrix metering. See the second table for more details of the F3’s successor models – the F4, F5 and F6.
Leica: Metering from the White Patch
The Leica M6 TTL rangefinder was launched nearly twenty years after the F3 in 1998 (though the F3 was still being produced at that time). It was produced for the niche that Leica occupied by the time – photographers who prioritised craft, discretion, and classic rangefinder handling over automation or frames per second.
It was a refined version of the original Leica M6 (1984–1998). While the original M6 also offered TTLmetering,the TTL in the newer model refers specifically to TTL Flash metering. This meant the camera could now meter flash exposure through the lens, something the original M6 couldn’t do. Personally, that’s not important to me. The reason I chose the TTL model was the larger shutter speed control, which I find easier to use.
Leica M6 TTL
As the M6 TTL is a rangefinder, unlike the F3 it has has no mirror, no focusing screen, and you don’t ‘see’ through the lens. Instead, you compose through a separate optical viewfinder, while a TTL meter reads light reflected from a small white patch on the shutter curtain.
The M6 TTL meters light through the lens, but only from a small central area, about 12–13% of the frame. This metering zone corresponds roughly to the 90mm frame lines in the viewfinder, which is visible when a 28mm lens is mounted. This is the most common lens on my 0.58 M6 TTL.
Since there’s no focusing screen to average light across the image, the camera measures only from a narrow reflective patch inside the lens throat.
The meter behaves more like a semi-spot meter – it is accurate but limited. Leica assume (correctly in most cases, I think) that their photographers will meter, then recompose. This is ideal for slower, methodical shooting where tone matters more than speed.
F3 SLR Vs M6 Rangefinder Summary Comparison
Feature
Leica M6 TTL
Nikon F3
Viewfinder type
Rangefinder
SLR
Metering system
Center-weighted selective (~13%)
Center-weighted TTL (~80%)
Design intent
Precision, manual control
Speed, general-purpose shooting
Ideal for
Deliberate exposures, tonal control
Fast shooting, balanced exposures
Reflective surface
White patch on shutter curtain
Focusing screen and mirror system
Summary of Rangefinder and SLR Successors
Feature
Leica M7
Nikon F4
Nikon F5
Nikon F6
Viewfinder type
Rangefinder
SLR
SLR
SLR
Metering system
Center-weighted selective (~13%)
Matrix (5-segment), Center-weighted, Spot (3.5mm)
3D Color Matrix, Center-weighted (customizable), Spot (4mm)
3D Color Matrix II, Center-weighted (customizable), Spot (4mm)
Design intent
Classic rangefinder with auto exposure
Versatile, electronic pro workflow
Advanced metering and AF for high-speed pro use
As per the F5, but with increased digital-era precision
Ideal for
Rangefinder shooting with auto exposure convenience
Flexible metering in dynamic environments
High-speed, accurate exposure in fast-changing light
As per the F5, but with more precision and flexibility
Reflective surface
White patch on shutter curtain
Focusing screen and multi-sensor prism system
1005-pixel RGB sensor linked to AF and lens data
Enhanced 1005-pixel RGB sensor with i-TTL integration
Final Thoughts – SLR vs Rangefinder Metering
Researching and understanding SLR vs Rangefinder metering systems has been helpful in getting the most out of my M6 TTL and F3, but it has also helped me understand how different the cameras really are. The M6 TTL demands more from me during exposure, but offers more precision. The F3, meanwhile, provides faster exposures, which means I’m less likely to miss the opportunity.
Ilford XP2 Super 400 is best known for a unique characteristic: though it is a genuine black and white film, it can be processed using standard C41 processing alongside everyday colour films on the high street.
There’s much more to XP2 Super 400, of course. Ilford emphasises several virtues, including fine grain, sharpness, wide tonal range, wide exposure latitude and enhanced negative contrast.
Unsurprisingly, it has a fan base – I’ve seen it described in photographers’ blogs as ‘The People’s Black and White Film – cheap, accessible and plentiful’. I’ve also seen it eulogised as ‘the one…with its silvery highlights, shadow detail and deep blacks’.
I will declare myself a fan. I originally shot with it as part of my exploration of black and white film, but I’ve become a regular user. This article is a result of that exploration.
Deal seafront from the pier, shot with a Nikon F6 and XP2 Super 400
The History of Ilford XP2 Super (and Chromogenic B&W Film)
Ilford XP2 Super is part of the XP (eXpanded Process) series, launched by Ilford Photo (UK) in the early 1980s as a response to the emerging chromogenic black-and-white filmmarket.
To give XP2 its full backstory, it’s worth taking a brief diversion to summarise the history of chromogenic black-and-white films. These emerged in the mid-20th century as an offshoot of colour negative film development. Unlike traditional B&W films, which form an image from metallic silver, chromogenic B&W films form their images from dye clouds, developed through C-41 colour chemistry. In other words, they can be developed simply by just about any lab.
In the 1950s and 1960s Kodak and other companies experimented with dye-coupler technology in colour emulsions. This laid the groundwork for black and white chromogenic films and by the 1970s the use of C-41 chemistry to simplify black and white lab work had become attractive enough for consumers and press photographers for a market to develop.
Back to the XP Series, and in 1980 Ilford released XP1. This was among the first commercially available chromogenic B&W films. In 1988 XP1 was replaced by XP2, which offered improved grain, contrast control, and better exposure latitude. In 1998 the film was re-engineered and launched as XP2 Super, the version still in production today, featuring fine grain for ISO 400, broad exposure latitude (‘ISO 50–800’) and of course, compatibility with standard C-41 labs.
The other chromogenic black and white films were Fuji’s Nepoan 400CN and Kodak’s BW400CN. In 2014, Kodak discontinued BW400CN, citing falling demand. Fuji followed suit in 2020. Today, Ilford XP2 Super is the last chromogenic B&W film still in production.
Magic Without Silver?
Whether or not you think there’s any magic in Ilford XP2 Super, the film itself does contain silver in the form of halide crystals (just like traditional B&W film). Moreover, when exposed to light, the image is formed initially in silver. However, during C-41 development, the silver halides trigger dye couplers that form the final image from dyes. The silver is then bleached and fixed away, leaving only the dye image – without silver.
Appearance
XP2’s grain is virtually invisible in well-exposed areas, especially compared to silver halide-based films like HP5 or Tri-X. XP2 has smooth midtones, and offers slightly compressed highlights and shadows, which is ideal for architecture, and well-lit landscapes – which is what I use it for. When I get a good, well exposed shot, XP2 rewards it.
Who Uses Ilford XP2?
XP2 hasn’t built a celebrity or cult following like Tri-X, but I’ve read that it was valued by photojournalists working on tight deadlines in the 1990s and early 2000s, who needed fast, lab-friendly B&W film. Wedding and portrait photographers, especially in the UK and Europe, where high-volume C-41 labs were common, were also users.
Today, it is embraced by fine art photographers seeking grain-free wide tonal range, and those in architectural or documentary fields looking for the same. More recently, XP2 has gained popularity among some ‘hybrid shooters’, who scan the negatives rather than print in the darkroom.
Getting the Best from XP2 Super 400
The first step in getting the best results from any film is to know its strengths and weaknesses.
Strengths – Good Light and a Little Over Exposure
Beyond convenient processing, XP2 is excellent in good light. With proper or slight overexposure and good light, XP2 delivers sharp, high-contrast images with a wide tonal range, which is especially good for landscapes.
The film has ‘high exposure latitude’ (film speeds can be ‘pushed’ and ‘pulled’) and apparently can be exposed between ISO 100 and 800 on the same roll and developed normally. I have tried one-stop variations successfully.
Weaknesses – Underexposure and Low Light
XP2 is vulnerable to underexposure: Underexposed areas tend to block up with deep blacks and lose their midtones. I have to be careful with XP2 as I tend to create more low-key than high-key images.
It’s also not the best in low light. Shadows can become muddy and somewhat lifeless. Though XP2 is known as being a ‘forgiving’ film, it is not as forgiving as traditional silver-based films in low light.
Shooting XP2 for Best Results
I’ve learned that XP2 thrives in bright daylight . A slight overexposure (ISO 200–320) can help preserve shadow detail.
I scan my images for this website. XP2 scans well, but when it’s underexposed, or the image is very high contrast, the scanner can amplify noise (especially in shadows), and the resulting scan simulates grain that isn’t technically in the emulsion. This is evident in the shot below, which looks quite grainy.
Ruined boat on the Kent Coast. Shot with a Leica M6 TTL on XP2 Super 400.
This is especially the case when you increase contrast (especially to give a bit more structure to a flat scan), as the texture becomes more apparent.
In the image here, the upper, darker sky shows grain. The battered, weathered wood is also detailed and “grain-revealing.” I’ve learned that even fine-grain film will show more texture when the subject contains lots of edges and patterns. There is some loss of shadow detail on the right of the shot. The shot was taken in bright sunlight, but I underexposed the image slightly.
Metering with the XP2
If you want to avoid losing shadow detail, as I have above, spot metering is your best bet. Just identify your darkest important shadow, not pure black, but a shadow where you want visible texture and take a spot reading of that area. Then expose 1 to 1 ½ stops below that reading and you should be in great shape.
If you only have a centre weighted meter, as I have both on my Leica M6 TTL and Nikon F3, (and no hand held meter), you need to know the size of the metered area to use it effectively. See the table below for the details on how to use centre weighted metering with two very different cameras.
While many photographers prefer silver-based films, chromogenic B&W has served as a practical solution for many working photographers from the ’80s onward.
XP2 remains unique as the only mainstream black and white film that uses colour negative development dye clouds instead of silver grain. It also has a unique look, and for many, including me, that’s it’s biggest appeal.
The Nikon FE2 isn’t quite as well known as some of the other mid-range film SLRs Nikon has produced. It is quite similar to, but somewhat shaded by, the engineering miracle that is the FM3a with its hybrid shutter. The mechanical FM series also seems to better known than the electronic FEs. However, despite being occasionally overlooked, the FE2 is a fine film camera.
The FE and FM Series
The Nikon FE2 with 28mm Voigtlander f2.8 Aspherical SL II-S Colour-Skopar
As one of Nikon’s semi-professional SLRs, the FE2 shares the same rugged, metal internal chassis and general design principles as its siblings, the FM, FM2, FE, FA, and FM3A.
The FM and FE formed part of Nikon’s four product lines of F, FE, FM, and EM. These targeted different classes of users and were designed to change Nikon’s brand image from a manufacturer of high-end SLRs to an “all-round manufacturer”, accommodating a wide variety of consumers from beginners to professional photographers.
While they look quite similar, the Nikon FE and FM cameras are quite different internally. The Nikon FE and FE2 both have an electronic shutter with aperture-priority automation, and the light meter uses needle matching in the viewfinder. The FM is all-mechanical (except for the light meter) and uses a “centre-the-LED” system.
the table below provides an at-a-glance comparison of the FM and FE Series. Note that the later FE10 and FM10, manufactured by Cosina, sharing the same designation but based on a different chassis and designed for a different market, have been omitted. For brevity I’ve used the term ‘automation’ to refer to shutter automation, of which these cameras either offered none or aperture priority. For other automation options such as shutter priority, programmed auto etc. you need the Nikon FA.
FM
FE
FM2
FE-2
FM-2n
FM3A
Shutter
Mechanical
Electronic
Mechanical
Electronic
Mechanical
Both
Automation
None
Aperture
None
Aperture
None
Aperture
Max. Shutter Speed (Sec)
1,000
4,000
Flash Sync (Sec)
1/125
1/250
Lens Compatibility Since
1958
1977
Introduced
1977
1978
1982
1983
1984
2001
Discontinued
1982
1983
1984
1987
2001
2006
FE and FM Series (excluding Cosina manufactured models)
What Makes the FE2 So Good?
What struck me first about the FE2 is the how bright the viewfinder is. It is brighter than the FE and nearly as bright as the FM3A, with excellent close-to-100% coverage at 93%. The viewfinder is Nikon’s interchangeable Type K2 focusing screen with the useful split image rangefinder and etched circle that indicates the area of the centre-weighted meter.
The FE2’s feature I like most the intuitive needle-matching light meter, which is also used in the FE and FM3A (both of which are reviewed on this site). If you like a light meter, and I do, this analogue system is the most intuitive I have ever come across. It makes manual exposure so easy that I seldom use aperture automation.
The exposure lock works extremely well on the FE2, as the needle connected to the light meter locks once it is engaged. This isn’t the case with the FE – you just need to trust that it is engaged.
A fast maximum shutter speed is always a bonus for me, and the FE2’s operates at up to 1/4000-second shutter, which provides a lot of flexibility. This enables you to shoot with a wide aperture in bright conditions or use ISO 400 film on a bright day, which is advantageous if that roll is to be used in both bright and darker conditions.
The other features that make it a very capable everyday shooter for both beginners and advanced photographers are:
Aperture priority automation
60/40 centre-weighted metering
Exposure compensation (1/3 stop per click)
Superb damping (so good mirror lock up was omitted)
1/250 sec flash (the world’s fastest sync speed SLR then in 1983)
Choice of replacement viewfinders (replacement sets come with tweezers)
The FE2 Shooting Experience
Setting ISO Speed
The ISO film speed setting control is on the same ring as the exposure compensation control, on the right of the top plate, just like the Nikon FE. You depress the button to the right of the dial to set ISO and lift the ring to set the film speed. Lifting the ring feels both fiddly and slightly flimsy, compared to the smaller ring on the shutter speed button on the FM2n for example.
Loading and Unloading Film
Working boats and gear, Deal Beach, shot with the FE2 and TMax 400
Loading film is straightforward and much like other Nikon SLRs. Once you have slid the safety lock mounted under the rewind crank to disengage it, you can lift the film rewind knob. Nikon revised the location of the safety lock between the FE and FE2 and it the later model handles better as a result.
Once you have raised the rewind knob completely the back of the camera back pops open and you can load the film in the usual 35mm fashion – ensuring the perforations along the edges of the film mesh with the sprockets. When the film is engaged with the spool, press the camera back until it snaps into place. Unloading is similarly familiar: depress the button on the bottom of the camera and turn the re-winding crank in the direction of the arrow until you feel the resistance in the crank drop.
Power On
To turn the camera on, you pull the film advance lever open (to unlock the shutter release) and half push of the shutter release. The camera automatically shuts off to save power after a few seconds. The power source is two readily available button alkaline LR44s, or one more specialist lithium 1/3N battery. The FE2 can shoot at at 1/250s when the batteries are drained but without the light meter.
Through the Viewfinder
Looking through the viewfinder, the aperture you have selected is displayed in a small window to the top of the frame. This is the Nikon Aperture Direct Readout (ADR) system. To the left there is a shutter scale that displays both the selected shutter speed and a light meter readout via a pair of needles. The second longer, thinner black needle is connected to the light meter. In auto-mode this needle indicates which shutter speed will be used, whilst the thicker, shorter green needle is set it A.
In manual mode, the green needle is set by the shutter speed dial and needs to be matched to the light meter reading shown by the other needle. You can adjust either the aperture or shutter speed to obtain a match. It’s a great system, and in good lighting I much prefer it to the LED system of the FM2n (or the F3).
Lenses
I prefer prime lenses to zooms on manual focus cameras, and as I like to travel light I generally carry a wide 24mm and a standard 50mm. If I am travelling light I’ll might just take the excellent 28mm Voigtlander shown in the photo above or a 50mm. My 50mm of choice is the f1.8 AI-s pancake. All the lenses I use with the FE2 are AI-s.
FE2 versus the FE
The FE2’s predecessor, the Nikon FE, is similar to the Nikon FM introduced in 1977 but the internals are electronic. Unlike the FE2, neither camera features a model number on the front of the camera.
Deal sea front from the pier, shot with the FE2 and TMax 400
Advantages of FE2 over the Nikon FE
The most apparent advantage of the FE2 over the FE is that the faster shutter. The titanium focal plane shutter is two stops faster at 1/4000s vs 1/1000s for the FE, with the FE2’s flash sync at 1/250 vs 1/125. The backup mechanical shutter, which I don’t expect to need to use, is also more usable at 1/250s vs 1/90s.
There are other refinements: the viewfinder is brighter than the FEs, the light meter needle is locked stationary when the exposure lock is applied, and the exposure compensation is in 1/3 stop fine-tuning increments. (The FE’s scale is in 1/2 stops). The camera back lock also has been re-positioned, making it easier to operate.
Advantages of FE over the Nikon FE2
The Nikon FE has a surprisingly long list of small advantages over its successor. They seem quite minor to me, at least, but some photographers prefer the FE. As much as I have enjoyed shooting with the FE, on balance I prefer the brighter, faster FE2.
Power Switch The FE’s power switch is very simple – just pull out the film wind handle. There’s an additional step on the FE2 – a half push of the shutter release. The camera automatically shuts off to save power. This seems to annoy some reviewers, but it doesn’t trouble me.
Legibility in the Viewfinder The shutter scale speeds are more larger and easier to read than on the FE2, as there are two fewer speeds to accommodate. I only noticed this in a direct comparison between the two, though – it is not as if the FE2’s display is illegible.
Battery Life This FE uses less battery power than the FE2 because its faster shutter needs stronger shutter springs and the batteries have to power the electromagnets to cope. All Nikons seem restrained in their battery usage, so this doesn’t trouble me either.
Compatibility withNon-AI Lenses The FE can use Nikon lenses going back to 1959, while the FE2 can’t use non-AI lenses. I don’t have any non-AI lenses, most of mine are AI-s or AI.
Battery Test Light The FE has a dedicated battery test light, which the FE2 lacks. This is definitely a nice feature to have but I don’t have it on most of the other cameras I use.
Cost The FE is less expensive than the FE2.
Pre Frame 1 Metering
There is one difference between the FE and FE2 that you may see as an advantage either way, depending on your point of view. This is Pre Frame 1 Metering.
When you load a new film, the FE2’s light meter doesn’t operate until the counter on the film advance gets to frame 1. Before frame 1 (frames 00 and 0), the shutter always fires at its single manually operated shutter speed of M250 (1/250th of a second).
Nikon added this feature because if you have set the camera to auto and accidentally fire the shutter with the lens cap on or in a dim enough environment, the camera will set an extra long exposure – potentially tens of minutes long! This can be overridden by setting the shutter speed to a fast manual speed or the mechanical backup speed, M250.
The FE does not have this feature, so experienced film photographers can squeeze up to two more frames (frames 00 and 0) out of a roll of film, which they appreciate. These early loading frames are really designed to ensure by the time you get to frame 1, your camera is properly wound, and you don’t get partial frames, but they can be utilised for shooting in many cameras. They are numbered 00 and 0 to provide a reference number to reference them for prints, etc.
Discontinuation
The Nikon FE2 was officially discontinued in 1987. A quick glance at the Year-by-Year Camera Timeline on this site shows that the market was extremely dynamic at that time, with autofocus becoming established, along with the first glimpse of digital cameras and the emergence of the bridge camera.
1985 Minolta introduces the world’s first fully integrated autofocus SLR with the autofocus (AF) system built into the body – the Maxxum 7000 a.k.a. the Dynax 7000
The Canon T90 marks the pinnacle of Canon’s manual-focus 35mm SLRs
The Canon RC-701 becomes the first still video camera marketed, offering 10 fps (frames per second) high-speed shutter-priority and multi-program automatic exposure
1987 Canon launches the EOS (Electro-Optical System), an entirely new system designed specifically to support autofocus lenses
1988 The Nikon F4 is introduced as the first professional Nikon to feature a practical autofocus system.
The Fuji DS-1P, the first digital handheld camera, is introduced, though it does not sell
The first of the Genesis series from Chinon helps to define the category of 35mm bridge cameras
More detail on the battle between Nikon and Canon for Auto Focus Dominance can be found in a short separate article. Regardless, manual focus cameras quickly became a niche product and Nikon’s final offering was the FM3A, with its 1/4000 second hybrid mechanical/electronic shutter.
Afterword – The Nikon FE10
There is a later Nikon with an FE designation. However, it was not a successor model to the FE and FE2 as it was built on a different chassis and designed for a different market. The Nikon FE10 of 1996 is a manual focus, F-mount film SLR manufactured under license by Cosina. It has a rather unappealing ABS plastic body in champagne silver and black body and was designed as a low cost beginner’s camera based on Cosina’s C2/C3 SLRs.
As such is unlikely to appeal to FE and FE2 owners, but Nikon’s fingerprints can be seen all over the enhancements to the donor Cosina. Depth-of field preview, AE Lock and exposure compensation, to name just a few, are features that make it usable by more experienced photographers. As a result it has some positive reviews from those that appreciate its light weight and very low cost.
Conclusion
I really enjoy shooting with the Nikon FE2 – it offers a very similar experience to the FM3A, a favourite of mine. It is both easy and rewarding to shoot with, and as it’s less of a collector’s piece than the FM3A, it’s one you can take anywhere.
Thoughts and Further Reading
If have experiences to share with the Nikon FE2, please leave me a comment below. I’d be delighted to hear from you. And if you are interested in classic or vintage cameras, there are articles on this site on:
Although I’ve shot with quite a few auto focus film cameras, I haven’t any hands-on experience of the early, historically significant, models from the 70’s and 80’s described in this post. I only dimly recall the point and shoots I used for family photographs in the ’80s and 90s, and the auto focus film cameras I have used since I got serious about photography all date from the 1990s or later. The earliest models I own are the excellent Contax T2 and the notorious Konica Aiborg (‘eye-borg’) both from 1991.
Contax My T2 and a friend’s G2 resting on the seat of his car.
I’ve sampled an autofocus rangefinder (Contax G2, 1996), a trio of point and shoots (Contax T2, 1991, Nikon 28ti, Fujifilm DL Supermini, both 1994), a 35mm mid range SLR (Nikon F100, 1999), and a top of the range SLR (Nikon F6, 2004). In medium format, I’ve used the Pentax 645 nII (2001) extensively.
The shooting experiences and results have all been good except for the Contax G2, the autofocus of which was possibly faulty and the Aiborg, which produced good results but was frustrating to handle.
This isn’t the story of those later AF models – though the Contax T2 makes an appearance at the end. Instead, this is a brief account of the pioneering autofocus efforts of the 1970s and 1980s. The article started as a paragraph in a review of the Nikon FE2 and developed a life of its own.
As I did my research, it became clear that this is also the story of the transition from SLR to compact cameras in consumer market and the rise of Canon as a dominant player in the photographic industry. It’s also clear I should get a Nikon L35F – it sounds excellent!
If you’re not familiar with the different types of AF systems, it’s worth reviewing the short description that follows.
Types of Auto Focus Systems
Active Auto Focus
Active auto focus systems measures the distance to the subject using waves of infrared light or ultrasonic sound and then adjusts the optical system for correct focus. This kind of AF can be used in poorly-lit environments, but only works on relatively close, stationary subjects. The familiar ‘AF Assist’ button found on many cameras uses an active AF system.
Passive Auto Focus
As the name implies passiveauto focus systems use the same incoming light as the optical system and don’t beam sound or light waves on to the subject. Instead they make use of Contrast Assessment,Phase Detection or both.
TTL Auto Focus
TTL auto focus (Though The Lens) means that the system is integrated behind the photo-taking lens.
Contrast Detection
Contrast Detection (or Assessment) evaluates what the camera ‘sees’ and then moves the lens a fraction and then re-evaluates to determine whether there is more or less contrast. If contrast has increased, the system continues to move the lens in the same direction until contrast is maximised. If contrast decreased, it moves the lens in the other direction. This is repeated until contrast is at the highest level attainable.
Phase Detection
Phase Detection (PD) works on similar principles to a range finder by dividing the incoming light into pairs of images and comparing them. Mirrors and lenses, or a prism (beam splitter) are used to split the rays coming from opposite edges of the lens and a secondary lens system refocuses the rays onto the film plane.
When a point is in focus, the light rays coming from it will equally illuminate opposite sides of the lens and it is ‘in phase’. If the lens is focused in front of or behind the point in question, the light rays at the edge of the lens arrive in a different position ‘out of phase’.
The distance between the two images is then measured to see how far front-focused or back-focused the subject is. The camera then uses this information to instruct the lens which way to turn its focus and by how much. Phase detection AF is incredibly fast compared to contrast detection, and is well suited to moving subjects.
The Genesis of Auto Focus
The first auto focus patent for a ‘self focusing camera’ was filed in the United States back in 1931, by the prolific, yet largely unknown, Armenian-American inventor and entrepreneur LG Simjian (1905 –1997). Simjian held over 200 patents, mostly in optics and electronics and conducted pioneering development on the flight simulator, ATM and teleprompter.
As a medical photographer he became interested in portrait photography which led to him to invent a self-photographing camera, the PhotoReflex. This, in turn, led him to his work on auto focus.
Patents were also filed in the 1940s and 1950s and both Canon and Nikon made reference to prototypes in the 1960s and 1970s, but the first camera equipped with AF to break cover came from Leitz (Leica) at the 1976 Photokina event in Cologne, and the company is usually credited with its invention.
1976 – Leica’s SL-2 Prototype
Leitz started patenting auto focus technology in 1960 and continued to develop their system over the next decade and a half. As Leica’s cameras became more sophisticated, their engineers recognised their light meter’s sensitivity to contrast. This developed into contrast detection: two LEDs on top of the viewfinder detected the highest contrast of a subject and a motor turned the focusing ring. The prototype was based on the Leica SL-2 and was named Correfot. An observer familiar with the prototype commented:
“It worked surprisingly well in low light. It wasn’t that fast because it took a number of gears for the motor to generate enough torque to turn the focusing ring, but at the time it didn’t bother me. We hadn’t seen anything like it. The motor housing was converted to hold six batteries that lasted only an hour. It was not something they could really market.”
Leitz, a conservative company, decided not to commercialise the system and sold it to Minolta.
1977 – Konica C35 AF
Konica’s point and shoot compact C35AF of 1977 was the first commercially viable auto focus camera. This used Honeywell’s Visitronic AF (VAF) system, a patented mechanical autofocus system that used light-sensitive detectors comparing the two images in its rangefinder.
The C35AF was an autofocus version of the Konica’s C35 automatic camera with a Hexanon 38 mm f/2.8 lens, a leaf shutter, built-in flash, and automatic exposure.
1978 – Polaroid SX-70
The first AF Single Lens Reflex (SLR) camera arrived in 1978 in the form of the Polaroid SX-70 Sonar OneStep instant camera, which was equipped with an active sonar autofocus system. This is essentially the original Polaroid Land Camera, a true (folding) SLR, with a sonar autofocus bar grafted onto the body.
1979 – Canon AF35M
The Honeywell Visitronic used in the Konica C35 AF was the system of choice of most manufacturers offering AF until Canon’s CAF system arrived in 1979. This system quickly became the standard for autofocus cameras. The CAF equipped Canon AF35M of the same year (the first of the Sure Shot range) offered auto focus, auto exposure, auto wind on and auto rewind. Canon claimed it as the world’s first 35mm autofocus camera.
The stage was set for a contest for auto focus supremacy and the compact cameras, and Canon, had a head start.
1981 – Pentax ME-F and Chinon CE-5
Auto focus 35 mm Single Lens Reflex cameras (SLRs) arrived in 1981 with the Pentax ME-F, which was based on the Pentax ME Super of 1979. This required the autofocus SMC Pentax AF 35–70 mm zoom lens equipped with a drive motor. It is easily recognisable by the bulky battery compartment below the lens. The ME-F used through-the-lens (TTL) electronic contrast detection system but focused poorly and did not sell well.
In the same year Chinon produced the CE-5, a Pentax K mount SLR that used infrared with large heavy lenses with lens-mounted motors. In the words of the manufacturer:
“Chinon “direct focus” electronics incorporated in the CE-5 match precisely to similar electronics in the optional 35 – 70mm zoom auto focus lens. Just depress the CE-5 shutter button to activate the 35 – 70mm AF lens; instantaneously the lens barrel rotates to the precise focus! This ingenious system even prevents accidental shutter release before the lens has completed focusing”.
1983 – Olympus OM-30 and Nikon F3AF
In 1983 Olympus introduced the OM-30 (OM-F in some markets), an updated version of the OM-G/OM-20), that could be used with an auto focus 35-70 mm lens which had a motorised focusing ring.
The camera offered three focus modes. With electronic autofocus mode, touching the release button focuses the lens ‘instantly’ (‘one touch autofocus’) with an electronic beep for focus confirmation. In electronic focus-aid mode, focus is obtained by rotating the lens focusing ring while watching LEDs. A tone sounds when the camera has obtained focus. Lastly there is ‘optical mode’, which is manual focus via a microprism/split image rangefinder and matte area.
Unfortunately, the auto focus mode was often inaccurate, slow and dependent on one zoom lens. As it offered focus confirmation with other lenses Olympus also promoted it as ‘the first focus-confirmation SLR for a photographer as serious as you’.
Nikon introduced auto focus with the F3AF which was based on the F3, and utilised TTL contrast detection. The launch was accompanied by two new auto focus lenses with internal focus motors, an 80 mm f2.8 and a 200 mm f3.5. These lenses featured Nikon’s usual optical excellence but their AF performance was relatively poor and the offering wasn’t successful.
Nikon also introduced its first compact AF 35mm camera, the L35AF, which was well received due to its excellent f2.8 35mm lens and accurate AF. The same factors make it popular with film photographers today for whom it has some bonus features. There’s a 46mm filter thread, and through the lens metering; there are icons in the viewfinder that will tell you where it is focusing as you shoot, and it also has a manual setting for ISO to over-ride DX if you want to push or pull the film.
1984 – Compact Auto Focus on the Rise
Nikon was the last of the major SLR manufacturers to offer compact AF cameras with the L35AF. By the end of 1984, that model had outsold all of Nikon’s SLR bodies (F3, FA, FE2, FM2, FG, FG-20, and EM) combined in that same time period.
At the same point in time Japanese 35mm SLRs had only 33% of the worldwide market versus 67% for 35mm compact cameras. In 1977 market share was 57% in favour of SLRs.
During the 70’s and ’80s there had been a shift from metal bodied, manually operated mechanical SLRs to more compact, automatic plastic-bodied models. This was supported by the rapid advances in electronics, including the rise of the integrated circuit, which made both automation and miniaturisation easier. The SLR manufacturers targeted amateur photographers using rangefinders and thought they would upgrade to SLRs equipped with sufficient automation. As the market share figures above show, they were not successful and compact cameras became the norm for amateur photographers.
1985 – Minolta 7000 and Canon T80
The Minolta 7000, released in 1985, was the first SLR with an integrated autofocus system – both the AF sensors and the motor were housed in the camera body. It was the first AF SLR that could focus quickly, accurately, and operate in low light levels and made use of phase detection (PD) autofocus. Minolta also provided a wide selection of lenses and accessories and priced their new Alpha (A) mount camera at a relatively affordable price point for mid-level enthusiasts. It sold well.
Canon introduced the Canon T80 as its first autofocus 35mm single-lens reflex camera that same year. It looked like nothing that came before, or after it, for that matter. The T80 had a modified FD mount with signal transmission capability known as AC, and a linear CCD array for TTL image contrast detection. There were three AC auto focus lenses available: an f1.8 50mm prime and two zooms – 35-70mm and 75-200mm.
Learnings from the Canon T80
The T80 was discontinued just over a year after its launch. The effort wasn’t wasted though as Canon explained on the 30th anniversary of EOS:
Canon T80 (Image credit: Mike Caine, Flickr, CC)
“The idea of a fully-electronic mount is largely attributable to the experience we gained from developing the T80, an AF camera that used lenses with built-in motors. In the case of telephoto lenses, having the motor inside the camera made it difficult to achieve high-speed focusing. Coordinating the aperture drive was also a test of limits due to the complex mechanisms of both the camera and the lens. However, we persevered because we felt that the future of next-generation cameras hinged on the development of a new, fully-electronic mount.”
In March 31 of that year Canon leaders and engineers from around the world met to discuss the development of a new system, known at the time as the “Entirely Organic System.”
1986 – Nikon F-501
Japanese industry analysts were predicting that the shipment of AF SLR cameras in Japan in 1986 would outstrip manual focus models. Nikon responded by hurrying to implement the ‘body-powered’ AF Nikon F-501 in April 1986 with TTL passive phase-detection autofocus and in the same year introduced new autofocus (AF) lenses.
The polycarbonate-bodied F-501 was the first successful auto focus SLR and offered automatic film loading and advance as well as a built-in motor drive. This provided single or continuous modes and a maximum film advance speed of 2.5 frames per second (frame/s) in continuous mode. Nikon adopted some design concepts from the camera in the Nikon F4.
The new lenses relied on the autofocus motor in the camera body to drive the focus mechanism via a screwdriver on the lens mount and could communicate electronically with compatible AF cameras.
1987 – The All New Canon EOS System
Canon introduced its ‘built from scratch’ AF system, which used a new lens mount for lenses with its own AF motors – the EF. Breaking compatibility with Canon’s FD mount, the aperture and focus were controlled via electrical contacts, with motors in the lens itself. In Canon’s own words from the same 30th EOS anniversary interview with the leading engineers:
“Before the EOS series was launched, our cameras featured the FD lens mount. However, a fully-electronic mount was essential in order to achieve a high level of AF technology with our wide variety of interchangeable lenses. To realise a high-precision AF that moves the focusing lens elements optimally according to the focusing distance or zoom position, it was a must for the lens to exchange information with the camera as well as to eliminate any mechanical error. This is why we chose to control the camera system by linking the camera with the lens via electrical communication. Through this, we were able to achieve high-speed and high-precision AF even at such super telephoto focal lengths as 600mm. What’s more the aperture was also electrically linked to enable smooth video shooting and playback, a feature that is taken for granted on cameras today.“
The system was introduced with the Canon EOS 650 in March and within two months it was the best-selling SLR in Japan and Europe.
1988 – The Nikon F4 and the Second Generation of AF
The Nikon F4 was introduced in 1988 as the next generation in Nikon’s line of F series professional cameras and was the first professional Nikon to feature a practical autofocus system. The F4 offered outstanding backward compatibility as it could mount any of Nikon’s manual focus or AF lenses from 1959 onwards.
The second generation of AF SLRs also began to appear in that year, the Minolta 7000i and Nikon F-801 being the most notable.
1989 – Compact Auto Focus Dominates
Of the 818,000 SLR produced in Japan in 1989 Over 90% were AF models. The manual focus SLR era that had been dominated by Nikon was over. Canon was the SLR market leader and Minolta was in second place. However, Minolta’s lead over Nikon was only temporary and the company was soon overhauled.
It wasn’t just manual focus SLRs that were declining. According to worldwide market share (CIPA figures) Japanese 35mm SLRs had only 15% of the market versus 35mm compact’s 85% in 1989. SLR dominance was effectively ended by auto focus compacts.
Post Script
The design of phase detection autofocus came from Honeywell and their patents of the 1970s. Honeywell sued Minolta for patent infringement and won, so all the camera manufacturers had to pay Honeywell for the rights to use phase detection autofocus.
A 1991 court decision found Minolta guilty and Minolta paid Honeywell $127.5 million in back royalties, and for license rights to continue using autofocus technology. The world’s camera manufacturers paid Honeywell over $300 million for licenses to their autofocus patents.
George Thorogood, London 2023, shot with Contax T2. No removable lens, no problem.
The Contax T2
The earliest auto cameras arrived in the 1970s and 1980s, but as we are wrapping up the story in the early ’90s it seems reasonable to give the Contax T2 of 1991 a mention.
The T2 was one of a range of high-end compact cameras produced by Contax between 1984 and 2002. The manual focus T was introduced equipped with a Carl Zeiss Sonnar T* 38 mm lens. The T2, used the same lens in an active autofocus system.
The T2 offered a high degree of automation, including auto focus and Program AE, coupled with a decent level of user control, including Aperture Priority exposure, manual focus and exposure compensation. Constructed of titanium and with a renowned lens, the T2 was a luxury model that has since become sought after and expensive.
It is rather too bulky to fit in any but the most capacious of pockets but it is very portable nonetheless. Its ideal for when you want a film camera with you and space and weight are at a premium. Those events where ‘professional cameras’ (those with removable lenses) are prohibited are also ideal for the T2.
The only real drawback to the T2, other than its cost, is that Program AE mode and Aperture Priority f2.8 share the same setting, so you can’t shoot wide-open unless the exposure level permits it.
Into the Digital Era
In the SLR market lens-mounted motors became the norm for auto focus, and in 1998, Nikon introduced AF-S lenses with their own ultrasonic “silent wave” motors built in, only a year before the launch of the digital Nikon D-1.
Nikon had the benefit of backward compatibility, but Canon had over a decade of experience with EOS by then and had gained a significant advantage. The two titans would continue to slug it out in a contest that was soon to enter the digital era, but they would be joined by electronics behemoth Sony, which acquired Minolta and its auto focus technology….
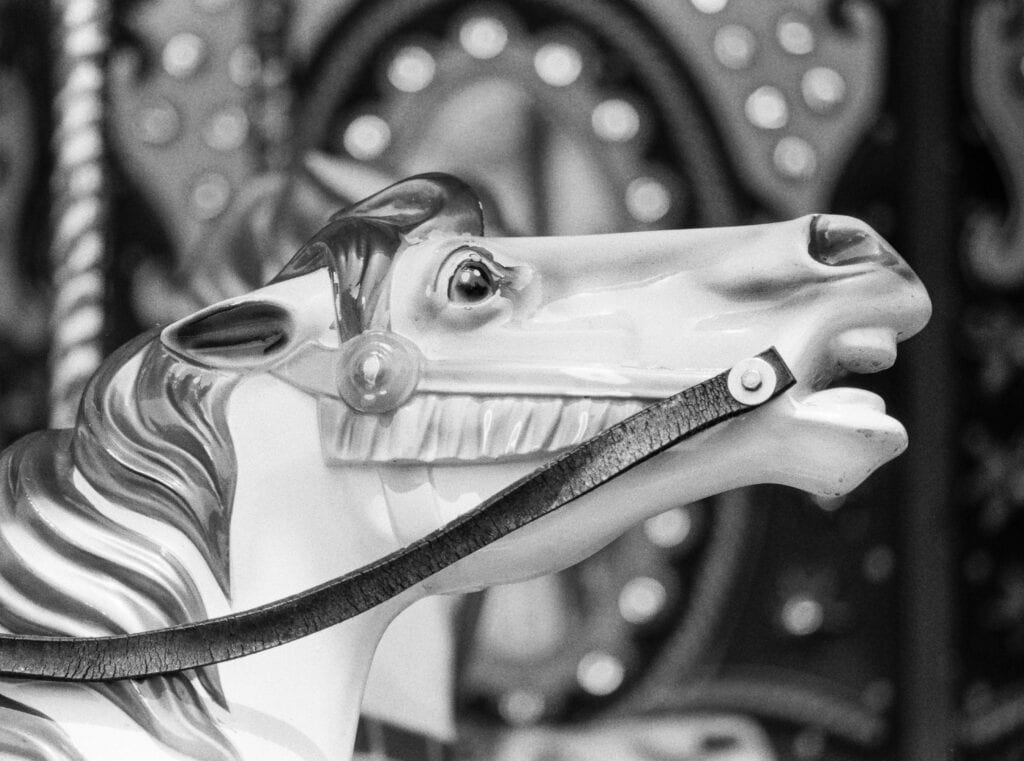
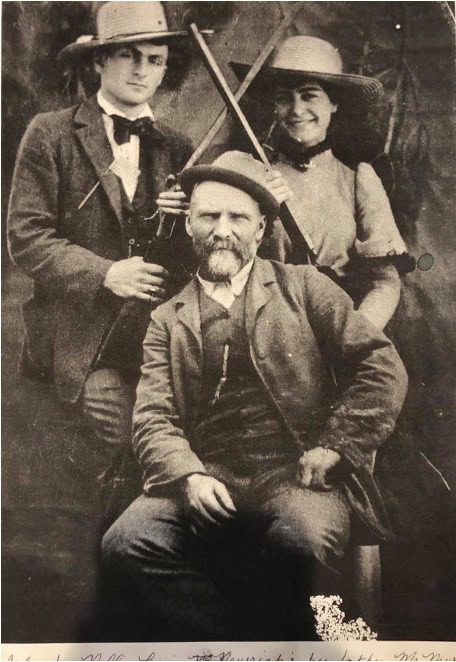
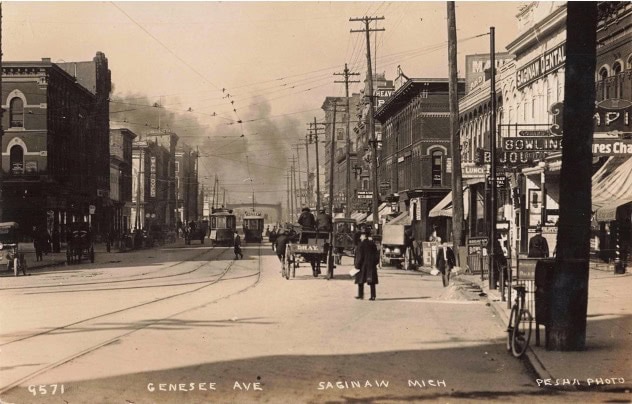
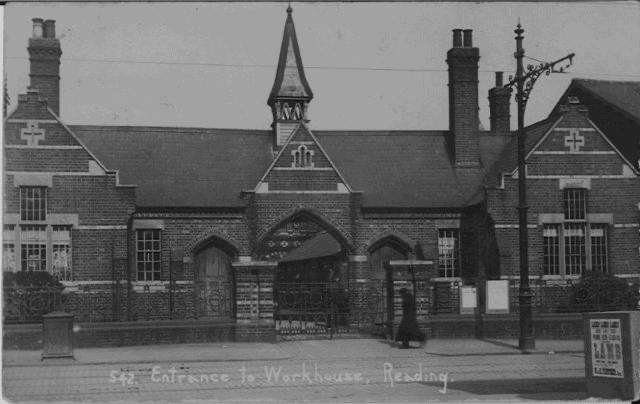
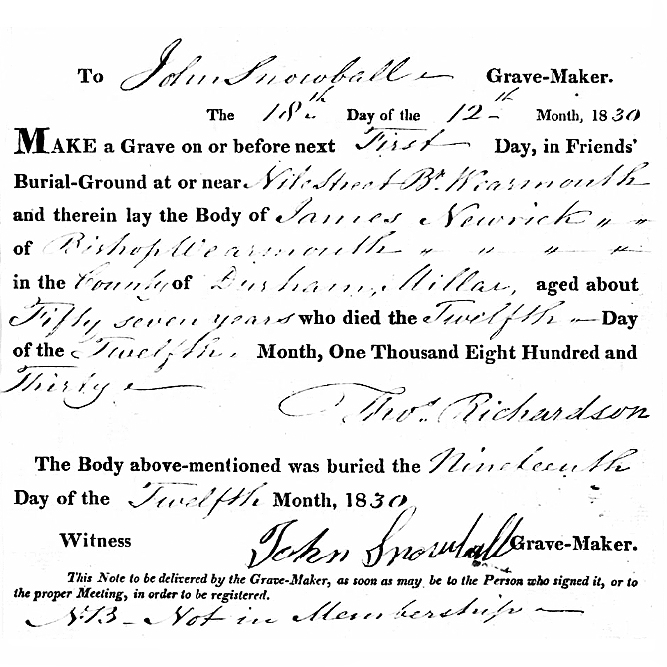
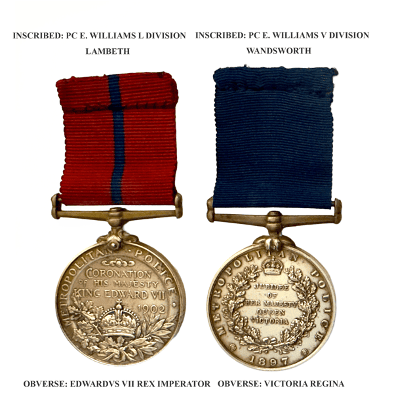

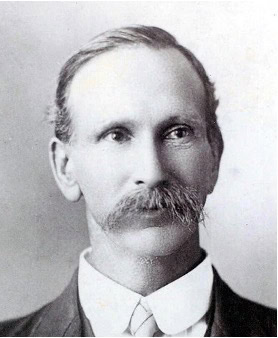
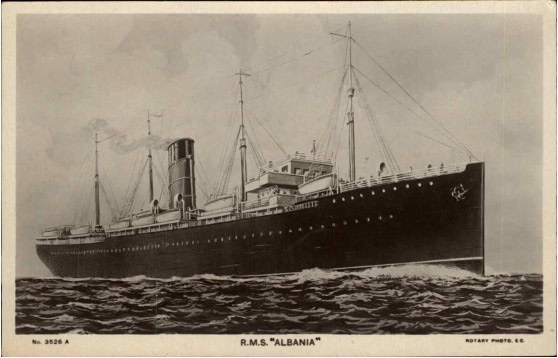
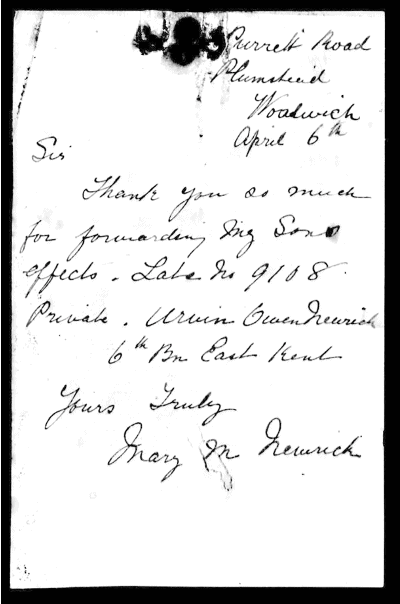
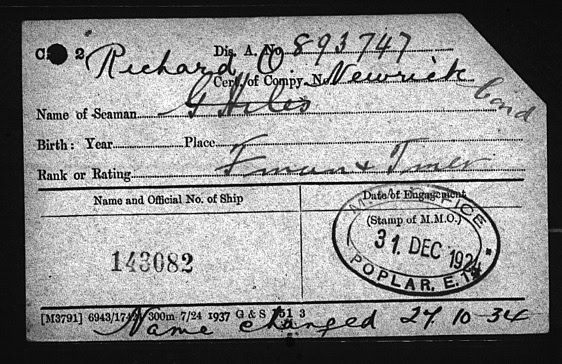


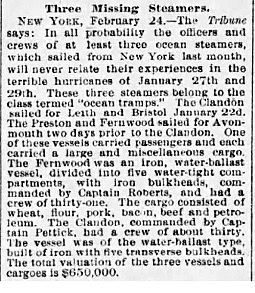
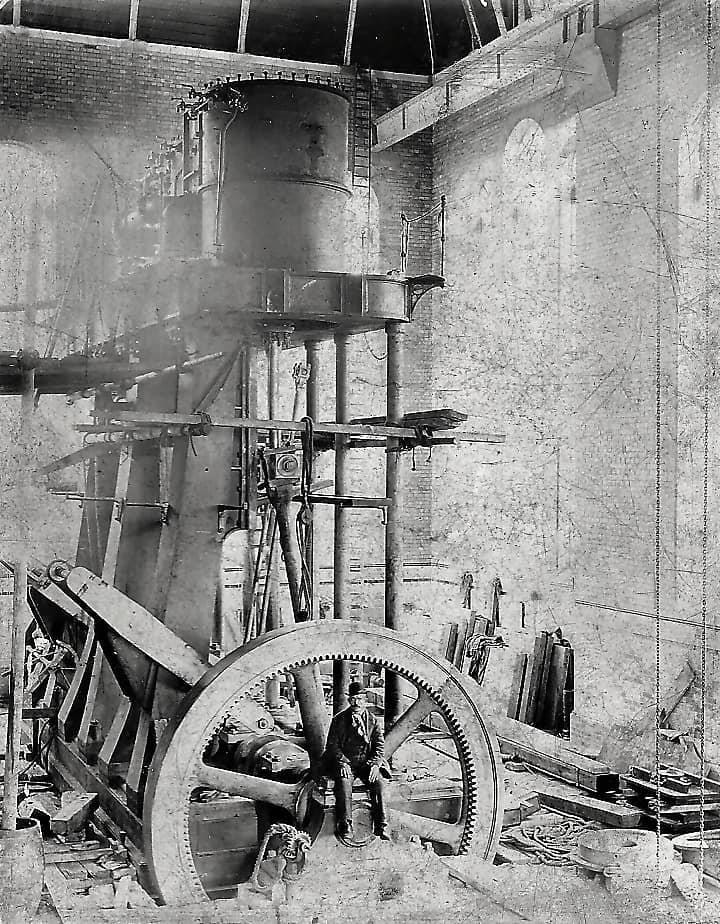
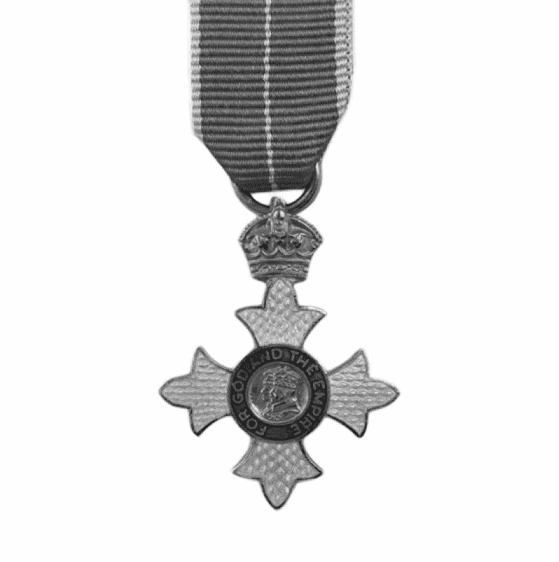
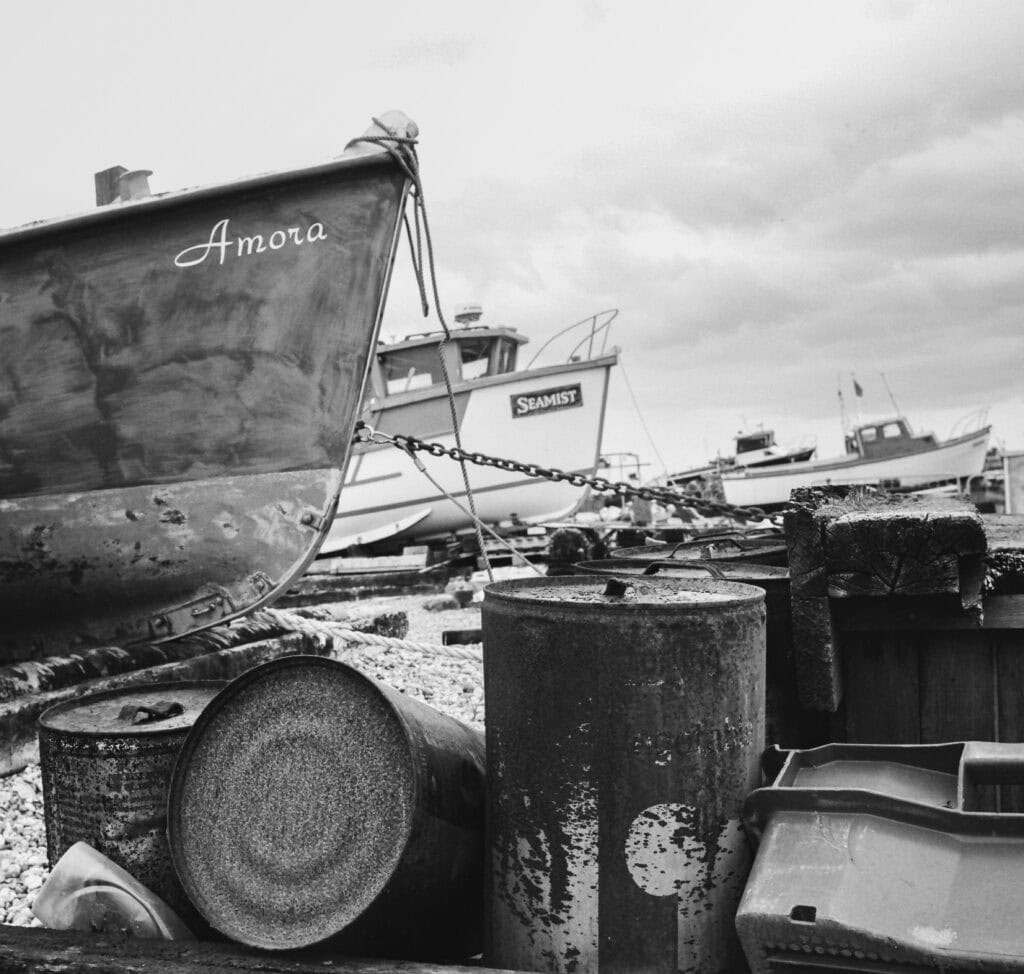
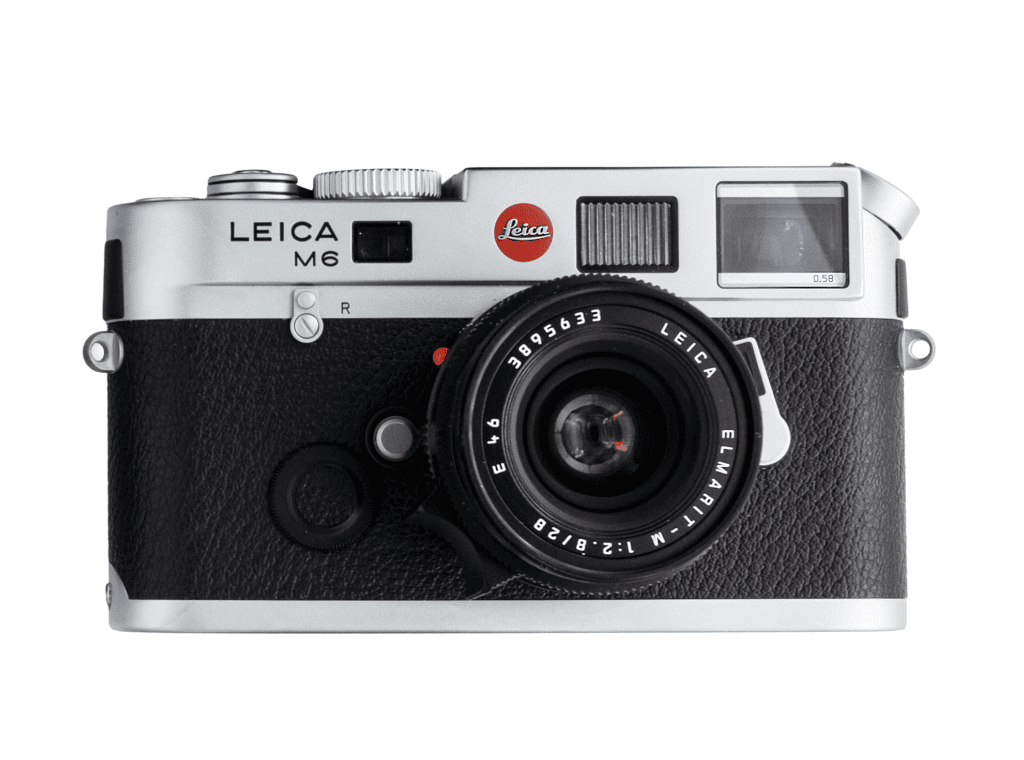

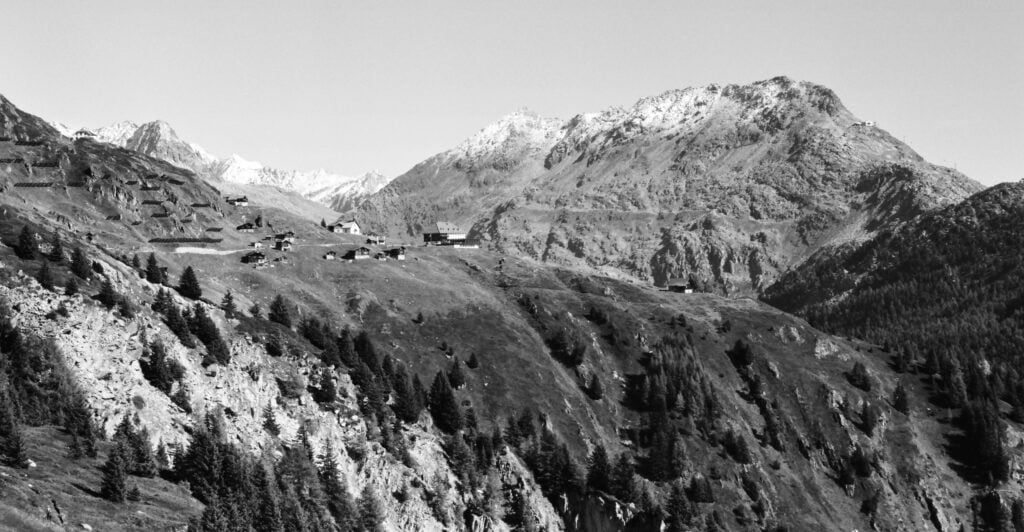
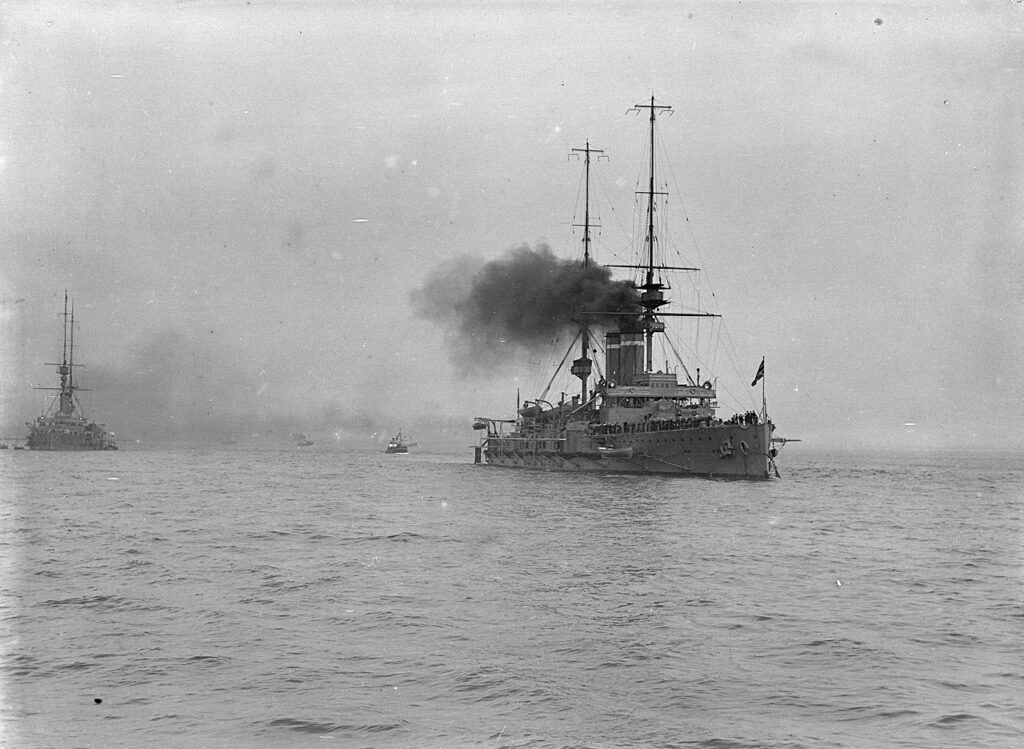
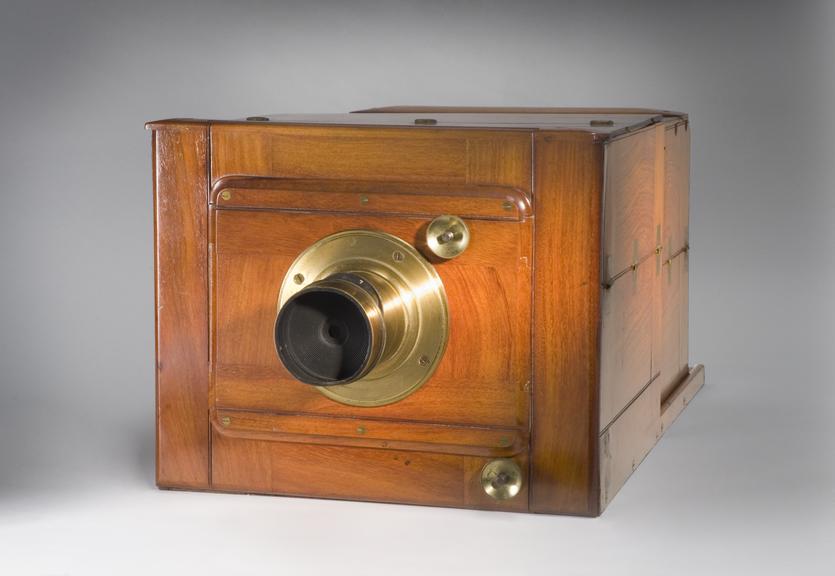
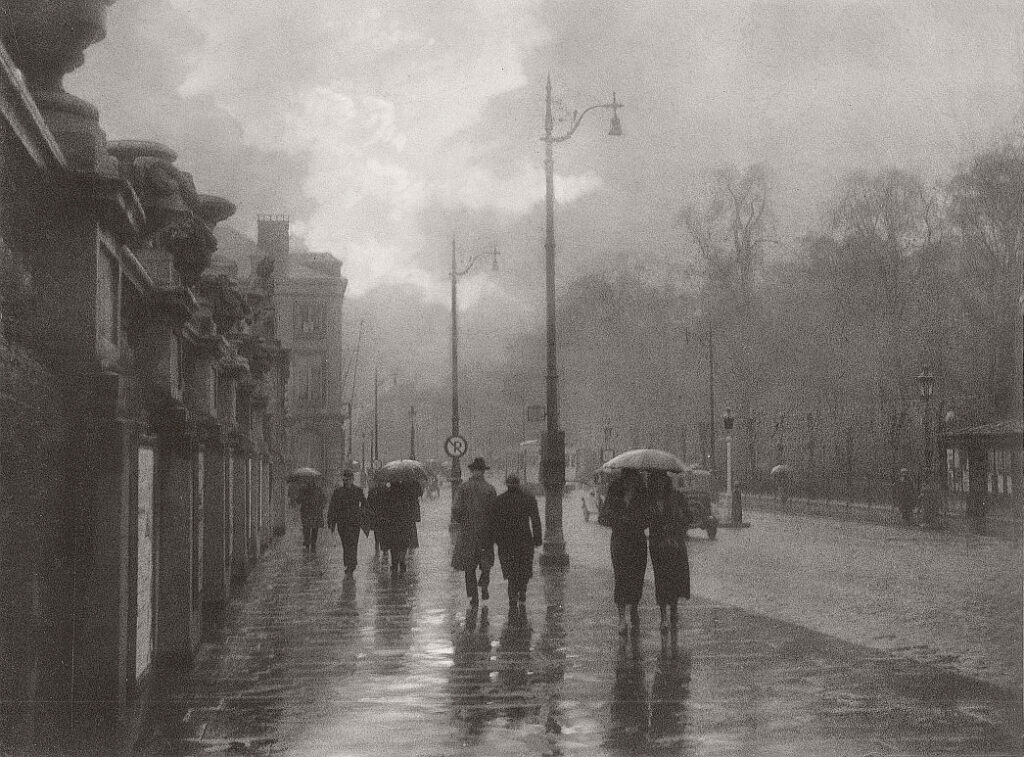


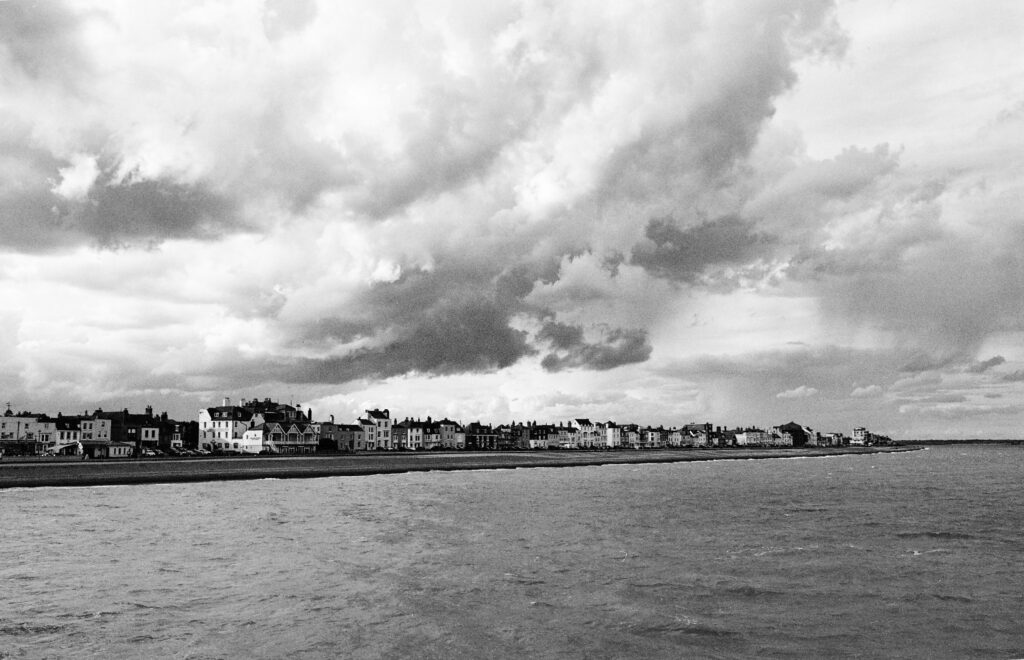


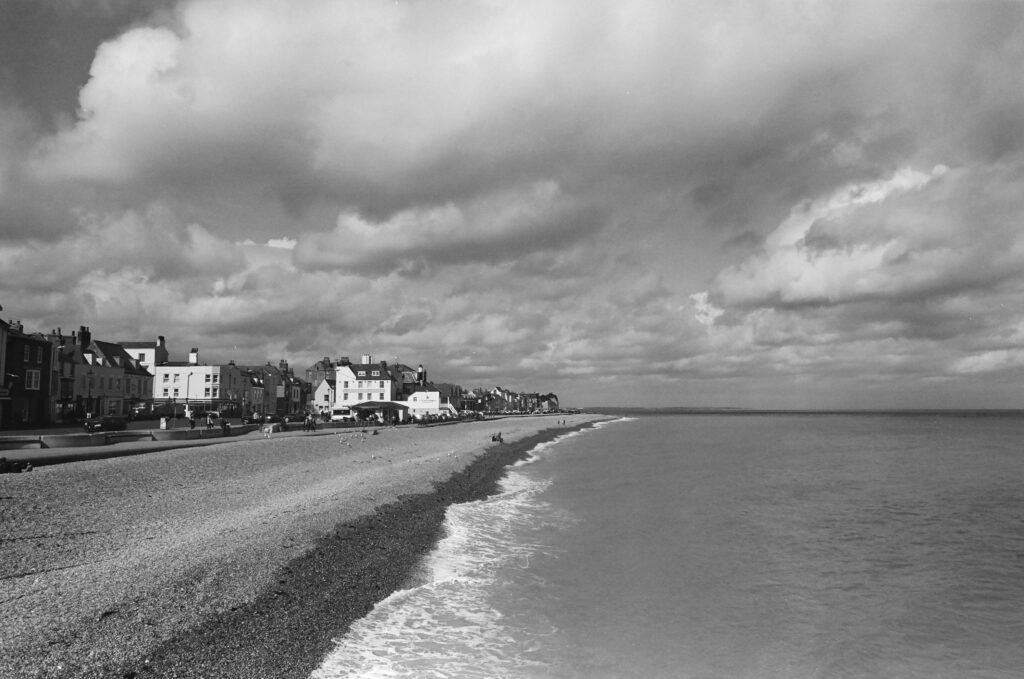
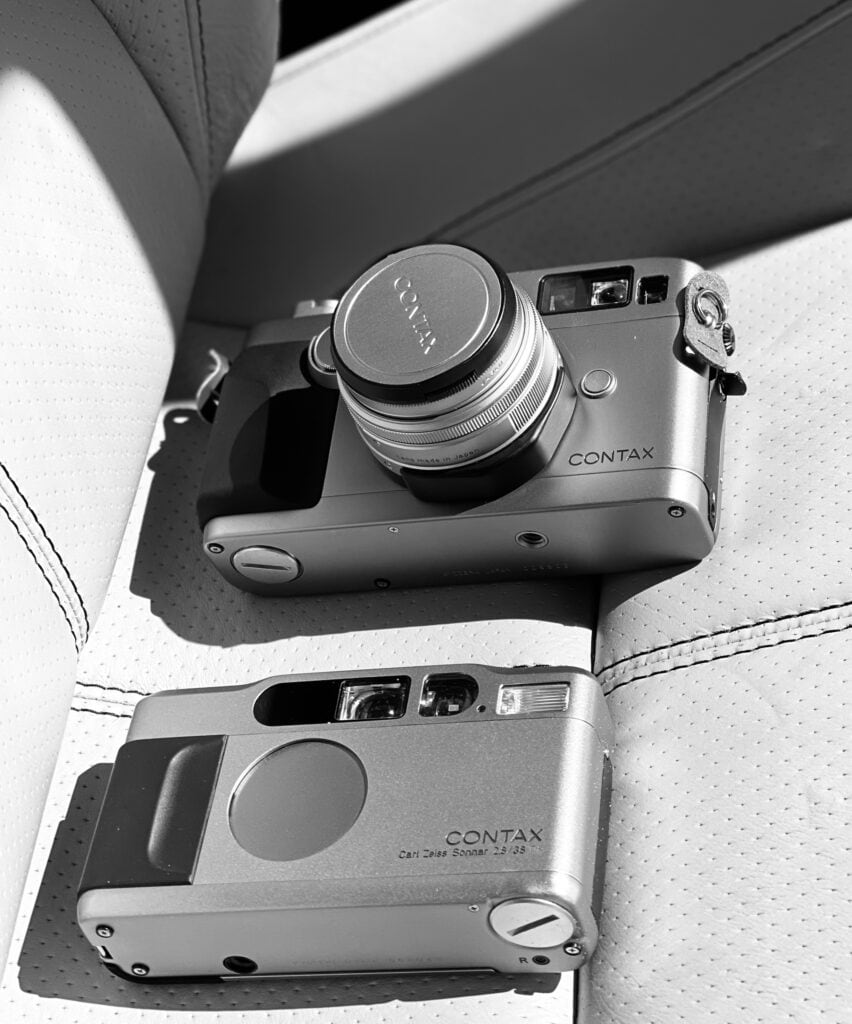
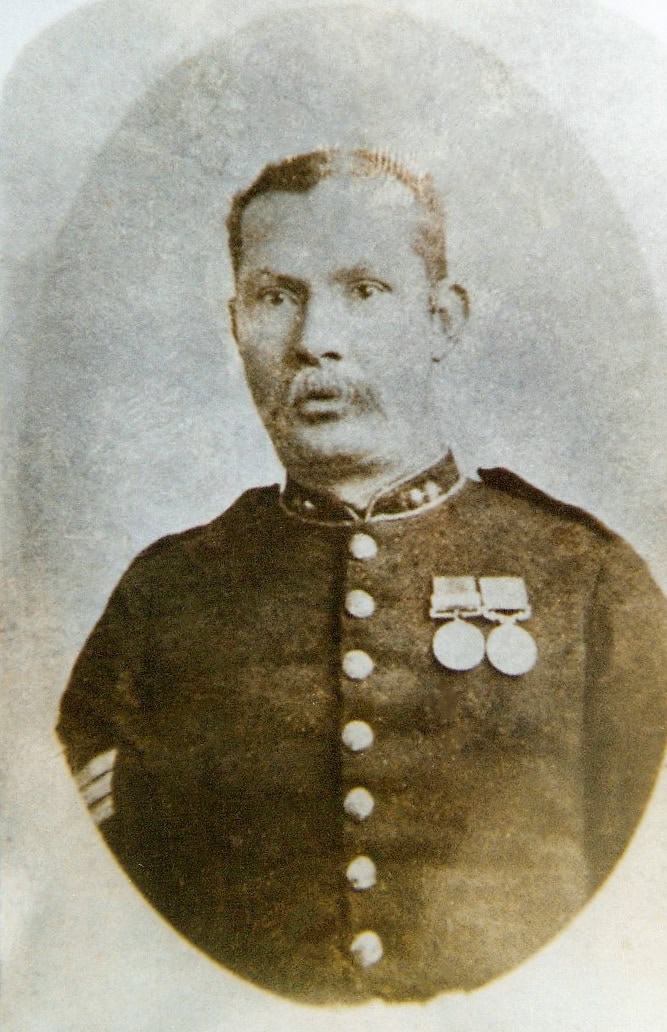