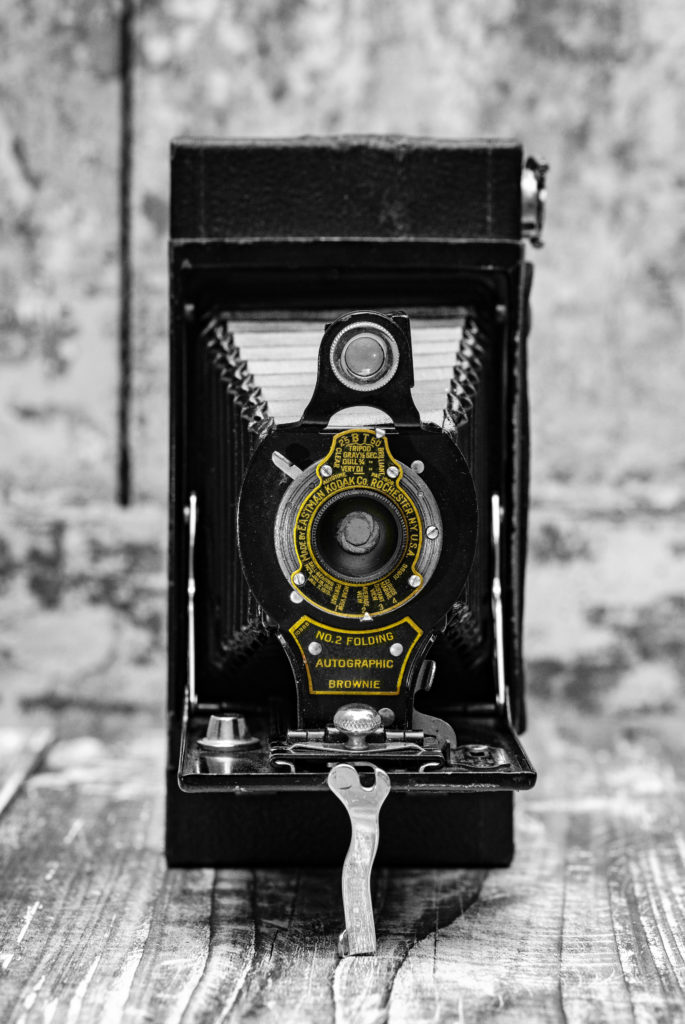
The Kodak No. 2 Folding Brownie was introduced in 1904 as part of the the Folding Brownie series. This was Kodak’s least expensive folding roll film camera range with a more basic specification than their Kodak branded counterparts. The smaller B ‘Folding Pocket Brownie Model B’ was launched in 1907. Both models took 120 roll film.
If you are looking to obtain one, you should ensure that you don’t confuse either model with the 1910 No 2A Folding Pocket Brownie that took 116 film, which is no longer available. I have read that you can use 120 film in 116 cameras with an adaptor. This will apparently produce six very large (11 x 6 cm) images!
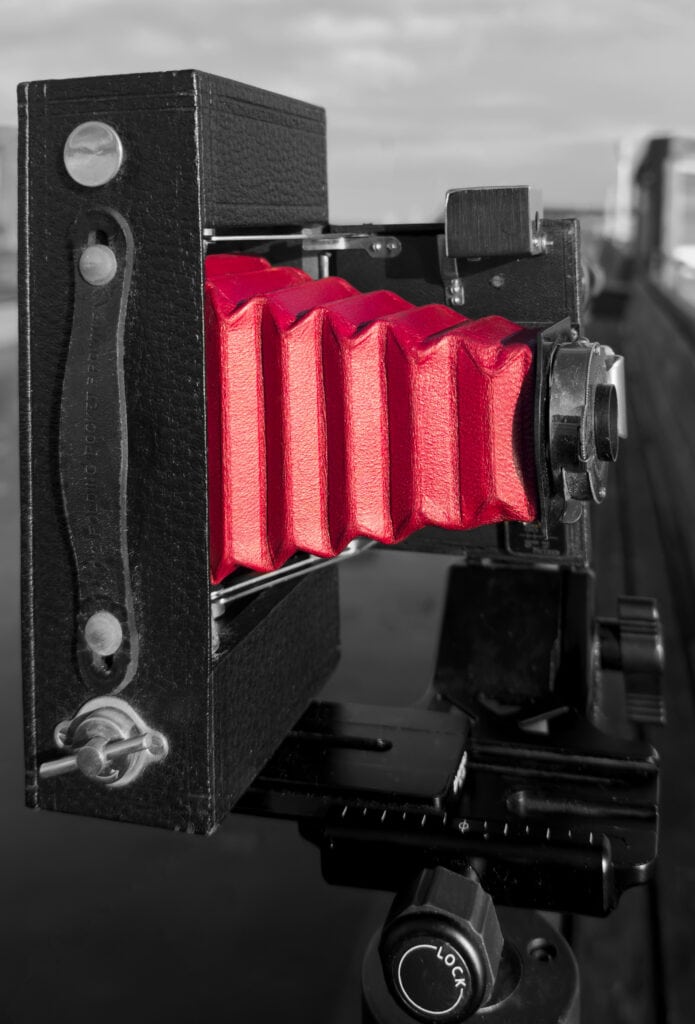
Like my No 2 Kodak Autographic Folding Brownie, I bought this folding pocket Brownie at a camera fair hosted by ImageX in Bicester, Oxfordshire. It came in its original cardboard box and was in excellent condition, the only sign of usage being on the handle. The red bellows look just like new.
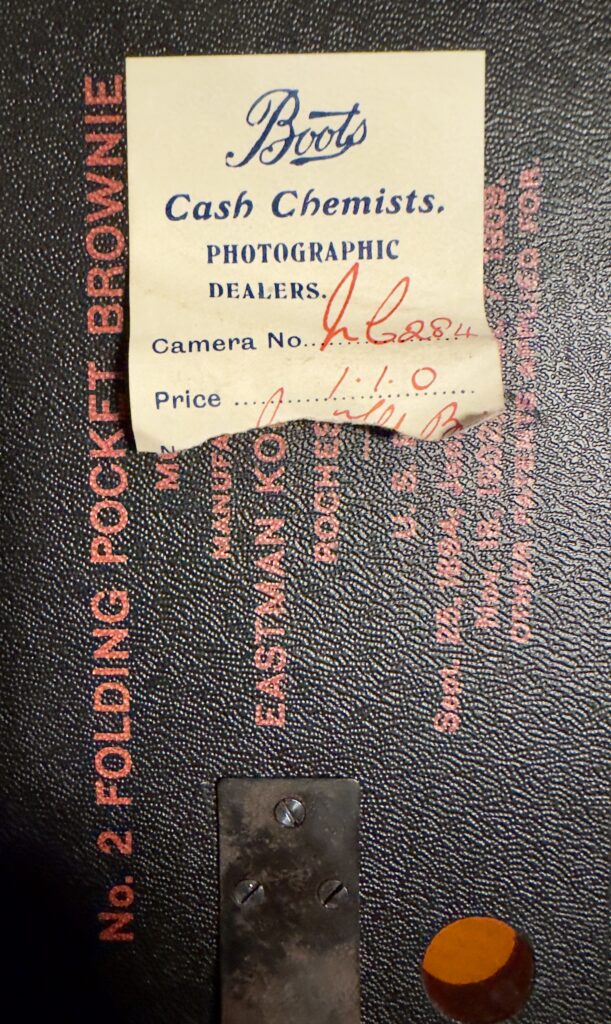
When I opened the camera up I was delighted to find an original sticker inside. This was the original purchase sticker from Boots the Cash Chemist, showing a price of one pound one shilling, which had been there since purchase in 1911!
I paid rather more than that, but it was a very fair price for such a good example. Looking online afterwards I found a less well preserved model for just under £20.
Folding Cameras
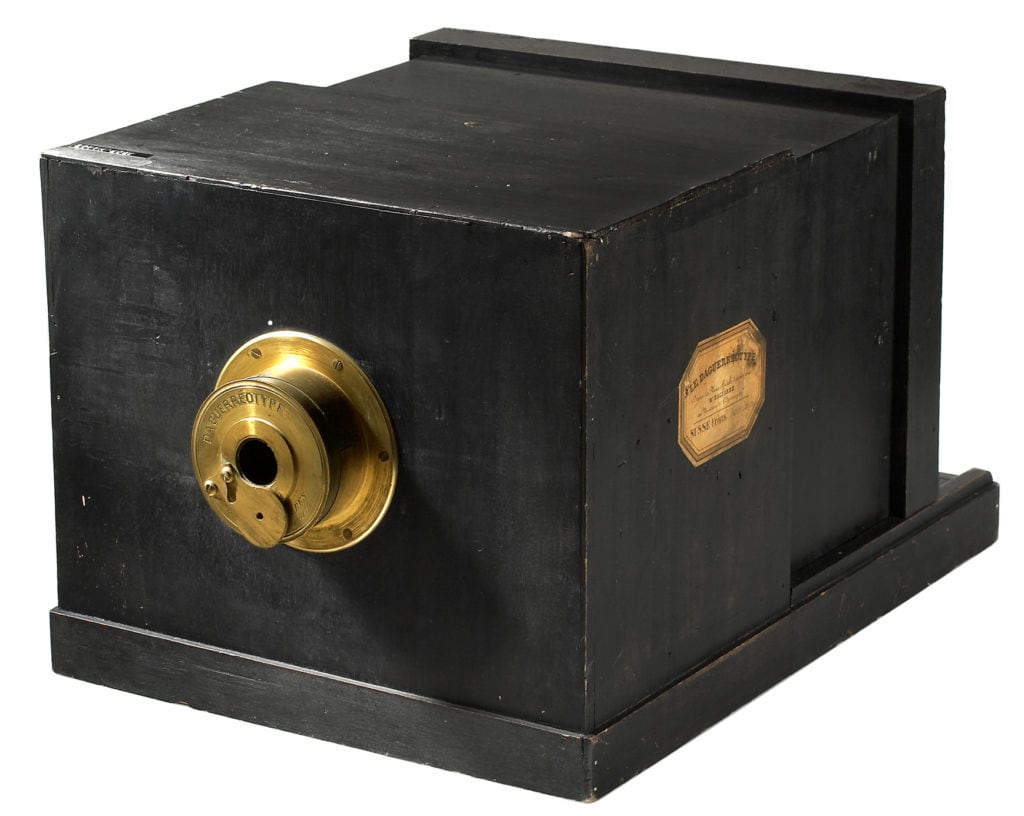
Folding cameras originated in the 1850s, replacing the 1840s sliding-box design. The lens and shutter are attached to a lens-board which is connected to the body of the camera by light-tight folding bellows. When the camera is fully unfolded it provides the correct focus distance from the film.
Folding cameras dominated camera design until the 1930s and remained significant into the late 1940s. The design persisted into the 1970s in specialized cameras such as the Polaroid SX-70 Instant film camera, and the Speed Graphic press cameras. See the article Early Cameras, a Timeline on this site for more on early camera design.
Kodak’s Folding Cameras
Kodak produced numerous folding models from the 1890’s until the 1960s. The first was the Folding Pocket Kodak which was introduced in 1897. The last was the Kodak 66, Kodak’s only post-war folder for 120 film rolls, which was manufactured in the UK between 1958 & 1960.
The Kodak No 2 Folding Pocket Brownie
The Kodak No 2 Folding Pocket Brownie is a horizontal format folding camera. Like larger large format models, the lens standard is pulled out on a track fixed to the wooden baseboard, which is fitted with a small focusing scale, which locks. It has an attractive set of red bellows (black after 1911) that can be set to three focusing positions: 100, 20, 8 feet.
The rectangular metal body has a leatherette covering a hinged back and two tripod sockets. There is a small ‘Brilliant’ finder fixed to the left side of the baseboard. A brilliant finder uses a combination of lenses and prisms to provide a bright image for composing the image. The finder on this model can be rotated through 90 degrees to allow the camera to be used in either portrait or landscape orientation.
The No 2 Folding Brownie uses a meniscus achromatic lens, the story of the which is the same design as The First Camera Lens, which is a subject of another article on this site. It uses the either the Pocket or Brownie automatic shutter.
Folding Brownie Vs Folding Pocket Brownie
The original No 2 Folding Brownie original had a wooden lens board and had a sliding latch on the back which was apparently unreliable. The Model B Pocket version abandoned the sliding latch and replaced them with had a pair of concealed buttons under the leatherette. The model name is printed inside the camera back and is also embossed into the handle on the top face. It is about 20% smaller than its predecessor.
Camera Controls
All the controls except the film wind on key are located on the lens barrel. The shutter (marked A on the diagram below) has five-blades and settings for I (Instant), B (Bulb) and T (Timed). The Instant setting was originally approximately 1/45 of a second, but likely to be slower in action. The shutter (C) is tripped from a small lever also on the lens barrel.
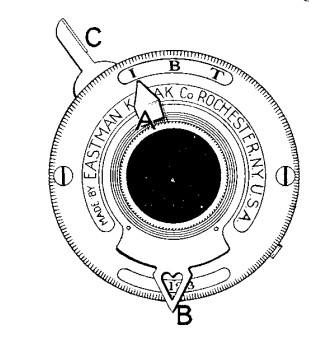
The aperture settings (marked B on the diagram) are marked 1-4. This refers to a simple numbering system used on simple Kodak cameras. This system can be confused with the U.S. Universal Scale System, (also called the “Uniform Scale System”) found on many pre-1920 cameras. See the short article on Aperture Scales on this site for more on this.
According to About Lenses published by Kodak in 1922, the aperture settings for cameras with Meniscus Achromatic lenses are No.1 (f 11), No. 2 (f 16), No. 3 (f 16), No. 4 (f 22).
The film is advanced by a key which is marked with an arrow to indicate the correct direction. The frame number can be seen in a small circular red window on the back of the camera. The camera takes 8 exposures of 6 x 7 cm images on No. 120 film.
The No 2 Folding Pocket Brownie in Use
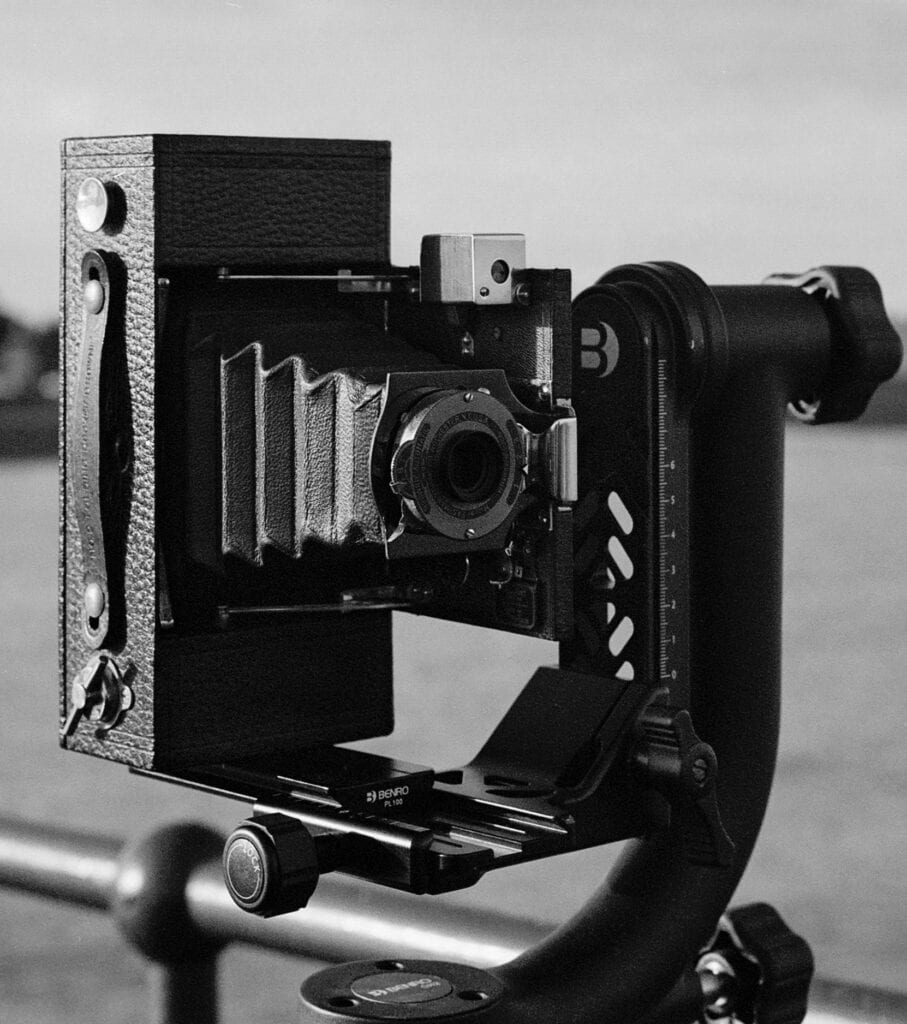
As usual with very old cameras, I kept my expectations from camera under control, but I didn’t experience any of the light leaks and the camera operated as expected.
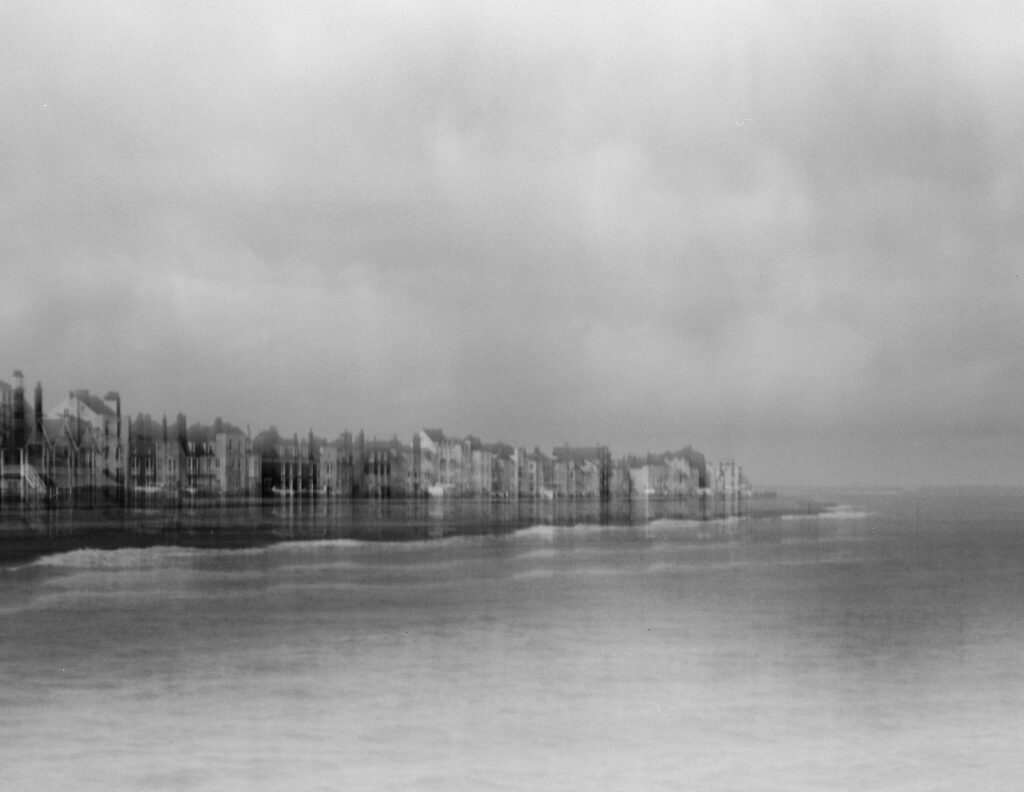
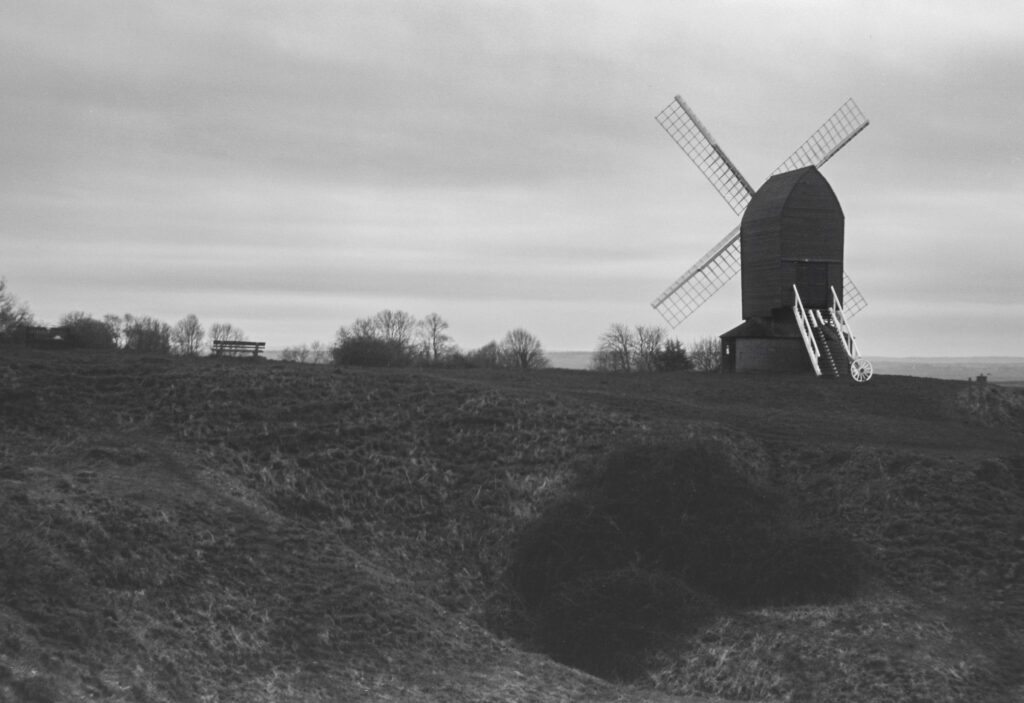
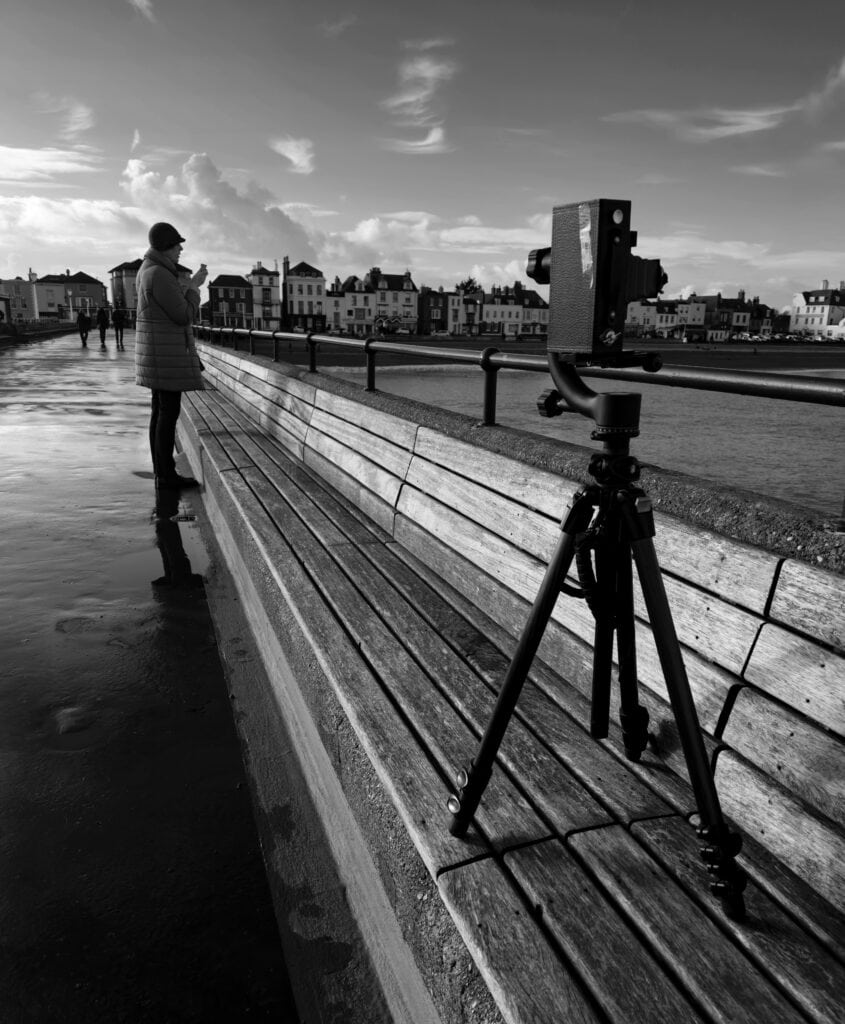
One film was shot handheld and one with a tripod. The tripod head I had with me was of the gimbal type, which limited me to shooting in portrait mode, but provided a lot of weight and so felt really solid. The handheld shots were all extremely blurred, so I suspect the shutter speed is well below its original 1/45 of a second. Based on the results I estimate it is now at about 1/15 of a second.
Opening and Loading the Camera
The camera is easy to open – you just press on the concealed buttons at rear upper corner of each side of the camera. The back of the camera will open and drops down. At each end of the interior of the camera you can see a recess for holding the film spools. Loading is also simple. To load the film you just need to pull up the axis pins, insert the loaded film and draw the film to the takeup spool. Remember to have the black side of the film facing the front and wind on using the key until the vertical arrow appears on the film spool. Close the camera and wind on until number 1 becomes visible in the red window on the rear of the camera.
Avoiding Film Fogging
I never load film in direct sunlight but you don’t need to work in complete darkness – subdued light is sufficient.
You might consider taping up the the red frame counter window on the back of the camera, whilst it is not in use. This helps prevent unwanted light getting into the camera and provides similar functionality to later frame counter windows that had covers to prevent light leaks and were only opened whilst the photographer was advancing the film.
Early film had low sensitivity to red light so a combination of the backing paper on the film, plus the red window, prevented film fogging. If you use Orthochromatic film (which is still available) this precaution is unnecessary as it is less sensitive to red light.
Framing and Focusing
Framing relies on the tiny (1.5 cm x 1.5 cm) ‘Brilliant’ finder mounted above the lens. This creates a tiny representation of approximately what the camera is pointing at. Peering down into this minute square of glass you will see a laterally reversed image.
Focus is basic ‘scale focusing’ and is set via a notched scale on baseboard. This has three pre-set distances that engage with a small catch, that is slightly fiddly to operate, though you probably won’t use it very much. I mainly use the most distant of these (100 feet).
Setting an Exposure
Given how forgiving black and white film is in terms of exposure latitude, I didn’t found it difficult to get an acceptable exposure. In any event the controls available to set an exposure are minimal. Set the to shutter to I (Instant) and the aperture to 1 or 2 and trip the shutter.
Choosing the right film
Kodak produced a large number of different roll film formats with a variety of different negative sizes. 120 (or No. 2 film as it was originally called, as per the name of this camera) is the only one still being manufactured. This is used extensively by medium format photographers, and readily available. The Kodak No 2 Folding Pocket Brownie model produces 8 exposures measuring 6 x 9 cm, which are the largest that can be obtained with a 120 film camera.
Film Speed
Modern 120 film is very different to what was available in 1911, so is difficult to compare sensitivity accurately as these old films had different emulsions. Early twentieth century photographers had several measures of sensitivity available to them (such as H&D) but ISO was not one of them.
The ISO film speed system, or ISO speed, was standardised in 1987 by the International Organisation for Standardisation (ISO)unified the various film speed rating systems that existed before, such as ASA (American Standards Association) and DIN (Deutsches Institut für Normung, the German standard).
I’ve seen accounts of an equivalent ISO range of 5-25 for Orthochromatic films, which were less sensitive to red light, and ISO 10-50 for Panchromatic Films. Both of these estimates are for the second decade of the twentieth century. The closest currently available Rollei Ortho 25 (which I used), but I found 100 worked fine, though the Rollei Ortho produced the best results.
Pros and Cons of the Kodak No 2 Folding Pocket Brownie
Pros
- Easy to load and unload
- Simple to use
- Light and portable
Cons
- Only one ‘instant’ shutter speed
- Slow shutter makes a tripod essential
- Fiddly scale focusing control
Further Reading and Getting in Touch
If you are interested in classic or vintage cameras, there are articles on this site on
- The Kodak Folding No 2 Autographic Brownie
- Autographic Photography (Kodak’s account of the benefits)
- The First Camera Lens
- Fox Talbot and Early Photography
- Wet Plate Photography
- From Chemistry to Computation (Photography timeline)
- Pictorialism
- Early Aperture Scales
- Timeline of Early Cameras
- The Nikon F3 Pro Camera
- The Nikon FM3A – Nikon’s last manual SLR
- The Nikon F6 – Nikon last film camera
If you’ve any experience with the Kodak No 2 Folding Pocket Brownie, please leave me a note in the comments – I’d love to hear about it.