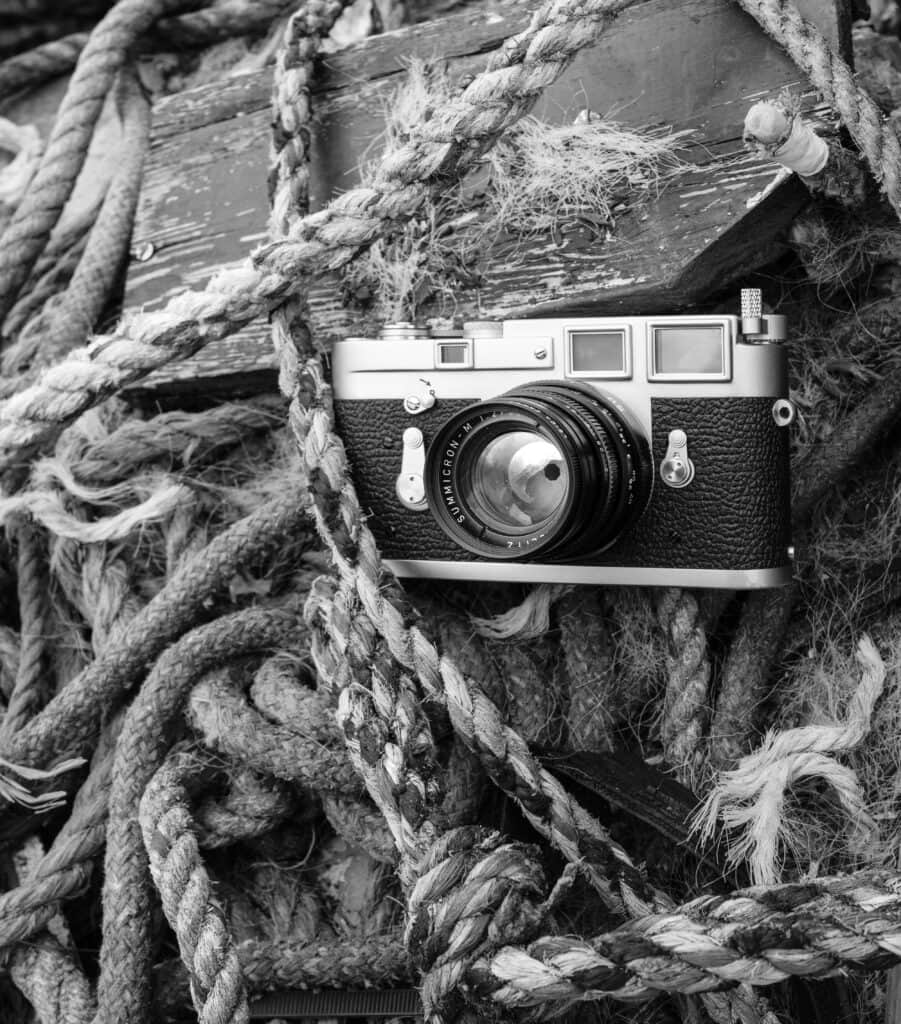
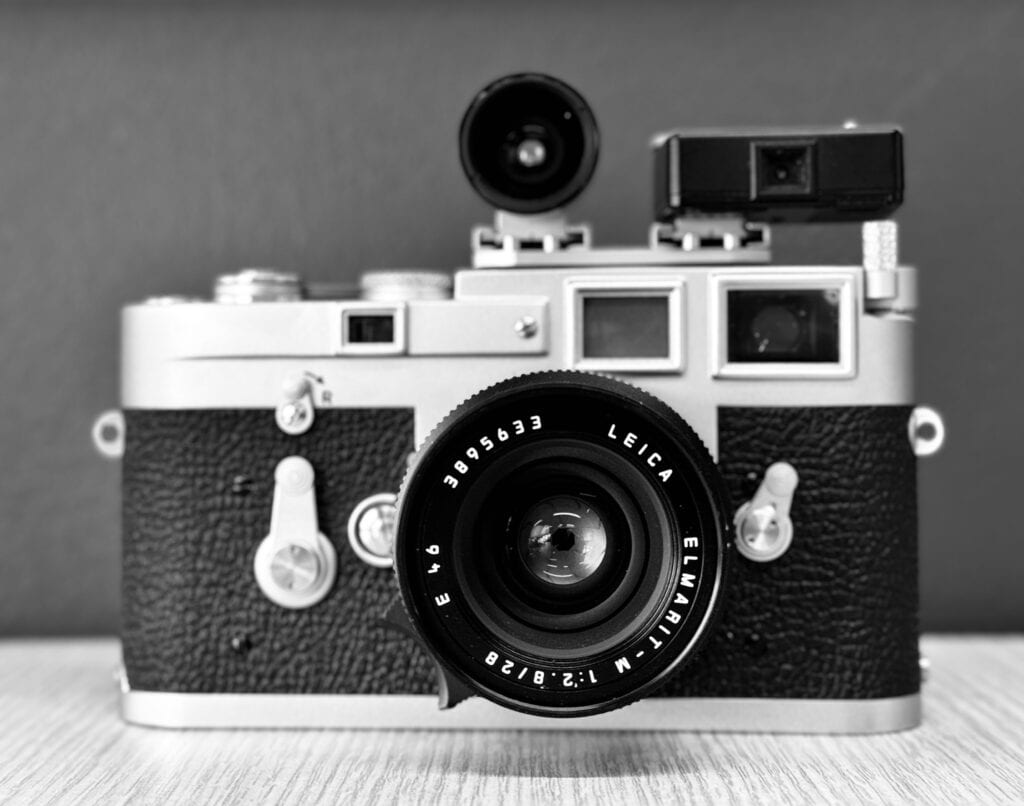
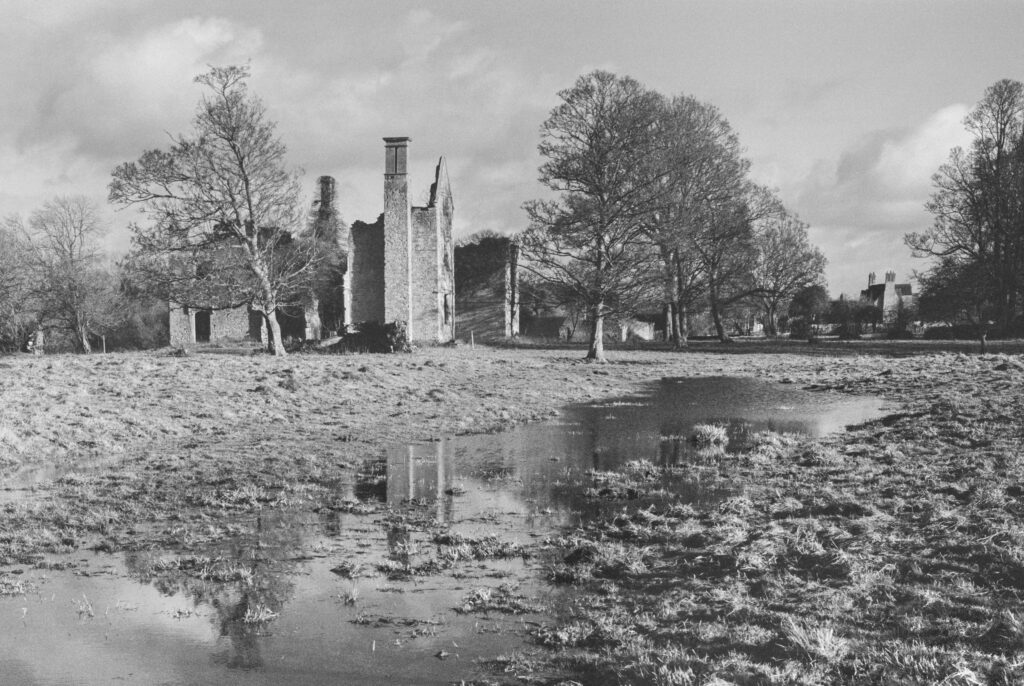
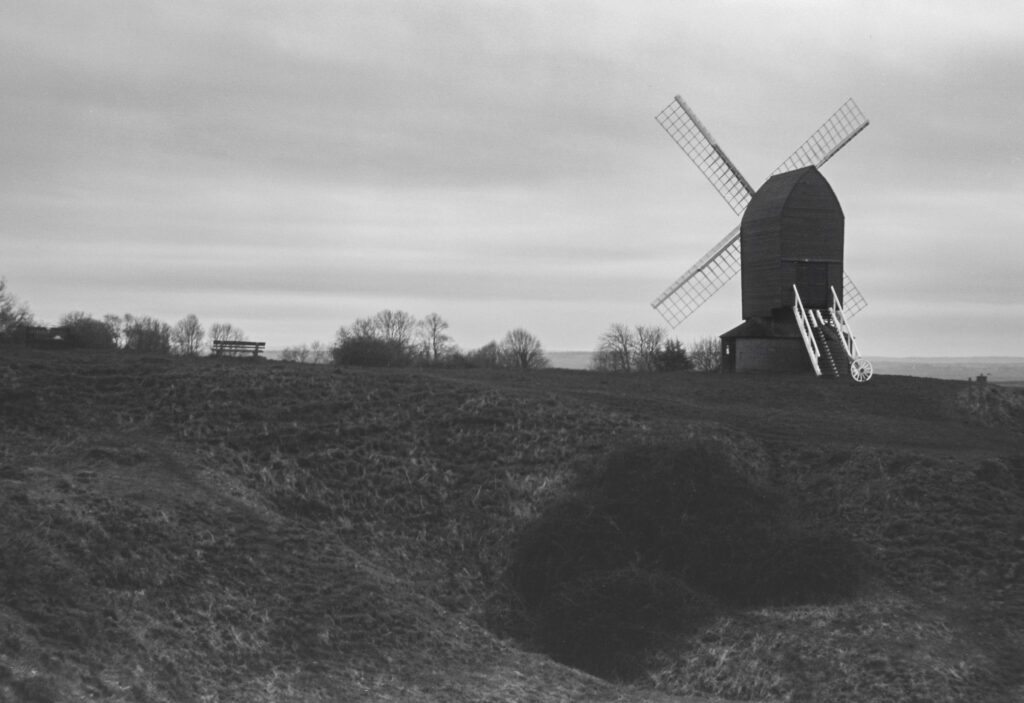
The Nikon FE2 – Great Film Cameras

April 4th, 2024

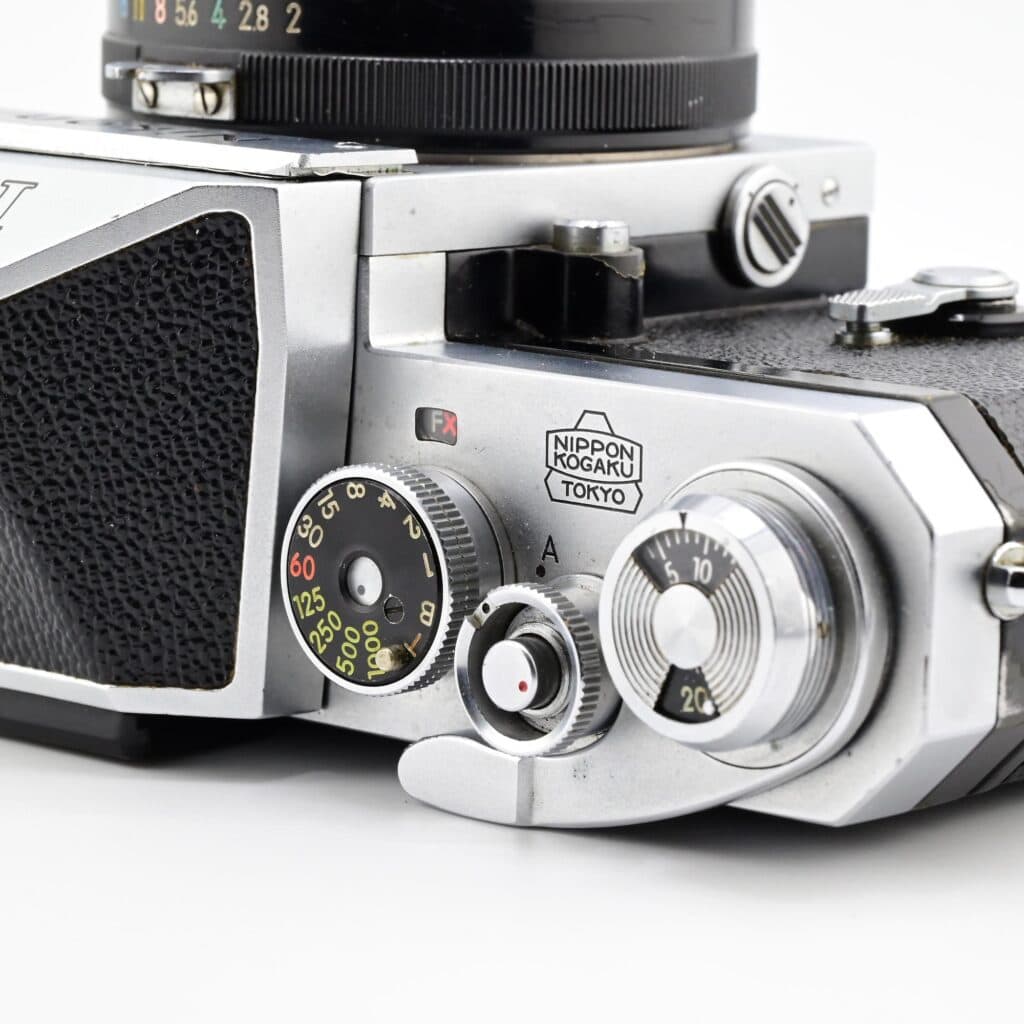
The Nikon FE2 isn’t quite as well known as some of the other mid-range film SLRs Nikon has produced. It is quite similar to, but somewhat shaded by, the engineering miracle that is the FM3a with its hybrid shutter. The mechanical FM series also seems to better known than the electronic FEs. However, despite being occasionally overlooked, the FE2 is a fine film camera.

The FE and FM Series
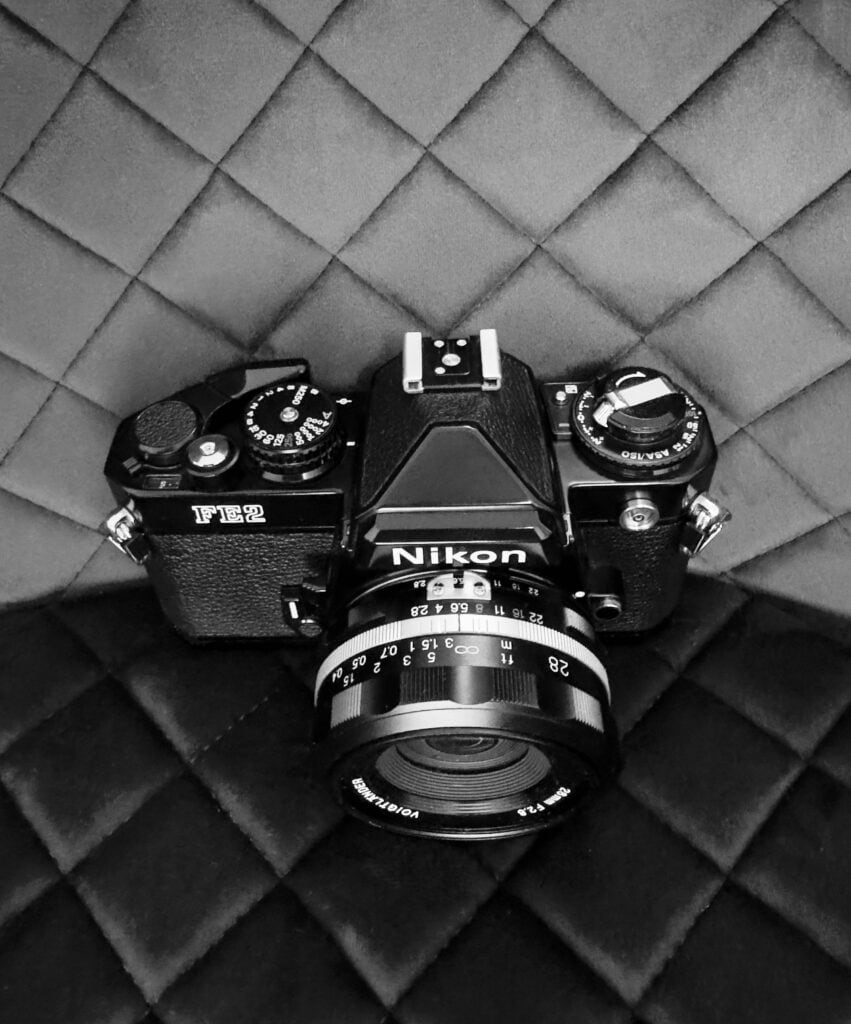
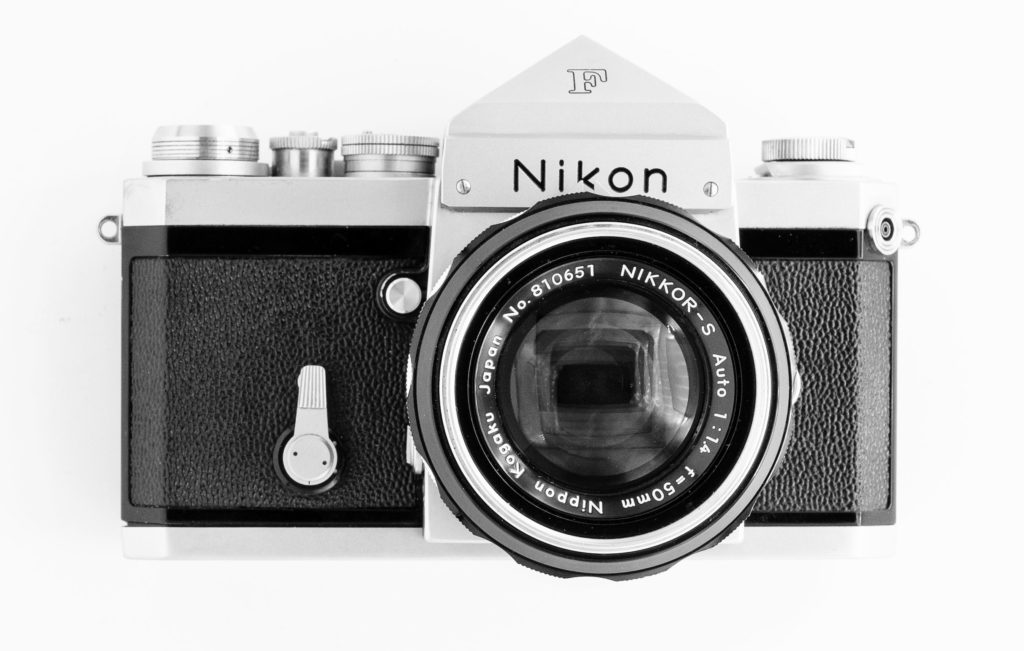
Nikon FE2
The Nikon FE2 with 28mm Voigtlander f2.8 Aspherical SL II-S Colour-Skopar 

As one of Nikon’s semi-professional SLRs, the FE2 shares the same rugged, metal internal chassis and general design principles as its siblings, the FM, FM2, FE, FA, and FM3A.

The FM and FE formed part of Nikon’s four product lines of F, FE, FM, and EM. These targeted different classes of users and were designed to change Nikon’s brand image from a manufacturer of high-end SLRs to an “all-round manufacturer”, accommodating a wide variety of consumers from beginners to professional photographers.

While they look quite similar, the Nikon FE and FM cameras are quite different internally. The Nikon FE and FE2 both have an electronic shutter with aperture-priority automation, and the light meter uses needle matching in the viewfinder. The FM is all-mechanical (except for the light meter) and uses a “centre-the-LED” system.

the table below provides an at-a-glance comparison of the FM and FE Series. Note that the later FE10 and FM10, manufactured by Cosina, sharing the same designation but based on a different chassis and designed for a different market, have been omitted. For brevity I’ve used the term ‘automation’ to refer to shutter automation, of which these cameras either offered none or aperture priority. For other automation options such as shutter priority, programmed auto etc. you need the Nikon FA.

 FMFEFM2FE-2FM-2nFM3A
ShutterMechanicalElectronicMechanicalElectronicMechanicalBoth
AutomationNoneApertureNoneApertureNoneAperture
Max. Shutter Speed (Sec)1,0004,000
Flash Sync (Sec)1/1251/250
Lens Compatibility Since19581977
Introduced197719781982198319842001
Discontinued198219831984198720012006
FE and FM Series (excluding Cosina manufactured models)

What Makes the FE2 So Good?

What struck me first about the FE2 is the how bright the viewfinder is. It is brighter than the FE and nearly as bright as the FM3A, with excellent close-to-100% coverage at 93%. The viewfinder is Nikon’s interchangeable Type K2 focusing screen with the useful split image rangefinder and etched circle that indicates the area of the centre-weighted meter.

The FE2’s feature I like most the intuitive needle-matching light meter, which is also used in the FE and FM3A (both of which are reviewed on this site). If you like a light meter, and I do, this analogue system is the most intuitive I have ever come across. It makes manual exposure so easy that I seldom use aperture automation.

The exposure lock works extremely well on the FE2, as the needle connected to the light meter locks once it is engaged. This isn’t the case with the FE – you just need to trust that it is engaged.

A fast maximum shutter speed is always a bonus for me, and the FE2’s operates at up to 1/4000-second shutter, which provides a lot of flexibility. This enables you to shoot with a wide aperture in bright conditions or use ISO 400 film on a bright day, which is advantageous if that roll is to be used in both bright and darker conditions.

The other features that make it a very capable everyday shooter for both beginners and advanced photographers are:

  • Aperture priority automation
  • 60/40 centre-weighted metering
  • Exposure compensation (1/3 stop per click)
  • Superb damping (so good mirror lock up was omitted)
  • 1/250 sec flash (the world’s fastest sync speed SLR then in 1983)
  • Choice of replacement viewfinders (replacement sets come with tweezers)

The FE2 Shooting Experience

Setting ISO Speed

The ISO film speed setting control is on the same ring as the exposure compensation control, on the right of the top plate, just like the Nikon FE. You depress the button to the right of the dial to set ISO and lift the ring to set the film speed. Lifting the ring feels both fiddly and slightly flimsy, compared to the smaller ring on the shutter speed button on the FM2n for example.

Loading and Unloading Film
Nikon FE2
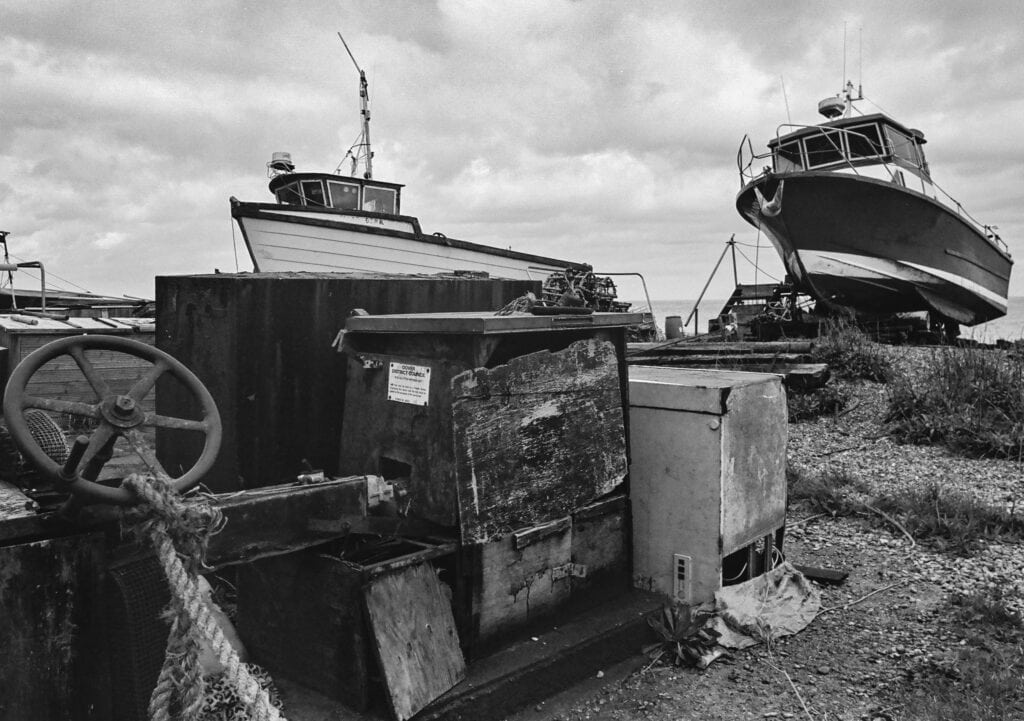
Working boats and gear, Deal Beach, shot with the FE2 and TMax 400

Loading film is straightforward and much like other Nikon SLRs. Once you have slid the safety lock mounted under the rewind crank to disengage it, you can lift the film rewind knob.  Nikon revised the location of the safety lock between the FE and FE2 and it the later model handles better as a result.

Once you have raised the rewind knob completely the back of the camera back pops open and you can load the film in the usual 35mm fashion – ensuring the perforations along the edges of the film mesh with the sprockets. When the film is engaged with the spool, press the camera back until it snaps into place. Unloading is similarly familiar: depress the button on the bottom of the camera and turn the re-winding crank in the direction of the arrow until you feel the resistance in the crank drop.

Power On

To turn the camera on, you pull the film advance lever open (to unlock the shutter release) and half push of the shutter release. The camera automatically shuts off to save power after a few seconds. The power source is two readily available button alkaline LR44s, or one more specialist lithium 1/3N battery. The FE2 can shoot at at 1/250s when the batteries are drained but without the light meter.

Through the Viewfinder

Looking through the viewfinder, the aperture you have selected is displayed in a small window to the top of the frame. This is the Nikon Aperture Direct Readout (ADR) system. To the left there is a shutter scale that displays both the selected shutter speed and a light meter readout via a pair of needles. The second longer, thinner black needle is connected to the light meter. In auto-mode this needle indicates which shutter speed will be used, whilst the thicker, shorter green needle is set it A.

In manual mode, the green needle is set by the shutter speed dial and needs to be matched to the light meter reading shown by the other needle. You can adjust either the aperture or shutter speed to obtain a match. It’s a great system, and in good lighting I much prefer it to the LED system of the FM2n (or the F3).

Lenses

I prefer prime lenses to zooms on manual focus cameras, and as I like to travel light I generally carry a wide 24mm and a standard 50mm. If I am travelling light I’ll might just take the excellent 28mm Voigtlander shown in the photo above or a 50mm. My 50mm of choice is the f1.8 AI-s pancake. All the lenses I use with the FE2 are AI-s.

FE2 versus the FE

The FE2’s predecessor, the Nikon FE, is similar to the Nikon FM introduced in 1977 but the internals are electronic. Unlike the FE2, neither camera features a model number on the front of the camera.
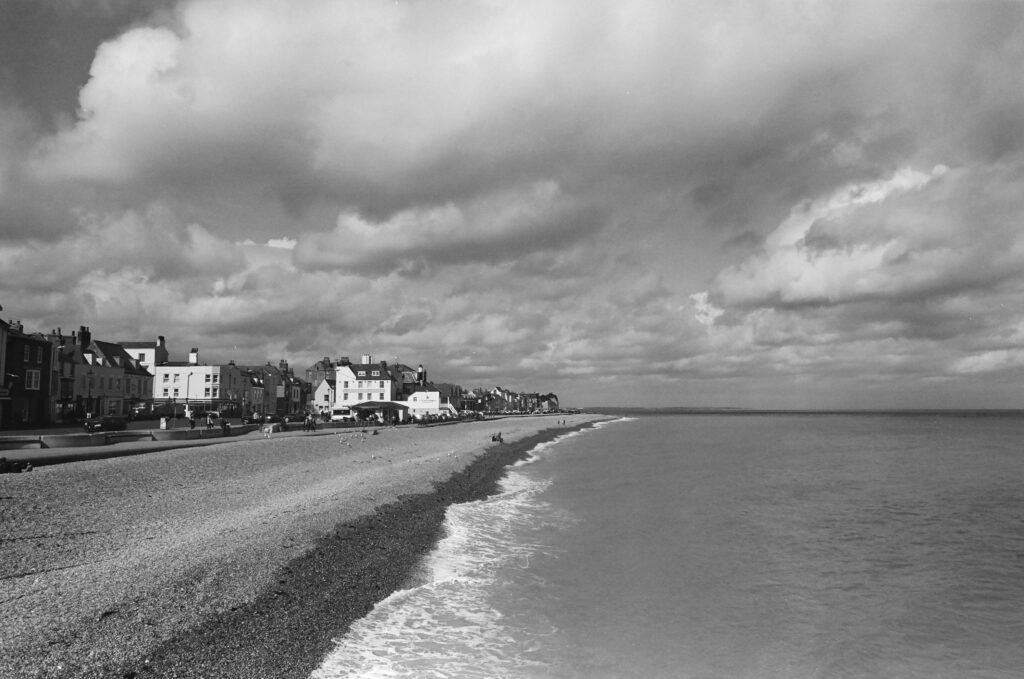
Nikon FE2
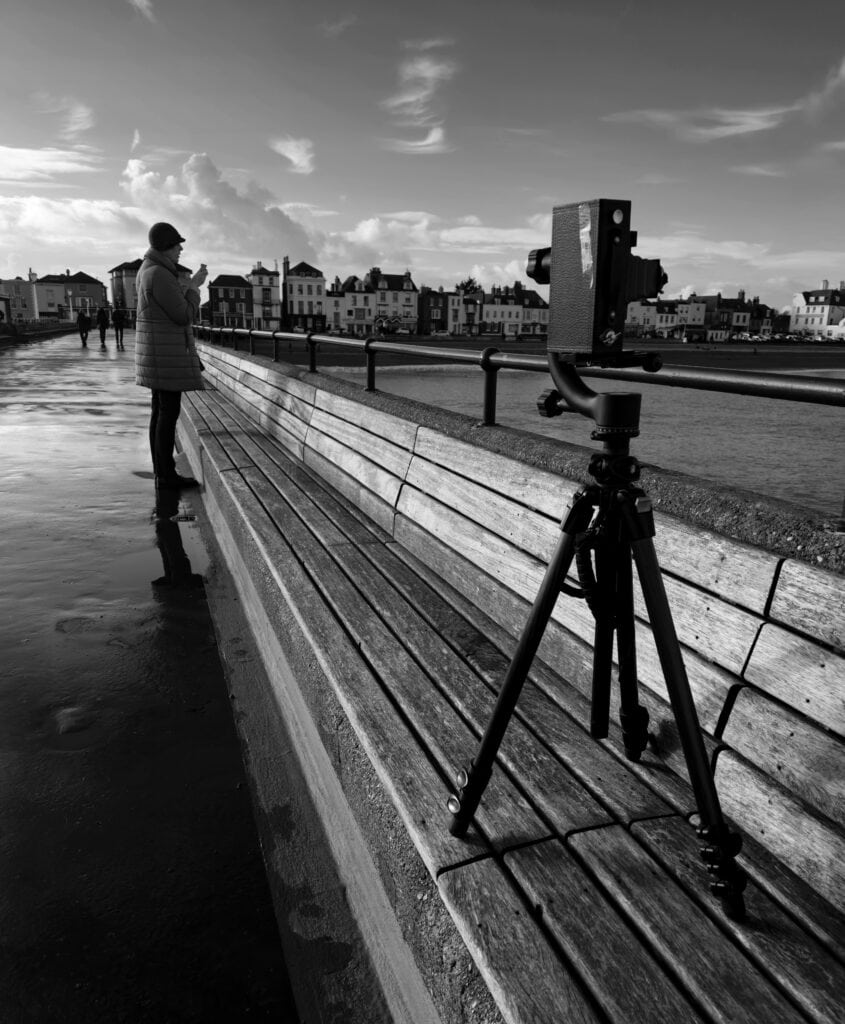
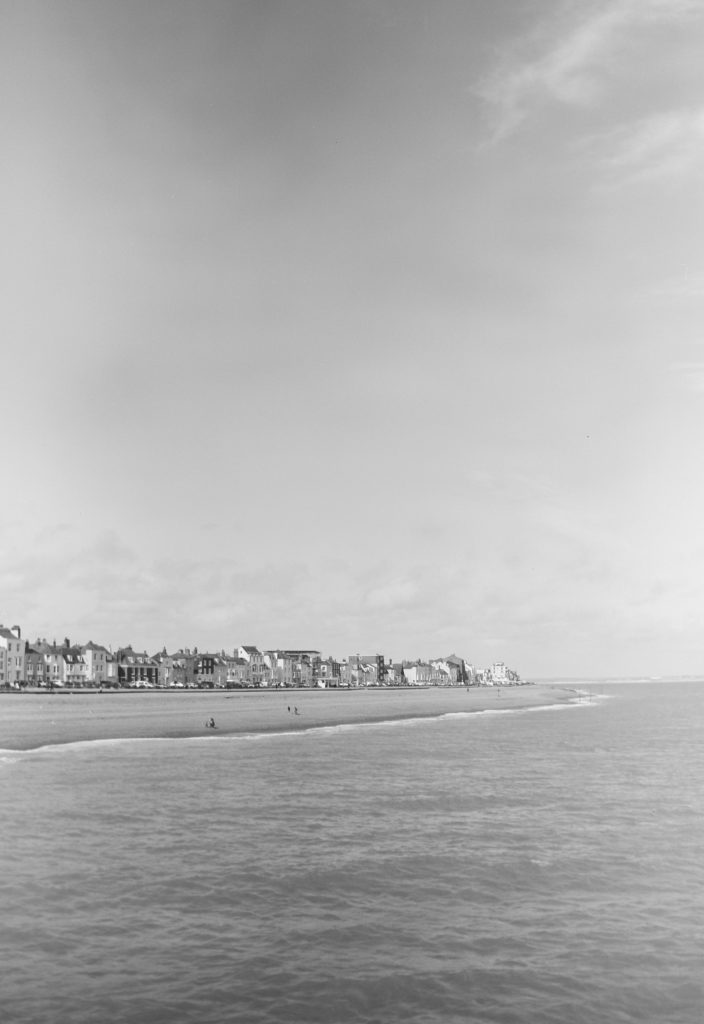
Deal sea front from the pier, shot with the FE2 and TMax 400

Advantages of FE2 over the Nikon FE

The most apparent advantage of the FE2 over the FE is that the faster shutter. The titanium focal plane shutter is two stops faster at 1/4000s vs 1/1000s for the FE, with the FE2’s flash sync at 1/250 vs 1/125. The backup mechanical shutter, which I don’t expect to need to use, is also more usable at 1/250s vs 1/90s.

There are other refinements: the viewfinder is brighter than the FEs, the light meter needle is locked stationary when the exposure lock is applied, and the exposure compensation is in 1/3 stop fine-tuning increments. (The FE’s scale is in 1/2 stops). The camera back lock also has been re-positioned, making it easier to operate.

Advantages of FE over the Nikon FE2

The Nikon FE has a surprisingly long list of small advantages over its successor. They seem quite minor to me, at least, but some photographers prefer the FE. As much as I have enjoyed shooting with the FE, on balance I prefer the brighter, faster FE2.

  • Power Switch The FE’s power switch is very simple – just pull out the film wind handle. There’s an additional step on the FE2 – a half push of the shutter release. The camera automatically shuts off to save power. This seems to annoy some reviewers, but it doesn’t trouble me.
  • Legibility in the Viewfinder The shutter scale speeds are more larger and easier to read than on the FE2, as there are two fewer speeds to accommodate. I only noticed this in a direct comparison between the two, though – it is not as if the FE2’s display is illegible.
  • Battery Life This FE uses less battery power than the FE2 because its faster shutter needs stronger shutter springs and the batteries have to power the electromagnets to cope. All Nikons seem restrained in their battery usage, so this doesn’t trouble me either.
  • Compatibility with Non-AI Lenses The FE can use Nikon lenses going back to 1959, while the FE2 can’t use non-AI lenses.  I don’t have any non-AI lenses, most of mine are AI-s or AI.
  • Battery Test Light The FE has a dedicated battery test light, which the FE2 lacks. This is definitely a nice feature to have but I don’t have it on most of the other cameras I use.
  • Cost The FE is less expensive than the FE2.

Pre Frame 1 Metering

There is one difference between the FE and FE2 that you may see as an advantage either way, depending on your point of view. This is Pre Frame 1 Metering.

When you load a new film, the FE2’s light meter doesn’t operate until the counter on the film advance gets to frame 1. Before frame 1 (frames 00 and 0), the shutter always fires at its single manually operated shutter speed of M250 (1/250th of a second).

Nikon added this feature because if you have set the camera to auto and accidentally fire the shutter with the lens cap on or in a dim enough environment, the camera will set an extra long exposure – potentially tens of minutes long! This can be overridden by setting the shutter speed to a fast manual speed or the mechanical backup speed, M250.

The FE does not have this feature, so experienced film photographers can squeeze up to two more frames (frames 00 and 0) out of a roll of film, which they appreciate. These early loading frames are really designed to ensure by the time you get to frame 1, your camera is properly wound, and you don’t get partial frames, but they can be utilised for shooting in many cameras. They are numbered 00 and 0 to provide a reference number to reference them for prints, etc.

Discontinuation

The Nikon FE2 was officially discontinued in 1987. A quick glance at the Year-by-Year Camera Timeline on this site shows that the market was extremely dynamic at that time, with autofocus becoming established, along with the first glimpse of digital cameras and the emergence of the bridge camera.

  • 1985 Minolta introduces the world’s first fully integrated autofocus SLR with the autofocus (AF) system built into the body – the Maxxum 7000 a.k.a. the Dynax 7000
  • 1986 The disposable camera is popularised by Fujifilm with the 35mm QuickSnap
  • The Canon T90 marks the pinnacle of Canon’s manual-focus 35mm SLRs
  • The Canon RC-701 becomes the first still video camera marketed, offering 10 fps (frames per second) high-speed shutter-priority and multi-program automatic exposure
  • 1987 Canon launches the EOS (Electro-Optical System), an entirely new system designed specifically to support autofocus lenses
  • 1988 The Nikon F4 is introduced as the first professional Nikon to feature a practical autofocus system.
  • The Fuji DS-1P, the first digital handheld camera, is introduced, though it does not sell
  • The first of the Genesis series from Chinon helps to define the category of 35mm bridge cameras

More detail on the battle between Nikon and Canon for Auto Focus Dominance can be found in a short separate article. Regardless, manual focus cameras quickly became a niche product and Nikon’s final offering was the FM3A, with its 1/4000 second hybrid mechanical/electronic shutter.

Afterword – The Nikon FE10

There is a later Nikon with an FE designation. However, it was not a successor model to the FE and FE2 as it was built on a different chassis and designed for a different market. The Nikon FE10 of 1996 is a manual focus, F-mount film SLR manufactured under license by Cosina. It has a rather unappealing ABS plastic body in champagne silver and black body and was designed as a low cost beginner’s camera based on Cosina’s C2/C3 SLRs.

As such is unlikely to appeal to FE and FE2 owners, but Nikon’s fingerprints can be seen all over the enhancements to the donor Cosina. Depth-of field preview, AE Lock and exposure compensation, to name just a few, are features that make it usable by more experienced photographers. As a result it has some positive reviews from those that appreciate its light weight and very low cost.

Conclusion

I really enjoy shooting with the Nikon FE2 – it offers a very similar experience to the FM3A, a favourite of mine. It is both easy and rewarding to shoot with, and as it’s less of a collector’s piece than the FM3A, it’s one you can take anywhere.

Thoughts and Further Reading

If have experiences to share with the Nikon FE2, please leave me a comment below. I’d be delighted to hear from you. And if you are interested in classic or vintage cameras, there are articles on this site on:

If you’ve any experience with the Nikon FE2, please leave me a note in the comments – I’d love to hear about it.
Early Auto Focus Cameras

April 4th, 2024

Although I’ve shot with quite a few auto focus film cameras, I haven’t any hands-on experience of the early, historically significant, models from the 70’s and 80’s described in this post. I only dimly recall the point and shoots I used for family photographs in the ’80s and 90s, and the auto focus film cameras I have used since I got serious about photography all date from the 1990s or later. The earliest models I own are the excellent Contax T2 and the notorious Konica Aiborg (‘eye-borg’) both from 1991.

Early Auto focus
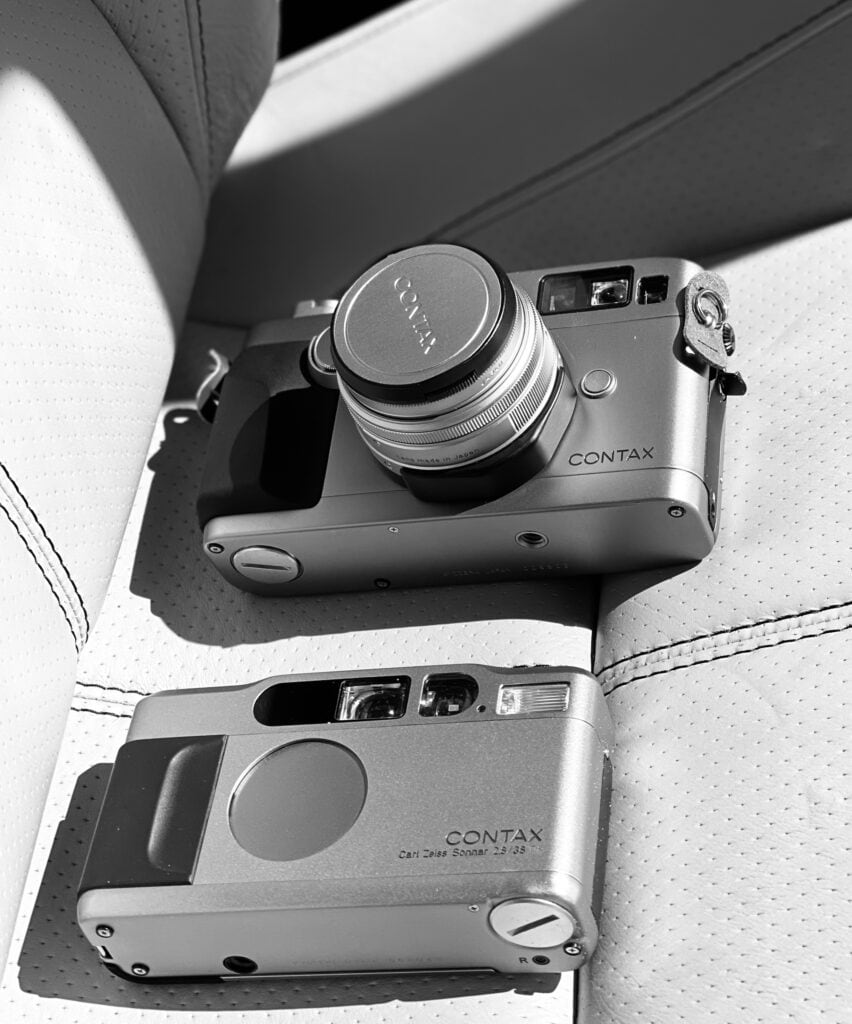
Contax My T2 and a friend’s G2 resting on the seat of his car.

I’ve sampled an autofocus rangefinder (Contax G2, 1996), a trio of point and shoots (Contax T2, 1991, Nikon 28ti, Fujifilm DL Supermini, both 1994), a 35mm mid range SLR (Nikon F100, 1999), and a top of the range SLR (Nikon F6, 2004). In medium format, I’ve used the Pentax 645 nII (2001) extensively.

The shooting experiences and results have all been good except for the Contax G2, the autofocus of which was possibly faulty and the Aiborg, which produced good results but was frustrating to handle.

This isn’t the story of those later AF models – though the Contax T2 makes an appearance at the end. Instead, this is a brief account of the pioneering autofocus efforts of the 1970s and 1980s. The article started as a paragraph in a review of the Nikon FE2 and developed a life of its own.

As I did my research, it became clear that this is also the story of the transition from SLR to compact cameras in consumer market and the rise of Canon as a dominant player in the photographic industry. It’s also clear I should get a Nikon L35F – it sounds excellent!

If you’re not familiar with the different types of AF systems, it’s worth reviewing the short description that follows.

Types of Auto Focus Systems

Active Auto Focus

Active auto focus systems measures the distance to the subject using waves of infrared light or ultrasonic sound and then adjusts the optical system for correct focus. This kind of AF can be used in poorly-lit environments, but only works on relatively close, stationary subjects. The familiar ‘AF Assist’ button found on many cameras uses an active AF system.

Passive Auto Focus

As the name implies passive auto focus systems use the same incoming light as the optical system and don’t beam sound or light waves on to the subject. Instead they make use of Contrast Assessment, Phase Detection or both.

TTL Auto Focus

TTL auto focus (Though The Lens) means that the system is integrated behind the photo-taking lens.

Contrast Detection

Contrast Detection (or Assessment) evaluates what the camera ‘sees’ and then moves the lens a fraction and then re-evaluates to determine whether there is more or less contrast. If contrast has increased, the system continues to move the lens in the same direction until contrast is maximised. If contrast decreased, it moves the lens in the other direction. This is repeated until contrast is at the highest level attainable.

Phase Detection

Phase Detection (PD) works on similar principles to a range finder by dividing the incoming light into pairs of images and comparing them. Mirrors and lenses, or a prism (beam splitter) are used to split the rays coming from opposite edges of the lens and a secondary lens system refocuses the rays onto the film plane.

When a point is in focus, the light rays coming from it will equally illuminate opposite sides of the lens and it is ‘in phase’. If the lens is focused in front of or behind the point in question, the light rays at the edge of the lens arrive in a different position ‘out of phase’.

The distance between the two images is then measured to see how far front-focused or back-focused the subject is. The camera then uses this information to instruct the lens which way to turn its focus and by how much. Phase detection AF is incredibly fast compared to contrast detection, and is well suited to moving subjects.

The Genesis of Auto Focus

The first auto focus patent for a ‘self focusing camera’ was filed in the United States back in 1931, by the prolific, yet largely unknown, Armenian-American inventor and entrepreneur LG Simjian (1905 –1997). Simjian held over 200 patents, mostly in optics and electronics and conducted pioneering development on the flight simulatorATM and teleprompter.

As a medical photographer he became interested in portrait photography which led to him to invent a self-photographing camera, the PhotoReflex. This, in turn, led him to his work on auto focus.

Patents were also filed in the 1940s and 1950s and both Canon and Nikon made reference to prototypes in the 1960s and 1970s, but the first camera equipped with AF to break cover came from Leitz (Leica) at the 1976 Photokina event in Cologne, and the company is usually credited with its invention.

1976 – Leica’s SL-2 Prototype

Leitz started patenting auto focus technology in 1960 and continued to develop their system over the next decade and a half. As Leica’s cameras became more sophisticated, their engineers recognised their light meter’s sensitivity to contrast. This developed into contrast detection: two LEDs on top of the viewfinder detected the highest contrast of a subject and a motor turned the focusing ring. The prototype was based on the Leica SL-2 and was named Correfot. An observer familiar with the prototype commented:

“It worked surprisingly well in low light. It wasn’t that fast because it took a number of gears for the motor to generate enough torque to turn the focusing ring, but at the time it didn’t bother me. We hadn’t seen anything like it. The motor housing was converted to hold six batteries that lasted only an hour. It was not something they could really market.”

Leitz, a conservative company, decided not to commercialise the system and sold it to Minolta.

1977 – Konica C35 AF

Konica’s point and shoot compact C35AF of 1977 was the first commercially viable auto focus camera. This used Honeywell’s Visitronic AF (VAF) system, a patented mechanical autofocus system that used light-sensitive detectors comparing the two images in its rangefinder.

The C35AF was an autofocus version of the Konica’s C35 automatic camera with a Hexanon 38 mm f/2.8 lens, a leaf shutter, built-in flash, and automatic exposure.

1978 – Polaroid SX-70

The first AF Single Lens Reflex (SLR) camera arrived in 1978 in the form of the Polaroid SX-70 Sonar OneStep instant camera, which was equipped with an active sonar autofocus system. This is essentially the original Polaroid Land Camera, a true (folding) SLR, with a sonar autofocus bar grafted onto the body.

1979 – Canon AF35M

The Honeywell Visitronic used in the Konica C35 AF was the system of choice of most manufacturers offering AF until Canon’s CAF system arrived in 1979. This system quickly became the standard for autofocus cameras. The CAF equipped Canon AF35M of the same year (the first of the Sure Shot range) offered auto focus, auto exposure, auto wind on and auto rewind. Canon claimed it as the world’s first 35mm autofocus camera.

The stage was set for a contest for auto focus supremacy and the compact cameras, and Canon, had a head start.

1981 – Pentax ME-F and Chinon CE-5

Auto focus 35 mm Single Lens Reflex cameras (SLRs) arrived in 1981 with the Pentax ME-F, which was based on the Pentax ME Super of 1979. This required the autofocus SMC Pentax AF 35–70 mm zoom lens equipped with a drive motor. It is easily recognisable by the bulky battery compartment below the lens.  The ME-F used through-the-lens (TTL) electronic contrast detection system but focused poorly and did not sell well.

In the same year Chinon produced the CE-5, a Pentax K mount SLR that used infrared with large heavy lenses with lens-mounted motors. In the words of the manufacturer:

Chinon “direct focus” electronics incorporated in the CE-5 match precisely to similar electronics in the optional 35 – 70mm zoom auto focus lens. Just depress the CE-5 shutter button to activate the 35 – 70mm AF lens; instantaneously the lens barrel rotates to the precise focus! This ingenious system even prevents accidental shutter release before the lens has completed focusing”.

1983 – Olympus OM-30 and Nikon F3AF

In 1983 Olympus introduced the OM-30 (OM-F in some markets), an updated version of the OM-G/OM-20), that could be used with an auto focus 35-70 mm lens which had a motorised focusing ring.

The camera offered three focus modes. With electronic autofocus mode, touching the release button focuses the lens ‘instantly’ (‘one touch autofocus’) with an electronic beep for focus confirmation. In electronic focus-aid mode, focus is obtained by rotating the lens focusing ring while watching LEDs. A tone sounds when the camera has obtained focus. Lastly there is ‘optical mode’, which is manual focus via a microprism/split image rangefinder and matte area.

Unfortunately, the auto focus mode was often inaccurate, slow and dependent on one zoom lens.  As it offered focus confirmation with other lenses Olympus also promoted it as ‘the first focus-confirmation SLR for a photographer as serious as you’.

Nikon introduced auto focus with the F3AF which was based on the F3, and utilised TTL contrast detection. The launch was accompanied by two new auto focus lenses with internal focus motors, an 80 mm f2.8 and a 200 mm f3.5. These lenses featured Nikon’s usual optical excellence but their AF performance was relatively poor and the offering wasn’t successful.

Nikon also introduced its first compact AF 35mm camera, the L35AF, which was well received due to its excellent f2.8 35mm lens and accurate AF. The same factors make it popular with film photographers today for whom it has some bonus features. There’s a 46mm filter thread, and through the lens metering; there are icons in the viewfinder that will tell you where it is focusing as you shoot, and it also has a manual setting for ISO to over-ride DX if you want to push or pull the film.

1984 – Compact Auto Focus on the Rise

Nikon was the last of the major SLR manufacturers to offer compact AF cameras with the L35AF. By the end of 1984, that model had outsold all of Nikon’s SLR bodies (F3, FA, FE2, FM2, FG, FG-20, and EM) combined in that same time period.

At the same point in time Japanese 35mm SLRs had only 33% of the worldwide market versus 67% for 35mm compact cameras. In 1977 market share was 57% in favour of SLRs.

During the 70’s and ’80s there had been a shift from metal bodied, manually operated mechanical SLRs to more compact, automatic plastic-bodied models. This was supported by the rapid advances in electronics, including the rise of the integrated circuit, which made both automation and miniaturisation easier. The SLR manufacturers targeted amateur photographers using rangefinders and thought they would upgrade to SLRs equipped with sufficient automation. As the market share figures above show, they were not successful and compact cameras became the norm for amateur photographers.

1985 – Minolta 7000 and Canon T80

The Minolta 7000, released in 1985, was the first SLR with an integrated autofocus system – both the AF sensors and the motor were housed in the camera body. It was the first AF SLR that could focus quickly, accurately, and operate in low light levels and made use of phase detection (PD) autofocus. Minolta also provided a wide selection of lenses and accessories and priced their new Alpha (A) mount camera at a relatively affordable price point for mid-level enthusiasts. It sold well.

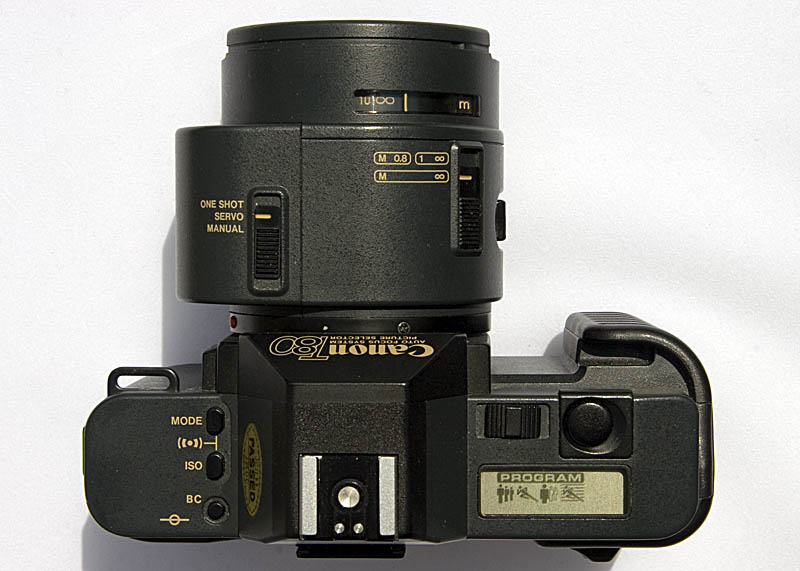
Canon introduced the Canon T80 as its first autofocus 35mm single-lens reflex camera that same year. It looked like nothing that came before, or after it, for that matter. The T80 had a modified FD mount with signal transmission capability known as AC, and a linear CCD array for TTL image contrast detection. There were three AC auto focus lenses available: an f1.8 50mm prime and two zooms – 35-70mm and 75-200mm.

Learnings from the Canon T80

The T80 was discontinued just over a year after its launch. The effort wasn’t wasted though as Canon explained on the 30th anniversary of EOS:

Early Auto focus cameras
Canon T80 (Image credit: Mike Caine, Flickr, CC)

The idea of a fully-electronic mount is largely attributable to the experience we gained from developing the T80, an AF camera that used lenses with built-in motors. In the case of telephoto lenses, having the motor inside the camera made it difficult to achieve high-speed focusing. Coordinating the aperture drive was also a test of limits due to the complex mechanisms of both the camera and the lens. However, we persevered because we felt that the future of next-generation cameras hinged on the development of a new, fully-electronic mount.” 

In March 31 of that year Canon leaders and engineers from around the world met to discuss the development of a new system, known at the time as the “Entirely Organic System.”

1986 – Nikon F-501

Japanese industry analysts were predicting that the shipment of AF SLR cameras in Japan in 1986 would outstrip manual focus models. Nikon responded by hurrying to implement the ‘body-powered’ AF Nikon F-501 in April 1986 with TTL passive phase-detection autofocus and in the same year introduced new autofocus (AF) lenses.

The polycarbonate-bodied F-501 was the first successful auto focus SLR and offered automatic film loading and advance as well as a built-in motor drive. This provided single or continuous modes and a maximum film advance speed of 2.5 frames per second (frame/s) in continuous mode. Nikon adopted some design concepts from the camera in the  Nikon F4.

The new lenses relied on the autofocus motor in the camera body to drive the focus mechanism via a screwdriver on the lens mount and could communicate electronically with compatible AF cameras.

1987 – The All New Canon EOS System

Canon introduced its ‘built from scratch’ AF system, which used a new lens mount for lenses with its own AF motors – the EF. Breaking compatibility with Canon’s FD mount, the aperture and focus were controlled via electrical contacts, with motors in the lens itself. In Canon’s own words from the same 30th EOS anniversary interview with the leading engineers:

Before the EOS series was launched, our cameras featured the FD lens mount. However, a fully-electronic mount was essential in order to achieve a high level of AF technology with our wide variety of interchangeable lenses. To realise a high-precision AF that moves the focusing lens elements optimally according to the focusing distance or zoom position, it was a must for the lens to exchange information with the camera as well as to eliminate any mechanical error. This is why we chose to control the camera system by linking the camera with the lens via electrical communication. Through this, we were able to achieve high-speed and high-precision AF even at such super telephoto focal lengths as 600mm. What’s more the aperture was also electrically linked to enable smooth video shooting and playback, a feature that is taken for granted on cameras today.

The system was introduced with the Canon EOS 650 in March and within two months it was the best-selling SLR in Japan and Europe.

1988 – The Nikon F4 and the Second Generation of AF

The Nikon F4 was introduced in 1988 as the next generation in Nikon’s line of F series professional cameras and was the first professional Nikon to feature a practical autofocus system. The F4 offered outstanding backward compatibility as it could mount any of Nikon’s manual focus or AF lenses from 1959 onwards.

The second generation of AF SLRs also began to appear in that year, the Minolta 7000i and Nikon F-801 being the most notable.

1989 – Compact Auto Focus Dominates

Of the 818,000 SLR produced in Japan in 1989 Over 90% were AF models. The manual focus SLR era that had been dominated by Nikon was over. Canon was the SLR market leader and Minolta was in second place. However, Minolta’s lead over Nikon was only temporary and the company was soon overhauled. 

It wasn’t just manual focus SLRs that were declining. According to worldwide market share (CIPA figures) Japanese 35mm SLRs had only 15% of the market versus 35mm compact’s 85% in 1989. SLR dominance was effectively ended by auto focus compacts.

Post Script

The design of phase detection autofocus came from Honeywell and their patents of the 1970s. Honeywell sued Minolta for patent infringement and won, so all the camera manufacturers had to pay Honeywell for the rights to use phase detection autofocus.

 A 1991 court decision found Minolta guilty and Minolta paid Honeywell $127.5 million in back royalties, and for license rights to continue using autofocus technology. The world’s camera manufacturers paid Honeywell over $300 million for licenses to their autofocus patents.

Early auto focus cameras
George Thorogood, London 2023, shot with Contax T2. No removable lens, no problem.

The Contax T2

The earliest auto cameras arrived in the 1970s and 1980s, but as we are wrapping up the story in the early ’90s it seems reasonable to give the Contax T2 of 1991 a mention.

The T2 was one of a range of high-end compact cameras produced by Contax between 1984 and 2002. The manual focus T was introduced equipped with a Carl Zeiss Sonnar T* 38 mm lens. The T2, used the same lens in an active autofocus system.

The T2 offered a high degree of automation, including auto focus and Program AE, coupled with a decent level of user control, including Aperture Priority exposure, manual focus and exposure compensation. Constructed of titanium and with a renowned lens, the T2 was a luxury model that has since become sought after and expensive.

It is rather too bulky to fit in any but the most capacious of pockets but it is very portable nonetheless. Its ideal for when you want a film camera with you and space and weight are at a premium. Those events where ‘professional cameras’ (those with removable lenses) are prohibited are also ideal for the T2.

The only real drawback to the T2, other than its cost, is that Program AE mode and Aperture Priority f2.8 share the same setting, so you can’t shoot wide-open unless the exposure level permits it.

Into the Digital Era

In the SLR market lens-mounted motors became the norm for auto focus, and in 1998, Nikon introduced AF-S lenses with their own ultrasonic “silent wave” motors built in, only a year before the launch of the digital Nikon D-1.

Nikon had the benefit of backward compatibility, but Canon had over a decade of experience with EOS by then and had gained a significant advantage. The two titans would continue to slug it out in a contest that was soon to enter the digital era, but they would be joined by electronics behemoth Sony, which acquired Minolta and its auto focus technology….

The Nikon F – Great Film Cameras

March 24th, 2024

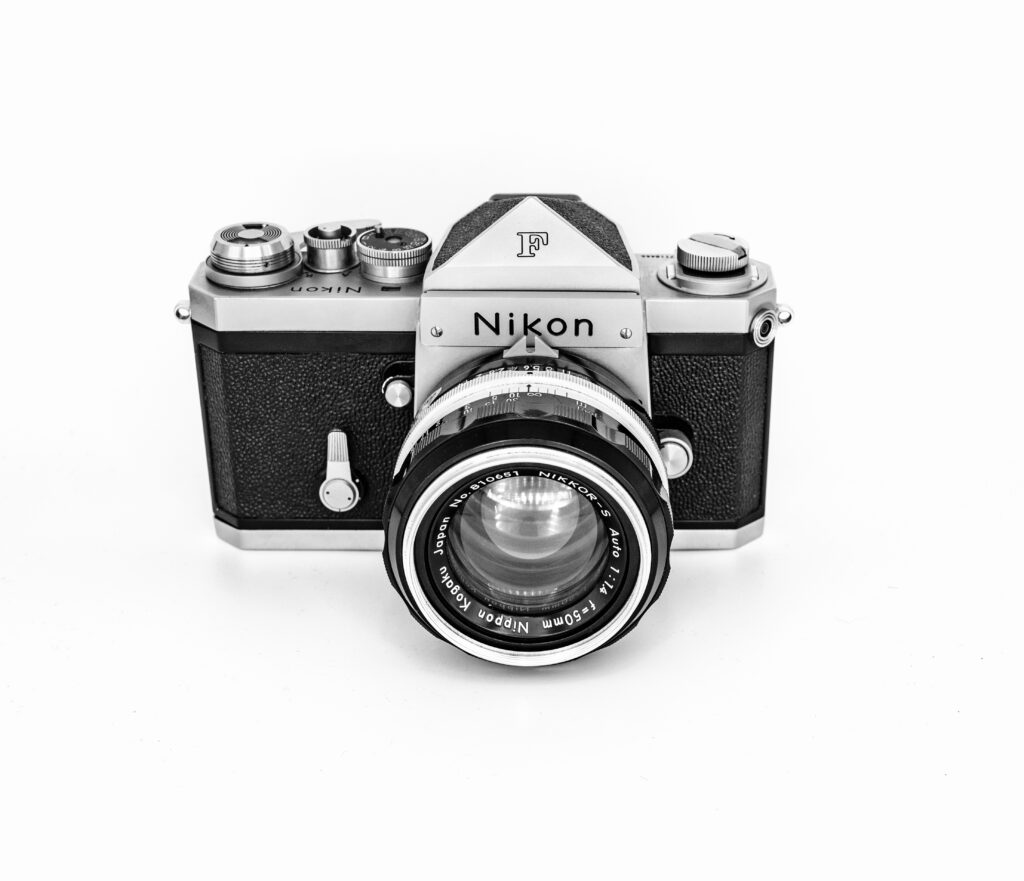
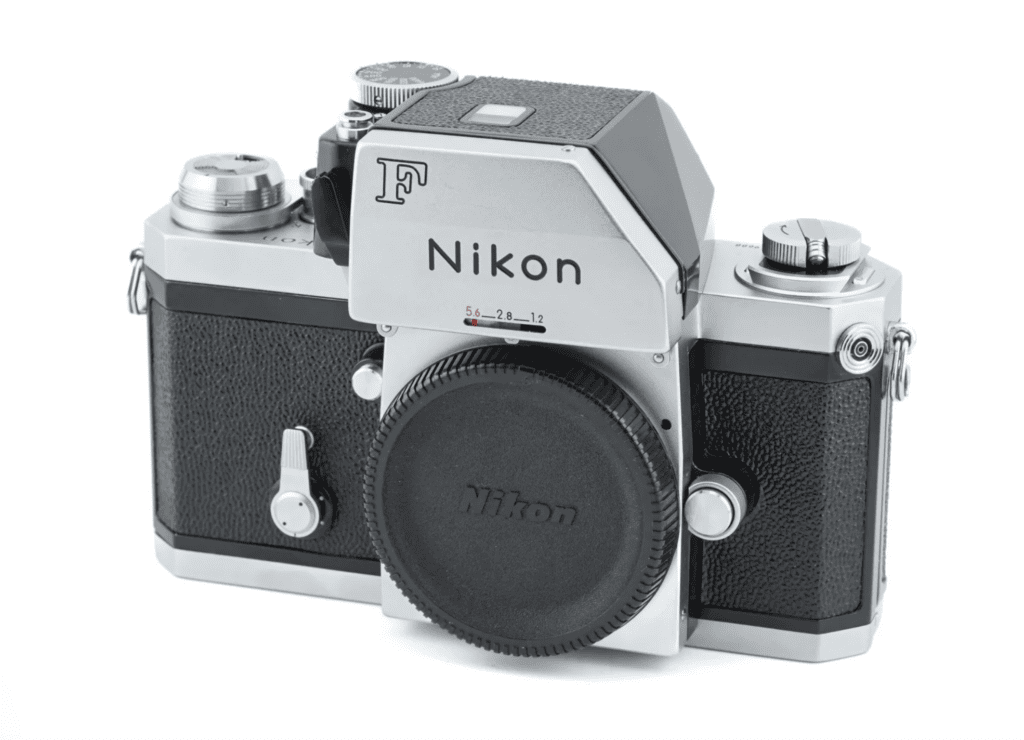
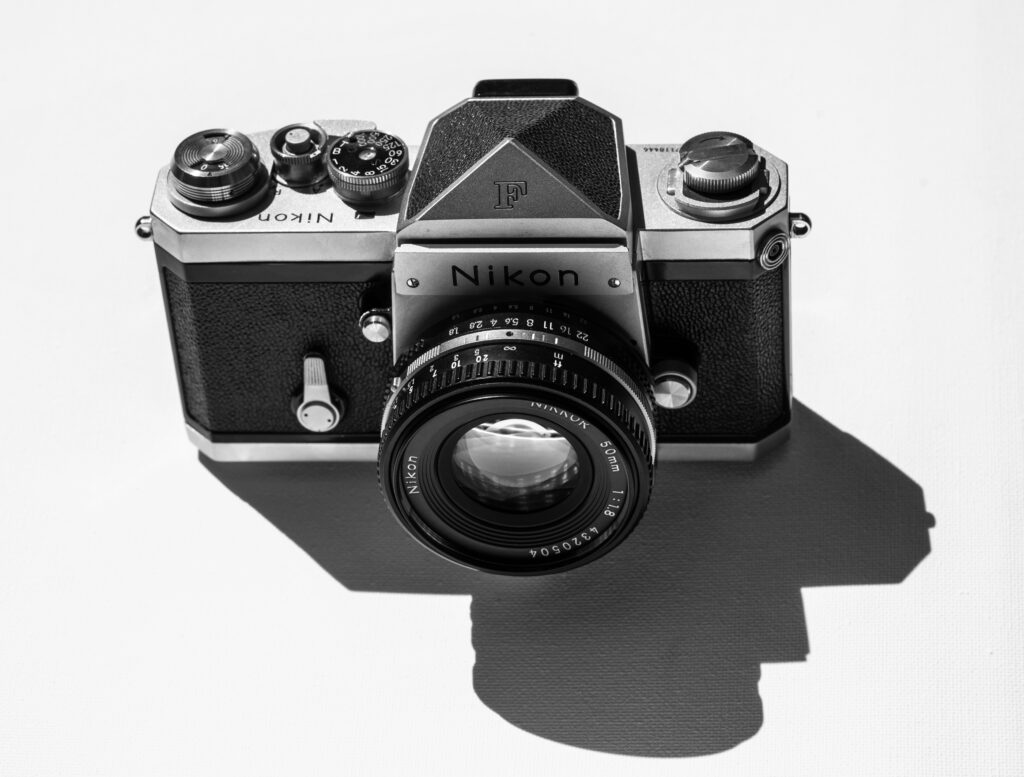
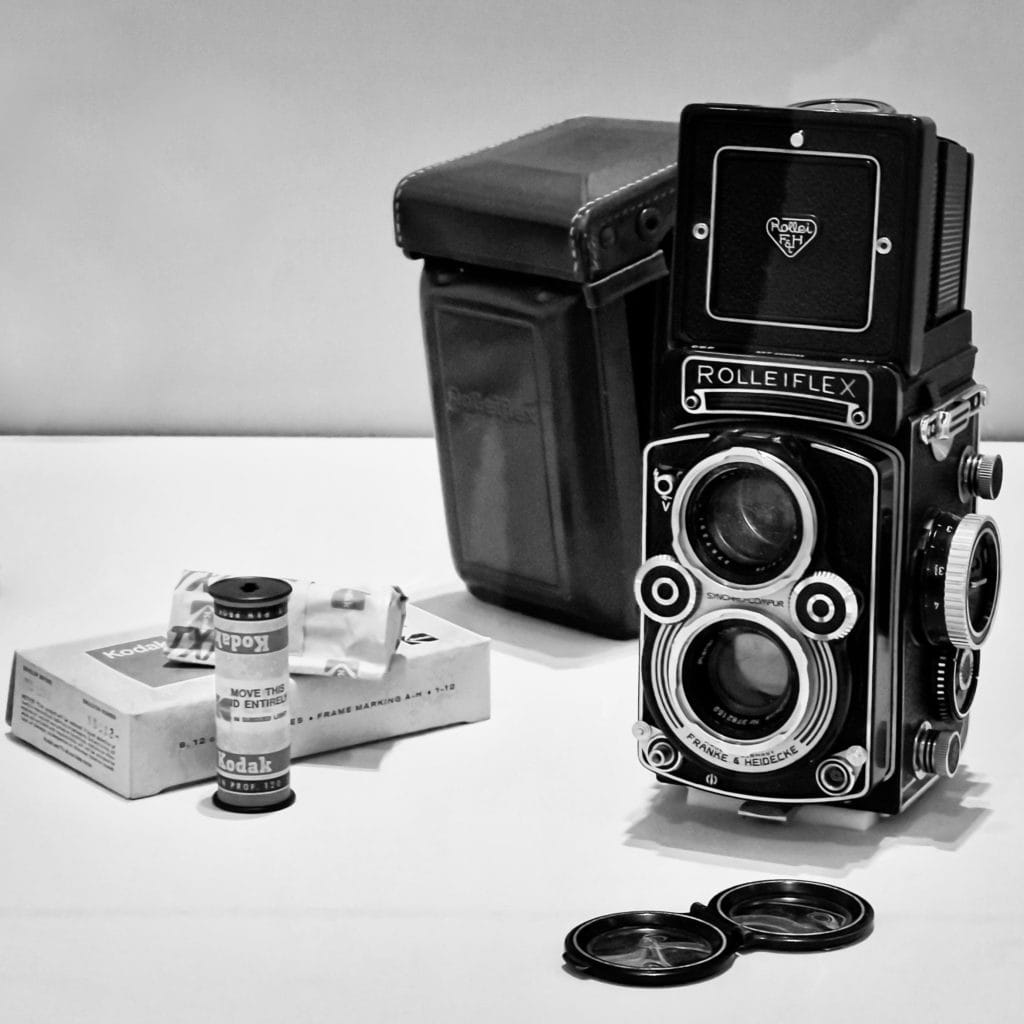
When I chose my first DSLR many years ago I chose a Nikon. Since then I’ve stayed with the brand into the Z mount era. When I went back to film in 2016 it was with a Nikon F3, and since then I’ve shot with most of Nikon’s pro and mid range film cameras, including the mighty F6, the engineering miracle that is the FM3A and the camera that took Nikon to market dominance in the SLR market – the Nikon F. This is its story.

Genesis of the Nikon F

The story of the Nikon F starts in the rangefinder era which began with the Leica I of 1925. A milestone in photographic history, the Leica I popularised the use of the accessory rangefinder. The Leica II and Zeiss Contax I with their built in rangefinders put the technology firmly on the map, and by the late 1930’s the low-cost Argus C3 rangefinder was the world’s best selling camera.

Nikon F
Portrait of an icon: the Nikon F cast a long shadow…

The Nikon I Rangefinder

Fast forward to post-war Japan. After WWII the Japanese camera industry was getting back on its feet. Nippon Kogaku K.K. (as Nikon was known until the late ’80s) introduced a 35mm rangefinder, now known as the Nikon I, which used a shutter and rangefinder mechanism based on the Leica II. However, the Nikon I bore a greater resemblance to the Contax rangefinder with a similar top focus wheel, removable film back, and a slightly modified Contax bayonet lens mount. It was launched in 1948 – about the same time as the Konica I rangefinder (also reviewed on this site).

By the late 1950s Nippon Kogaku (henceforth ‘Nikon’) was selling well engineered 35 mm rangefinder cameras such as the Nikon SP of 1957 (Nikon’s first professional camera) and the S3 of 1958 in competition to Leica. However, a limitation of the rangefinder was that telephoto lenses with a focal length of 135 mm or more required a cumbersome optional reflex box.

The Nikon SLR Development Program

Nikon F
A Nikon Ad from 1960

Single-lens reflex cameras (SLRs) had the advantages of the reflex box integrated in the camera. Nikon recognised the future potential of SLR cameras and in 1955 launched a program for their development in parallel with their rangefinder models.

The trial Nikon SLR model was based on the body of the Nikon SP, with a mirror box inserted. Only the mirror box, pentaprism and bayonet mount were newly developed. The new camera was designed by Yoshiyuki Shimizu and his team, who sought to create a system camera that could be adapted to a wide range of photographic situations.

The Birth of Nikon F, 1959

in 1959 when Nikon launched the The Nikon F, SLRs had been available for years but had not gained great acceptance by professionals. This was due to their weight, reliability, and dim viewfinders, when compared with the professional standard – the Leica M3.

The SLR deficit

The deficiencies of most post WWII SLRs are described by Nikon’s Camera Chronicle:  “Before focusing, the user had to set the lens aperture to its maximum setting to brighten the viewfinder with shallower depth of field. After focusing, the user had to manually adjust the lens aperture to the desired setting. If he did not do this, the photo would be overexposed. When the shutter was released, the viewfinder became dark. The user couldn’t check composition and lost track of moving subjects. After the film was advanced to the next frame, the mirror returned to its original position. Only then did the viewfinder brighten”…… The Nikon F would change all that.

Five Features that changed the photographic landscape

With the Nikon F, Nikon introduced an SLR that could compete with the rangefinders, combining several concepts that had already been introduced elsewhere into one extremely versatile camera:

  • Interchangeable bayonet lens mount (Kine Exakta, 1936)
  • Pentaprism viewfinder (Contax S,1949)
  • Interchangeable Viewfinders and focus screens (Exakta Varex,1950)
  • Instant return reflex Mirror (Asahiflex IIb,1954)
  • Automatic diaphragm for wide open composition (Zeiss Contax/Pentacon F 1956)

Or was it six?

The Nikon’s F Titanium foil focal plane shutter added a true ‘first’, but it was the incorporation of existing important innovations in one camera that changed the camera landscape, making the SLR an attractive option for professionals.

You want more reasons?

For a professional considering the camera there were other factors that made it attractive. Firstly, the combination of the automatic diaphragm and instant-return mirror made it faster than competing SLRs. Secondly, it had the same acclaimed control layout as the high-end Nikon SP rangefinder. Thirdly, the viewfinder was relatively bright and evenly illuminated due to the Fresnel lens integrated into the focusing screen. Lastly, the Nikon felt solid but was relatively compact and not overly heavy as the body dimensions (except for depth) were quite close to those of the SP.

Nikon had, in one camera, eliminated most of the disadvantages of the SLR versus the rangefinder, leaving just its advantages apparent. The Japanese company also had two other very strong cards to play, both of which had their origins in Nikon’s engineering excellence – reliability and flexibility.

Reliability

Nikon ensured reliability by subjecting the camera tests of endurance, heat run, low temperature durability and vibration to ensure that it could withstand hard use under any conditions. The shutter endurance test was particularly tough with 100,000 cycles of repetitive action, conducted with the aid of its motor drive.

Nikon F
My 1970 Nikon F

The result was a camera so tough it became known as “the hockey puck” for its ability to withstand damage and resist mechanical failure. Accordingly it was selected for extreme missions such as space with NASA, combat (notably the Vietnam war) and exploration (Everest, in 1963).

Flexibility – The System Camera

The Nikon F was designed as a system camera, enabling its use with a variety of viewfinders, choice of focusing screens, motor drives, and other accessories. At launch, Nikon offered an extensive selection of lenses ranging from wide-angle to telephoto, including the fast 58mm f/1.2 standard lens.

Once again, the concept of a modular camera had existed prior to the Nikon F, but Nippon Kogaku improved upon it with an impressive array of options. The first camera to introduce the concept was the Leica I of 1930 which had a standardised interchangeable screw mount lens and an accessory shoe.

The F Mount

The Nikon F incorporated a new bayonet mount, the F-mount, which featured a large diameter and a short flange distance to accommodate a wide range of lens designs. Moreover, the F Mount’s design enabled extraordinary longevity and allowed Nikon to become the leader in lens/camera compatibility. The F-Mount accommodated advancements such as AI (Automatic Indexing, 1977) and AIS (Automatic Indexing Shutter, 1983) in and is one of only two SLR lens mounts (the other being the Pentax K-mount) which were not abandoned by their manufacturer to introduce autofocus. 

Four Historic Turning Points

Nikon F
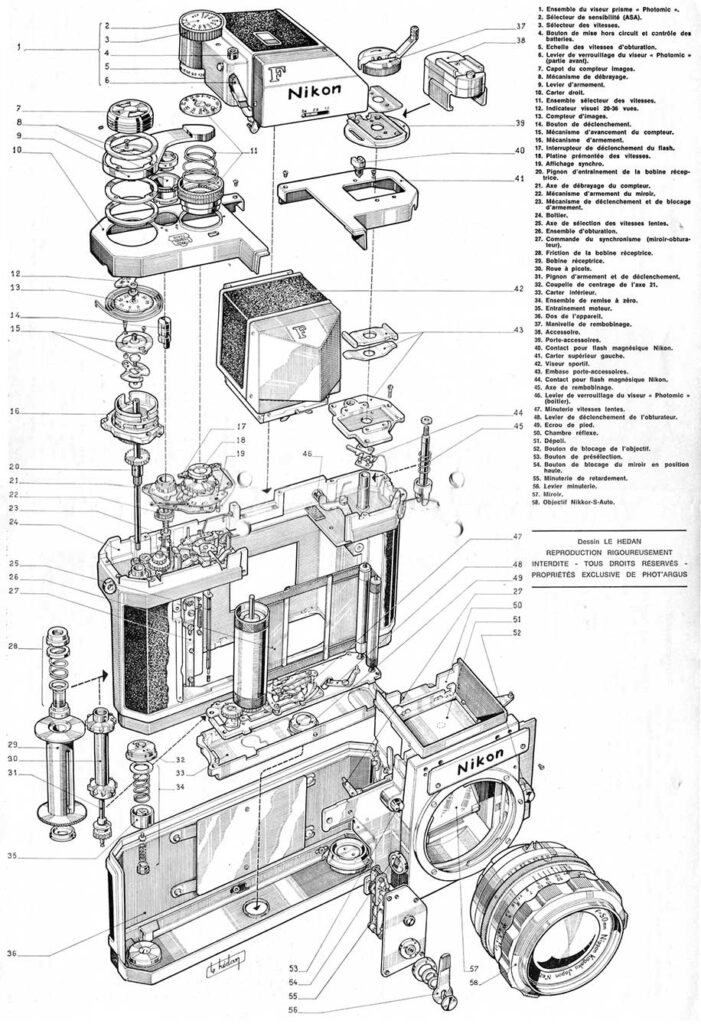
Nikon F Schematic

Upon its release, the Nikon F received widespread acclaim for its design, durability, reliability, and flexibility. The camera’s significance extends beyond its technical capabilities, marking a turning point in the photographic industry, establishing three turning points in the history of photography:

  • Signalled the end of the rangefinder era and the rise of the SLR
  • Established the SLR as the camera of choice among professional photographers, especially photojournalists and those working in challenging environments.
  • Promoted Nikon to a leading brand in the photographic industry with Leica losing ground
  • Established the rise of Japan as the leader in the photographic industry, with Germany losing ground

Notable Users

The Nikon F had many users of note, such as renowned photographers David Douglas Duncan, Gordon Parks, Don McCullin and Bert Stern. NASA took an F into space; it became one of the key instruments documenting the Vietnam war, and the F is associated with possibly the most iconic photo shoot in history. Below are some of the highlights.

David Douglas Duncan and LIFE Magazine

In June 1950, David Douglas Duncan, (aka DDD) a renowned photographer at LIFE Magazine visited Nikon’s Ohi Plant with Fortune’s Horace Bristol. Guided by Nikon President Masao Nagaoka, they compared their Leitz and Zeiss lenses to Nikkor with Nikon’s projection inspection equipment, determined that the Nikkors were superior and bought M Mount Nikkor lenses for Leica.

When the Korean War broke out shortly afterwards, DDD went to the front line with two Leica IIIc’s equipped with a Nikkor lenses. Subsequently, he was joined by Carl Mydans, also from LIFE, who also visited Nikon and bought Nikkor lenses for his Contax rangefinder.

The two photographers took almost all of the pictures of the Korean War carried by LIFE with their Nikkor lenses, and won the “U.S. Camera Awards” of 1950. Subsequently, the Nikon rangefinder and it’s Nikkor lenses became popular with all LIFE photographers. Their reputation quickly spread throughout the US and the rest of the world and helped establish Nikon as a global brand.

NASA Missions

The Nikon F’s journey into space with NASA began with its modification for the Apollo 15 mission in 1971. This included reformulating adhesives, redesigning the battery chamber, and enhancing the durability of plastic parts. The film advance lever, shutter release, and film rewind mechanisms were also modified to facilitate ease of use by astronauts wearing gloves. Additionally, the (ISO) dial was re calibrated to match the the film emulsions developed for NASA missions.

The Nikon F in the Vietnam War

The Nikon F was adopted by many photojournalists during the the Vietnam War, which became one of the most photographed conflicts in history. I grew up with the Vietnam War on the news but realised how little I understood about it when I read Max Hasting’s Vietnam: An Epic Tragedy, 1945-1975. It is an astonishing story, and a tragedy on a truly epic scale.

The Nikon F’s robust design made it ideal for photographers working in the difficult and unpredictable conditions of Vietnam. It was subject to jungle humidity, dirt and dust, and the rough handling that came with working in a conflict zone. David Douglas Duncan, who we met earlier, Eddie Adams, Nick Ut, Tim Page and Don McCullin all used Nikon F cameras during the Vietnam War.

It wasn’t the only tough camera of course, some Vietnam War photographers would take the Nikon F for normal/long lenses and a Leica for wide angle lenses.

One of the most famous stories about the Nikon F and the Vietnam war is how it saved a British Photographer’s life. In 1968, Don McCullin was documenting the Vietnam war for The Sunday Times Magazine. While stationed at Prey Veng he was spotted by a Cambodian solider who opened fire. McCullin had his Nikon F to his eye, and the bullet from the AK-47 struck the the solid brass top-plate of the Nikon, deflecting the round and saving his life

There are many other stories. I found an excellent account of a soldiers experiences in Lee Dudley’s Nikon F and the Vietnam War

Bert Stern, Marilyn Monroe and a Nikon F

Portrait photographer Bert Stern received a phone in June 1962 which resulted in one of the most famous celebrity photoshoots in history. Stern waited for hours for Monroe to appear in her Bel-Air Hotel, accompanied only by his Nikon F, but it gave him the opportunity to photograph her for next 12 hours and resulted in 2,571 photos. Marilyn Monroe would die only six weeks later, and the images, known as The Last Sitting, became iconic.

The Nikon F in the movies

The first of Nikon’s SLRs was quite the film star, as described in Michael Pritchard’s excellent book ‘A History of Photography in 50 Cameras‘.

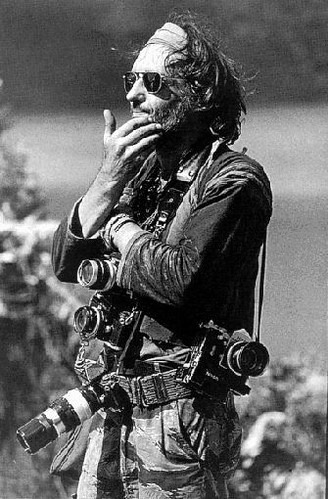
Dennis Hopper with Nikon F’s

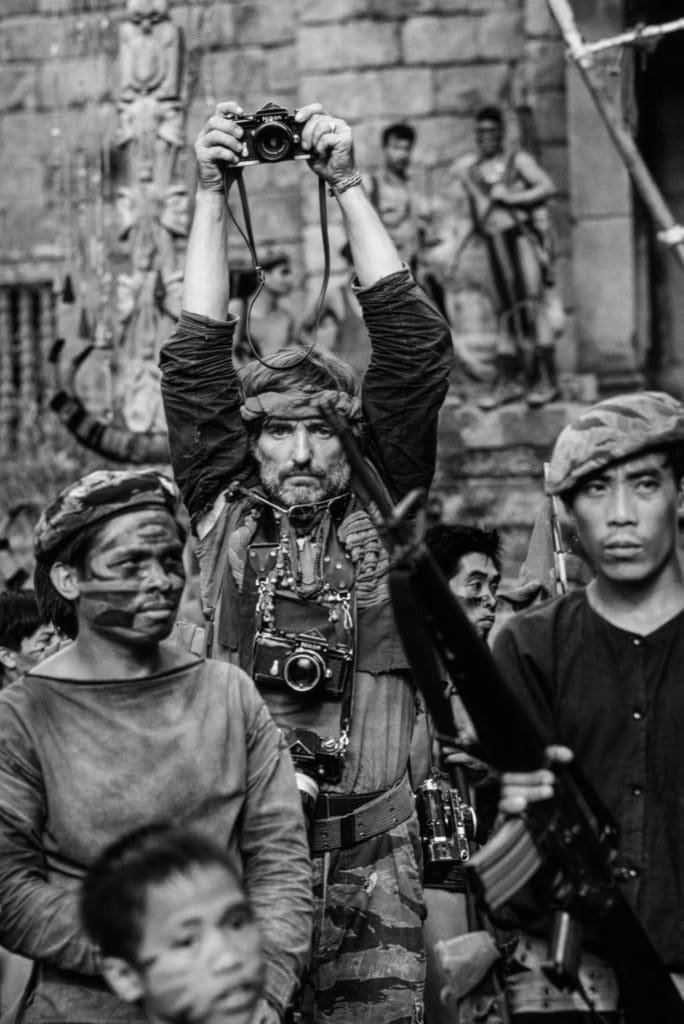
“The Nikon F reinforced its reputation and established itself as modern design icon through its starring roles in films such as Blow-Up, with David Hemmings as a fashion photographer in London; Apocalypse Now with Dennis Hopper as a Photojournalist; and, later, with Clint Eastwood as National Geographic photographer in The Bridges of Madison County.”

Clint Eastwood’s Nikon F was eye catching in black with an chrome eye-level prism, but for me it has to be Dennis Hopper, festooned in Nikon Fs, as a crazed Photojournalist in Francis Ford Coppola’s Apocalypse now that steals the show. I found Hopper’s role interesting enough to write an article on it: The Photojournalist of Apocalypse Now.

There are the other films the Nikon F plays a part in: Blow-Up (1966); The French Connection (1971); Diamonds are Forever (1971); Apocalypse Now (1979); Cannonball Run (1981); The Year of Living Dangerously (1982); The Killing Fields (1984); Full Metal Jacket (1987); Gorillas in the Mist (1988); Groundhog Day (1993); The Bridges of Madison County (1995); City of God (2002); Walk the Line (2005); Ford v Ferrari (2019).

Nikon F Hall of Fame

You can also peruse an excellent Nikon F Wall of Fame, featuring the likes of Mick Jagger, Sean Connery and many more.

Shooting with the Nikon F

The Nikon F still has some rangefinder DNA so loading film isn’t like other Nikon SLRs. I am not a big fan of the bottom-loading system, but if I was shooting regularly with the F, I’m sure I’d get used to it. Other than that, it’s remarkably straightforward.

Nikon F Brill Windmill
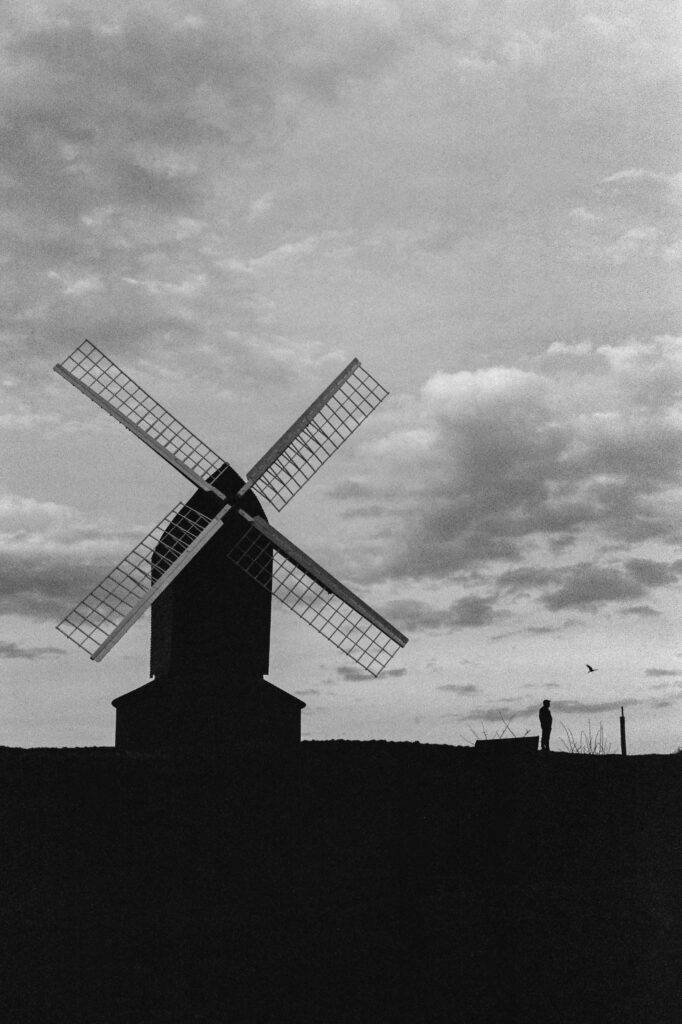
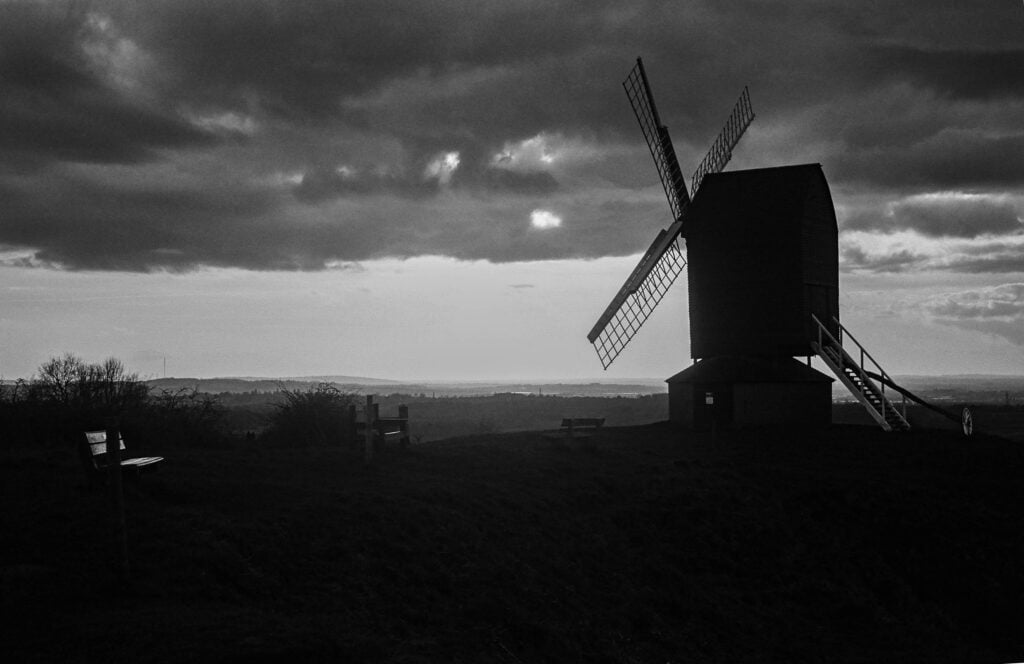
Man, Bird Windmill. Brill Windmill, shot with the Nikon F

Loading Film

To load film, you turn the lock on the bottom plate from ‘closed’ to ‘open’ and the camera’s bottom plate and the back cover come away as a single unit. Next, insert the 35mm film roll into the film chamber on the left side, and then thread the film leader onto the take-up spool on the right as normal.

You will need to set the ‘A-R’ ring around the shutter release button on the top plate to “A” (Advance), then wind the film on so that it passes under the take-up spool, ensuring the film meshes with the sprockets. After that, you can then replace the camera back and lock it by turning the lock to the “close” position. The shutter can then be cocked and released until the frame counter displays “1”. The counter resets itself automatically to two frames before zero when the camera back is removed, so it should just be two shots.

Speaking of which, the frame counter is located in the centre of the film advance lever. Opposite the frame counter is a reminder of the total number of frames – this is set manually using a tiny indicator pin on the dial.

On the bottom plate there is film-speed reminder which can be set manually to indicate colour or black and white film and to set a reminder of the ISO. One quirk is the flash sync, which consists of a pair of vertical contact points either side of the rewind knob for the F accessory hot shoe.

Shooting

After loading the Nikon shooting is extremely simple straightforward. With the eye level finder the Nikon F offers no light meter, and there’s no automation. You just set the aperture and shutter speed and focus. The viewfinder, unencumbered by a light meter display, provides a clear, bright view of whatever you are shooting. The maximum shutter speed is 1/000 if a second which is fine unless you are shooting with a large aperture on a very bright day.

Serial Numbers and Model Variants

Nikon F bodies were produced between March 1959 and October 1973. You can date your camera from the serial numbers. The earliest Fs are 640xxxx.

Nikon F
An early Nikon F with the Nippon Kogaku triangle logo

Early Nikon Fs can also be identified by a self timer with slanted serrations, a prism engraved Nippon Kogaku rather than screen printed, a back with patent pending numbers and marked ‘Made in Japan’ on the closing lock. Later models had this inscription on the baseplate near the tripod socket. Sometime in the 67xxxxx series the inscription on the top plate changed from the Nippon Kokaggu triangle to Nikon. This detail is shown left from an early (first 1000) model which at the time of writing was for sale at Grays ofWestminster.

The latest series was 745xxxx, and the very last model was 7451052. Based on that we can tell that around 745,000 cameras were shipped.

Nikon gave the 500,000th F to the photographer who had the biggest impact on the rise of Nikon, David Douglas Duncan.

The Nikon F ‘Apollo’

This is less exciting than it sounds, as the late model ‘Apollo’ variant of the Nikon F has minor cosmetic changes to match parts used on the F2 which was in production by that time. There is no actual link to the space program, other than time of manufacture. The Apollo updates are a plastic-tipped F2 type advance lever and self timer and stronger strap eyelets and start at 7335000. Later Apollos had an F2 type threaded PC connection also. Around 116,000 ‘Apollo’ Fs were produced.

The Nikon F Red Dot

In 1965 when Nikon introduced the first TTL metering finder, Photomic T, the top plate of the Nikon F was slightly revised and Nikon added a red dot in front of the serial numbers to designate the modified bodies. The red dot appears on body serial numbers 659xxxx to 66xxxxx (approximately). Bodies from 67xxxxx onwards incorporated the revision without the red dot. 

Motor Drive Models

The F36 motordrive was based on the system pioneered by Nikon’s S2 Rangefinder, the S36 and came from the factory matched and synchronised to a specific body. In this configuration the Nikon F offered offered 3 frames per second (fps). This was with the automatic mirror and diaphragm in operation and maximum speed could be increased to 4 fps with mirror lock up (MLU). There was also a 250 exposure version. In 1971 the F High Speed model delivered a 7 fps with MLU, and in 1976 a new High Speed model bettered this with an equivalent 9 fps for photographers at the Montreal Winter Games.

Finishes

There were two finishes available at launch: satin chrome metal/black leatherette and black enamel. The engraved letters, numbers and symbols are black-filled on chrome-plated bodies or white-filled on black-painted bodies. Well used black Nikon F bodies that display paint wear, particularly on edges of the covers are said to have become brassed, which was a badge of honour amongst professional photographers.

Black eye-level F’s are usually more expensive as they are less common and the association with black with professional photographers. In 2024 a mint copy like this is selling for a little over £1,000 on eBay.

The Photomic Head

The first Nikon F meters were clip on Selenium meters attaching to the top of the camera over the prism and shutter speed dial. Being Selenium meters, they did not need batteries.

The Nikon F with Photomic Head

The Nikon F’s “flag” Photomic meter head of 1962 introduced the F’s first built in light meter, ingeniously including the prism and meter in one unit.   Sadly it is bulky and asymmetric, and to my eyes ugly, but by placing the meter in the prism head assembly, Nikon was able to continually update its metering system at a relatively low cost.

In 1965 the Photomic T introduced TTL (Through the Lens) metering, in 1967 the Photomic TN followed with centre-weighted metering and 1968’s Photomic FTN displayed shutter speeds in the finder. If you are set on a Photomic the FTn has a greater film sensitivity range and a larger aperture coupling range in addition to the shutter speed display, so it makes the most sense.

I’m sticking to my eye level prism. As much as I like a built in light meter, the lines of the Nikon F are just too good to spoil with the Photomic. I have one on my F2 and it feels like a more acceptable trade off, but I just can’t take the ‘F’ off the F.

Purchasing a Nikon F

As with all classic or vintage film camera bodies the main consideration is the condition of the shutter. Whether a beater or a mint example, you want a Nikon F with a titanium foil shutter free of perforations, ripples, or little tears at the edges. If you are able to do a hands on inspection it is also worth checking that each of the shutter speeds trigger the shutter. Shutter speeds can of course drift and become inaccurate over time which is hard to detect pre purchase, but can usually be corrected (or at least improved) with a good CLA (Clean Lubricate and Adjust).

After that check for dark patches in the viewfinder which could be a sign of an ageing prism, which is de-silvering. This is a fairly common problem. Finders tend to be pricey for Fs so getting one with a good prism is important.

I have seen accounts that say the Nikon F does not have door seals – and others that say that it does but they are hard to see and never need replacing! Regardless, there are definitely mirror and prism cushions which can deteriorate, but there are kits available to replace them.

Successor – The F2

The Nikon F had a number of design issues originating from its evolution from the Nikon SP rangefinder, most notably the removable back. Another issue was that electronic metering had been added, rather than designed in from the start. Nikon listened to its user base and developed a successor, with an internal design mantra of “quicker and stronger.”

The new F2 of 1971 offered a rounder body, a swing back and a more comfortable plastic-tipped film advance lever. The F2 was also designed for metering from the start. The battery holder was moved to the bottom of the camera and the batteries were changed to more modern silver oxide cells, activated by an on/off switch that was changed to be a partial pull of the film advance lever.

The result was a mechanical SLR that is considered by many to be the finest ever produced. It is an improved and more practical camera but it does not have the same place in my affections as the Nikon F.

Thoughts and Further Reading

If you have experience with shooting a Nikon F, I’d love to hear from you. Please leave me a comment below. You might also find the following articles on this site interesting:

The Konica I Rangefinder

March 15th, 2024

If you are familiar with early rangefinder cameras, the Konica I (1947-1951) will look and feel familiar enough. If not, and it is your first encounter with a rangefinder, or if you are used to modern rangefinders, the little Konica offers a distinct shooting experience.

Konica I Rangefinder
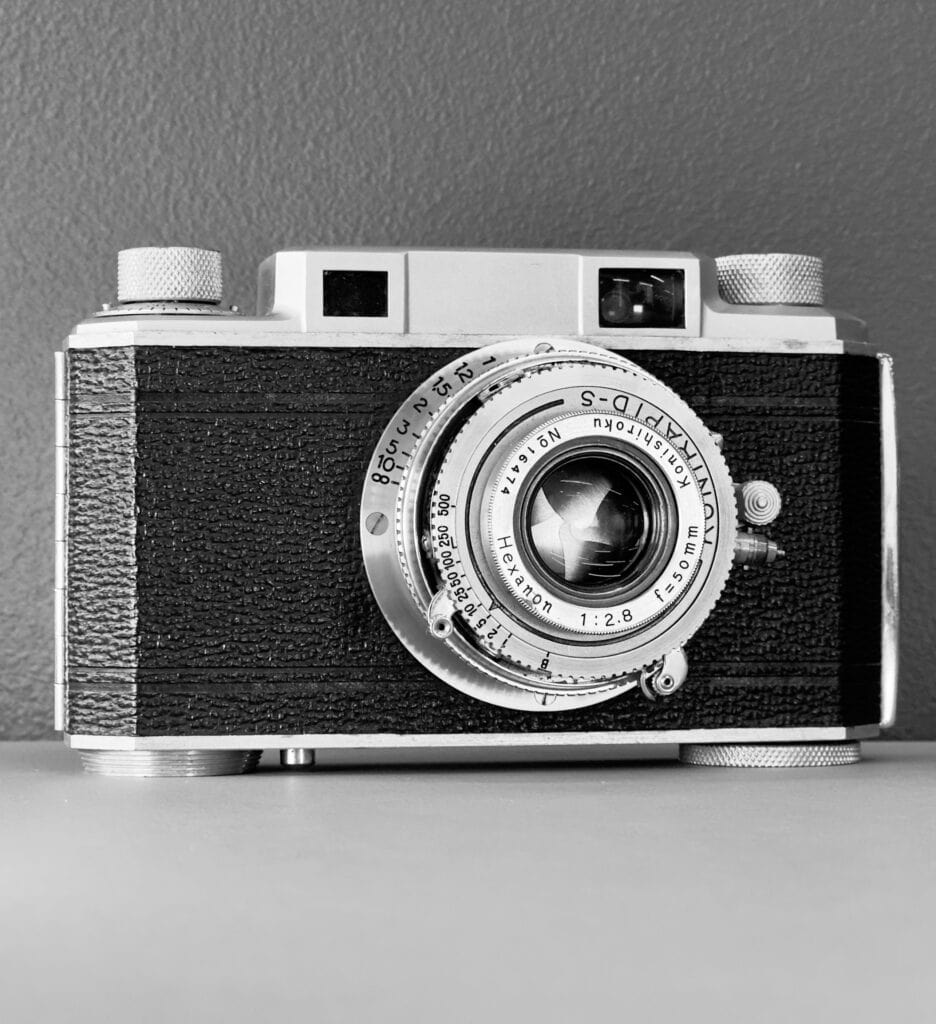
The Konica I Rangefinder. This is a Type F from 1951.

The Konica I is based on the design of a late 1930s 35mm prototype called Rubikon, which was re-purposed for X-ray photography during WWII. After the war, Konishiroku (the company name at that time) returned the Rubikon to its original design and renamed it ‘Konica’. This was derived from ‘Konishiroku’ and ‘camera’, a similar naming convention to ‘Leica’ and ‘Yashica’. The result was the 1947 Konica I rangefinder, the company’s first 35mm camera.

Whilst researching the Konica rangefinder, I discovered that Konica has a long and fascinating history with many firsts and wrote a short article on it, which you can find here.

Early Rangefinder Development

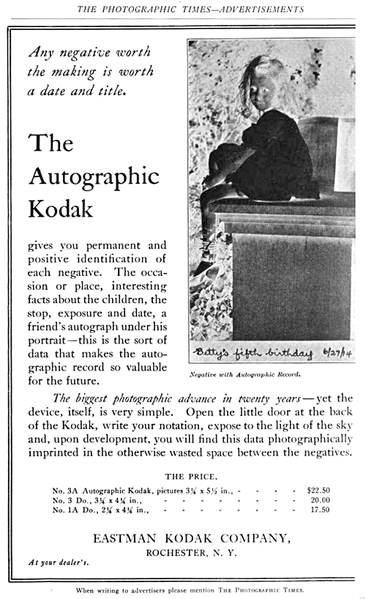
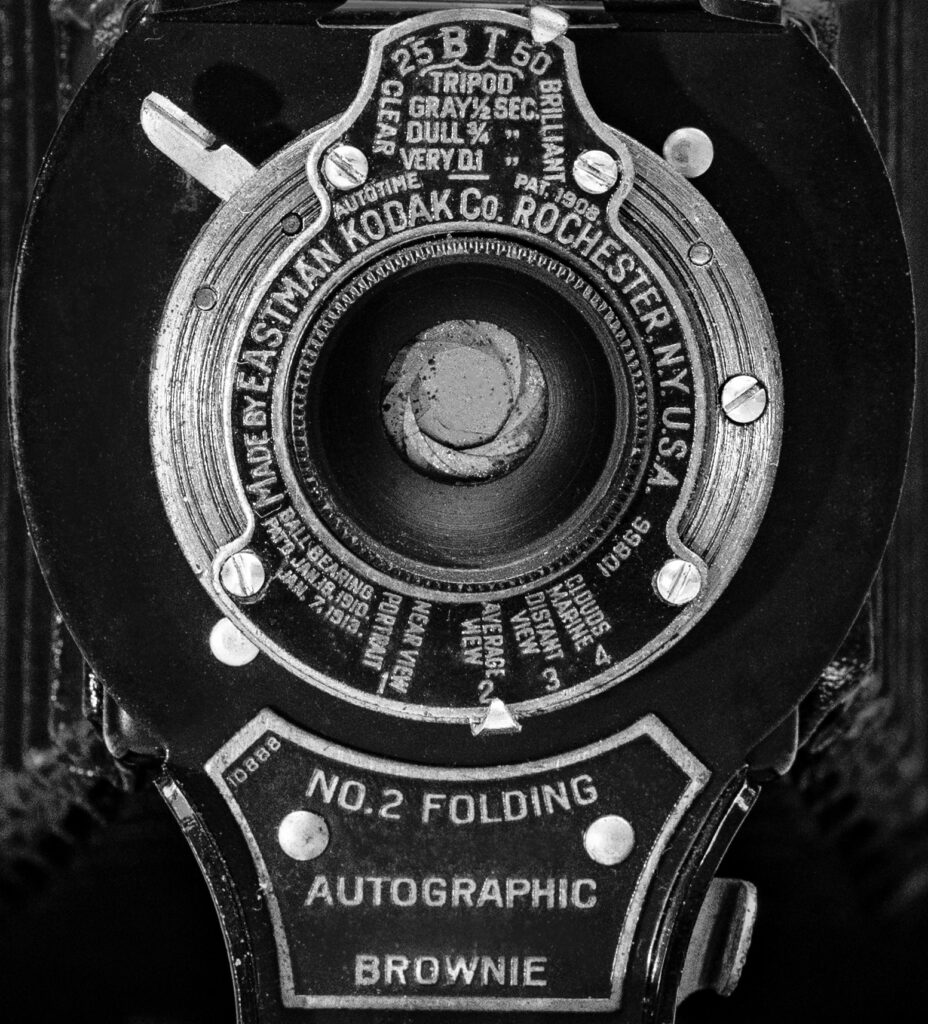
The first rangefinder cameras, sometimes referred to as “telemeters” – a pleasingly futuristic sounding term – appeared early in the twentieth century. Kodak was first to market with a coupled rangefinder camera in 1916 with the Kodak 3A Autographic Special. Kodak’s pioneering autographic feature creates another interesting diversion – you can read about it in my review of The Kodak No. 2 Autographic Brownie.

The Leica I of 1925, not itself a rangefinder camera, popularised the use of accessory rangefinders. A few years later in 1932, The Leica II and Zeiss Contax I were launched and gained popularity. In 1936 the Contax II integrated the rangefinder into the viewfinder, an innovation that was introduced by Leica only in 1954 with the legendary M3.

The Konica I Rangefinder

The Konica I is a coupled rangefinder film camera with a single eyepiece and an excellent 50mm Konishiroku Hexanon coated 50mm f/2.8 lens. The Hexanon is a Heliar type with 5 elements in 3 groups and the Konirapid-S leaf shutter offers speeds of 1–500 second and Bulb (B).

First Impressions

The first thing you are likely to notice about the Konica I is how solid it feels. While it doesn’t have quite the ‘milled from solid steel’ feel of a Leica M3, it has a real quality feel to it.

Konica I Rangefinder
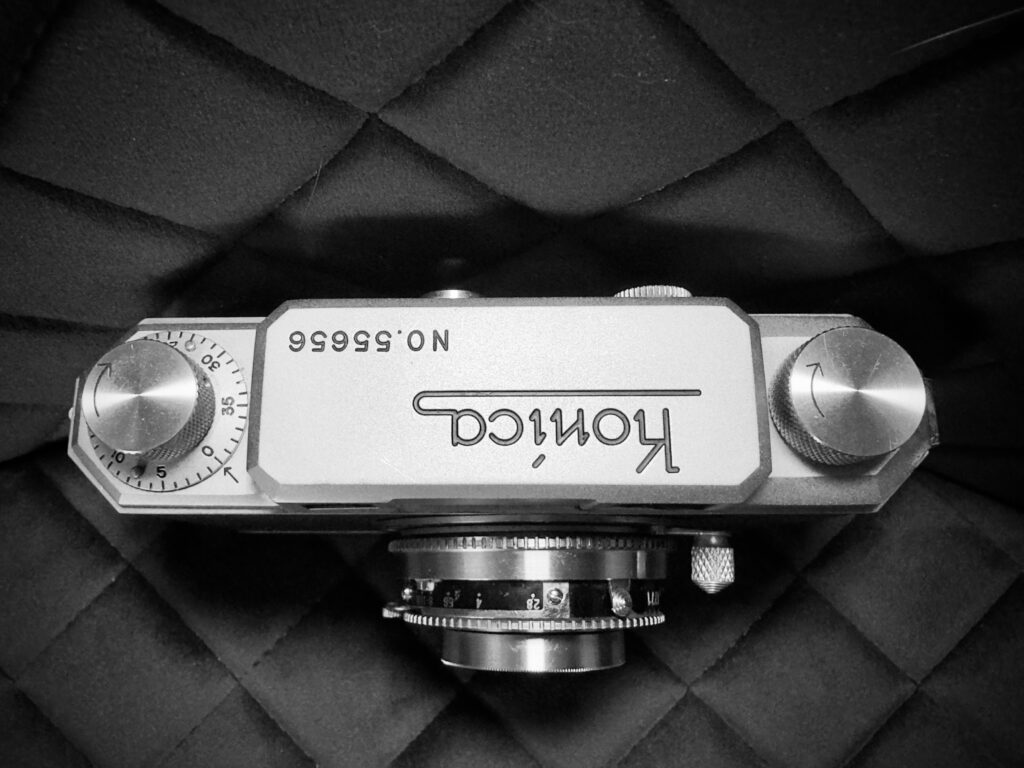
Top view of the Konica I.

Significantly, the rangefinder is bright, which is another hallmark of quality. Moreover, unlike many early rangefinder cameras, there is a single window rather than two separate rangefinder and viewfinder windows – like the Leica M3 of 1954. Unlike later Konica rangefinder models, there are no framelines and no parallax compensation, which is reflected in some poor framing on the first roll of film I shot.

Like many cameras with leaf shutters in the first half of the twentieth century, most of the controls including the shutter cocking lever, shutter release, shutter setting ring (and scale) are on the lens barrel. Right at the front is the shutter speed dial. The lens itself is retractable and requires pulling out and turning to lock in place, which is the same as on the Leica I.

A Closer Look

The top plate is engraved ‘Konica’ with the serial number (see variants below), and there is a winding knob, rewinding knob and a frame counter. On the rear of the top plate is a single rangefinder/viewfinder eyepiece and an unmarked, initially mysterious, button. Below, the bottom plate has a locking disk for opening and closing the camera back, a small silver film rewind button and a tripod socket.

Like many rangefinders, the Konica I uses helicoid focusing. This system rotates the lens element along a helical thread and moves it closer or further from the film plane. It was adopted by Oscar Barnack of Leica for the precise and repeatable focus in a short throw that it offered. Focus is operated via a ‘fingertip lever’ on the lens barrel, where the distance and (tiny) Depth of Field scales are engraved. The focus range on my model is 1-10m and infinity.

A useful cable release can be found on on the lens barrel along with a less useful (for me) and rather obtrusive flash connection post (or plug), which is marked bright red. The flash sync speed for those models that have it is 1/50 second.

I don’t know what the rangefinder base of the Konica I is (though I could measure it), nor could I find the viewfinder magnification. Accordingly, I can’t work out the rangefinder’s Effective Base Length. However, as the Konica I features a fixed 50mm lens that’s not too much of a concern; long lenses or ultra fast lenses make this a more important consideration.

Konica 1
Brill Windmill at dusk, shot with the Konica I rangefinder

Loading

Loading the Konica is simple enough. You open the camera back by turning the locking wheel on the bottom plate from ‘C’ to ‘O’ in the direction of the marked arrows. Insert the film canister into the camera, and pull the film leader across to the take-up spool in the normal fashion, engaging the film perforations onto the sprocket. You can then advance the film with the wind on knob on the top plate and reset the exposure counter to zero.

Shooting with the Konica I

Shooting is slower and requires a few more steps than later rangefinders, as the controls are not connected in the way that they are on later models. The shutter is not cocked by the film advance – this came with the Konica III in 1956; the shutter has separate levers for cocking and firing, and the winding knob needs a separate winding button (the mystery revealed!) to drive the exposure counter.

In a charming review of the Leica I Model A: First review of the new 1930 model the reviewer ‘Cyclops’ describes this feature as a film advance computer.  He goes on to remark that “this intelligent and pioneering system clicks along, frame by frame, so you always know exactly where you are. What will they think of next? The same review describes the shooting process as Having wound on your film set your aperture, decided on exposure time, calculated the distance to the subject and framed the scene you are ready to go“. This is similar to what you will experience with the Konica, though with the luxury of a single window.

Preparing to Shoot

Before taking a picture, firstly pull out the lens and twist left until it locks in place. Failure to do this will result in very blurred pictures. There is only one true locking position, but it can feel like it is locked in others.

Secondly, make sure you have removed the lens cap. This is obvious, I know, but rangefinders can’t ‘see’ through the lens, so if you leave it on, you won’t notice any difference in the viewfinder.

Thirdly, you’ll need a light meter reading or use the Sunny 16 rule – there is no built-in light meter. I am OK at estimating lighting, but I prefer to confirm with a meter. I use an app on my iPhone (myLightmeter Pro), which works really well and is very convenient.

Shooting Steps

Here are the shooting steps. As you will see, there are a couple more than you would find on later rangefinders like the Leica M3.

  • Set the required aperture using the iris adjustment tab at the bottom of the lens barrel. It is quite small and is marked with concentric rings.
  • Set the required shutter speed with the shutter speed dial at the front of the lens barrel.
  • Focus the lens using the knurled focus lever. It has a nice smooth action.
  • Cock the shutter using the lever on the lens barrel. If the shutter is uncocked the lever is visible in the viewfinder window. The back of the lever is painted red to act as a flag.
  • Fire the shutter using the shutter release trigger using your index finger. This felt natural to me after just a few frames.
  • Press the frame counter button
  • Wind on the film (full turn) to the next frame.

I noticed a couple of things when I took my first roll of film. Firstly, the shutter release is very sensitive and so has a finger support to prevent accidental releases. Secondly, there is no automatic double exposure prevention, as you can always cock and release the shutter. Perhaps unsurprisingly, this was corrected by the Konica II, but for Konica I users this combination can lead to wasted frames.

The overall experience is satisfying if you enjoy slow photography and the quality of the images is excellent. However, the wind on button does take some getting used to.

Konica I
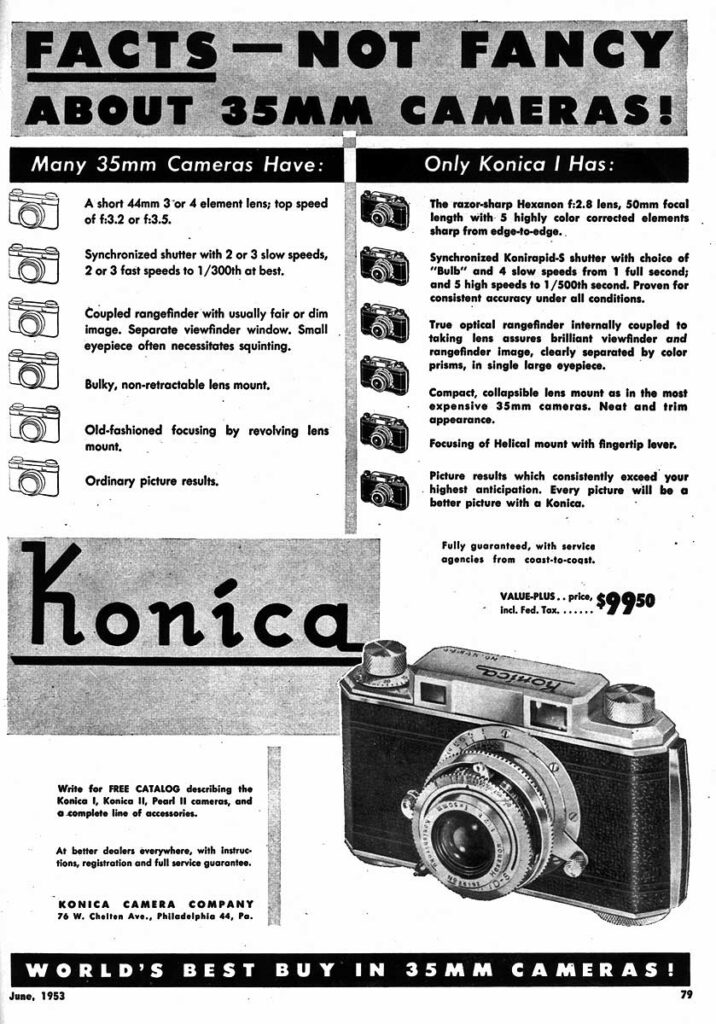
A US Ad for the Konica I

Manufacturer’s Instruction Manual

If you are looking for more information on shooting the Konica I, you can find a scanned copy of the Konica I Rangefinder manual at Mike Butkus’s site.

Identifying Model Variants

During my research, I found that my Konica I (which I purchased from the excellent Coeln Cameras) is a Type F. I also discovered that the camera was originally known just as The Konica and only gained the designation  Konica I, or Konica Standard later.

Type Ab and As models had ‘Made in Occupied Japan’ engraved on the top plate, whilst B and Type C models had this embossed in the bottom leatherette. Type C can be distinguished form the B as the name ‘Konishiroku’ is omitted from the back door. Subsequently, the Type Cs introduced the Konirapid-S Shutter, whilst the Type D updates the text on the camera bottom to read ‘Made in Japan.’ Type E introduced the Hexanon f/2.8 lens. Finally, the Type F can be identified by the ‘Made in Japan’ engraving on the metal door lock wheel on the bottom plate.

Lens Variations and Serial Numbers

Konica I Ab and As models were fitted with the f3.5 Hexar lens. With the Type B and C models a Hexar f2.8 version became available and the superior Hexanon f2.8 was introduced with the E model. According to the Konica Collector website, the f3.5 Hexar serial numbers run up to 37,600, the 2.8 Hexar to 46,000 and the 2.8 Hexanon to 68,700.

Pros and Cons

Pros

  • Combined viewfinder and rangefinder with bright rangefinder patch
  • High quality construction
  • Excellent f2.8 Hexanon lens
  • Compact with retractable lens
  • Inexpensive to purchase

Cons

  • No double exposure prevention
  • Need to remember to press the wind on button before advancing the film
  • No strap lugs
  • No parallel compensation
  • Highly sensitive shutter trigger easy to release accidentally

Thoughts and Further Reading

Konica I
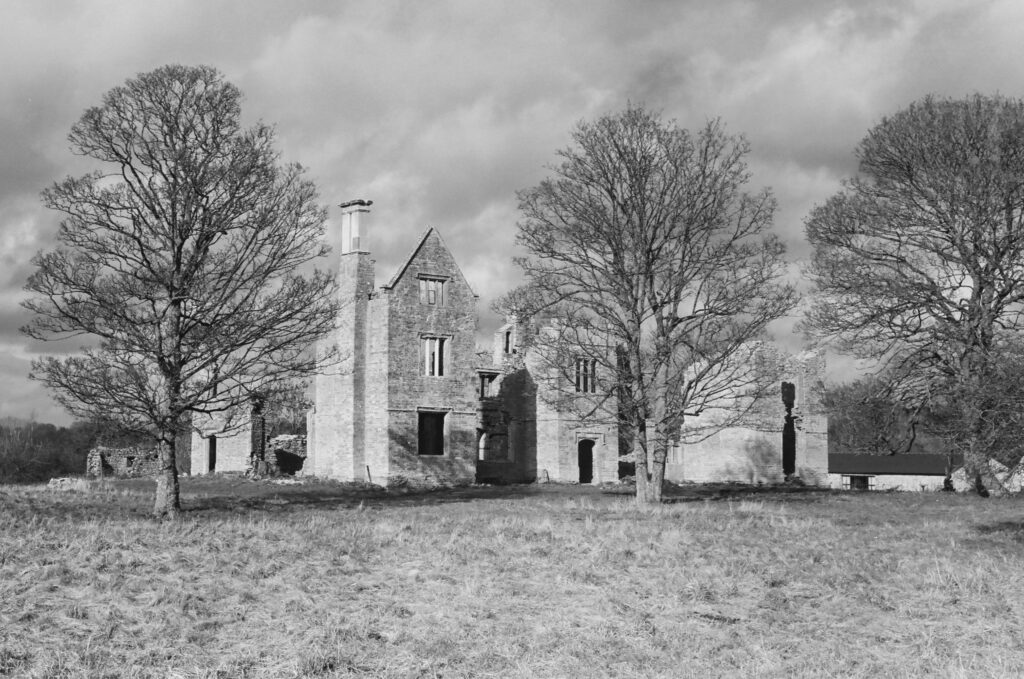
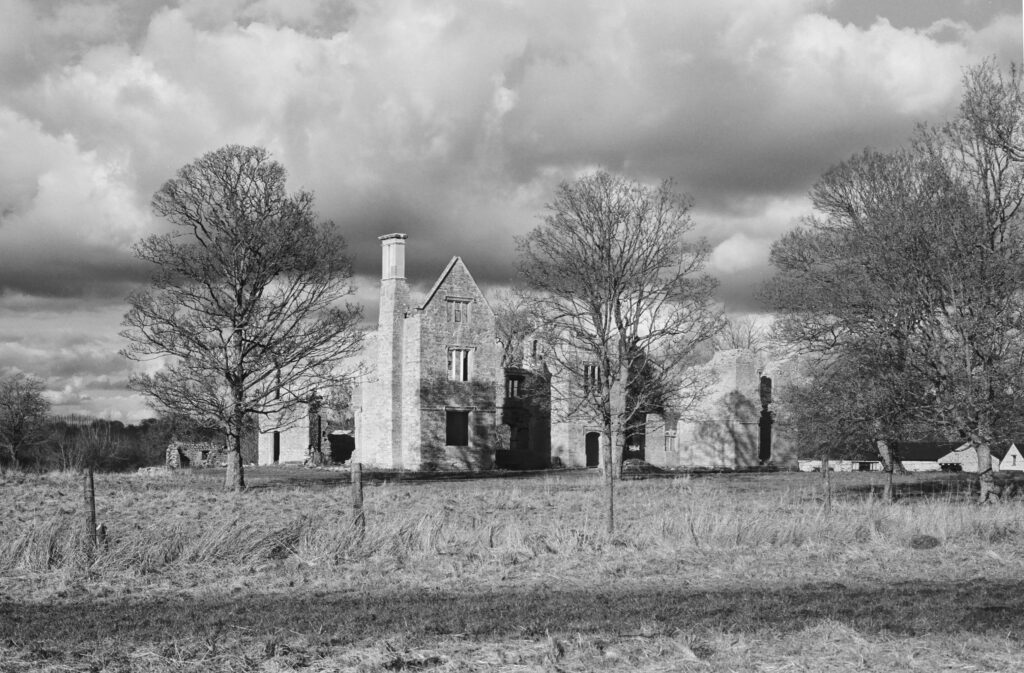
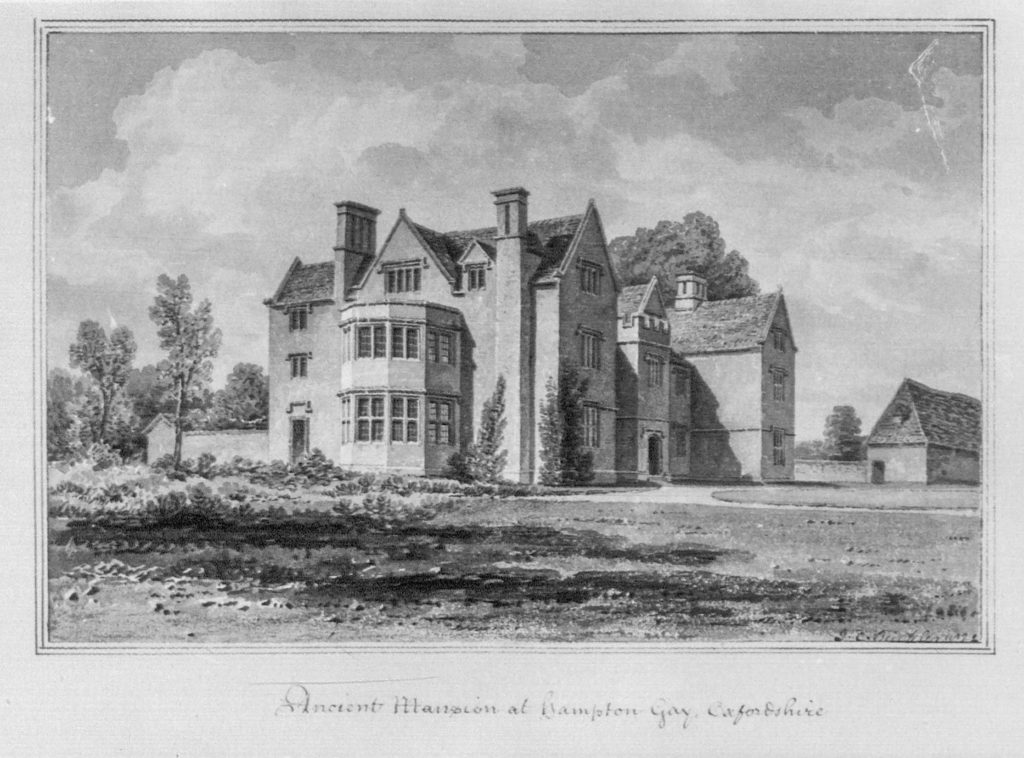
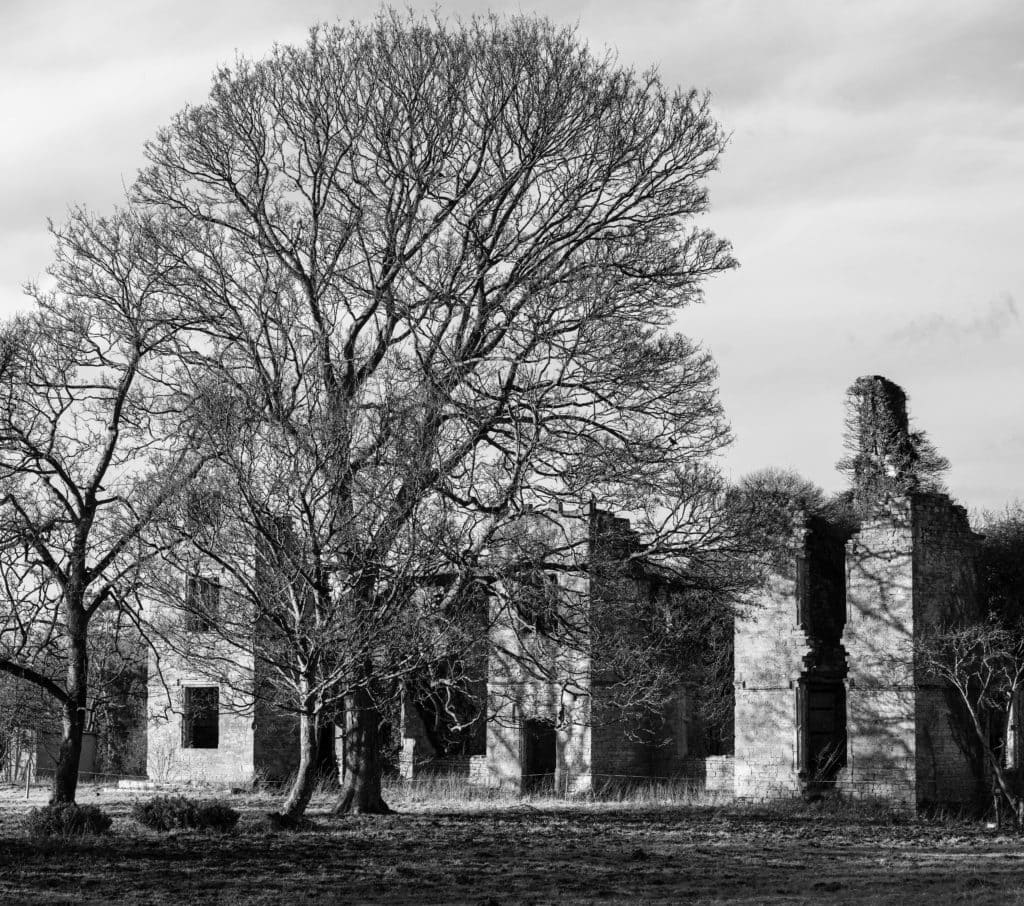
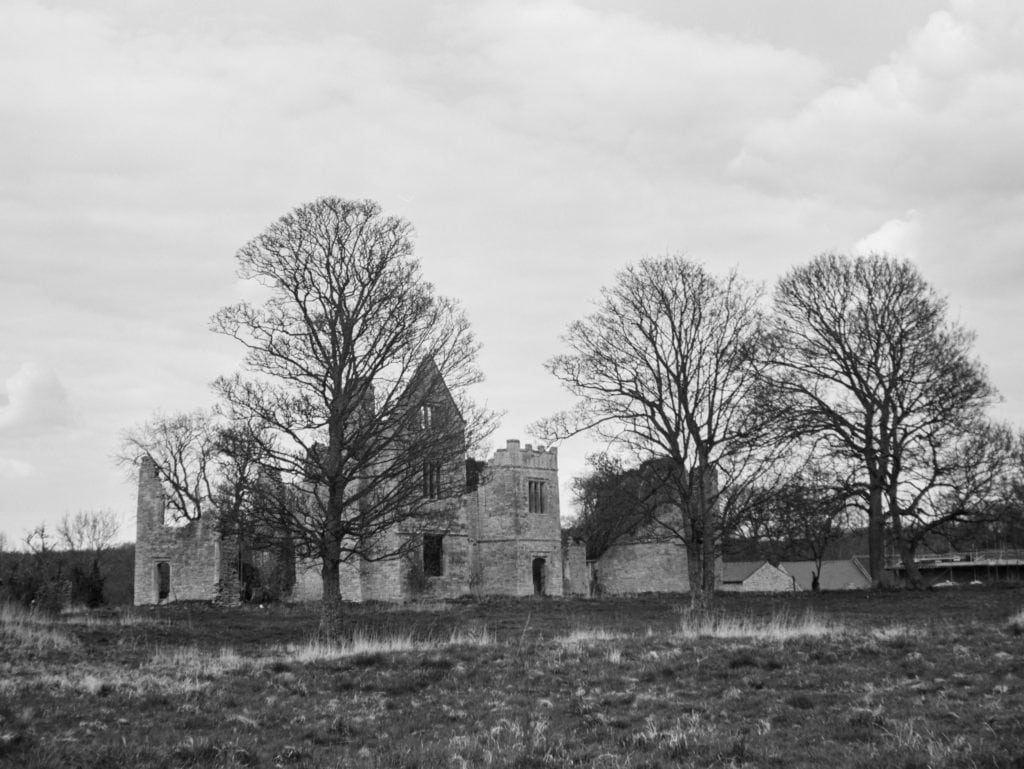
The Ruined Manor at Hampton Gay, 2024, shot with the Konica I

If you have thoughts or experiences you’d like to share on the Konica I, I’d be delighted to hear from you – please leave me a comment below. There is more to read on classic cameras, the history of photography and travel on this site. You might be interested in these articles:

The Understated Genius of Saul Leiter

March 11th, 2024

Saul Leiter – An Unfinished World

I have long enjoyed the photography of Saul Leiter and my admiration for his work was increased by visiting the “Saul Leiter: An Unfinished World” exhibition at MK Gallery, curated by Anne Morin.

Saul Leiter
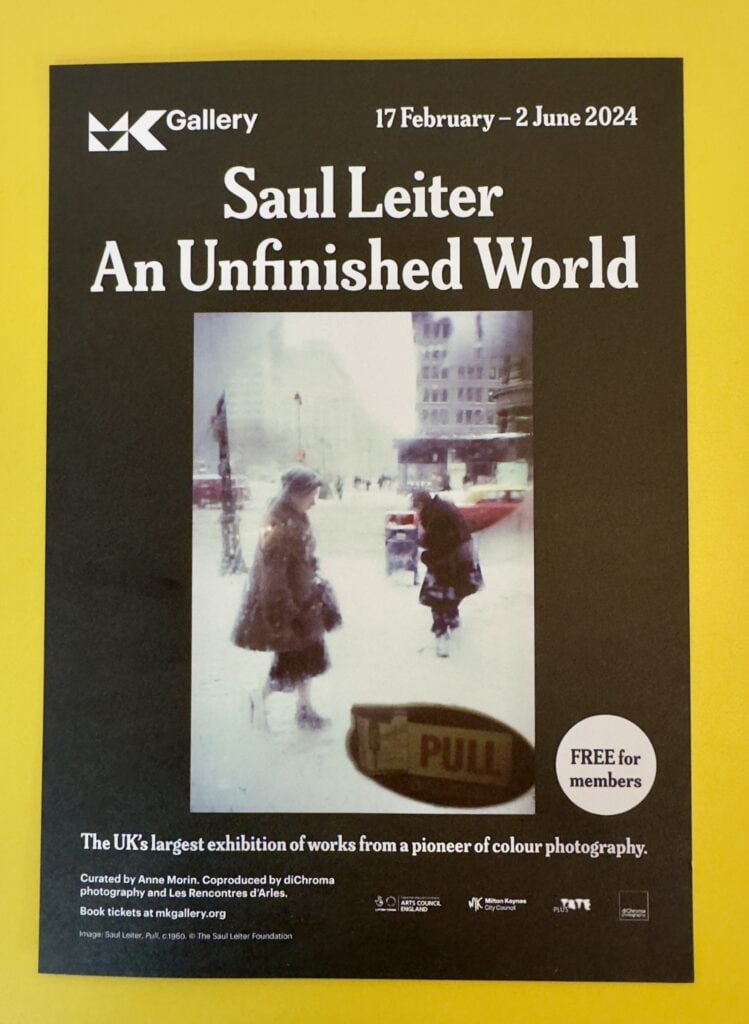
A flyer for the exhibition shot on a bright yellow table at the MK Gallery

This exhibition mixes Saul Leiter’s colour and black and white photographs, paintings and commercial fashion photography. There is a comprehensive chronology printed on the wall but the exhibition “encourages encourages viewers to find their own relationships and paths through Leiter’s unfinished world.” Given Leiter’s work and the world-view that underpins it, this approach makes a lot of sense.

The title is equally apposite and befits a collection of ‘tiny fragments of an unfinished world’. This was his world view, “little pieces of images juxtaposed and conjoined, to form ever-expanding fields.”

Many of Leiter’s pithy quotes adorn the walls, which I found both helpful and inspiring. All in all, it is a fine and very worthwhile exhibition. A review in the Guardian called it a “glorious survey of an impressionist with a camera.” I completely agree with that assessment, but the exhibition unlocked something I didn’t expect – an encounter with the person behind the lens. To my great surprise I found Saul Leiter the person as inspiring as his work.

The Photography of Saul Leiter

Saul Leiter had no formal training in photography, but the genius of his work was recognised by the influential Edward Steichen, who included it in two important MoMA shows in the 1950s.

Leiter’s work is characterised by abstract form and bold composition. He did a great deal of very fine black and white work which makes much use of much shadow and blur, and I enjoyed it greatly. However, it is his colour slide photography that has had most impact on me.

I like it when one is not certain of what one sees. When we do not know why we are looking at it, all of a sudden, we discover something that we start seeing. I like this confusion.

The experience Leiter describes here is often that of the viewer of his photography. There are large expanses of negative space, sometimes enveloping a detail; abstract lines that resemble brush strokes; reflections, fogged glass; fog; shadows and silhouettes. Much of street photography has a documentary feel but Leiter’s takes it to another more abstract, impressionist dimension.

He often makes use of steamed up windows for their abstracting quality, uses snow as a flat white backdrop and blurs foreground objects . He sometimes used expired colour film, which could produce surprise colour shifts.

Street photography depends greatly upon chance encounters, but as the Guardian review of the exhibition noted, “He finds chance and arbitrariness because he is looking for these things, and uses all his artistry to bring them out.”

He has other recurring themes. In addition to the inclement weather, translucent materials and properties of light that help him him gently smear his palette he regularly returns to cars, buses, hats and famously, umbrellas.

Painterly Parallels

His work is painterly, with fans and critics seeing parallels to the work of great artists like Edward Hopper, Piet Mondrian and Mark Rothko. The parallel with Hopper strikes a chord with me. I have seen some of Hoppers’ work, most notably, Nighthawks, in The Art Institute of Chicago. There are similarities in both the colour palette and the emotional undercurrent, though it occurs to me that Leiter’s urban experience is more about introversion than the isolation Hopper is known for.

Art critic Roberta Smith wrote in 2005: “Mr. Leiter was a photographer less of people than of perception itself. His painter’s instincts served him well in his emphasis on surface, spatial ambiguity and a lush, carefully calibrated palette.”

Harlem, 1960

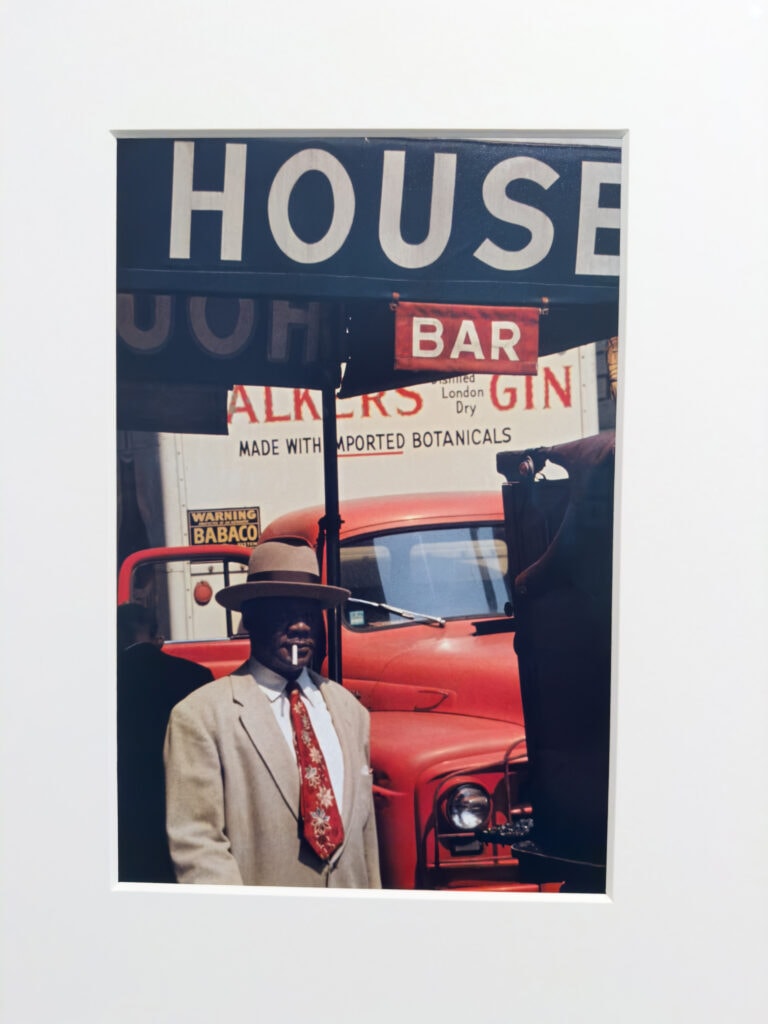
One of the photographs that impressed me the most at the exhibition was one of his most famous photographs: Harlem, 1960. There is great description of the image in The arts desk: “A black man in a panama hat and beige jacket smokes a cigarette as he walks under the black awning outside a bar. There’s nothing to this chance encounter with a passer-by, except for an amazing synchronicity of colour. The man’s beige jacket matches the lettering on the awning announcing HOUSE, while his tie matches the red cab of the lorry parked behind him and the lettering on the vehicle advertising Walker’s Gin. A man in a black coat walking the other way frames the left side of the picture while a black dustbin frames the right side. The coup de grâce is the beige and red sign overhead that reads BAR and completes the colour composition.

Saul Leiter
Harlem, 1960 by Saul Leiter

If this were a painting by Whistler, the image might be called Harmony in Beige, White, Red and Black and it would have been artfully contrived. Leiter’s photograph, on the other hand, was completely unplanned. “I’ve never had a system or a project,” he insisted. “I don’t go out looking for things. I wander around with my camera, like a flâneur.” The paradox is that he responded to “unimportant things” spotted en passant, yet the viewer often has to spend time unravelling this split second of information.

The Unseen Saul Leiter

Much of his colour work was taken on slides. This enabled Leiter to project his photographs on the walls of his apartment, which was important to him as he couldn’t afford to have prints made at the time.

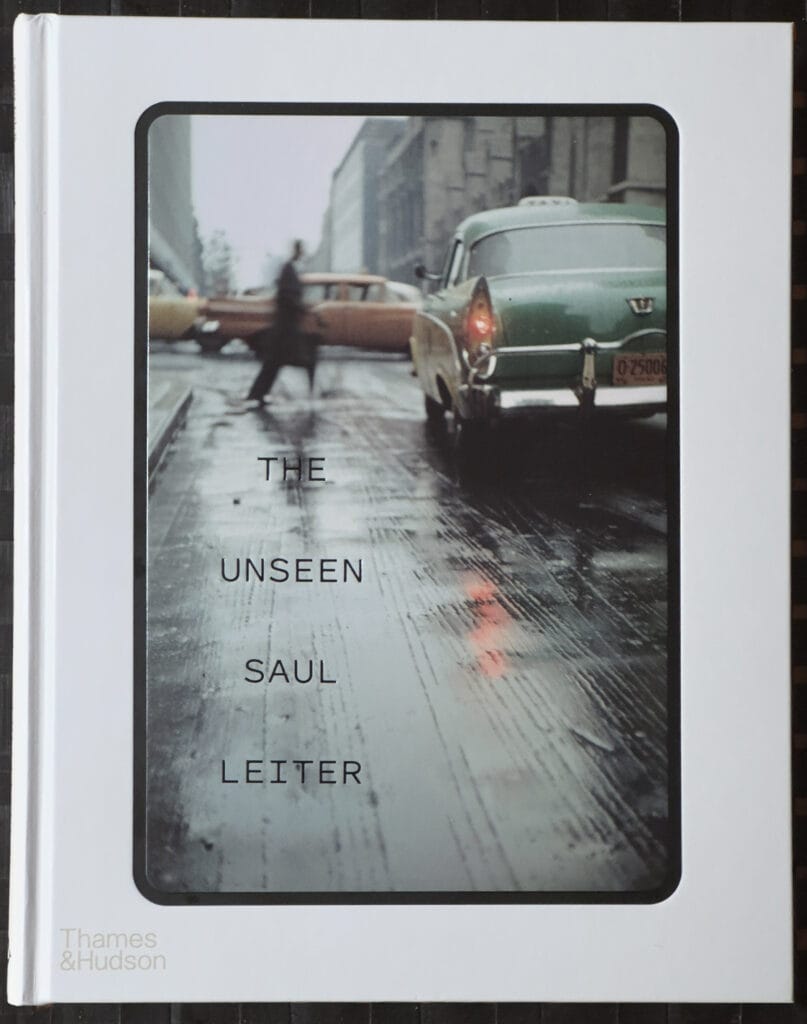
The MK Gallery bookshop had a copy of The Unseen Saul Leiter, which is a book of 76 Colour slides with several chapters of commentary. Most of the slides are Kodachrome, but some are Anscochrome or Ektachrome.  The images were taken mostly in the years 1948 to 1966, Saul’s first two decades of living and photographing in New York.

The book is important as, until it was published, the majority of Leiter’s images known to the public were those published in Early Colour, which largely introduced his extraordinary talent.

The origins of The Unseen book were an academic project. In 2017 the German scholar Elena Skarke approached the Saul Leiter Foundation because she wanted to write her dissertation on his work. She visited his studio (now the foundation’s headquarters) and decided to focus on the colour transparencies for her research.

Saul Leiter
My copy of The Unseen Saul Leiter, resting on a black bamboo table mat

The Unrecognised Pioneer of Colour

Saul Leiter was a pioneer in the use of colour photography. In the 1940s, when black and white photography was the norm for serious work he embraced colour, which he used in a completely unique way, often using a 150 mm telephoto lens in his colour street photography, the compressed view contributing to provided the painterly feel.

Colour Photography in the 1940s

At that time colour photography was the realm of ads and amateurs. Walker Evans, the famed documentary photographer of the great depression called colour photography “vulgar,” and he was far from alone in this sentiment.

One day I bought a roll of colour film and I took pictures. Then I got a small box with slides. I liked what I saw. I liked colour even though many photographers looked down on colour or felt it was superficial or shallow. – Saul Leiter

Colour Photography in the 1970s

The recognised pioneers of colour photography were William Eggleston, Helen Levitt and Stephen Shore, who gained recognition much earlier than Saul Leiter, becoming famous advocates for the medium in the 1970s. Sadly, Leiter barely made a footnote at that time.

For many years William Eggleston was recognised as the first photographer to use colour as a defining artistic choice. Happily that that view is fading and Leiter is getting the recognition he deserves – along with a better sense of perspective. After all, Alfred Stieglitz made and exhibited colour photographs using the Autochrome process in 1909.

Whilst I respect the work of all of those photographers, it has not had the same impact on me as Saul Leiter’s. He is in that very small group of photographers for me whose work is arresting in the true sense of the word – it stops you in your tracks. A few of those photographers have articles of their own on this site, including Cindy Sherman, Vivian Meyer, William Klein, Fan Ho and Brassaï.

Perhaps being left alone in relative obscurity helped him develop his unique and introspective world view. Geoff Dyer, in a review of his work in the Telegraph asked what it meant to be an ignored artist and asserted that “For Leiter – left alone to his colourful craft – it was the making of a master lensman.”

Zen Saul

Leiter was a thoughtful man with diverse influences. His library consisted of thousands of books and he was influenced by Japanese woodblocks and ink paintings as well as impressionist and post-impressionist painters.

During the research I conducted after the exhibition I came across an article by freelance photographer Belinda Jiao entitled Saul Leiter Street Photography Analysis: Techniques, Influences, Philosophy which shed more light on the influence of Japanese culture.

Love of Japan

I learned that he loved all things Japanese, which is a passion I share with him. The Ten Days In Japan I had in 2015 were wonderful. Belinda provides an illuminating quote from Pauline Vermare, the curator of the exhibition Photographer Saul Leiter: A Retrospective: there were etchings of paintings by Koryusai hung on his wall; among the heaps of collected items were Japanese calligraphy papers, vinyl records of Japanese musicals, and a massive library of books dedicated to Japanese literature, poetry, ceramics, ukiyo-e and Zen.

The same article describes the strong parallels between Leiter’s work and Zen Buddhism, which celebrates the living in the moment yet without attachment to earthly pleasures. It is also a shared characteristic also commonly found in Japanese ukiyo-e (translates into ‘Pictures of the Floating World’) prints, which has a strong emphasis on depicting the here-and-now, the banal fragments of being human.

The article also pointed out the correlation between Leiter’s choice of subject matter and those that feature regularly in ukiyo-e art – everyday life objects and elements of weather.

Although Leiter rejected the notion that he had a philosophy at all, the more you examine his work and its influences the more you appreciate his depth.

I don’t have a philosophy. I have a camera.

Increasingly, I wonder if that quote is accurate, or whether it is just a reflection of Leiter’s lack of ego.

The Prophets – Impressionism & Les Nabis

Saul Leiter’s biggest influences in the art world were the post-impressionist artists Pierre Bonnard and Édouard Vuillard, who were both members of ‘Les Nabis’, which means ‘the prophets’ in Hebrew. This was a movement that embraced bold colours, flattened and abnormal perspectives, combining late-Impressionism’s focus on light, Japanese-influenced lines, and Paul Gauguin’s striking use of colour.

The Cameras of Saul Leiter

It seems almost wrong to concern ourselves with the more mechanical aspect of his work, but to translate East Village light into the magic of his images Saul Leiter needed optics.

Leiter experimented with colour photography used slide film such as Kodachrome; he also enjoyed using expired film stock with its surprising and odd shifts in colour and his unusual perspectives often come from the use of telephoto lens. These are probably the most salient technical factors in his work. The cameras themselves tell us less, but I am always curious about which makes and models the great photographers used. We learn this from these entries in the timeline from the Unfinished World Exhibition:

1939 c. Is given a Detrola camera by his mother.

1948 Begins working with colour slide film. Works primarily with: Argus C3, Auto Granflex Junior, Leica and an early Rolleiflex.

1960-80 – Continues to do fashion photography which is published in Harper’s Bazaar, Elle, Show, Vogue (UK), Queen and Nova. Photographs are also included in Life, US Camera, Photography Annual and Infinity. Travels to Mexico, France, Italy and Israel. Often uses a Leica M4 for commercial work in the 1970s and after; for street photography uses Leica CL, Minox 35EL and Canon A-1 and AE-1, among others.

2003 – Receives a grant of $10,000 from Olympus along with his first digital camera, an Olympus E-1. Proceeds to purchase many digital cameras including Leica and Lumix models.

By 2005 Leiter had taken his last shot on film, ending a sixty-year relationship and turned full time to digital photography, which he embraced with great enthusiasm.

Painting

Saul Leiter painted daily from his mid teens years until his death. In his formative years abstract expressionism was large and expansive, but Leiter’s paintings, which are most water-colours, are much smaller in scale. I found them interesting but they didn’t move me in the way his photography does.

His friend, the painter Franz Kline, once said to him: ‘If only you painted big, you’d be one of the boys.

Early Life

Saul Leiter (1923–2013) was born into an Orthodox Jewish family, Leiter set out to become a Rabbi like his father but in 1946 he defied this family’s expectations and abandoned his studies. His interest in art led him to move to New York City in 1946, where he pursued painting and photography. His mother had given him a Detrola camera as a child, not knowing the instrument would help reshape his life

I got fed up with the whole religious world and all the preoccupations with purity and nobility and observance—I wanted to be free of those things.

In those formative years, eminent photojournalist W. Eugene Smith and abstract expressionist artist Richard Pousette-Dart (founder of the New York School of painting) encouraged Saul to pursue photography. It was through his friendship with Pousette-Dart that he recognised the creative potential of photography.

Fashion Photographer

His friends encouraged him to take up photography as a way to earn a living and he became a successful fashion photographer, with commissions for Harper’s Bazaar, Vogue and Elle. Leiter’s fashion photography paralleled his personal work, imbued with his unique style – he photographed models soft-focused or behind glass.

I started out as a fashion photographer. One cannot say that I was successful but there was enough work to keep me busy. I collaborated with Harper’s Bazaar and other magazines. I had work and I made a living. At the same time, I took my own photographs.

He preferred shooting in his home neighbourhood of New York’s East Village, where the vibrancy of the streets provided all he needed.

I take photographs in my neighbourhood. I think that mysterious things happen in familiar places. We don’t always need to run to the other end of the world.

Leiter never for self promotion or networking, and with little work and debts mounting in 1980s, he was forced to sell his Fifth Avenue studio. He continued his personal work from his East Village apartment, which he shared with artist Soames Bantry, his longtime partner who often sat for his photographs and paintings, and who died in 2002.

Recognition and The New York School

Although Edward Steichen exhibited some of Saul Leiter’s colour photographs at the Museum of Modern Art in 1953, for forty years afterwards they remained virtually unknown to the art world.

The concept of the ‘New York street photographer’ was born at the same time Leiter started working in the late-1940s. But Leiter wasn’t swept along by its momentum. He was not a conventional street photographer. He lacked the bleakness of Robert Frank or the knowing irony of William Klein which helped propel the popularity of their work and that label.

Saul Leiter may have faded entirely into obscurity if it weren’t for Richard Avedon, who, in 1992, recommended that his work should be included in the book The New York School: Photographs, 1936–1963. This led to other books and exhibitions.

Except for his inner circle, few saw Leiter’s personal colour work until towards the end of his life. Saul Leiter: Early Colour, a book of street photographs, was published to great acclaim in 2006 only a few years before his death in 2013. The instant success of Early Colour transformed Leiter’s life. His precarious finances improved with the increased print sales that followed the book.

The majority of his work, however was left unprinted, with tens of thousands of negatives and slides stored in boxes at his home.

Outlook

It strikes me that Saul Leiter’s outlook on life was deep but bright. He was introspective and contemplative but also cheerful. This is reflected in his photography, which often captures magic in the everyday. He saw what others didn’t and was upbeat where others weren’t. Though I never met the man, I feel an attachment to him that goes beyond his work.

It is not where it is or what it is that matters but how you see it

I see this world simply. It is a source of endless delight

A photographer’s gift to the viewer is sometimes beauty in the overlooked ordinary

 Photography is about finding things. And painting is different, it’s about making something

Afterword

While I am a photographer who works mainly in black and white I do use colour occasionally. If I am going to produce a colour image I prefer to use film and I have a great affection for the tones of Kodak Portra. Since the light of my encounter with Saul Leiter and his artistry I intend to review my colour work and see where that takes me.

When Photos Looked Like Paintings – Pictorialism

March 11th, 2024
What is Pictorialism?
Waterloo Place by Leonard Misonne (1899)

There is something magical to me about  pictorialist photography, particularly urban pictorialism, as shown here in Leonard Misonne’s accomplished example from 1899.  In addition to having the skill to take photographs with the cumbersome and slow equipment of the time, the pictorialist’s vision was realised through a complex end-to-end process that required yet more skill and talent. They had to be skilled in dark room manipulation, often made their own emulsions and embraced alternative printing methods.  Some even made their own paper.  So, there is much to admire about these photographers, but what exactly is pictorialism?

Summary – Pictorialism in 100 words

Pictorialism emerged in the late 19th century, driven by photographers’ desire to reinvent the medium of photography as an art form, emphasising beauty, tonality, and composition to elevate photography to the same level as painting. The Pictorialists used soft-focus, experimental techniques and processes, artisan chemicals and special papers to create their atmospheric images and increase their artistic impact. The movement was most active between 1885 and 1915. It waned with the rise of straight photography, which valued sharpness and documentary precision, but set the stage for future artistic photography and innovation in the field of photography.

But is it Art?

To explore the much asked question ‘what is pictorialism?’  we need to ask a more fundamental question that is central to the movement and its development.  That is, ‘is photography art’?

From its inception, when it took a mastery of optics, chemistry, and an arcane workflow to take and process a photograph there had been a debate about the nature of photography.   Was this new invention only capable of reproduction or could it transcend its machine origins and produce art?

In the early years of its development, photography was sometimes looked down upon as purely mechanical, but as early as 1853 the English miniaturist Sir William John Newton was championing the cause of photography as art.  Newton also suggested that photographers could make their pictures more like works of art by throwing the subject slightly out of focus and using retouching techniques.

Influences

Hill and Adamson

Photographers David Octavius Hill and Robert Adamson had a strong influence on the development of Pictorialism. The partnership was formed in Edinburgh in July 1843, just four years after the invention of photography was announced. In the four years that followed they produced an extraordinary body of work that included portraits, landscapes and social documentary using the Calotype process.

The strong sunlight needed to produce a successful calotype meant that Hill & Adamson were required to work outdoors and one of their most important achievements was the portrayal of The Fishermen and Women of the Firth of Forth, shot at Newhaven, a  small fishing village on the outskirts of Edinburgh.  The portraits are considered to be the first social documentary photographs and were compared by some critics of the time to those of Rembrandt.  Alfred Stieglitz would later describe Hill as “the father of pictorial photography” and would featured the duo’s photographs in his publications  and the galleries of the Photo-Secession.

Julia Margaret Cameron

Julia Margaret Cameron was also an important pictorialist influence whose pictures would be championed by Stieglitz in CameraWork (volume 41, 1913). Cameron’s photographs had a romantic and expressionist style and often used slightly blurred focus.  She considered her pictures art well before the pictorialist movement got underway and took inspiration from artists such as Raphael and Michelangelo.

When Cameron received the gift of a camera in December 1863 her husband was in Ceylon attending to the family’s coffee plantations, and her children were no longer at home. Photography became her focus and a link to the writers, artists, and scientists of her well-connected circle. Although she took up photography as an amateur with no knowledge and she worked at it with great energy and once she had developed her technique started to vigorously copyright, exhibit, publish, and market her work.  She developed close links to the South Kensington Museum (now the V&A).  IT was home to her first  exhibition in 1865 and home to her portrait studio in 1868.

Cameron was an outstanding portraitist, producing brooding head and shoulders shots of the famous men of her acquaintance including English poet laureate Alfred, Lord Tennyson and mathematician, scientist and photography pioneer Sir John Herschel.  Her work also consisted of theatrical tableaux from myth, the Bible, Shakespeare, and  the works of Coleridge and Tennyson.  Today, she is considered one of the most important and innovative photographers of the 19th century.

Oscar Gustav Rejlander

Oscar Gustav Rejlander was one of the fathers of art photography, and a pioneer of photomontage.  Originally a painter, he rejected the contemporary view of photography as a scientific or technical medium and made photographs that imitated painting, inspired by the Old Masters.

It was a visit to Rome in 1852 that was the catalyst for his interest in photography. Shortly after his return, Rejlander took photography lessons with Nicolaas Henneman, previously an assistant of William Henry Fox Talbot, after which he adapted his artist’s studio in Wolverhampton for photography.  In 1857 Rejlander produced his masterpiece, a 31-by-16-inch image, by joining 30 negatives together. The Two Ways of Life was both technically ambitious and controversial, depicting an elaborate and moralising allegory of the choice between vice and virtue.  Rejlander photographed each model and background section separately, using more than thirty negatives.  These were then combined into a single large print which demonstrated the aesthetic possibilities of photography.

The picture caused a sensation initially but became the lead example in a polarised public debate on art, photography and whether combining images was acceptable.

Lady Clementia Hawarden

Rejlander admired the work of another photographic pioneer, Lady Clementina Hawarden, whose work is sometimes compared to Julia Margaret Cameron’s, though to my mind it is very different.  Rejlander observed that ‘she aimed at elegant and if possible, idealised truth’.

As a Victorian woman, coming to photography in the late 1850s, Hawarden’s work was confined to her first-floor studio in her elegant Kensington home.  Her images pushed the boundaries of art and photography using a careful selection of props, clothing, and model poses using her daughters as her subjects were her daughters.  Their likenesses in her work were often reminiscent of the pre-Raphaelite artists.

Hawarden’s photographs demonstrated technical excellence as well as innovation and she became an expert in indoor photography.  This expertise was recognised by two silver medals the Photographic Society of London.

Peach Robertson’s Pictorial Effect

Rejlander’s work also inspired Henry Peach Robinson, a British photographer who, like Rejlander, had previously trained as an artist.  He achieved fame with his five-negative print of 1859, Fading Away, depicting a young consumptive dying in her bed surrounded by her family.  Like Rejlander’s work, the tableau caused controversy due to the photograph’s artificial technique and morbid subject matter, with critics questioning whether a single picture from multiple negatives made photography untruthful.

Robinson, a member of the Photographic Society, published his manifesto Pictorial Effect in Photography in 1869.  The work, which gave the movement its name, included compositional formulas taken from a handbook on painting and made the case that rules created for one art form could apply to another.

Emerson and Naturalistic Photography

In the 1880s the British photographer Peter Henry Emerson proposed an alternative artistic vision for photography. He was a dedicated student of the arts, influenced and inspired by the naturalist school of painters, which included Jean-François Millet.  Millet’s rendered his landscapes and peasant scenes in low tones and with a softened atmosphere, but they were realistic enough for him to periodically face the charge of being a socialist.

Emerson’s vision was that photographs should reflect nature and be produced without artificial means. He believed that the tone, texture, and light of the scene were enough to make photography an art form.  This point of view became known as naturalistic photography after the publication of his treatise Naturalistic Photography in 1889, in which he outlined a system of aesthetics.  This treatise insisted that photography should show real people in their own environment, and avoid costumes, posed models  or backdrops.

Improvements in Technology

Emerson embraced the photogravure process which was refined by Karl Klíc, a painter living in Vienna, who patented an improvement on William Henry Fox Talbot’s earlier process.  The Talbot-Klíc process allowed for deeper etched shadows and the transfer of the negative image to a copper plate using gelatin-coated carbon paper.  It was published in 1886.

Pictorialist Steichen
Wind, Fire, Therese Duncan on the Acropolis, Athens by Edward Steichen (1921)

In 1888, the introduction of the point-and-shoot Kodak camera, together with printing as a service, greatly accelerated the popularisation of photography.  This only intensified the public debate about the role of the medium, which reached its peak by the end of the century.

You can read more about the development of photography in the articles From Chemistry to Computation or The Timeline of Early Photography.

As photography became popular serious amateurs, many inspired by Emerson’s ideas and images, began to explore the medium’s expressive potential.  This resulted in the first truly international photographic movement – The Pictorialism Movement.  The movement represented a shift of focus from Emerson’s Naturalism to the broader expression of photographers as artists.

What is Pictorialism?

The pictorialist photographers produced pictures that were the polar opposite of the output of point-and shoot.  They used soft focus techniques, a  range of darkroom techniques and alternative printing processes to produce beautifully rendered, skilfully composed, highly picturesque, atmospheric and often otherworldly images.  These were hand printed (usually on hand-coated artist papers) using artisan emulsions and pigments, making the production of an image much closer to the creation of a painting.

The movement sometimes goes under other names including “art photography”, “Impressionist photography”, “new vision, and “subjective photography.

Pictorialism was closely linked to influential artistic movements such as Tonalism and Impressionism, and the Pictorialists took inspiration from popular art, adopting its styles and ideas to demonstrate that photography was an artistic process.

The emergence of Pictorialism was also the product of the meeting of photography and art in practical terms.  Artists started to use photographs to capture images that would be rendered as paintings later, whilst some Pictorialists had been trained as painters.

No Accepted Definition

There is no accepted definition of Pictorialism.  The Britannica definition is “an approach to photography that emphasizes beauty of subject matter, tonality, and composition rather than the documentation of reality.”  This is helpful, though in addition to an approach it is also variously defined as a style, particularly of fine art photography, and as an aesthetic or international movement, including an art movement.   The Alfred Stieglitz Collection at the Art Institute of Chicago captures much of this in this description:

“The international movement known as Pictorialism represented both a photographic aesthetic and a set of principles about photography’s role as art. Pictorialists believed that photography should be understood as a vehicle for personal expression on par with the other fine arts. Responding to both the new Kodak camera “snapshooters” and formulaic commercial photographers, the Pictorialists proudly defined themselves as true amateurs—those who pursued photography out of a love for the art.”

Understanding Pictorialism

To understand Pictorialism it’s worth reviewing what Pictorialist pictures have in common.  Landscape photographer Sandy King (who still works with 19th century hand made photographic processes) offers an excellent description of its characteristics:

  • Only images which show the personality of the maker, generally through hand manipulation, can be considered works of art
  • An interest in the effect and patterns of natural lighting in the outdoor landscape
  • An impressionistic rendering of the scene, in which overall effect is more important than detail
  • The use of symbolism or allegory to reveal a message
  • The use of alternative printing processes: carbon and carbro, gum bichromate, oil and bromoil, direct carbon, and platinum.

A review of the techniques Pictorialists used to convert the camera into something closer to a paint brush is also enlightening.  These included dark room manipulation; the combining of multiple negatives; the use of artisan emulsions; alternative printing methods using gum bichromate and gum bromoil; the use of paint brushes and hand made paper.  In addition to giving the pictures their unique look, these techniques also ensured that no two prints looked identical, even if they came from the same negative.

Who were the Pictorialists?

Some of the most notable Pictorialists are Alfred Stieglitz (1864-1946); Edward Steichen (1879-1973); Edward Weston (1886-1958); Paul Strand (1890-1976);  Julia Margaret Cameron (1815-79); Henry Peach Robinson (1830-1901); Peter Henry Emerson (1856-1936); Robert Demachy. (1859-1936);  Frederick H. Evans (1853-1943); Alvin Langdon Coburn (1882-1966) and Gertrude Käsebier (1852-1934).

You can find is a more comprehensive list of Pictorialist Photographers at the A-Z of Pictorialist Photographers on this site.

Women Pictorialists

As the A-Z list shows, many prominent Pictorialist photographers were women at a time when photography was largely male dominated. Female practitioners included Anne Brigman; Alice Boughton ; Julia Margaret Cameron; Imogen Cunningham; Mary Devens; Gertrude Käsebier; Adelaide Marquand Hanscom Leeson; Emily H. Pitchford; Sarah Choate Sears; Eva Watson-Schütze.

Pictorialist Clubs and Organisations

These photographers, who considered themselves artists, formed clubs and salons such as The Linked Ring, The Royal Photographic Society, The Photo-Club of Paris and The Trifolium of Austria all of which promoted photography as fine art.  As part of the advocacy for the expressive power of the photograph these clubs and organisations produced lavish journals and exhibition catalogues featuring beautiful hand-made photogravures.

The Photo Secession

In 1902 Alfred Stieglitz formed the Photo-Secession, a society with the stated aim of seceding from the accepted idea of what constitutes a photograph.  It was inspired by art movements in Europe, such as the Linked Ring.  Stieglitz described the aim of Photo-Secession as “to hold together those Americans devoted to pictorial photography in their endeavour to compel its recognition, not as the handmaiden of art, but as a distinctive medium of individual expression.”  He described its attitude as “one of rebellion against the insincere attitude of the unbeliever, of the Philistine, and largely of exhibition authorities”.   The “membership” of the Photo-Secession was largely set by Stieglitz’s predilections.  The core members were Edward Steichen, Clarence H. White, Gertrude Käsebier, Frank Eugene, F. Holland Day, and later Alvin Langdon Coburn.

The Photo-Secession actively promoted its pictorialist ideas through the influential quarterly Camera Work and the Little Galleries of the Photo-Secession (also known as the 291) which provided a place for the members to exhibit their work. Painter and photographer Edward Steichen and other notable artists were instrumental in developing the program of exhibitions at the gallery, which featured exhibitions by important European artists such as Henri Matisse, Paul Cézanne, and the Cubist works of Pablo Picasso that would influence artists across media around the world.

By 1910 Photo-Secession had become divided over the degree of manipulation of negatives and prints that was appropriate and divided.  In 1916 Käsebier, White, Coburn and others formed the Pictorial Photographers of America (PPA) to continue promotion of the pictorialism. A year later Stieglitz formally dissolved the Photo-Secession, although it had not been active for some time.

The Decline of Pictorialism

The heyday of Pictorialism was from the 1880s to 1915.  Unsurprisingly for such a romantic movement it lost momentum after the World War I and was a spent force by the end of World War II.  It was superseded by the sharp focus of Modernism in Europe and the West Coast or Straight photography movement in the USA, the greatest exponents of which were Edward Weston and Ansel Adams.

Later Pictorialists and Neo Pictorialism

Pictorialism had all but disappeared by the 1920s, but some photographers persisted with it. Adolf Fassbender, for example, kept making pictorial photographs into the late 1960s.  In the 1990s the label neo-pictorialist was applied to some photographers influenced by the original movement.  An article in Vice describes the emergence of neo-pictorialism well:

“A century after the fight for legitimacy, photography is now cycling back to its beginnings with a rise in traditional and alternative processes through companies such as the Impossible Project and Lomography seeking to reclaim analogue photography and leave behind the freneticism and immediate gratification of a digital photograph—much in the same way that Pictorialists sought to slow down the photography of their time with an eye to the myriad possibilities of the medium.”

Photography as Art

The ideas of Newton, Rejlander, Robinson, and Emerson’s were not the same, but they were all pioneers for photography to be considered a legitimate art form.  This is a question that rarely crops up today, but for those who wish to ponder it I’ll take a proof point from many possible options.  In 2011 a grey image of the Rhine by German artist Andreas Gursky sold for $4.3m (£2.7m) at auction, setting a new record at the time.  The grey and featureless landscape was described by the artist as an allegorical picture about the meaning of life.  That sounds like art to me.

More About Early Photography

If you are interested in the history of photography, you might also might these articles interesting:

Revision History

This article was originally written in September 2015 and was thoroughly updated and revised in March 2024.

The Leica M3 – Great Film Cameras

March 1st, 2024

When I went back to film in 2016, it was with an SLR, the Nikon F3, and the idea of shooting with a rangefinder had never occurred to me. During lockdown, I became curious about other kinds of cameras and acquired a couple of inexpensive rangefinders: an Agfa Optima 1535 and a Yashica Electro 35 GSN. Enjoying the rangefinder experience (albeit a highly simplified one) and getting some decent results from these very inexpensive cameras, I decided that I needed a proper rangefinder and found myself a Leica M3. It was made in 1962 but still looked brand new.

1962 Leica M3 with 50mm Elmar. The winding crank is an aftermarket addition.

Genesis of the M3

By the time the M3 was launched in 1954, Ernst Leitz GmbH of Wetzlar, Germany had already provided the photographic industry with two defining moments in the history of photography. The Leica I of 1925 had created the new ‘miniature’ 35 mm format and in 1930 the Leica II introduced interchangeable lenses and a built in rangefinder.

M is for Messucher

The ‘M’ in M3 comes from “Messsucher” the German word for “measuring viewfinder/rangefinder” which was the M3’s main feature: a ‘high-magnification’ (0.91x) single viewfinder/rangefinder eyepiece which placed the rangefinder focusing patch inside the viewfinder. Previous generations of Leicas, known as screw-mount or ‘Barnack’ Leicas, had separate eyepieces for focusing and framing.

I put ‘high magnification’ in quotes because there is no actual magnification, but the M3 is as close to 1:1 as you can get in the world of Leica rangefinders, where negative magnification is the norm. This is not the case with all manufacturers. Nikon’s rangefinders of the 1950s, such as the S2, for example, did offer 100% magnification.

3 Lenses

The ‘3’ in ‘M3’ referred to three sets of frame lines seen through its single bright viewfinder window, for three lenses: 50mm, 90mm and 135mm. These were automatically corrected for parallax.

Most of the M3’s features were not new, but like the Nikon F SLR of 1959, the Leica M3 combined a number of existing innovations in a superbly engineered package. The 1930s saw a great deal of innovation and saw the introduction of the newly standardised 135 film cartridge (Kodak Retina I, 1935) and affordable rangefinders (Argus C3, 1936). Many of the features that were improved (or in some cases perfected) in the Leica M3 came to market during this decade:

  • The Zeiss-Ikon Contax I rangefinder offered a bayonet lens mount in 1932
  • The Kine Exakta, the world’s first popular 35mm SLR had a film winder in 1936, though it was not the first model to introduce this.
  • The Contax II offered a combined range/viewfinder in 1936
  • Automatic parallax compensation arrived with the scale-focusing Minox of 1937

The World’s Best Rangefinder?

The Post Mill at Brill, shot with Leica M3 using a red filter

However, the Leica M3 was the first camera to feature true projected parallax-compensating frame lines for its 50mm, 90mm, and 135mm lenses. Even better, the right frame automatically appears in the viewfinder as the photographer mounts a lens of the corresponding focal length. This is known as auto indexing. Handily, the effect of using other lenses can be previewed using the manual frame selector lever located below the front finder window.

The M3 uses a horizontal cloth focal-plane shutter with a maximum speed of 1/1000 second and a maximum flash sync of 1/50. It is extremely quiet – nearly as quiet as a leaf shutter.

To describe the M3 just by its features doesn’t do it justice. It feels like so solid, with its top and bottom plates of chrome-plated brass, that its hard to image it has any component parts. One reviewer suggested the M3 should have its own element on the periodic table! To this day it is regarded by many as the finest rangefinder ever built. To some, it’s the finest camera, ever. Even today, in terms of design excellence and manufacturing quality it is astonishingly good,

Impact and Notable Users

For the professional or enthusiastic amateur photographer of the 1950s, the M3 offered the brightest and clearest view in the combined viewfinder/rangefinder, the best lenses available, a bayonet lens mount for quick lens changes, and a film advance lever for faster shooting. All this in a package weighing a little over 600g! This came at a price as the M3 cost about 50% more than the already expensive Leica III, but Ernst Leitz spared no expense in making the M3.

The reception of the Leica M3 was exceptionally positive, with photographers praising its build quality, reliability, and optical performance. It quickly became the camera of choice for many of the era’s leading photographers, including Henri Cartier-Bresson, Robert Capa, Robert Frank, W. Eugene Smith, Elliott Erwitt, Garry Winogrand, and David Douglas Duncan.

Variants

The Leica M3 was launched as a ‘double stroke’ (DS) model and updated to a ‘single stroke’ (SS) model in 1958. As this was the first lever wind-on model, Leitz was concerned about stressing the film and breaking it, so it split the winding into “double strokes.” This turned out to be unfounded. Mine is a later SS model, and I see no reason to prefer a DS, though some users consider the original mechanism superior.

Shooting Experience

Loading and Unloading

Horse at the ruins of Hampton Gay, shot with Leica M3

After the magnificent feel of the Leica M3, the loading experience is less impressive, as loading is a little slower than most 35mm models I have used. Leitz kept bottom loading from the Barnack era but with improvements. These included the addition of removable take-up spool to make the process of attaching the film leader easier by allowing it to be threaded outside the camera, and the addition of a rear door flap. When lifted, this flap provided enough access to ensure the film is correctly positioned over the sprockets and the pressure plate.

The rewind knob was also preserved, so there is no crank. To rewind the film, you move the lever on the front of the camera to ‘R’ (reverse), lift the knob out from the central advance indicator, and twist until the knob eventually resists. This is quite a slow process. I put an aftermarket crank on mine, which speeds up the rewind and doesn’t look too bad on the camera.

Through the Looking Glass

However, things improve significantly once that is over the way and you peering through that bright, clear uncluttered viewfinder. The frame lines on the M3 are limited to three and display one at a time – which is great. Newer Leicas have six and appear in pairs. The M3 is best suited to a classic 50mm lens and that’s what I use most.

Before I got an M6 TTL with 0.58X magnification and 28mm framelines I configured the M3 with an external viewfinder and it delivered good results. There are also 35mm ‘Goggles’ available, which I haven’t tried, but apparently you lose some of that magic viewfinder brightness.

Focusing, including critical focusing, is also much easier on the M3 than any other rangefinder I have used, including later Leicas like the M6 TTL. I’ve never had a blurred shot yet, which is definitely not the case with the other elderly rangefinders I’ve used.

Leica Lenses

The M3’s Elmar 50mm

Leica lenses are fabulous. My 1962 M3 came with a period-correct collapsible Elmar 50mm f2.8, which is the successor to the original Leica f/3.5 50mm Elmar of 1925-1961.

The Elmar was superseded by 50mm Summicron, Summilux, and Noctilux lenses in the 1970s.  By that time Leitz had sold just over half a million lenses, so there are plenty about. The tiny Elmar is finished in chrome. It is an excellent lens and looks great on the M3.

Summicron f2 50mm

I have also have a lightly faster f2 50mm Summicron-M in the form of the Type IV (11819) made from 1979-1993, which has a 39mm filter thread and a separate metal vented hood. It is very compact and astonishingly good. It is easy to recognise by its tapering, almost conical shape.

Leica M3
Summicron-M 50mm Type IV

The latest generation of this lens (APO-Summicron-M ASPH f/2.0) has a much higher specification, which offers better correction of colour and aspherical aberrations, a floating lens element and built in lens hood. This version is much more costly at £7,200 at the time of writing, vs £1200-1500 for the 11819.

In addition to the finest optical performance Leica lenses are accompanied by what many refer to as the ‘Leica look’ – as described in this Art Photo Academy article.

What makes Leica lenses so different is their exceptionally high micro-contrast, i.e., an ability to register a nearly full variety of tonal variations between slightly darker and slightly brighter areas of very similar colours. It is the high micro contrast that is responsible for rich colours and smooth tonal transitions that all amount to the three-dimensional “feel”.

I have observed that phenomenon with Leicas, both with the digital Q2, and on film with the M3 and M6 TTL: some shots do have a noticeably more three-dimensional look than I see with pictures taken on other cameras.

Leica M3
Leica M3 with 50mm Summicron on Deal Beach

Adding a Light Meter

Though using the Sunny 16 rule is straightforward enough, and black and white film is very forgiving, I always have a light meter to hand in the form of the iPhone app myLightmeter Pro. Some photographers seem to regard the use of a light meter as a weakness, but that’s not my point of view. I usually estimate the light, take a meter reading and then set the shutter and aperture – it’s interesting to see how often you and the meter agree, and it helps develops your estimation skills. Also, given the M3 allows the shutter speed to be set between the marked speeds, a light meter reading can be beneficial in making the best use of the ‘in-between speeds’ as a form of exposure compensation. That’s a bit of a stretch for Sunny 16…

An accessory shoe-mounted external light meter is another option. I’ve used the Voigtlander VC Meter II, which uses ‘over and under’ LED exposure arrows controlled by aperture and shutter speed dials. There are other options, too. The DOOMO Meter D looks similar but has plus and minus LEDs, and their Meter S offers an OLED display screen. HEDECO also offer an OLED model, the Lime Two.

Adding a 28mm Lens and Viewfinder

1962 Leica M3 with 28mm Elmarit, external light meter and viewfinder

For landscape photography, the 50mm sometimes isn’t wide enough, so I added a Voigtlander external viewfinder and a 28mm Elmarit-M f2.8 lens. I picked up the E46 filter thread version (11809), which is the last non-aspherical (ASPH) version and has a plastic hood which blocks a little of the viewfinder. This is an excellent lens, with low distortion. It is small and light and less costly than either later versions ,though they are even smaller and take the E39 filter thread which isn’t visible through the viewfinder.

To use the Elmarit-M with the external light meter and 28mm viewfinder required the use of a one-to-two slot adaptor – I found one made by Voigtlander. The clean lines of the M3 were utterly compromised by the resulting Frankenstein’s monster, but it works perfectly well.

Close Focusing

One downside to rangefinders, which I have to say hasn’t affected me at all, is their design is not suited to close focusing – close up they get their beams crossed. Most M mount cameras focus down to 0.7m with the M3 needing a little more runway at 1m.

Leica M3
The ruins of Hampton Gay Manor House, shot with the Leica M3

The Successor, M4

Leitz shipped more M3s than any other M film camera, with over 220,000 units sold by the time production of the M3 model ended in 1966. Its successor model was the M4, which sold just 58,000 units. This was due to the declining market share of rangefinders and the rise of SLRs. It was not due to any deficiency in the M4, which offered several enhancements over the M3. These include an angled rewind lever, a self-resetting film counter and frame lines for 35, 50, 90 and 135mm lenses.

The M3 was the high watermark of rangefinders. Historically, that is certain. If we are speaking of models that is more open to debate but it still provides a very special photographic experience and exceptional results.

Thoughts and Further Reading

If you have experience with shooting a Leica M3, I’d love to hear from you – please leave me a comment below. You might also find the following articles on this site interesting:

The Kodak No 2 Folding Pocket Brownie

February 19th, 2024

The Kodak No. 2 Folding Brownie was introduced in 1904 as part of the the Folding Brownie series. This was Kodak’s least expensive folding roll film camera range with a more basic specification than their Kodak branded counterparts. The smaller B ‘Folding Pocket Brownie Model B’ was launched in 1907. Both models took 120 roll film.

Kodak No 2 Pocket folding brownie
Brill Windmill, shot with the The No 2 Folding Pocket Brownie

If you are looking to obtain one, you should ensure that you don’t confuse either model with the 1910 No 2A Folding Pocket Brownie that took 116 film, which is no longer available. I have read that you can use 120 film in 116 cameras with an adaptor. This will apparently produce six very large (11 x 6 cm) images!

Like my No 2 Kodak Autographic Folding Brownie, I bought this folding pocket Brownie at a camera fair hosted by ImageX in Bicester, Oxfordshire. It came in its original cardboard box and was in excellent condition, the only sign of usage being on the handle. The red bellows look just like new.

When I opened the camera up I was delighted to find an original sticker inside. This was the original purchase sticker from Boots the Cash Chemist, showing a price of one pound one shilling, which had been there since purchase in 1911!

Kodak No. 2 Folding Brownie
1911 price tag inside the camera

I paid rather more than that, but it was a very fair price for such a good example. Looking online afterwards I found a less well preserved model for just under £20.

Folding Cameras

Folding cameras originated in the 1850s, replacing the 1840s sliding-box design. The lens and shutter are attached to a lens-board which is connected to the body of the camera by light-tight folding bellows. When the camera is fully unfolded it provides the correct focus distance from the film.

Folding cameras dominated camera design until the 1930s and remained significant into the late 1940s. The design persisted into the 1970s in specialized cameras such as the Polaroid SX-70 Instant film camera, and the Speed Graphic press cameras. See the article Early Cameras, a Timeline on this site for more on early camera design.

Kodak’s Folding Cameras

Kodak produced numerous folding models from the 1890’s until the 1960s. The first was the Folding Pocket Kodak which was introduced in 1897.  The last was the Kodak 66, Kodak’s only post-war folder for 120 film rolls, which was manufactured in the UK between 1958 & 1960.

The Kodak No. 2 Folding Brownie
The No. 2 Pocket Brownie on Deal Pier. Gimbal head not required!

The Kodak No 2 Folding Pocket Brownie

The Kodak No 2 Folding Pocket Brownie is a horizontal format folding camera.  Like larger large format models, the lens standard is pulled out on a track fixed to the wooden baseboard, which is fitted with a small focusing scale, which locks. It has an attractive set of red bellows (black after 1911) that can be set to three focusing positions: 100, 20, 8 feet.

The rectangular metal body has a leatherette covering a hinged back and two tripod sockets. There is a small ‘Brilliant’ finder fixed to the left side of the baseboard. A brilliant finder uses a combination of lenses and prisms to provide a bright image for composing the image. The finder on this model can be rotated through 90 degrees to allow the camera to be used in either portrait or landscape orientation.

The No 2 Folding Brownie uses a meniscus achromatic lens, the story of the which is the same design as The First Camera Lens, which is a subject of another article on this site. It uses the either the Pocket or Brownie automatic shutter.

Folding Brownie Vs Folding Pocket Brownie

The original No 2 Folding Brownie original had a wooden lens board and had a sliding latch on the back which was apparently unreliable. The Model B Pocket version abandoned the sliding latch and replaced them with had a pair of concealed buttons under the leatherette. The model name is printed inside the camera back and is also embossed into the handle on the top face. It is about 20% smaller than its predecessor.

Camera Controls

All the controls except the film wind on key are located on the lens barrel. The shutter (marked A on the diagram below) has five-blades and settings for I (Instant), B (Bulb) and T (Timed). The Instant setting was originally approximately 1/45 of a second, but likely to be slower in action. The shutter (C) is tripped from a small lever also on the lens barrel.

A typical Kodak control layout of the time

The aperture settings (marked B on the diagram) are marked 1-4. This refers to a simple numbering system used on simple Kodak cameras. This system can be confused with the U.S. Universal Scale System, (also called the “Uniform Scale System”) found on many pre-1920 cameras.   See the short article on Aperture Scales on this site for more on this.

According to About Lenses published by Kodak in 1922, the aperture settings for cameras with Meniscus Achromatic lenses are No.1 (f 11), No. 2 (f 16), No. 3 (f 16), No. 4 (f 22).

The film is advanced by a key which is marked with an arrow to indicate the correct direction. The frame number can be seen in a small circular red window on the back of the camera. The camera takes 8 exposures of 6 x 7 cm images on No. 120 film.

The No 2 Folding Pocket Brownie in Use

As usual with very old cameras, I kept my expectations from camera under control, but I didn’t experience any of the light leaks and the camera operated as expected.

A handheld shot of Deal sea front from the pier. Tripod required, but nice tone with ISO 25 film.

One film was shot handheld and one with a tripod. The tripod head I had with me was of the gimbal type, which limited me to shooting in portrait mode, but provided a lot of weight and so felt really solid. The handheld shots were all extremely blurred, so I suspect the shutter speed is well below its original 1/45 of a second. Based on the results I estimate it is now at about 1/15 of a second.

Opening and Loading the Camera

The camera is easy to open – you just press on the concealed buttons at rear upper corner of each side of the camera.  The back of the camera will open and drops down. At each end of the interior of the camera you can see a recess for holding the film spools.   Loading is also simple. To load the film you just need to pull up the axis pins, insert the loaded film and draw the film to the takeup spool. Remember to have the black side of the film facing the front and wind on using the key until the vertical arrow appears on the film spool. Close the camera and wind on until number 1 becomes visible in the red window on the rear of the camera.

Avoiding Film Fogging

I never load film in direct sunlight but you don’t need to work in complete darkness – subdued light is sufficient.

You might consider taping up the the red frame counter window on the back of the camera, whilst it is not in use. This helps prevent unwanted light getting into the camera and provides similar functionality to later frame counter windows that had covers to prevent light leaks and were only opened whilst the photographer was advancing the film.

Early film had low sensitivity to red light so a combination of the backing paper on the film, plus the red window, prevented film fogging. If you use Orthochromatic film (which is still available) this precaution is unnecessary as it is less sensitive to red light.

Kodak No. 2 Folding Brownie
The Pocket Kodak on Deal Pier, mounted on a tripod with the frame counter taped up.

Framing and Focusing

Framing relies on the tiny (1.5 cm x 1.5 cm) ‘Brilliant’ finder mounted above the lens.  This creates a tiny representation of approximately what the camera is pointing at.  Peering down into this minute square of glass you will see a laterally reversed image.  

Focus is basic ‘scale focusing’ and is set via a notched scale on baseboard.  This has three pre-set distances that engage with a small catch, that is slightly fiddly to operate, though you probably won’t use it very much.  I mainly use the most distant of these (100 feet). 

Setting an Exposure

Given how forgiving black and white film is in terms of exposure latitude, I didn’t found it difficult to get an acceptable exposure. In any event the controls available to set an exposure are minimal. Set the to shutter to I (Instant) and the aperture to 1 or 2 and trip the shutter.

Choosing the right film

Kodak produced a large number of different roll film formats with a variety of different negative sizes. 120 (or No. 2 film as it was originally called, as per the name of this camera) is the only one still being manufactured.   This is used extensively by medium format photographers, and readily available.  The Kodak No 2 Folding Pocket Brownie model produces 8 exposures measuring 6 x 9 cm, which are the largest that can be obtained with a 120 film camera.

Film Speed

Modern 120 film is very different to what was available in 1911, so is difficult to compare sensitivity accurately as these old films had different emulsions. Early twentieth century photographers had several measures of sensitivity available to them (such as H&D) but ISO was not one of them.

The ISO film speed system, or ISO speed, was standardised in 1987 by the International Organisation for Standardisation (ISO)unified the various film speed rating systems that existed before, such as ASA (American Standards Association) and DIN (Deutsches Institut für Normung, the German standard).

I’ve seen accounts of an equivalent ISO range of 5-25 for Orthochromatic films, which were less sensitive to red light, and ISO 10-50 for Panchromatic Films. Both of these estimates are for the second decade of the twentieth century. The closest currently available Rollei Ortho 25 (which I used), but I found 100 worked fine, though the Rollei Ortho produced the best results.

Kodak No. 2 Folding Brownie
Kodak No 2 Folding Pocket Brownie with immaculate red belllows.

Pros and Cons of the Kodak No 2 Folding Pocket Brownie

Pros

  • Easy to load and unload
  • Simple to use
  • Light and portable

Cons

  • Only one ‘instant’ shutter speed
  • Slow shutter makes a tripod essential
  • Fiddly scale focusing control

Further Reading and Getting in Touch

If you are interested in classic or vintage cameras, there are articles on this site on

If you’ve any experience with the Kodak No 2 Folding Pocket Brownie, please leave me a note in the comments – I’d love to hear about it.
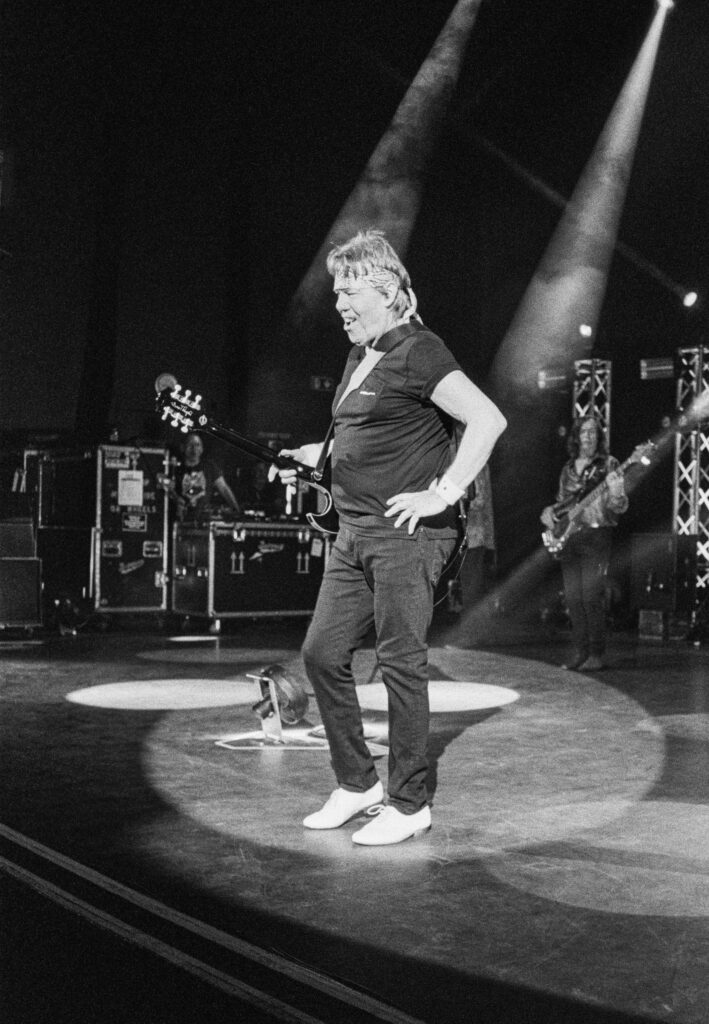
The First Camera Lens

February 19th, 2024

The first camera lens was produced by French optician and instrument maker Charles Chevalier‘s optical firm. Chevalier produced lenses for photographic pioneers Nicéphore Niépce and Louis Daguerre, who both used his lenses for their ground-breaking work in photography.

I researched this story because two of the earliest cameras in my small collection, the Kodak No 2 Folding Autographic Brownie and the Kodak No 2 Folding Pocket Brownie Model B, both used the same design as the very first lens and I wanted to understand its origin.

To tell the story of that first camera lens we need go back to earlier in the nineteenth century. Please note that this is the story of the first lens designed for use with a camera, not the first lens, which was created much earlier. Experiments with lenses go back to the 10th century Arabian scientist Abu Ali Hasan!

Foundations – The Meniscus Lens

Lenses used in the camera’s ancestor, the Camera Obscura, were simple biconvex lenses. This is a glass element that curves outwards on each side, like those in magnifying glasses. In 1812, the eminent English Scientist William Hyde Wollaston found that a meniscus shaped lens was a significant improvement to lens performance.

A meniscus is a curve in the surface of a molecular substance (such as water) when it touches another material. This shape provided a much flatter field and eliminated much of the distortion compared to the simple biconvex lenses.

The First Effective Camera Lens – The Achromatic Meniscus

In 1829, Chevalier created an achromatic version of the meniscus lens – a two-element lens made from crown glass and flint glass which have compensating optical properties. An achromatic lens addresses the problem of achromatic aberration.

Early Photography timeline first camera lens
The Susse Frére Daguerreotype of 1839

An achromatic aberration is one of many possible optical aberrations in lenses. These are performance deviations from a perfect, mathematical model. They are not caused by manufacturing flaws but are inherent in lens design and are due to the properties of light such as diffraction and refraction. Other examples include spherical aberration, astigmatic aberrations and field curvature.

Chevalier’s lens had addressed one of the biggest challenges of early lens design which is reducing achromatic aberration – getting red and blue wavelengths of light to focus on the same plane.

This what an achromatic lens does, and it is necessary because the colours of light with shorter wavelengths, like blue, travel more slowly through most transparent materials than colours with longer wavelengths like red – resulting in different focal lengths – resulting in focusing problems.

George Eastman of Kodak fame said of Chevalier’s lens of 1839 “as he was accustomed to achromatizing all of his lenses, Chevalier naturally thought of achromatizing the Wollaston lens too.” This was unsurprising as Chevalier came from an optical dynasty whose founder (Charles’ grandfather) had invented the achromatic microscope.

Chevalier’s lens also reduced field curvature and produced a much flatter image plane. Field Curvature causes a flat object to appear sharp only in a certain part(s) of the frame, instead of being uniformly sharp across the frame.

An Unfortunate Side Effect

Chevalier’s design however, had an unfortunate side effect – spherical aberration. This means the outer parts of a lens do not bring light rays into the same focus as the central part. 

Chevalier had effectively reduced one problem that caused blurring whilst accentuating another! However, while both spherical aberration and field curvature lead to image blur, there are visual differences.

Those differences lie in the distribution of sharpness across the image. Spherical aberration tends to cause a general reduction in sharpness, especially towards the edges, while field curvature results in different parts of the image being in focus at different distances.

Stopping it

There is relatively simple workaround to spherical aberration, which is to put a narrow aperture stop in front of the lens.  Whilst significantly reducing the aberration, the stop lets in less light it, making it ‘slower’. F14 was the fastest of the two apertures offered!

The Landscape Lens

A slow lens produced exposure lengths that were rather long for portraits, but Chevalier’s lens was much better suited to landscapes and became known as the “French landscape lens” or “landscape lens”. It sold with almost every early Daguerreotype camera.

The Portrait Lens

Chevalier worked on a faster lens design but it was the Petzval lens that provided the first portrait lens. It was also the first mathematically calculated precision objective in the history of photography. Previously optics had been ground and polished based on experience. The lens was developed by the Hungarian mathematics professor Joseph Petzval in 1840, who had the assistance of a team of artillery gunners and 3 corporals at his disposal. This was one of the few professions in which mathematical calculations were made. The lens was extremely fast, offering an f3.6 aperture and was produced by the Voigtländer company.

Kodak Autographic first camera lens
Kodak No 2 Folding Autographic Brownie

The Legacy of the First Camera Lens Design

The Landscape lens was selected by George Eastman as the optics for the Brownie camera due to its simplicity, and price/performance. A well-corrected design at the Brownie’s f/16 or f/22 or so, was quite sufficient for sharp-looking images for the contact prints of the time.

Accordingly, many of Kodak’s early low cost cameras typically came with either simple meniscus lenses, dual meniscus lenses (the ‘periscopic’ type) or achromatic meniscus lenses.

Some offered a choice a better lenses from third parties, such as Bausch and Lomb’s Rapid Rectilinear.  The Kodak No 2 Folding Autographic Brownie shown here offered this as an option. Here are some of the Kodak cameras fitted with these lens types:

  • The Kodak (periscopic meniscus)
  • No 1 and No 2 Kodak (periscopic meniscus) 
  • The Brownie (meniscus)
  • No 1 Brownie (meniscus)
  • No 2, 2A, 2B, No 2 C Brownie (meniscus)
  • No 3 Brownie – Meniscus achromatic

Source: Kodak Camera, The First Hundred Years by Brian Coe

Despite an antique design, its low cost and ease of manufacturing kept the meniscus lens going in the the Kodak stable for many years. A late examples is the Kodak Brownie Hawkeye Flash, an all plastic box camera produced between 1950 and 1961, with an f/15 single element meniscus lens. Another is the Brownie Fiesta of 1962-1966 with an f/11 meniscus lens.

Further Reading

The Kodak No 2 Folding Autographic Brownie and the Kodak No 2 Folding Pocket Brownie Model B both used achromatic meniscus lens and are reviewed on this site.

The story of lens development is told as part of the overall history of photographic technology in the article on this site: From Chemistry to Computation.

There are also several other articles on the history of photography and camera development on this site.

The Nikon FE SLR

February 12th, 2024

The Nikon FE flew under my Nikon radar for many years. I regularly shoot with the FM3a, F3 and F6, and I’ve had a FM2/n in my collection for some years, but somehow I remained completely unaware of the FE. I am not sure why! When a very clean FM came up at a camera fair hosted by ImageX I examined it and saw from the serial number that it was wasn’t an FM at all – It was a Nikon FE. What exactly that meant was a mystery to me, but a few rolls of film and some reading later, I have got to grips with it.

The Nikon FE and FM – Major Differences

The Nikon FE is a semi-professional SLR model, manufactured from 1978 to 1983. The exterior is very similar to the Nikon FM introduced in 1977 but the internals are electronic. Neither camera features a model number on the front so they are easy to confuse.

Nikon FE
Nikon FE with 50mm f1.8 AI-s pancake lens

Whilst they look alike, the FE and FM are quite different in two important respects and a few details. The Nikon FE has an electronic shutter and offers aperture-priority semi-automatic exposure mode. The centre weighted light meter makes use of needle matching in the viewfinder. The FM is all-mechanical (except for the light meter) and uses a “centre-the-LED” system.

In other words, the Nikon FE is essentially a Nikon FM with an added electronic shutter and aperture-priority mode. This is reflected in Nikon’s Product Timeline which describes the FE as “a sister model of the Nikon FM (1977) with Aperture-Priority Auto [A] mode.”

I am familiar with both metering systems from the FM3a (needle matching) and FM2/n (LEDs). My preference is for prefer needle matching over the LEDs (except in low light) and I usually shoot in full manual. The system is so easy and intuitive I don’t need auto mode. It really is a just personal preference, however. Plenty of photographers find the LEDs simpler and less distracting, and they are certainly easier to read in low light.

FE vs FM – The Details

There are a few other differences between the two models:

  • Viewfinder Screen The FE has an interchangeable viewfinder screen, though the choice of replacements is limited to two (Types B and E, K comes as standard).
  • Battery Check Indicator The FE has a dedicated battery indicator LED on the back of the camera. The FM’s light meter LEDs stay on.
  • Mechanical Shutter Speeds The FE has two mechanical shutter speeds, 1/90 and B. The FM’s speeds are all mechanical.
  • Auto Exposure Lock The FE has an AE lock lever. The FM does not offer this feature.
  • Slowest Manual Speed The FE’s slowest manual speed is 8 seconds, compared to the FM’s 1 second.
  • Exposure Compensation The FE, offering an automatic setting, offers exposure compensation, although the combined ISO/Exposure compensation is quite fiddly and there’s no indication in the finder that it is active. The FM, being manual, does not offer compensation – all adjustment is manual.
  • Weight Nikon specifies 590g for the FE and 540g for the FM, making the FE slightly heavier.
  • Serial Numbers FE serial numbers begin with 3000001 (prefixed by FE), FM serial numbers begin with 2100001 or 2100020 (prefixed by FM).
Nikon FE
Deal beach shot with the Nikon FE (Ilford XP2 400)

The Semi Professional Series

The similarities between the two models are unsurprising as the FE followed the FM in a series of small, semi-professional SLRs: the FM, FM2, FE, FE2, FA, FM3A. All these models shared the same rugged, copper-aluminium alloy (duralumin) internal chassis and general design ethos. An at-a-glance comparison of the FE and FM cameras is shown in the table below:

 FMFEFM2FE-2FM-2nFM3A
ShutterMechanicalElectronicMechanicalElectronicMechanicalBoth
AutomationNoneApertureNoneApertureNoneAperture
Max. Shutter Speed (Sec)1,0004,000
Flash Sync (Sec)1/1251/250
Lens Compatibility Since19581977
Introduced197719781982198319842001
Discontinued198219831984198720012006
FE and FM camera series (excluding Cosina manufactured FE10 and FM10)

Why the Nikon FE was Important

The Nikon FE was important to Nikon for two reasons. Firstly, the electronic Nikon F3 professional camera was already in the works and pro acceptance of electronic shutters was essential. These new shutters and the battery dependence they created were a major cause for concern for conservative pros. The Nikon FE had a popular reception and the positive press coverage it generated helped to overcome the negative sentiment towards electronic shutters that was current at the time.

Secondly, Nikon needed a competitive offering in the amateur/enthusiast market. At that time the market was shifting away from heavy mechanical camera bodies to more compact bodies with microprocessor electronic automation. Nikon a needed a camera to compete in that fast growing market segment. The Nikon FE’s electronic shutter allowed it to include automatic aperture priority and enabled Nikon to introduce it as a replacement for the older Nikkormat EL and Nikon EL series.

Oxford, shot with the Nikon FE (Ilford XP2 400)

Shooting with the Nikon FE

Batteries are ready available. You can use a pair of button alkaline LR44s or a single lithium Duracell 1/3N. I chose the later option.

Loading film is straightforward. Once you have slid the safety lock towards the rear of the camera you can lift the film rewind knob.  Raising the rewind knob completely pops the back of the camera back open. Load the film ensuring the perforations along the edges of the film mesh with the sprockets. When the film is engaged with the spool, press the camera back until it until it snaps into place.

The ISO film speed setting control is on the same ring as the exposure compensation control, on the right of the top plate. You depress the button to the right of the dial to set ISO and lift the ring to set the film speed. It works fine once you are used to it.

Looking through the viewfinder, the aperture you have selected is displayed in a small window to the top of the frame. This is the Nikon Aperture Direct Readout system. To the left there is a shutter scale that displays both the selected shutter speed and a light meter readout via a pair of needles. The longer, thinner black needle is connected to the light meter. In auto-mode this needle indicates which shutter speed will be used, whilst the thicker, shorter green needle is set it A.

In manual mode the green needle is set by the shutter speed dial and needs to be matched to the light meter reading shown by the other needle. You can adjust either the aperture or shutter speed to obtain a match. It’s a great system and in good lighting, I prefer it to the LED system of the F3 and FM2n. With needle matching I almost never use aperture priority as full manual seems so intutive.

The Next Generation

Nikon updated their compact SLR range with the release of the Nikon FM2 in 1982. The new model featured a much faster titanium shutter (1/4000th of a second vs the FM’s and FE’s 1/1000th), an enhanced light meter and an increased flash sync speed.

In 1983, Nikon introduced the Nikon FE2 with an improved shutter (same maximum speed but reduced shutter travel time) and improved damping. The following year Nikon updated to the FM2 as the FM2n, which took the improved shutter from the FE2. Later FM2ns adopted an aluminium shutter, presumably to reduce production costs.

Nikon FE Hampton Gay Manor
The Ruined Manor at Hampton Gay in 2024. Shot with the Nikon FE on Kodak TMAX 100

The FE Vs FE2

The FE2’s biggest advantage over the FE is a 4x faster shutter, but the FE does have a few advantages of its own.

  • Power Switch The FE’s power switch is very simple – just pull out the film wind handle. It’s a little more cumbersome on the FE2, the film advance lever has to be pulled open (to unlock the shutter release), followed by a half push of the shutter release. It then automatically shuts off to save power.
  • Battery Test Light The FE has a dedicated battery test light, which the FE2 lacks
  • Battery Life This FE uses less battery power than the FE2 because its faster shutter needs stronger shutter springs and the batteries have to power the electromagnets to cope.
  • Non-AI Lenses The FE can use Nikon lenses going back to 1959, while the FE2 can’t use non-AI lenses. 
  • Pre Frame 1 Metering The FE2 light meter doesn’t engage until the counter on the film advance gets to 1. Before 1, the shutter always fires at its single manually operated shutter speed – 1/250th of a second. The FE does not have this feature, which is designed to prevent long exposures with the lens cap on, allowing the user to take a shot or two before frame 1.

Pros and Cons

Pros

  • Intuitive needle matching light meter – especially useful in dynamic lighting conditions
  • Aperture-priority semi-automatic exposure mode in a small, lightweight package
  • Modern, automation equipped mount for non-AI lenses
  • Dedicated battery test light makes it easy to see battery status
  • Removable focusing screen provides some options
  • Inexpensive to buy

Cons

  • 1/1000 second maximum shutter speed can be a limitation in bright conditions (this can be overcome with filters of course)

Conclusion

I really enjoy shooting with the Nikon FE. It occurs to me that it is an ideal camera to get back to film with – suitable for beginners to experienced photographers. It isn’t going to replace the awesome FM3A in my affections, but it is a piece of Nikon history that is rewarding to shoot with, and, given its replacement value, one I am happy to take anywhere.

Thoughts and Further Reading

If have experiences to share with the Nikon FE, please leave me a comment below. I’d be delighted to hear from you. And if you are interested in classic or vintage cameras, there are articles on this site on:

If you’ve any experience with the Nikon FE, please leave me a note in the comments – I’d love to hear about it.
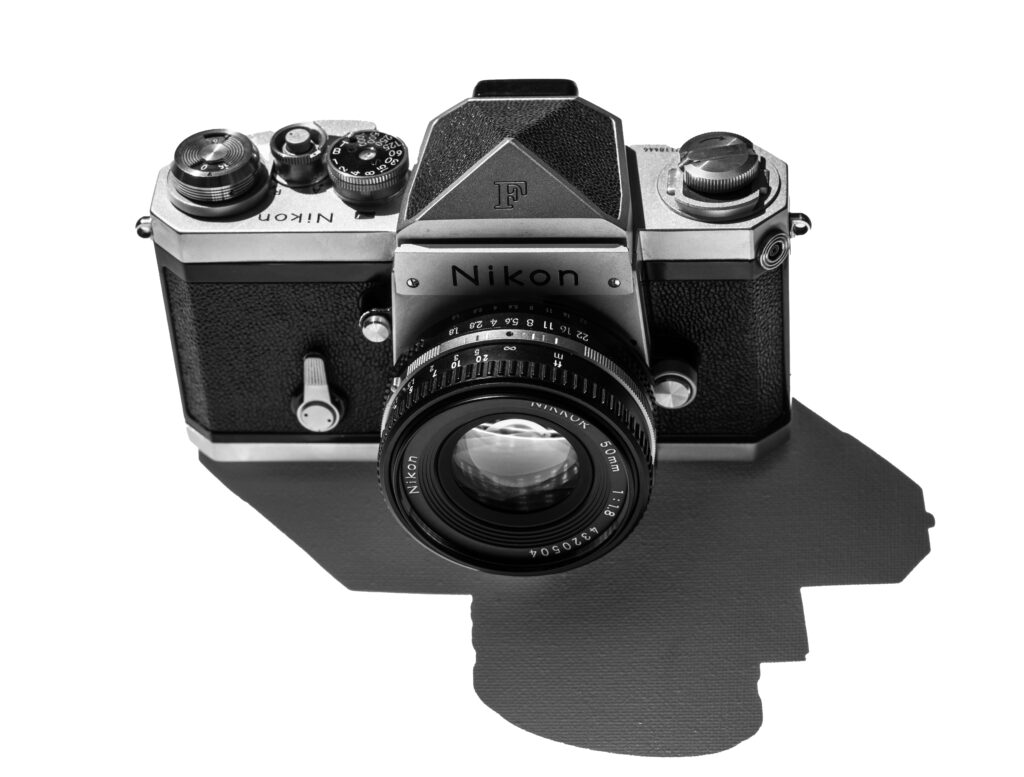
The Photojournalist of Apocalypse Now

June 13th, 2023

This article started as research into classic film cameras in movies, which led me to movies featuring photographers, and to my favourite movie Apocalypse Now, featuring Dennis Hopper as a manic photojournalist. The search for the origin of Dennis Hopper’s crazed character then took me on a voyage of discovery that proved to be nearly as winding as the Mekong River…

The greatest movies featuring photographers
Dennis Hopper, festooned with Nikon Fs, as the manic Photojournalist in Apocalypse Now, shot by still photographer Chas Gerretsen

The Photographer of Apocalypse Now

In Apocalypse Now Dennis Hopper plays an unnamed disciple of the deranged Colonel Kurtz (Marlon Brando), who leads a renegade army of American and Montagnard troops from a remote abandoned Cambodian temple.

Hopper’s photojournalist appears at the end of Captain Willard’s (Martin Sheen) journey up the fictional Nung River to terminate Kurt’s command due to his ‘unsound methods’.

Hooper greets Willard as the ne plus ultra of combat photography; bearded and unkempt, wearing full camouflage with a red headband and sunglasses and covered in Nikon photography gear, some of it visibly battered.

Dennis Hopper in Apocalypse Now

Hopper’s improvisational skills and unconventional acting style shine through in his depiction of the Photojournalist. His character serves as a representation of the war’s impact on the human psyche, showcasing the blurred lines between sanity and madness in the midst of chaos. Hopper’s performance brings a sense of unpredictability and instability to the film, mirroring the disorienting nature of the war itself. Francis Ford Coppola has talked admiringly of Hopper’s dedication to his character, saying, “Dennis Hopper was out there being crazy, as usual. He was mad, but I loved him. I loved working with him.”

The Literary Inspiration for The Photojournalist

The Photojournalist appears in only three scenes, but despite these brief appearances, Hopper’s role is central to the sprawling story.

The Photojournalist is based on The Harlequin in Joseph Conrad’s Heart of Darkness, a Russian sailor who was Kurtz’s only European companion for several months before the steamboat arrives, and who acted as his listener and advocate.

The Role of the Photojournalist

The Harlequin and The Photojournalist are both insiders obsessed with Kurtz’s genius who attempt to convert outsiders to his way of thinking. Here is the Photojournalist’s unsuccessful attempt to justify the severed heads on poles outside Kurtz’s headquarters:

The heads. You’re looking at the heads. Sometimes he goes too far. But… he’s the first one to admit it.

Both cut absurd figures: The Harlequin with his colourful patches and cheerful demeanour in such a hellish environment; the Photojournalist a parody of the crazed hippy combat photojournalist in a headband. Both have a tendency to babble.

This is the Way the World Ends

Although the Photojournalist speaks many of the The Harlequin’s lines they do not play identical roles. The Photojournalist is also illustrative of the heavy price war photographers can pay, particularly the blurred lines between observer and participant and the internal conflicts set off by the accompanying moral ambiguity. The unimaginable trauma of Kurtz’s bloody compound and all that came before it must also weigh very heavily:

This is the way the fucking world ends! Look at this fucking shit we’re in, man!

An Ounce of Cocaine

Coppola builds the photojournalist’s crazed dialogue around lines from the Heart of Darkness and poems by Rudyard Kipling and T. S. Eliot. These are combined with Hopper’s hippy jive talk, which may have been delivered ad lib, fuelled by Hopper’s prodigious drug intake on set.

Hopper was reputed to difficult to work with on set because he was almost always high. George Hickenlooper’s documentary about the production Hearts of Darkness: A Filmmaker’s Apocalypse supports this: “Dennis recounted the story to me that Francis came to him and said, ‘What can I do to help you play this role?’ Dennis said, ‘About an ounce of cocaine.’

A Pair of Ragged Claws

This is in stark contrast to Coppola’s extensive use of poetry in the Photojournalists dialogue, which comes from Kurtz reading poetry to the The Harlequin in Heart of Darkness. The exceptionally strange last line of the speech below is from T.S. Eliot’s The Love Song of J. Alfred Prufrock

Captain Willard : Could we, uh… talk to Colonel Kurtz?

Photojournalist : Hey, man, you don’t talk to the Colonel. You listen to him. The man’s enlarged my mind. He’s a poet warrior in the classic sense. I mean sometimes he’ll… uh… well, you’ll say “hello” to him, right? And he’ll just walk right by you. He won’t even notice you. And suddenly he’ll grab you, and he’ll throw you in a corner, and he’ll say, “Do you know that ‘if’ is the middle word in life? If you can keep your head when all about you are losing theirs and blaming it on you, if you can trust yourself when all men doubt you”… I mean I’m… no, I can’t… I’m a little man, I’m a little man, he’s… he’s a great man! I should have been a pair of ragged claws scuttling across floors of silent seas…

The photojournalist’s evident admiration of Colonel Kurtz is because he had enlarged his mind, which is also what The Harlequin admired so greatly about Kurtz in Heart of Darkness.

We Were All Crazy

The role was suggested to Coppola by the set stills photographer Chas Gerretsen, the still photographer for film. Describing war photographers he told Coppola that “we were all crazy” – and so the role was born. Chas had served in Vietnam and routinely carried Nikon F’s, some of which he sold to the production company for use in the film.

When Dennis Hopper arrived on set Chas was asked to advise  Francis Ford Coppola: “on how to dress a combat photographer” and the role of Dennis Hopper as Captain Colby was changed to the  photojournalist. Chas sold three of his old Nikon F cameras with lenses to the production company and they were used by Dennis Hopper in the film. The Nikon F cameras are on display in the Coppola Winery Movie Museum.

FORGET IT

All that was left to do was to replace the role of Captain Colby, Willard’s predecessor, in which Hopper had originally been cast. Colby appears only very briefly and does not speak, surrounded by Montagnard natives and stroking a rifle. His appearance is set up in Willard’s briefing:

There has been a new development regarding your mission which we must now communicate to you. Months ago a man was ordered on a mission which was identical to yours. We have reason to believe that he is now operating with Kurtz. Saigon was carrying him MIA for his family’s sake. They
assumed he was dead. Then they intercepted a letter he tried to send his wife :

      SELL THE HOUSE
      SELL THE CAR
      SELL THE KIDS
      FIND SOMEONE ELSE
      FORGET IT
      I’M NEVER COMING BACK
      FORGET IT

Captain Richard Colby – he was with Kurtz.

Bad, Dope-Smoking Cats

The Cultural References section of Sean Flynn’s entry in Wikipedia references him as the basis for the Photojournalist in Apocalypse Now. Though it is not substantiated it is entirely possible. Flynn, along with Englishman Tim Page, are portrayed as the lunatic journalists and “bad, dope-smoking cats” of Michael Herr’s classic book on the Vietnam War Dispatches.

Herr went “chopper-hopping round the war zone” with Page and Flynn, taking huge risks according to one reviewer of Dispatches. He later collaborated on the narrative of Apocalypse Now.

In Dispatches Herr described Page as the most extravagant of the “wigged-out crazies running around Vietnam”, largely due to his drug intake. Page’s Wikipedia page also describes him as part of the inspiration for the character of the Photojournalist, who specialised in wigged-out craziness:

One through nine, no maybes, no supposes, no fractions. You can’t travel in space, you can’t go out into space, you know, without, like, you know, uh, with fractions – what are you going to land on – one-quarter, three-eighths? What are you going to do when you go from here to Venus or something? That’s dialectic physics.

I thought dialectic physics was pure invention and part of the madness. It is not, and is helpfully described as “a living method of cognising nature and of searching for new truths in modern science, and in physics in particular” in M. E. Omelyanovsky’s Dialectics In Modern Physics.

In Like (Sean) Flynn

Whether he acted as an inspiration for the role or not Sean Flynn, the only child of hell-raising screen legend Errol, has one of the most fascinating, but also one of the saddest stories of the war.

Initially following in his fathers footsteps as an actor (his first film was Son of Captain Blood, sequel to his father’s classic Captain Blood), he abandoned the craft to start a new life in Vietnam as a combat photographer.

He exploits are truly intrepid. He shot his way out of an ambush with the Green Berets with an M16; incurred injuries from a grenade fragment in battle; made a parachute jump with an Airborne Division, and identified a mine whilst photographing troops, saving an Australian unit from potential destruction. Flynn used a Leica M2 in Vietnam, and it came to light, complete with a strap that fashioned from a parachute cord and a hand grenade pin, just a few years ago.

The Disappearance of Sean Flynn and Dana Stone

In 1970 Flynn was captured by Viet Cong guerrillas at a checkpoint along with fellow photojournalist Dana Stone. The pair had elected to travel by motorbike rather than the limos the majority of photojournalists were travelling in. Neither he or Stone were seen again. Despite the efforts of his mother to find him, Flynn was declared dead in absentia in 1984 and the fate of two remains unknown, notwithstanding the continued efforts of friends and the Joint POW/MIA Accounting Command (JPAC), the organisation responsible for recovering the remains of fallen soldiers.

Sean Finn’s story is told in a film inspired by his life entitled The Road to Freedom which was filmed on location in Cambodia in 2011. It also the subject of an eponymous track on the album Combat Rock by The Clash.

A CIA Kurtz?

Whilst the role of Colonel Kurtz and his ‘unsound methods’ was clearly inspired by ‘Heart of Darkness’, there is another potential influence which is less well known. This is revealed in the UK documentary ‘The Search for Kurtz’ which describes how CIA Paramilitary Operations Officer Tony Poe and his leadership of Operation Momentum, which was launched in 1962 to turn the Laotian Hmong people into anti-communist guerrillas.

The Wrath of Klaus Kinski

Another significant influence for the Vietnam river epic is Aguirre, Wrath of God by Werner Herzog, starring a barely sane Klaus Kinski in the role of his life. The story follows the self styled ‘Wrath of God, Prince of Freedom, King of Tierra Firme’ Lope de Aguirre, who leads a group of conquistadores down the Amazon River in search of El Dorado, city of Gold.

It is an astonishing and spectacular film, described by Robert Egbert as is “one of the great haunting visions of the cinema”. Curiously, I did not make the connection with Apocalypse Now until researching this article. Like Apocalypse Now, which was troubled by a heart attack, an overweight star, a mental breakdown and storms that destroyed the sets, the filming of Aguirre is the stuff of legend. Herzog allegedly pulled a gun on Kinski to force him to continue to act in the remote fever-ridden jungle district where the film was shot.

Has a character in a movie, especially an unnamed one, ever had such a rich set of sources?

The Photojournalist’s Cameras

The Photojournalist’s cameras are Nikon Fs with a variety of lenses; possibly a fast 50mm, a 105mm and a 200mm. This isn’t a a surprising photographer’s rig as the Nikon F, along with the Leica M2, was the leading film camera of the Vietnam war and carrying multiple cameras was common. Richard Crowe a former Combat Cameraman who served between 1966–1972 described the practice on the Q&A website Quora:

“If we are talking about photojournalists, they usually carried two to three 35mm cameras each with a different focal length lens. Nikon and Leica cameras were the favorites and the photojournalists usually owned their own equipment. The guys that I worked with often carried both a Leica with a UWA lens and two Nikons with normal and short telephoto lenses. The Canon SLR cameras of the day would often not stand up to the rough usage and dirt and grime in Vietnam. The photojournalists began to paint the silver portions of the camera bodies black so the camera would not be a point of aim for a sniper. Later on, camera companies began to supply cameras with black bodies and called them “Photojournalist Models”. BTW: no photojournalist that I knew or met ever carried a zoom lens on his camera. The early zoom lenses for SLR cameras were pretty crappy in image quality.”

Notable Vietnam War Nikon F users included Eddie Adams, Larry Burrows, Tim Page, Henri Huet, Dana Stone, Philip Jones Griffiths and Don McCullin, whose F famously stopped a bullet from an AK47.

The Legacy of the Nikon F

The Nikon F was not the first SLR, that distinction belongs to the Exakta, which is the subject of another blog about photographers – Rear Window. Prior to its introduction, however, no SLR could challenge the mighty German rangefinder in the 35mm camera market; SLRs were often compared unfavourably to rangefinders as heavy, slow and less than reliable, with dim viewfinders.

The F swept away that dominance and many professional photographers abandoned Leica for Nikon. Leica lost its market dominance and never recovered it, though it has prospered in its niche of late.

Photographer of Apocalypse Now Nikon F
The long shadow of the Nikon F

The Nikon F brought many advancements to market simultaneously:

  • A system camera with interchangeable viewfinders and focusing screens
  • An automatic diaphragm and an instant-return mirror, which made it the quickest SLR by far.
  • An impressive lens line up
  • A large reflex mirror that kept the viewfinder bright, and reduced vignetting
  • A 100% viewfinder, an SLR first
  • A focal plane shutter with titanium-foil blinds—also a first

These advancements made the technical advantages of the SLR over the rangefinder compelling. The need to match lenses to frame lines and for external viewfinders to use wide angle lenses disappeared. Gone too were the framing and parallax compensation issues and the limitation on zoom and lenses longer than 135mm.

Over time the F became legendary for indestructible levels of reliability and durability. It still casts a long shadow.

The Legacy of Apocalypse Now

Apocalypse Now is an iconic movie, savage and darkly comic, and an expedition through insanity from start to finish. It is widely considered one of the greatest films ever made. I have watched it many times and it has retained its power for me.

Robert Egbert said of it: “Apocalypse Now is the best Vietnam film, one of the greatest of all films, because it pushes beyond the others, into the dark places of the soul. It is not about war so much as about how war reveals truths we would be happy never to discover.

Related Articles on Flash of Darkness

If you enjoyed this article, another movie that is a favourite of mine and features a photographer is Alfred Hitchcock’s Rear Window. The journey wasn’t quite as twisting as Apocalypse now but it was interesting nonetheless…

There are also two articles on classic film cameras in the movies on this site – one of Leica and one on Nikon.

The Greatest Movies about Photographers: Rear Window

June 11th, 2023

This article was inspired by classic film cameras in movies – specifically , Leicas and Nikons. From cameras in movies, it’s a short step to movies about photographers. My favourite movie with a photographer as the lead character is Alfred Hitchcock’s Rear Window, and I was intrigued by the camera and telephoto lens Jimmy Stewart used in the role – hence this article.

The greatest movies featuring photographers
Jimmy Stewart, his Exacta Varex with Grace Kelly and Thelma Ritter in Rear Window

Rear Window

Alfred Hitchcock’s Rear Window contains probably the most iconic photographer/film camera combinations in movie history. The film is based on a short story, “It Had to Be Murder” and stars Jimmy Stewart as LB ‘Jeff’ Jeffries, a New York magazine photographer. Recuperating from a broken leg, Jeffries is confined to a wheelchair in his apartment in Greenwich Village.

Jeff’s rear window looks out onto a courtyard and his neighbour’s apartments, which he observes during his convalescence in a stifling Manhattan summer. The include a lonely middle-aged woman, a new wed couple, a dancer, a husband and his sick wife, an alcoholic pianist and a couple who often sleep out in the balcony in the hot weather. Jeff’s observations include some suspicious sounds and behaviour and he becomes convinced one of his neighbours, Lars Thorwald, has committed a murder.

Inspirations for a Murderer

Mischievously, Hitchcock modelled the murderer on a former meddling producer he did not care for, David O. Selznick. Grace Kelly plays the archetypical Hitchcock blonde heroine in Lisa Carol Fremont, a stylish and resourceful socialite who has to engage in much of the action as Jeff is wheelchair bound. Although he did not write the the screenplay, Hitchcock also supplied colour for the murder story from two cases he head read about in the newspapers: the infamous Dr. Crippen and the less well remembered Patrick Mohan, both of whom dismembered their victims.

The Role of the Photographer

Rear Window is another of my favourite films, and the role of the photographer is pure Hitchcock. David Campany describes it well in the essay Re-viewing Rear Window:

“For Hitchcock’s purposes, a photographer is above all someone who looks. It is their socially accepted voyeurism that is significant, not their images. Voyeurism requires a safe distance, a vantage point for the observer beyond the reach of the observed (much like a movie audience, watching but not accountable). In Rear Window, the photographer is cut off not just by the lens of his camera, or by the glass window of his apartment, or indeed by the abyss of the courtyard across which he stares. It is his professionalized looking, with its fantasy of objectivity, that cuts him off. It demands his separation from the world. Despite witnessing what he believes is a murderer covering his traces, he feels no urge to get it on film. Rather, he uses his camera’s long lens as a telescope to watch, swapping it for binoculars when things get really intense.”

That Obscure Object of Desire

Jeff’s camera was an Exakta Varex VX 35mm film SLR made by the improbably named Ihagee of Dresden, which was in East Germany at the time. This manufacturer is best known for the Kine Exakta (1936-1948), the first 35mm single-lens reflex (SLR) camera in regular production.

The Exakta Varex VX was introduced in 1951 and was based on the Kine Exakta. The Exakta Varex VX was a system camera that could be used with either a waist level finder or with a pentaprism and a variety of focusing screens. Other specialised equipment available for the camera system included microscope adaptors, extension bellows, stereo attachments and medical attachments.

Exakta as Witness

In addition to a staring role in Rear Window Josef Koudelka used an Exacta Varex to photograph the invasion of Prague in 1968. He had returned to Czechoslovakia from Romania recording his photo-essay Gypsies (also with an Exacta Varex) two days before the Soviet invasion of Czechoslovakia in August 1968.

These photographs, of crowds staring down the barrels of tank guns, defiant youths waving resistance flags in smouldering streets and anti-Soviet graffiti that sprang up every day and was whitewashed every night, came to define one of the pivotal moments of 20th-century history. However Josef Koudelka would have to wait another 16 years for an exhibition at London’s Hayward Gallery before being credited as the photographer. Until then, the pictures had been attributed to PP (Prague Photographer) to protect Koudelka and his family from reprisals. Josef Koudelka: the lonely, rebel photographer

Rear Window

In Alfred Hitchcock’s Rear Window the Exakta Varex VX was paired with a huge 400mm telephoto lens; the catchily named Kilfitt fern-kilar f/5.6 model. The f/5.6 400mm lens weighed 1.76kg and almost certainly required a tripod to obtain sharp shots.

Collectively the camera/lens combination is known as the ‘Rear Window stalking camera’ and is much desired by collectors.

Although scarcely known today beyond its association with the Hitchcock classic, Kilfitt was an innovative German lens manufacturer who introduced the first production varifocal (zoom) lens for still 35mm photography – The Zoomar of 1959, which arrived the same year as the Nikon’s game changing F. Kilfitt also produced the first macro lens to provide continuous close focusing in 1955. If you are interested in photography milestones such as these, take a look at the timeline on this site.

My Own 400mm Rear Window Lens

Greatest movies featuring photographers - Rear Window
The Nikon 400mm f3.5 prime mounted on an F6

I have a 400mm lens prime also. Not wanting to spend several thousand on a lens I would use only occasionally I purchased an old school manual focus Nikon Ai-S 400m f3.5 IF-ED from a Japanese eBay seller.

A Beast of a Lens

It’s an all-metal 2.8kg beast of a lens, a whole 1kg heavier than the Rear Window 400mm, and built like the proverbial tank. Mine came with a protective clear 122mm filter, which made it even better value. It is an amazing piece of kit but not the most practical. There’s no VR and it requires a tripod and a gimbal head, which makes the combined shooting weight pretty substantial.

The first version of the lens was introduced in 1976 and was followed in 1977 by an Ai version. Mine is the Ai-S lens version introduced in 1982 and which can be identified by the minimum aperture number which is engraved in orange. The expression ‘they don’t make them like that anymore’ was never more true than with this lens which is an incredibly solidly engineered piece of work.

I used it originally for shots of the moon with the Z7 and the FTZ adapter using focus peaking, but I have recently acquired the new 100-400 mm zoom for that kind of shot. It’s better optically of course, and far lighter, but has nothing like the presence. I’ve kept the old monster for use with my older Nikon cameras – the F series and FM film classics. Sometimes, only film will do.

Other Movies Featuring Photographers

Whilst my favourite movie with a photographer as lead is Rear Window, but there are many others featuring photographers. My favourite is Apocalypse Now – the subject of another article on this site, but here’s a list of some of the most notable of the others.

  • Blow-Up (1966)
  • Double Exposure: The Story of Margaret Bourke-White (1989) 
  • Proof (1991)
  • The Killing Fields (1991)
  • High Art (1998)
  • Pecker (1998)
  • Harrison’s Flowers (2000)
  • Gentlemen’s Relish (2001)
  • City of God (2002)
  • Closer (2004)
  • Fur: An Imaginary Portrait of Diane Arbus (2006)
  • Everlasting Moments (2008)
  • The Secret Life of Walter Mitty (2013)
  • Kodachrome (2017)
  • Photograph (2019)

A Road Trip in The Faroe Islands – Part II

June 4th, 2023

Getting To The Faroe Islands

The date for our departure on our long anticipated road trip in the Faroe Islands finally arrived on the 25th May 2023. Our first was flight from Stanstead, UK to Aalborg, Denmark, an old city on the Limfjord where Viking ships once sailed. As it was a late afternoon flight with a decent layover we had time to head into the city for quick dinner with our Danish friends who would be accompanying us in Aalborg.

The final flight, on Atlantic Airways, arrived at Vágar Airport  (Vága Floghavn in Faroese, IATA: FAE). This is the sole airport serving the Faroes on the island of Vágar. The landing was flawless, despite a nasty cross wind. The airport was built by the British Army during World War II and site was chosen largely because it was hard for German warships to observe from the sea! This is not the only legacy of the British in the Faroe Islands, as the locals apparently continue to enjoy British staples such as fish and chips and Dairy Milk chocolate. 

It was late when reached the Hotel Brandan in Tórshavn so we retired after a quick night cap.

For those interested in photography, in addition to the shots on this page, you can find my black and white gallery here. Also on this site, Part I of this blog provides a bit more background to The Faroe Islands and describes why it is well worth visiting.

Where to Stay in The Faroe Islands?

We had a short debate about where to stay in The Faroe Islands, particularly as to whether we should stay in a remote location or in the city. Although we found some lovely cabins out in the wilds, eventually we decided that it would be best to base ourselves in the capital city Tórshavn. We found this decision suited us very well.

We travelled to some fairly remote locations during the day and Tórshavn felt like a metropolis in comparison. The Hotel Brandan was comfortable, hotel amenities were very welcome, the staff were friendly and the excellent breakfast set up us nicely each day.

Road Trip Day 1. Rain, Vestmanna and The National Gallery

We awoke full of excitement on our first full day, and after breakfast headed for the village of Vestmanna (West Men), on the northwest coast of Streymoy, the main island. It is a short drive, just half an hour or so from our hotel. We took the scenic mountain road Oyggjarvegur and stopped near Kaldbaksbotnur, a village of just two farms, near Kaldbaksfjørður and took in the spectacular views of the fjord.

Amazing light in Kaldbaksfjørður, seen from Kaldbaksbotnur

Vestmanna is a medium sized Faroese village best known for boat tours to the Vestmanna bird cliffs. The boat was sailing that day, but as we had already booked two other boat trips and it was raining we elected to visit the Saga Museum by the harbour and grab a coffee. Piracy was a common hazard in Vestmanna for centuries and features quite heavily in the various stories told by the wax figures and accompanying audio at the Museum.

The Epic Voyage of St. Brendan The Navigator

The first of the waxwork figures we encountered is of an Abbot. This figure, and accompanying audio, tells the story of St. Brendan The Navigator, an Irish Monk. He is important in the story of The Faroe Islands because of the epic journey he is said to have made across the North Atlantic in the sixth century, which was recorded in a ninth century text. During the voyage, Brendan visited an island which he described as The Paradise of Birds and a larger island described as The Island of Sheep. It’s not hard to see how this could have been The Faroe Islands, an archipelago whose name means Island of Sheep.

The National Gallery, Listasavn Føroya

We returned to Tórshavn, a name that rather pleasingly translates as Thor’s harbour. For the mythologically inclined, Thor’s most nautical myth is an account of his fishing trip to catch Jörmungandr (Jormungand) the Midgard Serpent.

On the return journey we took the other (non-scenic, but still scenic!) road from Vestmanna. We had a pleasant walk around Tórshavn harbour before heading for Listasavn Føroya, the National Gallery of the Faroe Islands, which is a great rainy day location to visit.

The National Gallery houses a large collection of nearly 3,000 works of Faroese art of which only around 10% are displayed in the museum’s permanent exhibition. These are divided into themes, and the museum is well worth visiting. There was a lot of great work on show, but I particularly enjoyed the work of Sámal Joensen-Mikines, Edward Fuglø (particularly ‘Colony’) and Rannva Kunoy. There are trees around the museum which is quite a novelty on the Faroes, which is treeless across most of the islands.

In the evening we dined at Áarstova, a lamb and seafood restaurant in Tórshavn. It is named after the house two famous local poets, Hans Andrias Djurhuus and Janus Djurhuus, were born in. The food, setting and service were all excellent.

Day2 . Wind, Klaksvík and Gjógv

The second day we headed to Tórshavn to Klaksvík via Route 10 and the Eysturoy tunnel. This incredible feat of engineering, which took several years to compete, shortens the drive from just over an hour to a little over 30 minutes. All the sub sea tunnels charge a toll, which was applied by our hire car company. It was exciting to see the world’s first undersea roundabout (aka the jellyfish roundabout), after which we drove up the East coast of Skálafjørður, the longest fjord in the Faroe Islands, passing half a dozen or so small villages.

Encountering a Skrid

The view Gøtuvík near a turf-roofed farmhouse

There is a very small road about halfway across one of the narrowest parts of Eysturoy which provides wonderful views of the bay of Gøtuvík. We stopped and took a few shots there. It was so windy we could hardly stand up straight to take our photographs. Reading a local weather report later, that was hardly surprising as we were experiencing a skrid – a gale force (8) wind. Beyond that, at force 9, is a stormur a strong gale, and a hvassur stormur, which blows at storm force 10.

Syðrugøta – and a Saga

We rounded the end of Gøtuvík bay, passing Syðrugøta, where The Faroe Islands’ most famous Viking age Chieftain Tróndur í Gøtu (c. 945 – 1035) is said to have lived. He is a central character in the Færeyinga saga, the Faroe Islands’ saga which tells of the arrival of Christianity, and his opposition to it.

For those interested in the strange world of the Norse I can highly recommend a book that provides a thoroughly entertaining deep dive into it: The Children of Ash and Elm. This is written by a scholarly archaeologist who happens to posses a great sense of humour.

Shortly after we passed Syðrugøta it started to rain quite heavily and the wind picked up, but this didn’t deter the women playing football on a windswept pitch in one of the small towns we passed through. We were in awe of their resilience.

On to the Northern Islands

After crossing Leirvíksfjørður, the fjord that separates the islands of Eysturoy and Borðoy, via the 6km long Norðoyartunnilin (The Northern Isles Tunnel) we drove into Klaksvík, the capital of the four Northern Islands; Borðoy, Kunoy, Kalsoy, and Viðoy.  Borðoy was the only one of the four we visited, but we got great views of Kalsoy later that day from the village of Gjógv.

Klaksvík – The Harbour amongst the Mountains

The harbour at Klaksvík

Klaksvík is the main fishing port for the islands and the second largest city. Despite this, before the sub sea tunnel Norðoyartunnilin opened it must have been quite isolated. It is in an impressive location, sitting between two fjords and surrounded by high mountains that rise from the shoreline, which made for some great pictures.

A Faroese knitwear shop, Tógvhandilin, beckoned. Klaksvík is one of three main towns with shops, the others being Tórshavn (the clear leader) and Runavík. There is a knitwear festival in the islands each year. Each of us bought something – hats, mittens and a sweater. Faroese knitwear is very well made and amazingly warm.

My hat was certainly a welcome upgrade when we were out at sea later on the trip. Before we left we had coffee and something to eat at Fríða Kaffihús, a nearby café. This recommendation came from the knitwear shop and proved to be a winner.

Spectacular Gjógv

Our next destination was Gjógv, a small, colourful fishing village located on the northeast tip of the island of Eysturoy, overlooking the island of Kalsoy. It is about 30 miles from Klaksvík and is located at the end of a deep valley, with no other villages in sight.

The view of Kalsoy from Gjógv

We parked and walked down towards the village, which sits on either side of a river. The majority of Gjógv’s houses are modern but colourful and make for a lovely spectacle as you walk down the hill towards the sea. It was a lovely start, but it gets even better.

Walking down to the shore we found breath taking views over the volcanic shore to the Island of Kalsoy. One of our party observed that the coast resembled one she had seen in South Africa, and having seen something similar myself, I agreed. The village gets its name from a 200-meter-long gorge, which was used for centuries as a natural harbour and is also quite something to behold.

Some Welcome Waffles

After taking in the views for some time we enjoyed the local speciality of Faroese waffles (vaflur) with rhubarb jam at Gjáarkaffi, a tiny coffee house. It turns out that rhubarb is one of the few vegetables that grows in the tough climate of the Faroe Islands. My memories of British rhubarb and custard are not especially fond ones, but the slightly sharp jam was a superb accompaniment to the waffles.

One of the old photos in Restaurant Barbara

A Different Kind of Surf and Turf

We drove back to Torshavn, well pleased with the day, and completed it with dinner at Barbara. This is a fish restaurant, which serves a multi course tasting menu described as tapas. It is set in a very old turf-roofed house which has an interior full of character. I particularly liked the old black and white photos of life in the Faroe Islands in the early twentieth century. We had high expectations of the restaurant and it did not disappoint, though like all the best restaurants in town, the bill was quite steep.

Day 3. History: Kirkjubøur and Sandur

Next up on our road trip was Kirkjubøur. This is the country’s most important historical site and the southernmost village on Streymoy. Here, in close proximity, are the ruins of the Cathedral, the oldest church still in use, and an ancient log house which has been continuously inhabited since the sixteenth century by one of the leading families of the Faroe Islands. Most of the houses in the village are dressed in classic pitch-black with turf roofs and there are views of the islands of Hestur, Koltur and Sandoy.

Kirkjubøur was the seat of the Faroese bishop from the 12th century until the Reformation, and the church there was the most important in the islands. The medieval village was larger than it is today with around 50 houses. Most of these were washed away by a storm in the 16th century.

What remains is still fascinating.

Kirkjubøargarður/Roykstovan

The farm house Kirkjubøargarður is one of the oldest constantly inhabited wooden houses of the world and the oldest part, the Roykstovan, (the smoky room) dates to the 11th century. This part of the building is open to the public. The Patursson Family, who have played a number of important cultural and political roles in the history of the Faroes, has occupied the farm since 1550 and is still resident.

Faroe Islands
Kirkjubøur: St. Olav’s Church and St. Magnus Cathedral (Film, Nikon F3)

Saint Olav’s Church – Ólavskirkjan

Saint Olav’s Church or Ólavskirkjan dates from about 1250 (though I’ve seen older dates). What is agreed is is that it is the Faroe Islands oldest church still in use.

Saint Olav is the patron saint of the Faroe Islands (and of Norway). He is celebrated each year at Ólavsøka (Saint Olav’s Wake), a two-day celebration held on 28th and 29th of July. Many Faroese gather in the capital Tórshavn, some in traditional Faroese dress, greeting those they meet with “Góða (Good) Ólavsøka!”.

A set of carved pew ends from the church, known as the Kirkjubøur chairs, are now in the National Museum. We didn’t get to that museum on the trip, but there are some great images of them on a set of postage stamps issued by Postverk Føroya in the 1980s.

The museum also holds a runestone, the Kirkjubøur stone, which was found in the church in 1832. The glass art in the front gate was made by painter, sculptor, glass artist and explorer Tróndur Patursson.

The Epic Brendan Voyage – Part II

In 1977 this intrepid member of the Patursson family accompanied British explorer and historian Tim Severin across the North Atlantic on the Brendan, a replica of a replica of St. Brendan’s currach in an attempt to prove this feat was possible. It was! Setting out from Tralee, Ireland, this remarkable, two-masted boat of ancient design, wrapped with ox hides and sealed with animal grease, successfully made the 4,500 mile crossing, arriving in Newfoundland Canada. The voyage took over 13 months and the route took in the Hebrides, the Faroe Islands and Iceland.

St. Magnus Cathedral

The ruins of San Magnus Cathedral (Film, Nikon F3)

Close to both St Olav’s church and Kirkjubøargarður farm house is Magnus Cathedral, a ruined cathedral, built around 1300, which is commonly said to have been abandoned before it was a finished, though recent research suggests it did indeed get a roof. The ruins are the largest medieval building in the Faroe Islands and stand as a reminder of a time when the small village it looms over was the religious centre of the islands.

On an overcast day it has a pleasingly mysterious atmosphere, though curiously only my film shots were able to capture it. These were taken on a slightly battered Nikon F3, which was the camera that got me back into film photography.

As a black and photographer, I am fan of atmospheric ruins, particularly if they have a story to tell, and I have been photographing a local ruined manor in Oxfordshire for many years.

The Crossing to Sandy Sandoy

By way of extreme contrast to the epic Brendan Crossing, our first sailing in the Faroes was the short ferry crossing from Gamlarætt to Skopun on Sandoy. This is the only island in the archipelago with sand dunes.  The ferry rolled considerably in the swell but the journey took less than 30 minutes. This service will soon be replaced by a sub sea tunnel which is under construction. Our point of arrival, Skopun, is a niðursetubygd, a unique Faroese term for a settlement or village of modern origin (19th century) which has no outlying land belonging to it.

The Old Church in Sandur

From Skopun we drove down to the town of Sandur, walked around the old church which is the 6th on the site, and took in the view. The first of these churches was an 11th century stave church. Also dating from the 11th century is a hoard of silver coins that was found in the graveyard. The sandy beaches may have welcomed settlers well before the Viking age as evidence of settlement in the 4th-6th century was found on the island in 2007.

Returning to the harbour at Skopun we took some pictures of some old abandoned boats just beyond the harbour, before boarding the ferry and returning to Tórshavn via Gamlarætt.

A Literary Lunch

We had a late lunch in the Paname Café in Torshavn after a wander in the excellent bookshop that is in the same building. The fare in the café was first rate. The bookshop, H.N. Jacobsens Bókahandil, was established in 1865 and is the oldest in the islands. The building that houses the café and bookshop has the classic Faroese grass roof and red exterior and is quite a landmark in Tórshavn. It’s a great place to hang out for a while.

Another wander in the old town was followed by a short rest at the hotel and before we knew it was it time for dinner, which we took in the hotel. The bar was crowded with Icelanders who seemed to be having a most excellent time.

The road to the Drangarnir sea stacks

Day 4. Sea Stacks and a Waterfall into the Sea

Our last day of our road trip on The Faroe Islands took us on Route 50 back to Vágar, the home of the airport in the western part of the Faroe Islands. We crossed via the sub sea tunnel and drove through Sandavágur with its landmark bright red-roofed church. Soon we reached Sorvágur, a little town most visitors frequent only to sail to the famed bird island of Mykines.

Later that day we would heading out to the sea stacks by boat. After a short wander around the harbour and town we headed on to Gásadalur and its famed waterfall that empties into the sea.

A Miss and A Myth

We passed Lake Leitisvatn, also also known as Sørvágsvatn, and more commonly the Floating Lake because of the optical illusion it presents when seen from Trælanípa cliffs. This view requires a one hour hike. Though we planned to see this, to our regret we didn’t make it.

We did however, see the silver statue of a Nykur (also known as a Nixie or water spirit) at the lake. We took this to be a prancing horse, but despite its equine form this is no pony, but a sinister mythical beast and the subject of Faroese legend.

The Nykur has the rather unfortunate habit of luring the unwary to mount it or touch it, after which its sticky skin keeps them attached and they are dragged down and drowned in the lake. The word Nykur may well be related to Old English nicor (water monster) used in the epic poem Beowulf.

Gásadalur and Múlafossur

Road trip Faroe Islands

Gásadalur is home to the spectacular waterfall Múlafossur. There are only about 30 waterfalls that empty directly into the sea in the world and I had never seen one before. It is quite something, and made all the more special by the seabirds that fly in front of it.

A farm dog followed us as we walked towards the waterfall and wanted to play. We threw a stone for him which he ran after and jealously guarded for a while, before realising it. He stayed with us for some time.

Nearby the waterfall in Gásadalur is a café and guesthouse in a working farm, Gásadalsgarðurin, which sells local art and serves locally sourced food. Here I tried another local delicacy – fermented meat. The farm breeds bull calves organically and their fermented meat is used in a beef soup. The soup has been recognised at Embla, the Nordic Food Awards.

Drangarnir

We walked around the harbour and then to the boat, where we met our skipper, an avuncular and highly capable Faroese named Elias.

One of the Drangarnir sea stacks

We had booked the boat to sail to Drangarnir, the Faroe Islands’ most famous rock formations. There are two sea stacks, Stóri Drangur (large sea stack), a spectacular sea arch, and its companion Lítli Drangur (small sea stack).

Beyond the stack stacks lie Mykines. We had booked a trip to the island earlier in our stay but never reached it due to bad weather, which is not uncommon.

Elias talked of his life in The Faroe Islands and the childhood he spent there. It was great to hear directly from a Faroese. His description of an active life, bound by community and much closer to nature made a great case for life on the islands. We also learned that our food in Gásadalsgarðurin had been cooked by his mother and served by this sister!

Bøur Beach and Village

Road trip Faroe Islands
Our Faroese Skipper, Elias

We sailed past the picturesque village of Bøur, which must have one of the best views in the islands. It overlooks Drangarnir, as well as the uninhabited islands of Gásholmur and Tindholmur. There is a tiny beach of black volcanic sand nearby, which is likely be one of the quietest beaches in the world.

We finished the day at Katrina Christiansen – a fish restaurant with a history. The building is early eighteenth century and the informative website describes how it started as a barbershop, before becoming a general store and home to William Heinesen a well known Faroese poet, writer, composer and painter. The menu offers a choice of tasting menu, and both fare and service were excellent, with the cod cheeks and Faroese beef and mashed potatoes being the standouts.

Return and Reflections

A typical view on a road trip in The Faroe Islands

Our return to the UK was via Copenhagen as the connection at Aalborg was just too tight for comfort. I will confess to feeling a little lost when I returned to Oxfordshire and kept my slightly battered and much annotated map of The Faroe Islands in my pocket for a few days. The post holiday blues have passed now and I am extremely happy and grateful to have been able to make the trip.

A road trip in the Faroe Islands is a much more practical proposition than I had thought and the islands are quite unlike anywhere else.

I saw some of the most stunning landscapes in the world – rugged, sculptured, dramatically lit, and painted shades of green I have never seen before. They are also largely untouched and possess a distinctive and fascinating cultural identity.

Beyond The Faroe Islands: Other Road Trips on this Site

If you’ve enjoyed reading about our road trip in The Faroe Islands, you might enjoy some of the others I have made.

A Road Trip in The Faroe Islands – Part I

June 2nd, 2023

Why visit the remote and northerly Faroe Islands? A volcanic archipelago of 18 islands situated between Iceland and Norway in the most turbulent part of the North Atlantic might not seem like the most promising destination for a road trip. However, as I found recently, the islands proved to be an epic setting for a motoring holiday .

The Gift of the Gulf Stream

The Faroe Islands are located on the 62nd parallel in the North Atlantic, northwest of Scotland and about halfway between Iceland and Norway. The island’s closest neighbours are the Northern Isles (Orkney and Shetland) and the Outer Hebrides of Scotland. 

This is generally a rather chilly part of the world; the Arctic starts only a couple of parallels up at 64.2°N. The icy Bering Sea, The Sea of Okhotsk on the Eastern coast of Siberia, Alaska and the Hudson Bay are some of the cold and rather inhospitable neighbourhoods at this latitude.

Fortunately, the Faroe Islands sits right in the heart of the Gulf Stream. This creates a temperate marine climate with minimal temperature variation. The average temperature ranges from around 3°C in winter, which is very moderate for so northerly a location, to an admittedly rather cool 12°C in the summer. The harbours never freeze and snow is short lived.

The Connected Archipelago

Like north west Scotland, the Orkneys and Shetland, the Faroe Islands are notoriously windy, resulting in extremely choppy seas. In years gone by this severely restricted travel between the 17 inhabited islands – especially in bad weather or at night.

This presents few problems today as the islands are well connected by an impressive series of sub sea tunnels, making it easy to travel across them by car. One sub sea tunnel even has a roundabout – the world’s first undersea roundabout, AKA the jellyfish roundabout. The Faroe Islands have a good infrastructure, with an excellent road network. Over half the islands’ electricity is produced from sustainable sources like wind power.

The archipelago is 113km (70 miles) long and 75km (47 miles) wide, with an area of about 1,400 square kilometres (540 sq. mi.). This makes it slightly larger than half the size of Luxemburg and the 170th largest country by area.

A road trip is an eminently practical proposition.

The Wild Beauty of The Faroe Islands

The Faroes are also an utterly beautiful and somewhat otherworldly place to visit.

You will never be more than 5 km (3 miles) away from 1100 km (687 miles) of spectacular coastline. This is deeply indented with fjords, dotted with imposing sea stacks and has many steep rocky cliffs, many of which are populated by colonies of seabirds.

Looking out to Kalsoy island from the coast at Gjógv

The rugged landscape, composed of volcanic rock and sculptured by glaciers, has high mountains, deep valleys and many waterfalls. Nothing much grows above ground, so the contours of the land are always on show and the treeless slopes contribute to the islands’ wild beauty.

With all this on offer, the Faroe Islands are a landscape photographer’s paradise.

The two photographers in our party took a medium format Hasselblad System V film camera, a Nikon F3, a Leica Q2, a brace of modern Nikon digital cameras and a selection of lenses from 24mm to 500mm. I also made use of my iPhone Pro, especially from within the car. We were both pleased with the results, some of which you can see in this article. You will find the main black and white photo gallery here.

Constantly Changing Light

Although the archipelago sees less than 850 hours of sunshine per year, the northern light is ideal for photographers and artists. The light is never the same for long; the changeable maritime climate produces brilliant sunshine one minute and misty hill fog the next. Rainfall and cloud are both frequent.

Why visit The Faroe Islands?
A sunlight valley under heavy cloud.

Our Faroese skipper on our sailing trip out to the sea stacks joked that it rains 300 days a year. That’s an exaggeration, as it only rains for 210 days! You can of course pick the month of your visit, and June has the fewest wet days at 12. As they say in The Faroe Islands (and in Iceland), “if you don’t like the weather, wait a minute.” Inevitably we encountered some rain on our trip, but it didn’t trouble us.

At this latitude the sun is also up (but not always visible!) for nearly 20 hours at the summer solstice.

A Fascinating History: Settlement of the Faroes

Unlike most of the world, human colonisation did not occur in pre history. Evidence of settlement on the Faroe Islands goes back to the mid-fourth century, though the people are unknown. This was followed by Irish monks in the eighth century, who may have established Christian communities.

Norse settlements followed in the ninth century, resulting in a Norse culture. The name Føroyar (Faroe Islands) is derived from old Norse and means Sheep Islands. The Faroese language, which is closely related to Icelandic, derives from the Old Norse language of these Norsemen, which developed into modern Nordic languages in the mid-to-late 14th century.

It’s possible there is some Gaelic language in Faroese as place names such as Mykines, Stóra Dímun and Lítla Dímun may contain Celtic roots.

The conversion of the islanders to Christianity came c. 1000 from Norway. In the same century the Faroe Islands may well have formed a stepping stone beyond Shetland for the journey across the North Atlantic to America. The islanders established their Althing (parliament), later named Løgting, at Tinganes in Tórshavn, the capital city.

The islands became a Norwegian province in 1035 and passed to Denmark with the rest of Norway in 1380. Later the islands became a Danish royal trade monopoly, which inhibited economic development for many years.

A Fascinating History: The Faroese Strike Back

Rising Faroese national identity and a shift to fishing as the islands’ main commodity led to the end of the Danish trade monopoly in 1856. Faroese national identity was further strengthened in the 19th century by the creation of a written Faroese language and the restoration of the Faroese Løgting (parliament). This body first sat in 825 and is likely to be the Parliament with the longest unbroken tradition. The Thingvellir of Iceland and Tynwald, on the Isle of Man, also make claim to this distinction.

The British occupation of the Faroes to protect against German incursions from occupied Denmark changed life in the Faroe Islands and strengthened demands for home rule. This resulted in autonomous status in 1948. As part of that move, Faroese was also given equal status with the Danish language.

Faroe Islands
The beautiful village of Gjógv.

The Unspoilt Faroe Islands

With a low population density, minimal industrialisation and tranquil untouched landscapes, the Faroe Islands offer a beautiful pristine environment that’s hard to find elsewhere.

The most substantial contributor to the the low level of industrialisation is the percentage of fishing and aquaculture in the thriving Faroese economy. This contributes virtually all the income from exports (around 95%). There is plenty of room for both of these activities: the Faroe Islands has self-identified as one of 15 Large Ocean States (LOS) with a maritime zone of 271,000 square kilometres. You will see Salmon farms in fjords and bays throughout the islands.

It’s also a very safe place with one of the lowest incarceration rates in the world. At the date of our visit, you wouldn’t quite be able to count the prison population on your fingers, but you could get pretty close! The prison is famous for its location, which has possibly the best views of the spectacular fjord Kaldbaksfjørður.

As you can see from the word ‘Kaldbaksfjørður’, the written language looks both Nordic and magnificently old. It contains the letter ‘Eth’ (ð) which is also to be found in Old English and Middle English.

Faroese Culture and Art

The Faroese people have a distinct cultural identity, rooted in their Norse heritage and many local traditions, including a long tradition of ballads (kvæði) and songs. These have helped to keep the Faroese language alive for centuries.

This is accompanied by modern Nordic design sensibilities, which are visible in many of the newer buildings.

For art lovers there are several galleries of Faroese Art to enjoy. The work we saw, which spans the nineteenth, twentieth and twenty-first centuries, really enriched our experience of the islands.

Heading for Drangarnir, the Faroe Islands’ most famous rock formation

Faroese restaurant culture has changed drastically within the last decade, particularly in the capital. It is now much more common for Faroe Islanders to eat out and traditional Faroese food has become part of a burgeoning dining scene with new restaurants emerging regularly. We ate very well during our stay.

Why Visit The Faroe Islands? Why Not?

I hope this short article answers the question ‘why visit the Faroe islands?’ Yet, as I write this another question occurs to me: why did it take so long for me to visit the Faroe Islands?

In part II of this post I’ll describe the packed four day itinerary of our Faroe Islands road trip.

The Ruined Manor Part II – The Barry Family at Hampton Gay

May 19th, 2023

I have been photographing the ruined manor at Hampton Gay regularly over the last 20 years or so. Along the way I learned about the history of the manor, and became interested in the story of the family that built it. According to the landed families site the story of the Barry family at Hampton Gay starts with John Barry (d. 1546), a glover and landowner of Eynsham, Oxfordshire. The coat of arms of the Barry family dates back much earlier – to the reign of King Edward II (1307-1327) – but the connection to that time is no longer discernible.

Engraving of the Manor at Hampton Gay by JC Buckler, 1822

Oxford, Sheep and the Manor

The Barry’s fortune and subsequent investment in the Manor at Hampton Gay came from John Barry, who moved to Oxford in 1536. He prospered substantially, becoming Oxford’s leading tax payer and holding the office of Alderman of Oxford, 1537-46 and Mayor 1539-41. In 1544 he purchased the Hampton Gay estate, but died just two years later, leaving some 1,900 sheep in his will.

The estate passed to his eldest son, Laurence Barry (d. 1577) and then to Laurence’s eldest son Vincent (1548?- 1615), who built the manor house. The exact date is not certain, but it probably dates from the 1580s.

Like many other landowners at the time, Vincent Barry enclosed the fields of the parish for sheep farming, which resulted in a revolt amongst the local labourers and farmers and a plot to murder him and his daughter. Barry was warned, and the revolt was thwarted. Several men were arrested and the ringleader was executed.

The Barry Inheritance

After Vincent Barry died it passed to his daughter Katherine and her husband Sir Edward Fenner (d. 1625). The next to inherit the estate was his cousin, Vincent Barry (1628-80) of Thame, Barrister-at-law and Justice of the Peace for Oxfordshire. He followed in turn by his son, also Vincent Barry (1660-1708).

The Sale of The Manor

The Rev. Vincent Barry (1660-1708), was a cleric and graduate of Oriel college, Oxford. He inherited Hampton Gay Manor from his father in 1679. In 1682, he was admitted to the Inner Temple, one of the four Inns of Court. The same year, he sold the Hampton Gay estate, sold the Manor in 1682 to Sir Richard Wenman (1657- 1690), 4th Viscount Wenman. This was possibly in order to provide for his widowed mother and other dependants. He subsequently became the vicar of Fulham. The Barry fortunes would then decline for some generations.

Re-establishment of the Barry family fortune

It was not until the nineteenth century that Sir Francis Tress Barry (1825-1907)re-established the Barry family’s fortune. He established himself in business in Bilboa and made a fortune from open cast copper mining in Portugal. Sir Francis purchased St. Leonard’s Hill, in Windsor, which he used to lend to the Prince of Wales during Royal Ascot. He was involved in various philanthropic projects, including making a Christmas gift of 6d to all the children in the London workhouses and workhouse schools. Sir Francis also owned Keiss Castle in Scotland, where he served as a Deputy Lieutenant of Caithness and financed the excavation of Nybster Broch, an Iron Age drystone structure nearby. Sir Francis had five sons and two daughters.

The following is from his obituary from the Morning Post, March 1st, 1907.

The late Baronet filled the position of British Vice-Consul for the province of Biscay, Spain, in 1846, and was Acting Consul for the provinces of Biscay, Santander, and Guipuzcoa in 1847. In 1854 Mr. Barry was offered by the Earl of Clarendon the appointment of British Consul at Madrid, but was obliged to decline it as he had established himself as a merchant at Bilbao. Returning to England shortly after, he joined his brother-in- law, Mr. James Mason, in the exploitation of the famous San Domingo copper-mines in Portugal, from which time many honours fell to him. He was decorated with the Order of Christ by the King of Portugal in 1863, five years after being raised to the rank of Commander of the same Order. In 1880 he was decorated by the King of Spain with the Cross of Naval Merit (Second Class). He acted as Consul-General in England for Ecuador in 1872. Sir Francis represented Windsor in the Conservative interest from 1890 to 1906. He was created a Baronet in 1899, and also held the Portuguese title of Baron de Barry. Sir Francis is succeeded by his son, Major Edward Arthur Barry, who was born in 1858.

The Barry Baronetcy continues to this day.

The man who returned the Manor

SL Barry Long Crendon Manor
Long Crendon Manor, Where Colonel Barry lived with his second wife (shot on a Nikon F3 in 2023)

The story of the Barry family at Hampton Gay resumes with Stanley Leonard Barry. He was born in 1873, the fifth and youngest son of Sir Francis Tress Barry. Educated at Harrow, he became a Second Lieutenant in the Royal Berks Regiment (Militia) in 1891, and a Lieutenant in the 10th Royal Hussars, in 1894.

According to the Anglo Boer war site Barry served in South Africa in the South African War from 1899-1902 as as a Staff Captain. He was mentioned in despatches and highly decorated – receiving the Queen’s Medal with six clasps, the King’s Medal with two clasps, and the Distinguished Service Order (DSO). He also became a Brevet Major. A brevet was a military commission conferred for outstanding service but without a corresponding increase in pay.

After the South African war he served as Signalling Officer, Deputy Assistant Adjutant General (Intelligence) and Assistant Military Secretary (AMS) to General Sir John French from 1900 to 1906.

During World War One Lieutenant Colonel Barry once again served under Sir John French, now Commander-in-Chief of the British Expeditionary Force (BEF) in France. This time he served as Aide-de-Camp (ADC). He also served in attendance on HRH the Prince of Wales (later Edward VIII, and the Duke of Windsor after his abdication), in the early years of the war.

From 1916 Colonel Barry served as Assistant Military Secretary, Home Forces, Horse Guards. He was mentioned in Despatches, made a Member of the Victorian Order (MVO) and a Companion of the Distinguished Order of Saint Michael and Saint George (CMG) in 1915. He was also awarded the Chevalier, Legion of Honour.

After the war Colonel Barry was awarded an OBE, and was promoted to Brevet Colonel. He retired from the army in 1929 and lived in Long Crendon Manor, which was restored by renowned architect Phillip Tilden in 1920/21 under the direction of Colonel Barry’s future second wife.

Return – after 300 years

The Barry Family at hampton gay
The Manor at Hampton Gay, 2021

According the peerage.com, Colonel Barry married twice: Hannah Mary Hainsworth in 1906, and Laline Annette Hohler (formerly Astell) in 1927. His second wife was the widow of fellow WWI veteran and DSO holder Lt-Col. Arthur Preston Hohler, who survived the war but died soon after returning to England in 1919.

Colonel Barry had a daughter from his first marriage, Jeanne Irene Barry (1915-2008), who married the Hon. James McDonnell, the son of the 7th Earl of Antrim, in 1939.

Colonel Barry returned the Manor to the Barry family in 1928 when he purchased it from Wadham College. The family had last owned it 300 years previously, in 1628. The College had purchased it in 1862 for £17,500. It burned down just 15 years later.

The ruins of the manor remained in the Barry family after Colonel Barry died in 1943 but the story of the Barry family at Hampton Gay came to an end when his daughter, by then the Hon. Jeanne McDonnell, sold the ruins in 1975.

Photos of the Ruin

For more photos of the ruin take a look my galleries:

  1. Main Hampton Gay Gallery
  2. Film Gallery
  3. Tilt Shift Lens Gallery


Vivian Maier and The White Bear

September 9th, 2022

It’s hard not be distracted from Vivian Maier’s work by her life. As told in the 2015 documentary Finding Vivian Maier, the extraordinary stories of her life and the discovery of her work have contributed substantially to her posthumous status as a photographic legend.

Taking in the first UK exhibition of her work Vivian Maier: Anthology, in Milton Keynes, I was determined to avoid that.  Vivian Maier’s work demands our full attention. 

As Enigmatic as the Smile of the Mona Lisa

The challenge of admiring Vivian Maier’s work is that her life story is so unusual and her work so deeply entwined in it, that it is extremely difficult not to get lost in it.  Her experimental self portraits, frequently cast in shadow or captured in a reflection, contribute to this challenge.  Sometimes they are playful, often slightly mischievous and occasionally ghostly, but every glimpse draws you into the life of an extraordinary woman.  Her appearance is as enigmatic as the smile of Mona Lisa and it’s hard not be fascinated by her and dwell on her extraordinary story.

The White Bear

Not dwelling on Vivian Maier’s life story when looking at her work is so difficult that it reminds me of the famous test of the white bear.  As a boy, Tolstoy and his friends founded a club with the sole membership requirement of standing in a corner for 30 minutes and not thinking about a white bear.  This is called intentional thought suppression, and it is difficult to achieve. There is a book on the subject: White Bears and Other Unwanted Thoughts.

A Guardian review of Anthology argues that the exhibition of 146 images overcomes this problem, and I agree. ‘The extraordinary life story of the nanny who was secretly a street photographer can overshadow her groundbreaking images – but at the first UK show of her work they take spectacular centre stage’ was Sean O’Hagan’s summary.

The text that greeted me on the wall of the Anthology exhibition by curator Anne Morin described her life in just 75 words. 

Vivian Maier’s work was unknown to most people for the vast majority of her life. While working as a nanny in New York and Chicago for over 40 years, she photographed daily life on the streets. She produced over 140,000 images as well as film and audio recordings. Maier’s work came to light in 2007, just before her death, when her huge archive was auctioned off from a Chicago storage locker due to missed payments.

Vivian Maier: Anthology, Milton Keynes, June-September 2022, curated by Ann Morin

I’ll leave it at that.  Morin’s introduction, captured by my iPhone, then went on to describe her work.

Her images, mostly from the 1950s – 1970s, present a distinctive record of urban America. From carefree children and glamorous housewives to the homeless and poor, Maier’s pictures capture the highs and lows of everyday life. Street scenes with shop fronts, arcades and architectural images play with perspectives and patterns. Smouldering furniture, abandoned toys and tangles of electrical cables set the scene as families, workers and commuters go about their daily business.

Vivian Maier: Anthology, Milton Keynes, June-September 2022, curated by Ann Morin

The Exhibition

Up close to the large prints of the exhibition, Vivian Maier’s work made a huge impression on me.  I am reasonably well versed in the history of photography and have written about several of the greats that stopped me in my tracks: Fan Ho; William Klein;  Brassai and Cindy Sherman amongst them.  Artists sometimes have the same effect. Caravaggio, the original master of dark and light, is one who took my breath away. Maier is one of these – the kind of photographer who inspires you to pore over books of their work (I bought the Thames and Hudson retrospective).

What struck me about Vivian Maier’s work, particularly her square framed black and white street photography, is the unique combination of ‘how did she do that?’ composition, shot making excellence and an extraordinary probing empathy for her subjects.

The strange, rather detached, but still evident humanity that characterises Maier’s street photography work is arresting. In another Guardian review Adrian Seattle concludes with ‘We could talk of a compassionate eye but I’m not sure it helps or even if it is true. It was all the same to Maier and she didn’t flinch or pass by.’ The autobiography Vivian Maier Developed: The Untold Story of the Photographer Nanny by Ann Marks records that Maier was once described as an extraterrestrial by an acquaintance, and I think I understand why.  There’s that white bear again. 

Vivian Maier’s Cameras

Much of the exhibition shows images taken on the iconic 6 x 6 medium format Rolleiflex, for which Maier is most famous. A little online research revealed that, like many photographers of the period, she started out with a simple Kodak Brownie box camera. Maier acquired her first Rolleiflex in the early 50’s and over the course of her career used a Rolleiflex 3.5T, Rolleiflex 3.5F, Rolleiflex 2.8C and a Rolleiflex Automat.  The Rolleiflex is solidly made and weighty, with the 3.5F tipping the scales at over 1.2 Kg.

Vivian Maier
A Rolleiflex Twin Lens Reflex camera on show at the Anthology Exhibition

The Iconic Rolleiflex

The Rolleiflex is a twin-lens reflex camera (TLR) which has two lenses with same focal length, one above the other.  The bottom lens is used to take the picture, while the top lens is used for viewing the image.  The two lenses are connected, so that the focusing screen displays what will be captured on film.  Because the camera is held or suspended at waist level the viewfinder is often called a ‘waist level finder’.  That viewpoint is quite different, and subjectively often better than an eye level view, simply because it is lower.  

The viewfinder requires an angled mirror to reflect the image onto a matte focusing screen at the top of the camera, which the photographer looks down into. Unlike an SLR, in which the mirror moves out of the way when the shutter button is pushed, the mirror remains stationary. The advantage of this is that there is no ‘mirror slap’ or vibration from the mirror as it moves. This allows the Rolleiflex to shoot at lower shutter speeds hand-held. 

The first TLR model is not known for certain, but the London Stereoscopic Company’s “Twin Lens Carlton Hand Camera”, from 1898, is a good contender.  Mass adoption came later however, with the introduction of the Rolleiflex in 1929, developed by Franke & Heidecke in Germany. 

Other Rolleiflex Users

Vivian Maier is one of the most famous Rolleiflex photographers. Other illustrious users include Diane Arbus, Richard Avedon, David Bailey, Bill Brandt, Robert Capa, Imogen Cunningham, Robert Doisneau, Helmut Newton and Gordon Parks. Amateur users included celebrities such as Marilyn Monroe, James Dean and Grace Kelly.

Post Rolleiflex

Post Rolleiflex, Maier embraced the freedom a 35mm camera can provide, wielding a much more compact Leica IIIc rangefinder, an Ihagee Exacta SLR, (star of Hitchock’s Rear Window) a Zeiss Contarex SLR and a few other SLR models. Maier mostly used Kodak Tri-X black and white film, which was introduced in 120 form in 1954, and from the early 70s onwards Ektachrome colour film.

Shooting with the Rolleiflex 3.5F

I have a Rolleiflex 3.5F Twin Lens Reflex (TLR).  It is a beautifully engineered camera and the view of the world is much improved through its ground glass screen. It really is magical. Achieving critical focus at wider apertures isn’t easy, however, and the Selenium light meter isn’t particularly accurate.  The maximum speed the leaf shutter can deliver is 1/500 of a second. When you first use a Rolleiflex the lateral inversion and odd viewpoint can make you dizzy.  Because of a balance problem, I’ve never quite conquered that.

To get the same beautiful waist-level view, but with a higher percentage of keepers and less dizziness, I have shifted my medium format allegiance to a Hasselblad 203FE, which is an SLR with a waist level finder.  I have no idea why such a similar shooting experience doesn’t affect my balance. However, in terms of both usability and keepers, the Hasselblad’s almost supernatural light meter, auto exposure, astonishingly bright acute matte viewfinder and 1/2000 second focal plane shutter make its complexity worthwhile.  Now and again I dust off my Rolleiflex and venture out with it, but as yet I have no images to cherish from those forays, but I haven’t given up.  

I have no idea what percentage of keepers Vivian Maier had – and at this point, whilst her vast body of over 100,000 images is still being curated, (there’s the white bear again) I imagine even the archive manager of the biggest collection, John Maloof, doesn’t have the full picture yet, but every image I’ve seen is superbly executed.   She clearly knew her craft very well indeed.  

Colour Photography

In Chicago in the early 1970s Maier switched to colour photography, shooting with a Leica IIIc rangefinder and various German SLRs. 35mm rangefinders and SLRs typically have eye level viewfinders and the change of viewpoint from waist level to eye level is a significant shift. Some of the work from this period seems to be as much about exploring colour as depicting the subject, and there are also less people and more objects, including found objects. I enjoyed the images, but my preference is for the earlier black and white square-framed Rolleiflex shots.

Vivian Maier’s Time Capsule

Much like opening up a time capsule, viewing her work makes you feel like a time traveller. Immersed in each piece of work, a glimpse into the life and times of a bygone era. Maier was ahead of her time; her images are timeless. Her empathic eye made her street portraits striking. Her images portray a great deal of affection toward her subjects. She had the knack for capturing the essence of her subjects. Vivian had a gift for entering the privacy of the people she photographed; her brilliance in reading human behaviour is undeniable. Like a movie trailer, her photographs leave us with more questions than answers. Cleverly timed. Always in the right place at the right time, with an intuitive sense of timing, effortlessly capturing moments of both high drama and sublime banality. It is not easy to make the mundane and everyday look extraordinary, but Vivian did with an expert sense of composition.

Vivian Maier: Anthology, Milton Keynes, June-September 2022, curated by Ann Morin

That sense of time travel is something only the greats can deliver. I had the same sensation when I came across the work of Brassai, who transported me to his dark and beautiful realm in 1930s Paris. Vivian Maier does the same for New York and Chicago from the ’50’s to the 70’s, delivering a head-shaking ‘how does she do that?’ experience, both in terms of her composition and crisp shot taking.

To be able to conjure up that sense of wonder and to transport us to another time and another place is a rare thing and I am grateful to the enigmatic woman who made it possible. And if that troublesome white bear sometimes intrudes, that’s a price worth paying.

The Kodak No 2 Folding Autographic Brownie

April 8th, 2022
Kodak Autographic
Kodak No. 2 Folding Autographic Brownie

The Kodak No 2 Folding Autographic Brownie has couple of unique points of interest. The front plate is engraved with tiny text that describes the rather eccentric ‘Autotime’ system, and there is a stylus on the back to engrave notes on the negative using the Autographic feature.

It also has a good deal of ‘early camera’ DNA. Not only is the lens standard pulled out on a track fixed to the baseboard like a Victorian field camera, but the back is detachable, though it takes 120 roll film rather than a plate.  This makes it one of the most interesting cameras I have ever come across, which inspired me to research and write this article.

From the serial number (109947) engraved on the foot this particular Kodak No 2 Folding Autographic Brownie was probably manufactured in late 1916.

For cameras made between 1915 and 1919 you can determine the date of manufacture of this camera with reasonable precision from the design changes listed by serial number at brownie-camera.com.

Serviced by Kodak in 1953

I bought it at a camera fair hosted by ImageX in Bicester, Oxfordshire and when I opened the camera up I discovered a Kodak London service sticker from 1953, proving it had a very long shooting life.   Although the body shows quite a lot of wear and the aperture blades and shutter are slightly pitted, the camera is light-tight and in working condition – no doubt due to the care of attention of Kodak London.

Kodak No 2 Folding Autographic Brownie
‘Serviced by Kodak Ltd London 1963’

Kodak’s Folding Cameras

This model of Brownie is a vertical format folding camera.  Folding cameras originated in the 1850s, replacing the 1840s sliding-box design with leather bellows.   See the article Early Cameras, a Timeline on this site for more on early camera design.

Kodak produced numerous folding models from the 1890’s until the 1960s. The first was the Folding Pocket Kodak which was introduced in 1897.  The last was the Kodak 66, Kodak’s only post-war folder for 120 film rolls, which was manufactured in the UK between 1958 & 1960.

The non-box Brownies

The name ‘Brownie’ brings a low-cost box camera to mind, but Kodak manufactured several folding models in that famous and long-lived family of cameras between 1904 and 1926.  The Folding Brownie series were Kodak’s least expensive folding roll film cameras and had a more basic specification than their Kodak branded counterparts. The also offered fewer optional configurations.

The first folding Brownie was the No. 2 Folding Brownie, which was introduced in 1904, with a model B introduced in 1907 as the Folding Pocket Brownie.  These were the predecessors of the Autographic Brownies.

The No.2 Autographic Folding Brownie

Kodak Autographic Brownie
Kodak Advertisement for the new Autographic Brownie

The No 2 model in Kodak Autographic Folding Brownie series was produced from 1915-1926 for the type 120 Autographic film. The exact number of cameras manufactured of this type in that 11-year period isn’t known, but brownie-camera.com states that 540,000 were made before 1921. Kodak only made minor changes to the design during the production run.

The most notable of these changes is the early change from the square-ended box shape shown in the Kodak Advertisement. This was changed to a more to a more curved design in 1917 (from serial no 133,301 according to brownie-camera.com.) Another change that is useful in dating models is the shape of the foot, which was modified from an S-shape to a C-curve in 1919 (from serial no 133,301 according to the same source).

120 Roll Film Format – The Last Survivor

Kodak produced a huge number of different roll film formats with a variety of different negative sizes. 120 (or No.2 film as it was originally called, as per the name of this camera) is the only one still being manufactured.   The larger 116 and 130 film utilised by other Autographic Brownie models have both been discontinued.

120 film is still used extensively by medium format photographers, and readily available.  The No 2 Folding Autographic produces 8 exposures measuring 6 x 9 cm, which are the largest that can be obtained with 120 film.

6 X 9 is a less common format than 6 x 7 (e.g. the hallowed Pentax 67), 6 x 4.5 (e.g. Mamiya or Pentax 645 models) or 6 x 6 (e.g the legendary Rolleiflex). Some examples of 6 x 9 cameras include the Fuji GW690 series, Zeiss Super-Ikonta C, Plaubel 69W ProShift, Royer Teleroy and Agfa Record III. Some technical and field cameras can also take 6 x 9 film backs.

The Kodak Autographic System

Kodak was researching a way to allow the photographer to enter their own notes onto a negative when Henry Jacques Gaisman’s invention came to the company’s attention. ‘Jack’ Gaisman (1869 –1974) was a prolific inventor and the founder of the AutoStrop Company, a safety razor manufacturer.  His patent was purchased for the sum of $300,000.  It was such a large amount at the time to as to be newsworthy and the purchase was covered in the New York Times. Gaisman reputedly filed over one thousand patents including those related to swivel chairs, men’s belts, and carburettors, as well as razors and cameras.

The Kodak Autographic System uses a narrow slot covered by a light-tight hatch.  To write a note, the user lifted the hatch, which revealed the film’s paper backing.  A stylus held by a clip on the back of the camera next to the hatch was used to make a notation on the paper backing.  The hatch was left open for a few seconds, depending on the prevailing light, which exposed the marked area and burned the note in.  The text entered would appear in the margin of the processed print

Kodak’s autographic films (which were designated by an ‘A’ after the film size designation) made use of thin carbon paper sandwiched between the film and the paper backing. 

Other Autographic Models

There were two other models of Folding Autographic: the No 2A for the slightly larger 116 film, and the No 2C for 130 film, which produced the largest negatives. Kodak sold autographic backs as upgrades for their existing cameras.

Kodak Advertisement showing an annotated negative

Autographic Advertising

The Kodak autographic was hailed in the original 1915 advertisement as ‘The biggest photographic advance in twenty years’.  Kodak also promoted the Autographic with the slogan shown in the advertisement below: ‘Any negative worth the making is worth a date and title’.

Despite Kodak’s promotional efforts the system was never popular. It was discontinued in 1932.

You can read Kodak’s account of the benefits of autographic photography, from the 1915 ‘Kodaks and Kodak Supplieshere.

Lens Options and Shutter Variants

There was a choice of two lenses.  The higher end lens option is a rapid rectilinear which was widely used in more expensive cameras. The other is a very simple achromatic lens.   They are easy to distinguish as the glass elements the achromatic lens are behind the shutter and the aperture.

Information on the focal length of either lens is hard to come by, but I have seen a reference to 98mm and a maximum aperture of f/7.9.  Given the crop factor of a 6×9 image the 35mm equivalent is approximately 42mm, which is what I would expect from the shots I have taken.

Both lenses made use of the quirky and not particularly accurate Kodak ball bearing shutter until it was replaced in the last two years of manufacture by a Kodex shutter.

Shutter speeds are limited to 1/50 seconds and 1/25 seconds plus B (Bulb) and T (Time) for long exposures.   In keeping with the rest of the camera, the shutter speed selection scale is rather eccentric with the B and T modes set between the ‘instant’ speeds.  

The Autotime System

The Kodak Autographic System isn’t the only Kodak innovation on the camera. Setting the correct exposures was originally performed using the Kodak Autotime system, an early, and rather incomplete, automation system.

Aperture Scale Kodak

Using Autotime, the photographer selects the shutter speed to match the lighting conditions. The 1/50th second speed is marked “Brilliant” 1/25th “Clear” and guidance for “Gray”, “Dull” and “Very Dull” is marked in between. These make use of the slower, and manually, controlled Bulb and Time settings. Aperture selection using Autotime is via a choice of subjects marked at the bottom of the shutter dial.  These are “Portrait/Near View”, “Average View”, “Distant View”, “Clouds/Marine”.

The Autotime Patent

Autotime was patented in 1908. It was not a Kodak invention, nor was the idea fully implemented as it lacked the mechanically geared linkage between aperture and speed settings suggested by the inventor, Frank S. Andrews.   I can find little about the visionary Mr Andrews except in this article on the Autotime scale. The concept was well ahead of its time, and it was not until the 1950’s that the coupling of aperture and speed settings was resurrected by Kodak in the Retina range of 35mm cameras.  

The Autotime Scale was eventually abandoned along with the Autographic feature. 

The 1-4 Aperture Scale

Below the Autotime labels are the numbers 1-4. These are from a simple 1-4 scale often used on low cost Kodak cameras. This can be confused with the U.S. Universal Scale System, also called the “Uniform Scale System”, often used on simple cameras prior to 1920. See the article Aperture Scales on this site for more on this.

The 1-4 numbers on this camera represent f/8, f/16, f/32, and f/64.

The No2 Kodak Autographic Folder in Use

My example has the simple lens option so my expectations from camera weren’t high, but I was pleasantly surprised by the results. I didn’t experience any of the light leaks that often plague cameras of this vintage, presumably because the bellows were replaced during the 1953 service – they are in excellent condition. The focus was reasonably sharp and the exposures fairly accurate.

Kodak Autographic
The Ruined Manor at Hampton Gay, shot with a 1916 Kodak No 2 Folding Autographic

Framing and Focusing

Framing isn’t easy as it relies on the tiny (1.5 cm x 1.5 cm) ‘Brilliant’ finder mounted above the lens.  This creates a tiny and approximate representation of what the camera is pointing at.  Peering down into the minute square of glass the photographer sees an image that is laterally reversed just like a viewfinder in a Rolleiflex, but much, much smaller!  It is usable, though getting the horizon level isn’t easy.

Focus is very basic ‘scale focusing’ and is set via a scale on baseboard.  This has just two pre-set distances that engage with a catch on side of the lens standard.  I’ve only ever used the most distant of these (30m or 100 feet). I’ll get round to trying to shoot some portraits at some point and try out the 2.5m/8 feet setting.

Setting an Exposure

Setting an exposure isn’t difficult as there aren’t that many usable options! I always use 1/50th of a second as the 1/25th is a bit slow without a tripod, and I avoid setting the aperture wide open as this is likely to be when the rather unsophisticated lens will produce the softest image.  This gives me a fixed shutter speed and a choice of 3 apertures, which I select after consulting the light meter on my iPhone.  Given how forgiving black and white film is in terms of exposure latitude, I haven’t found it difficult to get a reasonably accurate exposure.

The shot above left was taken on a cloudy day with Kodak TMAX 100. I had to crop it as the horizon wasn’t straight. It is by no means a great shot of a wonderful location, but it does prove the Kodak to be surprisingly effective. I have a gallery of shots of the manor and you can also read about the story of the ruined manor and the lost village of Hampton Gay.

The shot below right was taken with same film from the first roll I shot from the pier in Deal, Kent. The shot is reasonably sharp and the image is uncropped as I managed to get the horizon straight. There is a dark patch in the centre of the sky, though I am not quite sure what caused it. This was evident in a couple of other shots from that roll. There are several galleries on Deal on this site.

Kodak Autographic
Deal, Kent from The Pier

Avoiding Film Fogging

Care needs to be taken of the red frame counter window on the back of the camera, which displays the frame counter numbers on the backing paper of the film. Early film had low sensitivity to red light so a combination of the backing paper on the film, plus the red window, prevented film fogging. Modern film is sensitive across the whole spectrum of light, so taping up the window whilst it is not in use helps prevent light getting into the camera.  I haven’t experienced any fogging by removing the low tack tape I use to view the film counter when winding on, so it doesn’t present a real problem. This is similar to later frame counter windows that had little covers to prevent light leaks and were only opened whilst the photographer was advancing the film.

Some reviewers have developed workarounds for winding on ‘blind’ with the tape applied throughout but I haven’t found that necessary.

Loading and Unloading

Loading the camera with film isn’t especially difficult – I used this YouTube video to help me the first time round. I have found that my camera won’t wind on past frame 8, but I work round that by unloading the camera in darkness, and haven’t lost any frames as a result.

Getting in Touch and Further Reading

If you’ve any experience with the Kodak No 2 Autographic Folding Brownie, please leave me a note in the comments – I’d love to hear about it.
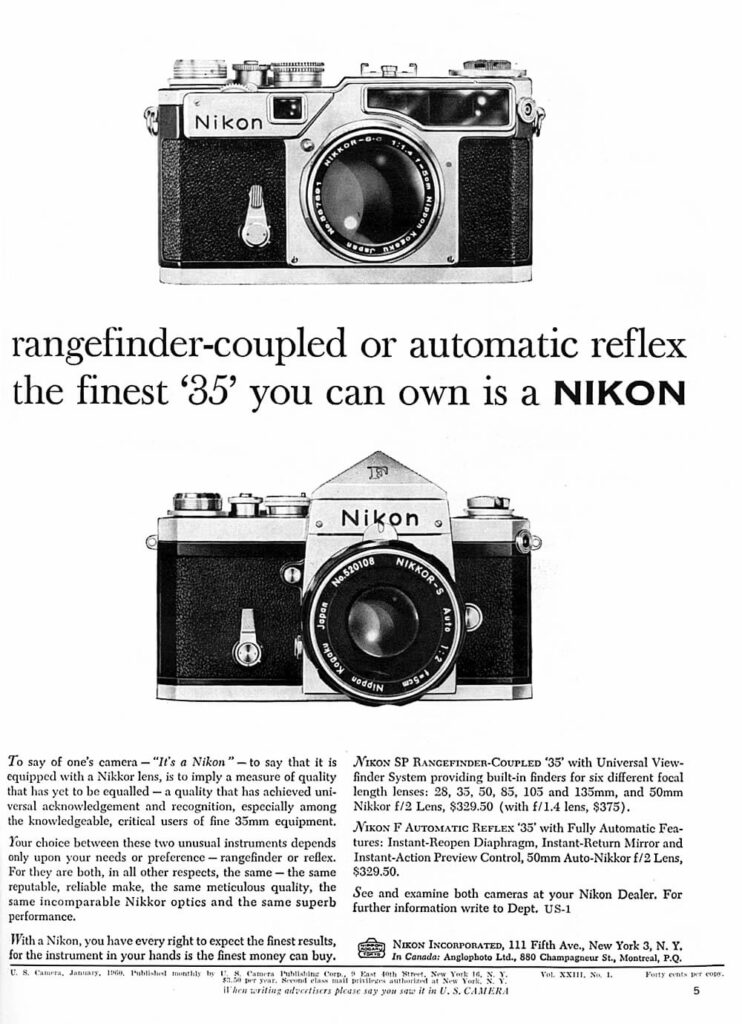
If you are interested in the history of photography, you might enjoy these articles on this site.

Nikon Film Cameras in The Movies

July 27th, 2021

As a Nikon user and collector, I’ve noticed quite a few Nikon film cameras appearances in the movies and on TV shows. This short article outlines those appearances. I’ve also written in more detail about the Nikon F’s appearance in one of the all time great movies – Apocalypse Now and there is an equivalent article on Leica M cameras in the movies.

The Nikon F, Film Star

The first of Nikon’s SLRs was quite the film star, as described in Michael Pritchard’s excellent book ‘A History of Photography in 50 Cameras‘.

“The Nikon F reinforced its reputation and established itself as modern design icon through its starring roles in films such as Blow-Up, with David Hemmings as a fashion photographer in London; Apocalypse Now with Dennis Hopper as a Photojournalist; and, later, with Clint Eastwood as National Geographic photographer in The Bridges of Madison County.”

Nikon SLRs in Movies

Beyond those described above, the Nikon F series Single Lens Reflex (SLR) cameras appeared in several movies, including more greats like Full Metal Jacket and Taxi Driver. I found additional appearances from a little internet research, which revealed quite a few more. The Nikon F, F2, F3, F4 and F5 have all made appearances, but despite searching, I can’t find a movie with Nikon’s final pro SLR, the mighty Nikon F6 in it. Whilst I haven’t included TV, I am sure that my favourite TV detective, Columbo, used a Nikon F or F2 in one episode but I can find no reference to it. I suppose I will just have to watch every episode again… I am also yet to see another favourite, the Nikon FM3a on the screen, though the FM and FM2 have made appearances. With retro cameras becoming more popular its by no means impossible it’ll appear one day.

classic cameras in movies Nikon F
1971 Nikon F with the classic 50mm f/1.4 NIKKOR-S Auto lens (1966-1974)
  • Lolita (1962, Nikon F1)
  • Blow-Up (1966 Nikon F)
  • The French Connection (1971, Nikon F Photomic)
  • Diamonds are Forever (1971, Nikon F)
  • The Killing Fields (1984, Nikon F)
  • Jaws (1975, Nikon F2)
  • Taxi Driver (1976, Nikon F2)
  • The Eyes of Laura Mars (1978, Nikon FM with MD motor-drive)
  • Apocalypse Now (1979, Nikon F)
  • Cannonball Run (1981, Nikon F)
  • The Year of Living Dangerously (1982, Nikon F)
  • Under Fire (1983, Nikon F2)
  • Ghostbusters (1984, Nikon FE2)
  • Full Metal Jacket (1987, Nikon F) Private Joker and Rafterman!
  • Gorillas in the Mist (1988, Nikon F)
  • Groundhog Day (1993, Nikon F Photomic)
  • The Bridges of Madison County (1995, Nikon F with S36 motor drive)
  • Heat (1995, Nikon F4) 
  • The Lost World: Jurassic Park (1997, Nikon F5)
  • Ronin (1998, Nikon FE2)
  • City of God (2002, Nikon F)
  • Walk the Line (2005, Nikon F Photomic)
  • The Bang Bang Club (2010, Nikon FM2)
  • Batman v Superman (2016, Nikon S3 Y2K)
  • Ford v Ferrari (2019, Nikon F Photomic)
  • Wonder Woman 1984 (2020, Nikon F3 HP)

The First SLR?

Today many people think of the Nikon F as the first Single Lens Reflex camera, but it was actually the much less well known Ihagee (who made the Exakta VX Ihagee Dresden famously used in Rear Window) that manufactured the first 35mm SLR outside of prototypes. The F brought the innovations and features of earlier models into a single body so well that earlier models seem to have faded from consumer memory. Its effect on the camera market is similarly profound as it ended the dominance of German rangefinders from Zeiss and Leica. If you are interested in the history of photography there are a couple of comprehensive timelines on the site. From Chemistry to Computation is the timeline of the photographic process, whilst the Camera Timeline Year by Year describes camera introductions and innovations every year from 1900 to the present day.

My Nikon Film Cameras

Beyond Nikon Film cameras in the movies, I have a small collection of Nikons I enjoy shooting with. Some of which are reviewed on this site (The F6 and FM3a).

I have a late Nikon F from 1971 and it shoots very well. It has the original standard non-metered eye level finder, like the ones Dennis Hopper was carrying in Apocalypse Now. As much as I like an integrated light meter, the Photomic heads spoil the lines of the F too much so I use a hand held lightmeter. The Photomic heads are a little easier on the eye on the F2 and I have added a DP-12 Photomic head to my 1975 F2. I have a rather battered 1980 F3, which I bought in Sweden, and a 2004 F6, which I use a great deal. I also have an FM3a and FM2n, both of which are very lightweight and great to shoot with.

Other Classic Film Cameras in Movies

A huge number of film camera manufacturers have come and gone and their products have appeared in hundreds, if not thousands of movies, but below are a few of the more notable ones. Of the models listed below, I have only shot with the Olympus OM-1, another game changing camera which began a shift towards more compact, lighter 35 mm SLRs, away from the increasing weight of the Nikon pro SLRs and back towards the smaller form factor that Leica had always delivered with rangefinders.

Though I don’t have any of the Rolleiflex models listed below (2.8F and T), I have a Rolleiflex 3.5F from 1961 which I absolutely love, and is considered by many to be one of the finest film cameras ever made. The Rolleiflex uses 120 medium format film which produces huge and very detailed 6x6cm negatives. Shooting a Twin Lens Reflex (TLR) camera is an entirely different experience to shooting either an SLR or rangefinder, and though manual focus can be challenging, gazing at the world through that illuminated ground glass screen that sees the world back to front is absolutely entrancing.

  • Rear Window (Graflex Speed Graphic, 1954)
  • Lolita (Agfa Isolette, Nikon S2 Rangefinder, 1962)
  • From Russia With Love (Rolleiflex T, 1963)
  • Bullit (Rolleiflex 2.8F, 1968)
  • Jaws (Pentax Spotmatic, 1975)
  • Close Encounters of the Third Kind (Rollei B35, 1977)
  • National Lampoon’s Vacation (Olympus OM-1, 1983)
  • Easy Money (Exacta VX, 1983)
  • The Killing Fields (Rolleiflex 2.8F, Pentax Spotmatic, 1984)
  • Bridges of Madison County (Nikon SP Rangefinder, 1995)
  • Ronin (Leica R6.2, 1998)
  • Catch me if you Can (Kodak Retina 2C, 2002)
  • Harry Potter and the Half-Blood Prince (Pentax 67 medium format, 2009)
  • Jurassic World (Lomography Diana F+, 2015)
  • Batman v Superman (Nikon S3 Y2K Rangefinder, 2016)
  • Kong: Skull Island (Canon AE-1 Program, 2017) 

Early Cameras, a Timeline

July 17th, 2021

This timeline of early cameras describes significant photographic milestones and early cameras representative of their year of introduction between the inception of photography and 1900. I’ve also provided an overview of the most important developments decade by decade from 1840-1900 as an introduction to the timeline.

If you are interested in the development of 20th century cameras there is also a timeline from 1900 to the present day on the site, whilst the article From Chemistry to Computation provides an overview and timeline of the development of cameras, lenses, and photographic processes from the 1840s to the present day.

The Genesis of Photography 1826-1839

The Daguerreotype

Early Photography timeline
Susse Frere Daguerreotype, 1839 (Wikipedia Commons)

The first cameras were smaller versions of the camera obscura, a simple viewing device based on a sliding-box design that had been in use for several hundred years. By the 19th century this was commonly employed by landscape painters to achieve proper perspective. French artist Louis Daguerre built upon the work of Nicéphore Niépce, who had produced what is widely regarded as the first photograph in 1826, by designing the first camera to be commercially produced. This was the Daguerreotype, which was announced to the world in 1839.

Daguerreotypes followed the sliding-box design of the camera obscura, and used two boxes, one slightly smaller than the other.  The lens was placed in the front box. The second, slightly smaller box, slid into the back of the larger box. Focus was achieved by sliding the rear box forward or backwards until the image was sharp on the ground glass focusing screen. The image was laterally reversed unless the camera was fitted with a mirror or prism to correct it. When the image was sharp the lens cap was put on the lens and the screen was replaced by a plate holder loaded with a sensitised plate to make an exposure. The lens cap was used as a shutter.
The daguerreotype used a direct-positive process, which created a unique and highly detailed positive image on a sheet of copper plated with a thin, highly polished coat of silver. The photographic process made use of a number of hazardous chemicals. Before sensitisation, the surface would be wiped with nitric acid to remove any organic matter. The plate was then sensitised by exposing the silver surface in darkness or under safelight first to iodine fumes, and then to bromine fumes, resulting in a silver halide coating. After exposure, the plate was carried to a developing box, where it was exposed to fumes from heated mercury. Finally, the plate was fixed by removing the remaining silver halide with a mild solution of sodium thiosulfate.

As there were no camera manufacturers at the time, Daguerreotypes were manufactured by opticians, cabinet makers and instrument makers.

Fox Talbot and The Paper Negative

A few years earlier, during the mid-1830s, the British gentleman scientist and polymath William Fox Talbot, had been keen to make a permanent record of what another draftsman’s aid, the camera lucida showed. The camera lucida’s purpose is to superimpose a refracted image of the landscape onto the artist’s sketchbook. It consists of an adjustable metal arm fastened at one end to the artist’s sketchbook and a glass prism at the other.

Talbot’s frustration with the camera lucida led him to recollect his previous experiences with the camera obscura and start to experiment to see if he could capture a permanent image to make nature record the image. He referred to these experiments as ‘photogenic drawing’.

Talbot found that a sheet of writing paper, coated with salt and brushed with a solution of silver nitrate, darkened in the sun, and that a second coating of salt impeded further darkening or fading. Talbot used this discovery to make tracings of botanical specimens. He would place the specimen on a piece of sensitized paper, cover it with a sheet of glass, and expose it to the sun. Wherever the light struck, the paper darkened, but wherever the plant blocked the light, it remained white. He called his new discovery “the art of photogenic drawing”, and it is still in use today in the salt print process.

Talbot’s salt print process evolved into the Calotype photographic process, where a sheet of paper coated with silver chloride was exposed to light in a camera obscura yielding a negative image. The image was “developed” on the paper, which was actually the acceleration of the silver chloride’s chemical reaction to the light it had been exposed to. The developing process permitted much shorter exposure times in the camera. The developed image on the paper was fixed with sodium hyposulfite. The negative could yield any number of positive images by contact printing on another piece of sensitized paper.

To minimise exposure times Talbot made use of much smaller cameras with short focal length lenses which would concentrate light on a smaller area. The best made lenses available to him were microscope lenses, which he fitted to small cameras his wife referred to as ‘mousetraps’ as he had so many of them around the house. It was with one of these small cameras, measuring only 2.5 inches each side that was used by Talbot to take his first successful photograph in 1839. Though the ‘mousetraps’ are the most well known Talbot made and commissioned many more sophisticated cameras during his research which are now distributed in museums throughout the world.

Similar Cameras, Different Images

Ottewill sliding box camera c. 1856 (Coeln Cameras)

Creating a Calotype used much of the same basic equipment as found in Daguerreotype making. A similar camera type, though there were many variations for both methods, similar ways to expose the image and similar way of preparing, although the Calotype offered a somewhat safer process.

However, the difference between the images they produced was vast. While both created a monotone image, the Daguerreotype created pictures that recorded very fine details across the whole range of tones and appeared to produce a glow from within the image due to the reflective properties of the metal, which of course had no grain.

The Calotype images had higher contrast because the chemicals were absorbed into paper fibres, which reduced detail in the highs and lows. Because of those fibres, the image also offered a grain that would diffuse detail, rather than preserve it. As it was a paper to paper positive negative process, further detail would be lost in the transfer.  This resulted in a less detailed but highly atmospheric image. 
Cameras of the 1840s

Faster Lenses

The earliest daguerreotype exposure times ranged from three to fifteen minutes, making the process fairly impractical for portrait photography. This was due to the slow Chevalier lenses used by Daguerre. Accordingly, with few exceptions, daguerreotypes made before 1841 were of static subjects. Josef Max Petzval, a professor of mathematics at the University of Vienna, changed this with the design of a new lens, though it took nearly a year to design and manufacture it. It was the first lens to be designed using optical principles and mathematical computation – previously they had previously been ground and polished according to experience. In 1841 the first camera fitted with this lens was introduced by Voigtländer and Sons, an Austrian maker of telescopes and other optical equipment. It was the first  portrait lens and had a 160mm focal length and an achievable aperture of f/3.6. Exposure times were many times shorter than with the previous generation of lenses.
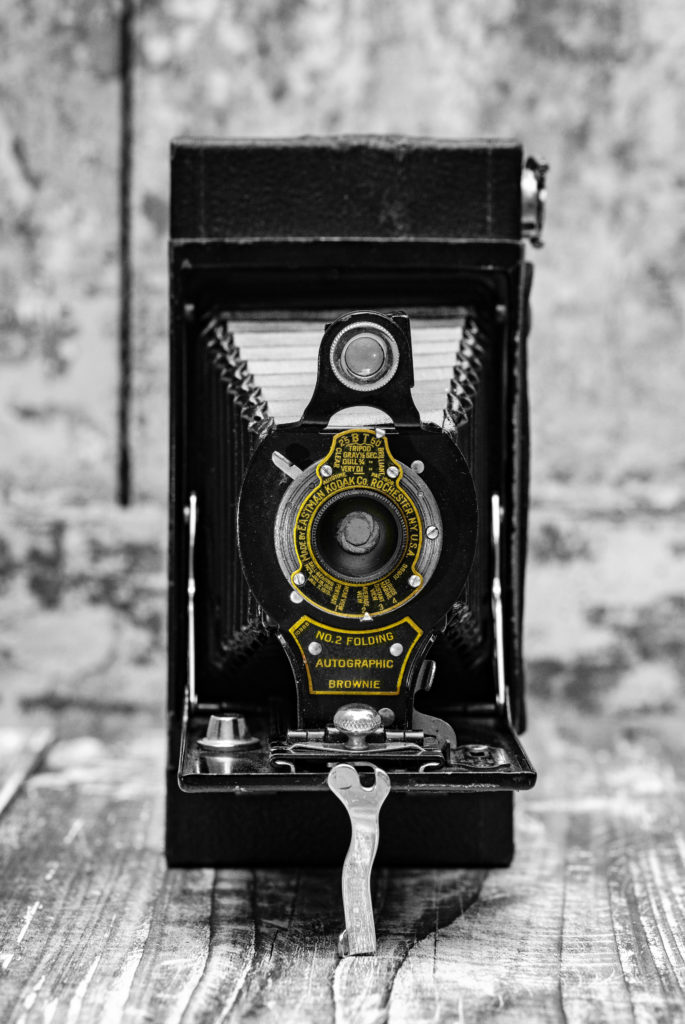
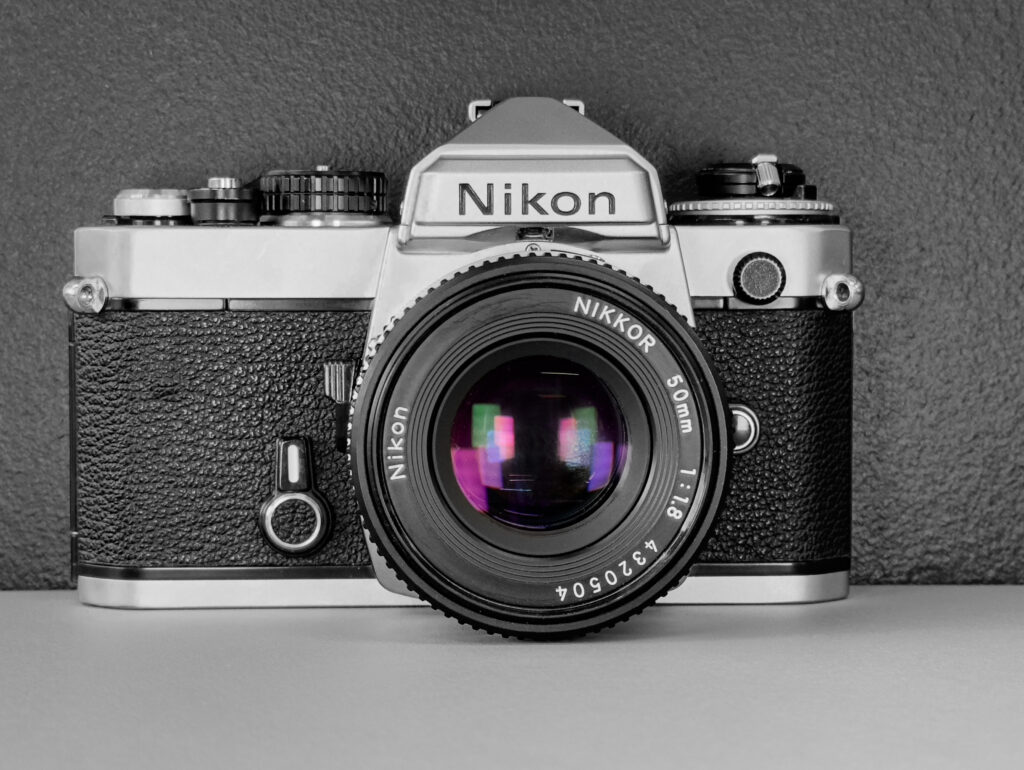
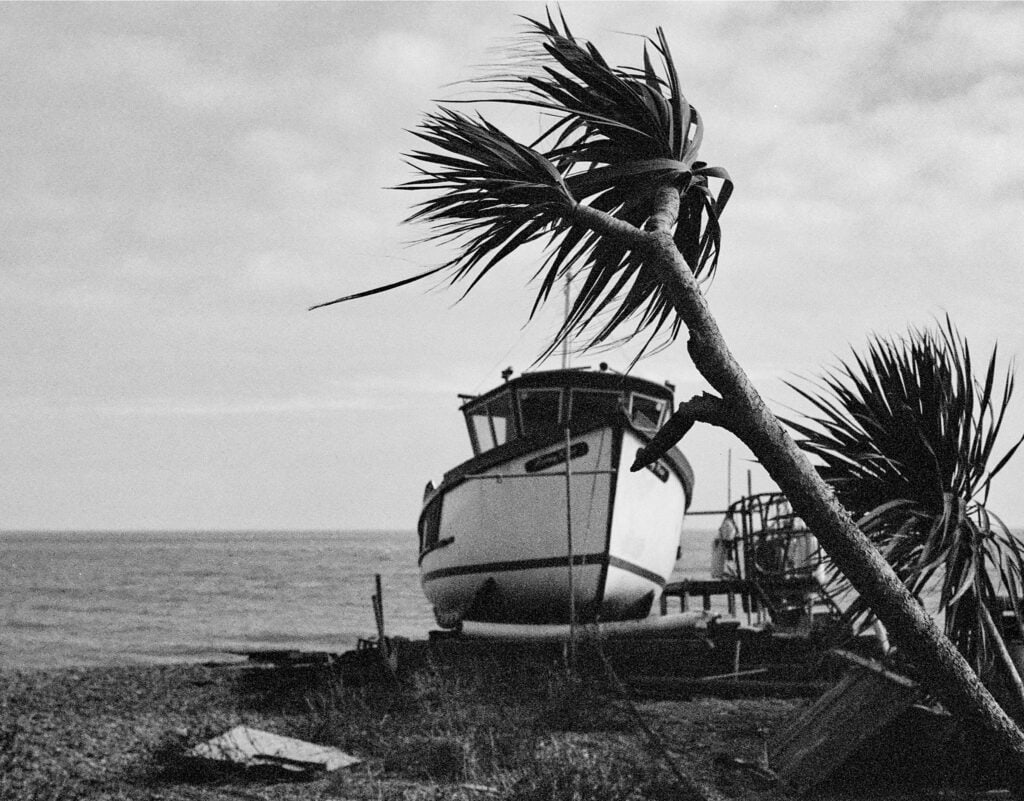
Faster Exposures

In 1841 Franz Kratochwila freely published a chemical acceleration process in which the combined vapours of chlorine and bromine increased the sensitivity of the plate by five times, greatly reducing exposure times from minutes to between fifteen and thirty seconds in bright lighting conditions.

Early Camera Manufacturing

Early cameras
Marion & Co. advert, 1852 (Grace’s Guide to British Industrial History)

Gradually the opticians, cabinet makers and scientific instrument makers, as well as chemists familiar with the chemical process required for early photography evolved into photographic supply shops and camera manufacturers. French optician  Noël Paymal Lerebours was one of the first, and used his skill in optics to manufacture and sell a sliding box whole-plate Daguerreotype camera, working from the instruction manual for Daguerre’s pioneering instrument. W. Butcher and Sons of London started as a pharmacy but evolved into a magic lantern supplier, then a camera importer and finally a manufacturer. George Hare was a joiner, like his father, before he started producing the high quality cameras he became renowned for in London. Frank Brownell, of Kodak Brownie fame, started as a cabinet maker in the 1880s. Another start point was stationery – Marion and Co Ltd, originally an offshoot of Auguste Marion of Paris, started in fancy stationery but widened their business to papers, prints, plates and then onto cameras.

These small firms were economically quite vulnerable. Thomas Ottewill, one of the leading British camera makers, was made bankrupt on several occasions during the 1860s. This was despite his claim in 1856 of ‘having now the largest manufactory in England for the making of cameras’ and having an incredible talent pool. Camera makers George Hare, T. Mason, Patrick Meagher, T. Garland and A. Routledge all worked for Ottewill before establishing their own businesses. Ottewill and brought in partners William Morgan and a Mr Collis after bankruptcy. A partnership arrangement offered greater protection for the business and this model was often adopted by the emerging photographic firms.

The 1850s

A Faster Chemistry Set

The wet plate collodion process of 1851 invented by Frederick Scott Archer was many times faster than previous methods and enabled photographers to make glass negatives combining the sharpness of a daguerreotype with the replicability of a calotype. However, wet plates needed to be processed wet which required photographers to carry around a portable darkroom as well as the camera.

A commercially viable method of producing a photographic print on paper from a negative was already available for wet plate collodion photographers in the form of the albumen print. This was published in January 1847 by Louis Désiré Blanquart-Evrard. Thin paper was coated with a layer of egg-white (albumen) containing salt and sensitized with a silver nitrate solution, then printed using daylight under a negative. The prints could be toned with a gold solution which gave a purple-brown tint to the image and reduced the risk of fading. This process would became the dominant form of photographic positives from the mid 1850s to the start of the 20th century.

The wet plate collodion process offered an alternative to the Albumen print in the form of glass-based positive made by taking an underexposed negative so that it could be viewed as a positive using a dark backing. This was known as the Ambrotype and was introduced in the early 1850s. The ambrotype quickly grew in popularity because it maintained the image clarity of the earlier daguerreotype —but was faster and cheaper to produce. The finished plate was usually mounted in a decorative presentation cases just as daguerreotypes had been. Also like the daguerreotype, which it replaced, each image was a unique original that could only be duplicated using a camera.

A second collodion-based positive emerged in the form of tintype, or ferrotype, which replaced the Ambrotype’s glass plate with a thin sheet of japanned iron. The process was first described by Adolphe-Alexandre Martin in France in 1853. This type of photography survived well into the twentieth century because of its continued use by street photographers.

Bellows

In the late 1850s sliding-box gave way to a leather bellows with a lens plate at one end, and the light-sensitive plate holder at the other. First came a square design and then a more compact tapering version. In 1856 Captain Francis Fowke patented a compact concertina-pattern pleated bellows camera of his own design, which was the first to use cloth bellows, rather than a wooden body between the lens and plate. The tapering design invented the following year by C.G.H. Kinnear, and proved extremely durable. It is still in use in large format cameras today.

The 1860s

First Steps Towards Industrialisation

By the 1860s the medium had started to become industrialized. Instead of mixing chemicals according to their own recipes and hand coating their papers, photographers could buy commercially prepared albumen papers and other ready made supplies. The market was moving increasingly towards the middle-class, which required photographers to produce a greater quantity of cheaper prints. In this new market, the photographers original artisan processes and refined techniques became less important.

The quest for a larger volume of prints gave rise to the he carte de visite (CdV) which was patented by André Adolphe Eugène Disdéri in 1854. His camera featured a moveable chassis and multiple lenses, with which he could make eight exposures on a single glass-plate negative, print the entire plate at once, cut the sheet into eighths, and paste the individual photographs on mounts the size of visiting cards. The carte de visite was slow to gain adoption until 1859, when Disdéri produced CdVs of Emperor Napoleon III’s which caused a sensation a triggered a craze that would last throughout the 1860s as ‘cardomania’ until it was supplanted by the larger ‘cabinet card’ of the 1870s.

The cameras that took multiple images at once were known as “Multiplying Cameras.” The number of lenses varied with some cameras having 4 lenses others 8, 9, 15 or a few a even 36 lenses, but regardless of the number of lenses the multiple images were exactly the same.

The Fast(er) Distortion Free Lens

By 1865 photographers had three types of lenses available to them: the simple landscape meniscus, the Petzval Portrait lens, and the wide-angle Globe lens or the Ross Doublet. What they needed was an intermediate lens with minimal distortion. The Rapid Rectilinear lens which fulfilled this requirements was introduced by J. H. Dallmeyer in 1866. Most previous rectilinear (i.e., distortion less) lenses had been slow (f16), and Dallmeyer was therefore justified in calling his f8 lens rapid. Lenses of this type were fitted to most better quality cameras for nearly sixty years.

The 1870s

Ernemann Alex Tailboard Camera, introduced c. 1895, this example c. 1901 (Coeln Cameras)

The Tailboard Camera

The tailboard camera gradually became more popular – a camera with bellows and rear focusing. Focusing with a tailboard camera is carried out by adjusting the ground glass back’s position forward or backward until the image on the matte screen is sharp. The design goes back to the 1850s but adoption accelerated in the 1860s. A good example is the Hare Tailboard of 1878. Tailboard cameras were still available into the 1890s and 20th century, as typified by the Ernemann Alex shown left.

The End of the Portable Chemistry Set

Dry plates, glass plate coated with a gelatin emulsion of silver bromide, superseded wet plates in the 1870’s. These could be stored until exposure, and after exposure could be brought back to a darkroom for development at leisure. This was far more convenient than the wet collodion process, which required the plate to be prepared just before exposure and developed immediately after. The dry plate could be factory produced. It was still important to have a camera which could fold down to increase portability size even though the photographer no longer required a portable darkroom.

The 1880s

Hand and Detective Cameras

In the 1880s the hand camera, also known early on as the ‘detective camera’ was introduced. The terms ‘detective’ and ‘hand’ camera were used interchangeably during the 1880s. The Oxford English Dictionary records the former term in the British Journal of Photography in 1881 and the latter term in the Photographic News in 1889 and meaning a hand camera adapted for taking instantaneous photographs. Compared to larger bellows cameras, the design was unobtrusive. Many manufacturers introduced their own designs, including Rouch with the Eureka and Fallowfield with the Facile. The Eureka’s back incorporated a built in changing bag so that the photographer could move an exposed plate and insert an unexposed on ready for his next shot without the need for separate plate holders.

Modern Bellows

The 1880s also saw an evolution of the bellows design with George Hare’s New Patent Camera of 1882, a front focusing model which built on the Kinnear design with a back hinged to the baseboard and a front which pulled out on rails for focusing. The British Journal of photography described the camera as ‘the model upon which nearly all others in the market are based’ – despite Hare’s patent.

The Quest for Flexible, Lightweight Media: Celluloid Plates

A number of photographers experimented with celluloid as a replacement for their heavy and fragile glass plates. John Carbutt, an English photographer who had emigrated to America, was the first to gain some success. He persuaded the Celluloid Manufacturing Co. to produce a thin celluloid film which was sufficiently transparent for photographic purposes around 1884 and started to manufacture cut film using this material in 1888, but it was slow to catch on.

Paper and The Roll Film Holder

In 1883, George Eastman startled the trade with the announcement of film in rolls, with the roll holder adaptable to nearly every plate Camera on the market. His first approach was to coat the photographic emulsion on paper and then load the paper in a roll holder. The holder was used in view cameras in place of the holders for glass plates.

Flexible, Lightweight Roll Film

Eastman was well aware, however, of the serious drawbacks associated with using paper as a photographic support and began experimenting to find a flexible, transparent base from about 1884 onwards. It was not until early in 1888, however, that he began seriously considering celluloid as a possible medium. He set a young research chemist, Henry Reichenbach, to work on the problem, which Reichenbach duly found. The first successful roll-film hand camera, The Kodak, was launched publicly in the summer of 1888, followed by an improved model in 1889. This second Kodak was the Kodak No 1 and featured an easily removable lens board, and an improved shutter.

Independently, the Rev. Hannibal Goodwin had also devised a process for making celluloid film and applied for a patent in 1887. However, due to an unclear patent submission (Goodwin was not a chemist), the patent was not granted until 1898. By this time George Eastman had started production of rollfilm using his own process. It was not until after Goodwin’s death that it was ruled that Kodak had infringed Goodwin’s patent.

Roll Film Processing

Although the Kodak was made possible by technical advances in the development of roll film and small, simple cameras, Eastman’s real genius lay in his marketing strategy. By simplifying the operation of the camera and the processing the film for the consumer, he made photography accessible to the casual amateur, coining the memorable slogan: “You press the button, we do the rest.”

The 1890s

The 1890s Camera – Greater Variety, Faster Shutters and Easier to Use

The 1880s saw a number of significant developments, but in the 1890s this accelerated with faster shutters, daylight loading film, packaged dry ferrotype plates, camera movements, folding cameras and pocket cameras all appearing in that decade.

The Dry Plate Tintype

The dry plate process came to tintype or ferrotype photography with the manufacture of the gelatin tintype in the 1890s. This was followed by the introduction of packaged dry ferrotype plates the following year. This was popularly adopted and was popular into the the 1920s when the widespread use of the roll film camera by the amateur photographer greatly reduced the need for street, country fair and beach vendors.

The First Fast Shutter

In the 1890’s the first fast shutter appeared, patented by Ottomar Anschütz in 1888 in Germany and 1889 in Britain. It was capable of exposures as short as 1/1000 of a second, which at the time was considerably faster than other shutter designs. It was incorporated into the Goerz Anschütz camera, including a collapsible version, which proved both popular and durable. This fast, portable camera made the medium capable of capturing activities such as cycling races, rowing and other sports. These were featured in illustrated periodicals and newspapers that started to incorporate photographs during the 1890s.

Early Cameras
Dallmeyer New Naturalist, c. 1896 with focal-plane shutter stamped ‘Ottomar Anschütz’, vertical reflex viewfinder and red leather bellows (Coeln Cameras)

Daylight Loading Film

The 1890s also saw the introduction of daylight loading. Kodak introduced its first daylight-loading camera, the Daylight Kodak, in 1891 which meant that the photographer could now reload the camera without using a darkroom. Film for the Daylight Kodak had a black paper trailer at the beginning and end of the film which covered it during loading and unloading.

Camera Movements

In 1895 Fredrick H. Sanderson patented a mechanism for swinging the front lens panel, resulting in Sanderson’s Universal Swing Front Camera. This was a bellows camera with a variably movable lensboard and the first highly flexible view camera which introduced large format camera movements which include include rise and fall, lens shift, swing and tilt, and are still in use today. The field camera, a term suggestive of portability compared to heavier studio cameras, was one of several types of cameras available in the late nineteenth century including hand and stand and reflex models. There were as yet no rangefinder cameras, which would not be introduced until 1916 with the Kodak 3A Autographic Special.

The Pocket Camera and the Snapshot

In 1895 The Pocket Kodak was introduced, which was the first mass-produced snapshot camera. The Pocket Kodak was one of the first cameras that use front roll design, daylight film spools and a red window to see the number of the exposure on the back of the film. In a front roll design the feed and take up film spools are located in the front of camera, where there is enough room to the left and right of the incoming light rays. Before this design was introduced, the spools were located behind the plane of focus, making the camera about one third longer.

This small compact camera was also was easy to use: “one button does it” was the Kodak slogan. Photography was no longer restricted anymore by heavy equipment supported by with tripods and casual amateur photography, characterised by the snapshot was born. The term snapshot was coined earlier, in 1860, by Sir John Herschel, based on the hunter’s term for a quick shot made without careful aim, although it took until the 1890s to be matched to a technology. The associated term ‘snapshotter’ was noted by The Oxford English Dictionary from 1899, ‘snap-shottist’ from 1891 with the term ‘snap-shot’ from 1894. 

Folding Cameras

The Folding Pocket Kodak of 1897, was a significant milestone in camera development as it was to establish the principals of the folding roll film format, which would continue to dominate camera design from the 1890s to 1930s. This design offered the photographer a camera that would fold up into a compact package that was light and easy to carry via a lens standard panel that pulled out on sprung struts with collapsible bellows. A classic example is the Kodak No. 2 Folding Autographic Brownie which is reviewed on this site.

The Turn of the Century

The Rise of Personal Photography

By the early 1900s Kodak had introduced the first of the Brownie series which brought the snapshot to the masses in the form of an affordable cardboard box camera that took pictures on roll film.

Timeline of Early Cameras

  • c. 1826 Joseph Nicéphore Niépce uses bitumen of Judea for photographs on metal and makes the first successful camera photograph, View From My Window at Gras
  • 1827 Niépce addresses a memorandum on his invention to the Royal Society in London, but does not disclose details
  • 1829 Unable to reduce the very long exposure times of his experiments, Niépce enters into a partnership with Louis-Jacques-Mandé Daguerre
  • Charles Chevalier creates a compound achromatic lens to cut down on chromatic aberration, a failure of a lens to focus all colours to the same plane, for Louis-Jacques-Mandé Daguerre’s photographic experiments
  • 1832 Robert Hunt’s Researches on Light records the first known description employing platinum to make a photographic print, but does not succeed in producing a permanent image
  • 1835 William Henry Fox Talbot makes his first successful camera photograph or “photogenic drawing” using paper sensitised with silver chloride.
  • 1839 The public birthday of photography, from three inventors – Daguerre, Fox Talbot and Bayard
  • Susse Frères manufactures a daguerreotype camera which is one of the first two photographic cameras ever sold to the public
  • The first camera to be manufactured in any quantity is the Giroux Daguerreotype
  • c. 1840 The Voigtländer Daguerreotype is the first camera made of metal. It is the fastest camera lens of its time, with an aperture of f3.6
  • 1840 French optician and daguerreotypist Noël Paymal Lerebours uses his skill in optics to manufacture and sell a sliding box whole-plate camera, copied from the instruction manual for Daguerre’s pioneering instrument
  • Alexander Wolcott patents the daguerreotype reflector camera which uses a concave mirror to focus the available light onto a photosensitive plate
  • 1841 Charles Chevalier creates a double-box camera that uses a half-sized plate 
  • William Henry Fox Talbot patents the calotype, or paper negative process
  • The Nouvel Appareil Gaudin camera uses a metal disc with three differently-sized holes mounted on the front of the lens to provide variable f-stops
  • 1843 Joseph Puchberger patents the first hand crank driven swing lens panoramic camera
  • Two French Physicists, Fizeau and Foucault develop the first recognisable shutter mechanism in order to photograph the sun
  • 1845 The Bourquin of Paris camera is the first camera with the lens in a metal tube using a rack and pinion mechanism for focusing
  • 1849 David Brewster develops the lenticular Brewster Stereoscope.
  • 1851 English sculptor Frederick Scott Archer invents the Collodion process, or collodion wet plate process, which is 20 times faster than all previous methods and is free from patent restrictions
  • The Great Exhibition transforms stereoscopy from a minor scientific interest to a craze which will not wane until the 1870s
  • 1851 W. and W.H. Lewis introduces the first commercially produced bellows camera in the US, the Lewis-type daguerreotype
  • 1853 Thomas Ottewill and Company registers a double folding sliding camera
  • The Tintype process is first described by Adolphe-Alexandre Martin – an inexpensive direct positive on a thin sheet of metal coated with a dark lacquer or enamel
  • 1854 Andre Adolphe Disderi is the first to devise a way to make multiple Carte de Visite images on a single photographic plate, which requires a new type of camera with a shifting back. Each time the back is moved, a different portion of the plate is exposed allowing a set of several images to be printed at the same time. These cameras soon become known as Multiplying Cameras
  • James Ambrose Cutting takes out several patents relating to the Ambrotype process, underexposed or bleached wet collodion negatives that appeared positive when placed against a dark coating or backing 
  • 1856 Captain Francis Fowke patents a compact concertina-pattern pleated bellows camera of his own design. It is the first to use cloth bellows, rather than a wooden body between the lens and plate. It will be produced the following year by Ottewill & Co. for the British Government
  • 1857 The folding camera with tapering bellows is invented by C.G.H. Kinnear, forming the basis for subsequent bellows designs
  •  David Acheson Woodward patents the solar camera, derived from the earlier solar microscope, using sunlight to make enlargements from glass negatives
  • c. 1857 Horne & Thornthwaite produces a sliding box wet-plate camera featuring a sliding box movement and a rack and pinion lens movement
  • 1858 John Waterhouse invents Waterhouse stops, a system using plates with different aperture diameters that could be inserted into a slot in the lens barrel which are the earliest selectable stops
  • 1859 The Excelsior Wet Plate Camera is invented by August Semmendinger, one of the first US manufacturers of wet plate photography equipment.
  • 1860 P. Meagher introduces an improved version of the Kinnear design called the Improved Portable 
  • 1861 The first photographic single-lens reflex camera (SLR) is invented by Thomas Sutton
  • 1862 The Pantoscopic camera is produced by Johnson and Harrison in England. It is one of the first designed to take panoramic photographs (110º view) on glass plates. It produces 7½ x 12 inch images on flat collodion plates
  • 1864 The Dubroni No. 1 is the first successful self-developing camera
  • 1873 Charles Harper Bennett improves the gelatin silver process by hardening the emulsion, making it more resistant to friction
  • 1866 The Rapid Rectilinear lens is introduced by John Henry Dallmeyer, reducing distortion, coma and lateral colour
  • 1874 The Scénograph, an early collapsible strut camera ideal for use in the field, is designed by Dr. Condèze of Belgium
  • 1878 G. Hare introduces Improved Portable Bellows Camera, with bellows and rear focusing. It is focused by adjusting the ground glass back‘s position forward or backward until the image on the matte screen is sharp, an approach which characterises the tailboard camera
  • 1878 Heat ripening of gelatin emulsions is discovered by Charles Harper Bennett, making possible very short exposures and paving the way for the snapshot
  • W.W. Rouch & Co. produces the Patent Portable, a light weight bellows camera which takes 6 ½” x 8 ½” plates held in slides
  • 1879 The Lancaster’s Gem Camera (Carte Apparatus) is manufactured by J. Lancaster & Son. Gem cameras produce multiple small images, although there is no standard size for ‘gem’ images.
  • c. 1880 The Photographic Artists’ Co-operative Supply Association introduces the PACSA tailboard camera
  • 1881 Thomas Bolas patents a hand-held, box form camera he calls a detective camera
  • 1882 Etienne Jules Marey perfects a chronophotographic gun, a device capable of taking 12 exposures a second
  • G. Hare introduces the influential New Patent Camera or ‘1882’ pattern with a back hinged to the baseboard and a front which pulled out on rails for focusing
  • c. 1882 Transitional wet-plate cameras, which can take both wet and dry-plate slides are sold by companies such as J.H. Dallmeyer
  • 1883 Ottomar Anschütz designs a camera with an internal roller blind shutter mechanism in front of the photographic plate – the first focal-plane shutter in recognisable form
  • William Schmid patents the first detective camera to be widely sold
  • 1884 The first production SLR with a brand name is Calvin Rae Smith’s Monocular Duplex
  • The McKellen Treble Patent marks the boundary between the older Kinnear pattern and the newer field camera design that will remain popular to the end of the Edwardian period
  • 1885 The London Stereoscopic Co.’s Carlton may be the first off-the-shelf twin-lens reflex TLR camera
  • The Waterbury View Camera is offered by the Scovill Manufacturing Company. Its is a light and compact popular camera that becomes available in numerous sizes from 4 x 5 to 8 x 10 inches
  • 1886 The first single use camera, the Ready Fotografer, is introduced, using a dry plate, though it appears to have enjoyed very limited success
  • Thornton-Pickard Manufacturing Co. introduces the Jubilee in readiness for Queen Victoria’s Golden Jubilee incorporating a rotating lens panel able to hold up to four lenses
  • C.P. Stirn patents the Stirn Concealed Vest Camera (or waistcoat camera in the UK) which becomes a popular and much copied design
  • George Eastman and Franklin M. Cossitt patent the Eastman Detective Camera. Though it is not successful, it is a precursor of the hand-held Kodak of 1888
  • c. 1886 J. Lancaster & Son Introduces The International patent tailboard mahogany half-plate camera
  • c. 1887 The Mayfield Pocket Camera from Mayfield, Cobb & Co. Ltd is one of the first cameras to be made of a plastic-like substance such as ebonite
  • 1887 E. Français introduces the Kinegraphe Grand Angle, one of the first twin-lens reflex cameras
  • Marion & Co. introduces the New Academy which adds a mirror behind a glass screen to a pair of vertically mounted lenses which slide for focusing making the camera into a twin-lens reflex model
  • The Interchangeable View Camera is marketed by Eastman Dry Plate & Film Co. It is a plate camera that can also be fitted with an Eastman Roll Holder containing a roll of flexible film
  • 1888 The Kodak is George Eastman’s legendary first roll-film camera bearing the new brand name. It comes pre-loaded with a 100-exposure roll of flexible film. After finishing the roll, the consumer posts the camera back to the factory to have the prints made
  • ‘Krügener’s Taschenbuch’ Patent Book Camera is one of the smallest cameras of its time, with dimensions of just 45 × 100 × 140mm
  • E & H T Anthony introduces the Fairy, an 8 x 10 inch lightweight folding view camera with a revolving back and bellows so pictures could be taken both horizontally or vertically
  • 1889 The No.1 and No. 2 Kodaks are introduced. They resemble the original Kodak Camera, but have a different shutter and are available with paper-based stripping film or its successor, Eastman transparent film
  • George Eastman introduces the first transparent plastic roll film, made from highly flammable cellulose nitrate film
  • The Loman Reflex, the first commercially produced camera with a focal-plane shutter, is introduced
  • c. 1890  L’Orthoscope by E. Tourtin, is the first French reflex camera, for plates 9 x 12cm
  • 1891 Kodak markets its first daylight-loading camera, the Daylight Kodak, which meant that the photographer could now reload the camera without using a darkroom.
  • 1892 The Boston Camera mfg. Company produces the Bulls-Eye camera, the first to use Samuel Taylor’s new numbered paper backed film, which requires the introduction of a red window
  • W. Griffiths & Co. Ltd introduces the innovative Zodiac which replaces the usual wooden base of the period with telescoping metal tubes. The rear standard slides along the tubes and for fine focusing they are extended by a worm screw
  • 1893 J. Lancaster & Son, Birmingham, England introduces the Instantograph Patent Camera, a 1/4-plate model complete with Lancaster’s Patent Instantaneous Lens and rubber-band shutter, one of a series of models first introduced in 1888
  • The first Richard Vérascope stereo camera is launched. It is the best selling stereo camera of its time. The range will continuing through the 1950s 
  • 1894 Kodak markets the Flat Folding Kodak in England. It is a folding camera for darkroom loaded roll film, with a capacity of 48 pictures of 4 x 5 inch on one spool
  • The Xit series of cameras are introduced by J. F. Shew. The folding side-strut design (also known as chambre à joues) makes the camera quite compact when folded. Shew advertises them as “the most portable camera in the world”
  • 1895 The Pocket Kodak appears, the first mass-produced snapshot camera
  • Sanderson’s Universal Swing Front Camera is introduced, a bellows camera with a variably movable lensboard and the first highly flexible view camera
  • The Briefmarken Camera was manufactured by Emil Wunsche, of Dresden Germany featuring 12 lenses to capture 12 stamp size portraits simultaneously on 9 x 12cm size plates
  • 1896 The Zar Camera Company of Chicago launches the Pocket Zar, a miniature glass plate box camera with a body entirely constructed of cardboard, a material never used to such an extent in cameras before
  • 1897 Kodak markets the Folding Pocket Kodak, which produces a 2¼ x 3¼ inch negative
  • Kodak introduces the No. 4 Cartridge Kodak, which takes 4 x 5 daylight loading roll film and becomes the most successful of the range with more than 90,000 produced between 1897 to 1907
  • 1898 The ‘Al-Vista’ panoramic camera is produced by Multiscope & Film Co, Burlington, USA
  • c. 1899 The Pascal is one of the first cameras for roll film, and the first with spring-motorised film advance. It is a box camera, with a wood-and-metal body, with leather covering and makes twelve pictures 40×55 mm on special roll film
  • 1900 Kodak introduces the first of the Brownie series which brings the snapshot to the masses. It is a cardboard box camera with a simple meniscus lens that takes 2 1/4-inch square pictures on 117 roll film
  • Kodak markets the The No. 3 Folding Pocket Kodak Camera, a camera that would go on to have probably the largest number of model variations of any Kodak camera made.

Early Photography Web Resources

Most of the resources I have found for early photography provide information on British manufacturer’s and their cameras. This is not because that is my exclusive interest, jut what I have come across so far. If you have information on early photography books or websites from Germany, France, the US or any other country, please share them with me and I’d be glad to update this article.

Early cameras

Books on Early Photography

  • British Camera Makers This fine book by Norman Channing and Mike Dunn, now out of print, but still available second hand, covers early photography in Britain in detail, extending into the twlighlight of manufacturing in Britain in the 1960s.
  • A History of Photography in 50 Cameras by Michael Pritchard is one of the best books on cameras I have read and covers some of the most important camera models, including some early cameras
  • The massive Encyclopedia of Nineteenth-Century Photography appears to be the definitive work on early photography up to the beginning of the twentieth century, with 1,200 essays. It is however, extremely expensive to purchase in print – I’ve read a couple of the essays online but have not purchased it.

I hope you enjoyed this article on cameras through the years and accompanying timeline. If you spot omissions or errors, please let me know in the comments.

Leica Film Cameras in Movies

April 3rd, 2021

The legendary German marque has had more than its fair share of movie appearances, particularly the M3. Leica pioneered the 35mm ‘miniature format’, back in 1930 with the first practical camera to use standard cinema film, which required high quality lenses and negative enlargement to make the format work.

classic film cameras in movies leica M3
1962 Leica M3 with collapsible Elmar 50mm f2.8 with 2000 Leica M6 TTL and 28mm Elmarit-M

Subsequent development, based on many years of learning, resulted in the M3 of 1954, which a huge step forward on its predecessors, combining the viewfinder and rangefinder in one bright window, a bayonet lens mount, and rapid film advance lever. Despite its high price it was very successful with over 220,000 units sold by 1966 when production ended. By that time the Nikon F, nemesis of the teutonic rangefinder, had been in the market 7 years and the world of 35mm photography had changed forever, with the SLR having won the hearts and minds of many professional photographers.

The M6 TTL

Enthusiasts continue to argue over which is the best Leica and the M3 maintains a strong fan base, mainly for its large, bright high magnification viewfinder, which many argue has never been bettered. I’ve shot with the M3, M6TTL and M7 and my personal favourite is the M6TTL (0.58 version pictured below, along with 0.85 M7) The built in light meter is eschewed by the Leica hardcore, but I find it preferable and it has superior ergonomics with a modern film crank and large dial for the shutter speed. Leica consider a film rewind crank, which has been standard on virtually all film cameras since the ’60s to be a bit racy and like the original M3, neither film camera in production today (the Leica M-A and Leica M-P) sports one.

I came to Leica from the autofocus Q, which I travelled the world with as part of my job at the time. I am not a digital Leica M shooter, but I do love shooting with film Ms, the lenses are outstanding and full of character and the build quality is second to none. They are also very beautiful cameras and look great in the many movies they have appeared in.

The Leica M in Movies

  • Persona (1966, M3)
  • Downhill Racer (M3, 1969)
  • Darling (M3, 1965)
  • Green Berets (M3, 1968)
  • Le Mans ( M3, 1971)
  • Patton (M3, 1970)
  • The Day of The Jackal (M3, 1973)
  • The Odessa File (M3, 1974)
  • Woodstock (M4, 1974)
  • Dog Day Afternoon (M3, 1975)
  • The Omen (M3, 1976)
  • Under Fire (M4-2, 1983)
  • Salvador Leica (M3, 1986)
  • Wings of Desire (M4, 1987)
  • Mighty Joe Young (1988, M6)
  • Addicted to Love (M6, 1997)
  • George of the Jungle (M6, 1997)
  • Payback (M3, 1999)
  • Spy Game (M6 with motor drive, 2001)
  • Imposter (M6, 2002)
  • We Were Soldiers (M3, 2002)
  • Blood Diamond (M6, 2003)
  • Eurotrip (M7, 2004)
  • The Hitchhikers Guide to the Galaxy (M7, 2005)
  • The Omen (M7, 2006)

Other Classic Film Cameras in Movies

A huge number of film camera manufacturers have come and gone and their products have appeared in hundreds, if not thousands of movies, but here are a few of the more notable ones. Of the models listed below, I have only shot with the Olympus OM-1, another game changing camera which began a shift towards more compact, lighter 35 mm SLRs, away from the increasing weight of the Nikon pro SLRs and back towards the smaller form factor that Leica had always delivered with rangefinders.

Though I don’t have any of the Rolleiflex models listed below (2.8F and T), I have a Rolleiflex 3.5F from 1961 which I absolutely love, and is considered by many to be one of the finest film cameras ever made. The Rolleiflex uses 120 medium format film which produces huge and very detailed 6x6cm negatives. Shooting a Twin Lens Reflex (TLR) camera is an entirely different experience to shooting either an SLR or rangefinder, and though manual focus can be challenging, gazing at the world through that illuminated ground glass screen that sees the world back to front is absolutely entrancing.

classic film cameras in movies spiderman
‘Spiderman’ Yashica Electro 35 GSN
  • Rear Window (Graflex Speed Graphic, 1954)
  • Lolita (Agfa Isolette, Nikon S2 Rangefinder, 1962)
  • From Russia With Love (Rolleiflex T, 1963)
  • Bullit (Rolleiflex 2.8F, 1968)
  • Jaws (Pentax Spotmatic, 1975)
  • Close Encounters of the Third Kind (Rollei B35, 1977)
  • National Lampoon’s Vacation (Olympus OM-1, 1983)
  • Easy Money (Exacta VX, 1983)
  • The Killing Fields (Rolleiflex 2.8F, Pentax Spotmatic, 1984)
  • Bridges of Madison County (Nikon SP Rangefinder, 1995)
  • Ronin (Leica R6.2, 1998)
  • Catch me if you Can (Kodak Retina 2C, 2002)
  • Harry Potter and the Half-Blood Prince (Pentax 67 medium format, 2009)
  • Jurassic World (Lomography Diana F+, 2015)
  • Batman v Superman (Nikon S3 Y2K Rangefinder, 2016)
  • Kong: Skull Island (Canon AE-1 Program, 2017) 

The Last Word

The last word in this article goes to the humble Yashica Electro 35 GSN rangefinder pictured above, a typical manual focus rangefinder camera with a fixed lens and aperture priority auto exposure mode. You simply set the aperture and if it is not correct for the lighting conditions the ‘over’ or ‘slow’ directional arrows light up.

Long after it was discontinued, the inexpensive Electro has developed a cinematic identity thanks to an appearance as Peter Parker’s camera in The Amazing Spiderman (2012). There are several Electros (G, GS, GSN, GTN, GL, MG-1 and CC) and thanks to its moment in the spotlight the GSN has become known as the Spiderman version.

In addition to being inexpensive and fun to use, the camera has highly evocative 1960s branding; the space-age atomic symbol on the front of camera and the Color-Yashica branding on the sharp 45mm f/1.7 lens are both very 1960s indeed. Colour was new to consumers when the camera was first released in 1966! I have one myself, and whilst its no Leica, for value for money and fun to shoot with its hard to beat.

That’s it for my classic cameras in movies round up. If I have missed any cameras you think I should include please leave me a comment. For more about historically important cameras, please visit the year by year timeline.