The Hasselblad 203FE – Great Film Cameras

The Hasselblad 200-series cameras are much less common than the 500 series. Of the Hasselblad shooters I know, I am the only one with a 203FE. Although they look similar and accept many of the same magazines, finders, and some of the same lenses, they are seen as very different and potentially troublesome.
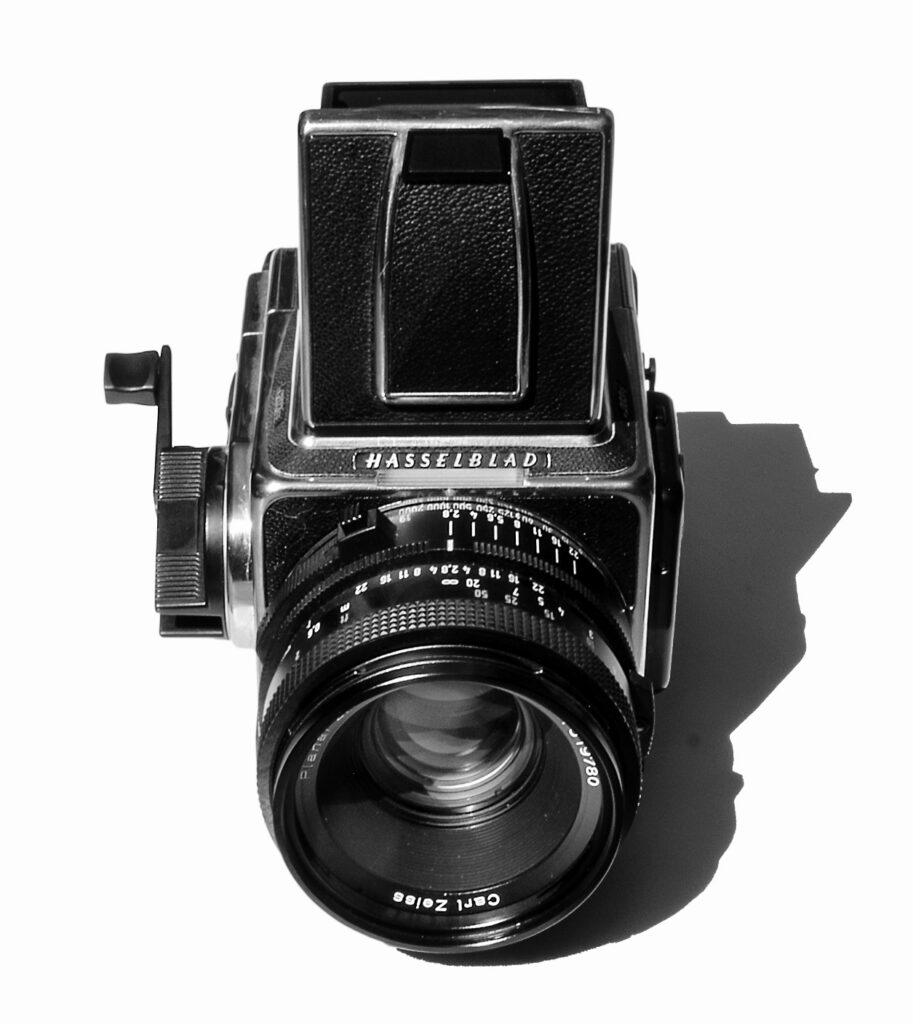
Hasselblad 203FE
Hasselblad 203FE

This is not an unfair perspective. The 203FE is easily the most complex camera I have ever used and the only one I have got into enough trouble with to have to find a specialist and phone for help. Despite that, and the ongoing risk that the electronics will fail and leave me with a costly piece of unusable camera history, I think it is one of the finest film cameras ever made. In this article, I will cover why, some of the pitfalls and the differences between it and the other two late models (205FCC and 202FA), which are the most developed versions of the 200 series idea.

The biggest difference between the 200 series and the 500 series is the type of shutter they use. The 500 series need a leaf shutter in every lens, while the 200 series cameras have a focal-plane shutter in the camera body. This allowed Hasselblad and Carl Zeiss to make faster lenses without shutters, most famously the Planar 110mm f/2, and allowed Hasselblad to add sophisticated through-the-lens metering and electronic automation.

The result is an intriguing contradiction: the 203FE is an exceptionally capable film camera, perhaps the most capable Hasselblad ever made, while a 500-series body is the safer camera to own.

Origins

Hasselblad’s first consumer camera was the focal shutter equipped Hasselblad 1600F, introduced in 1948, but the origins of the 200 series began with the 2000FC in 1977. Removing the shutter gave Zeiss greater freedom to produce large-aperture optics and allowed the camera body itself to provide speeds as high as 1/2000 second.
Hasselblad 203FE
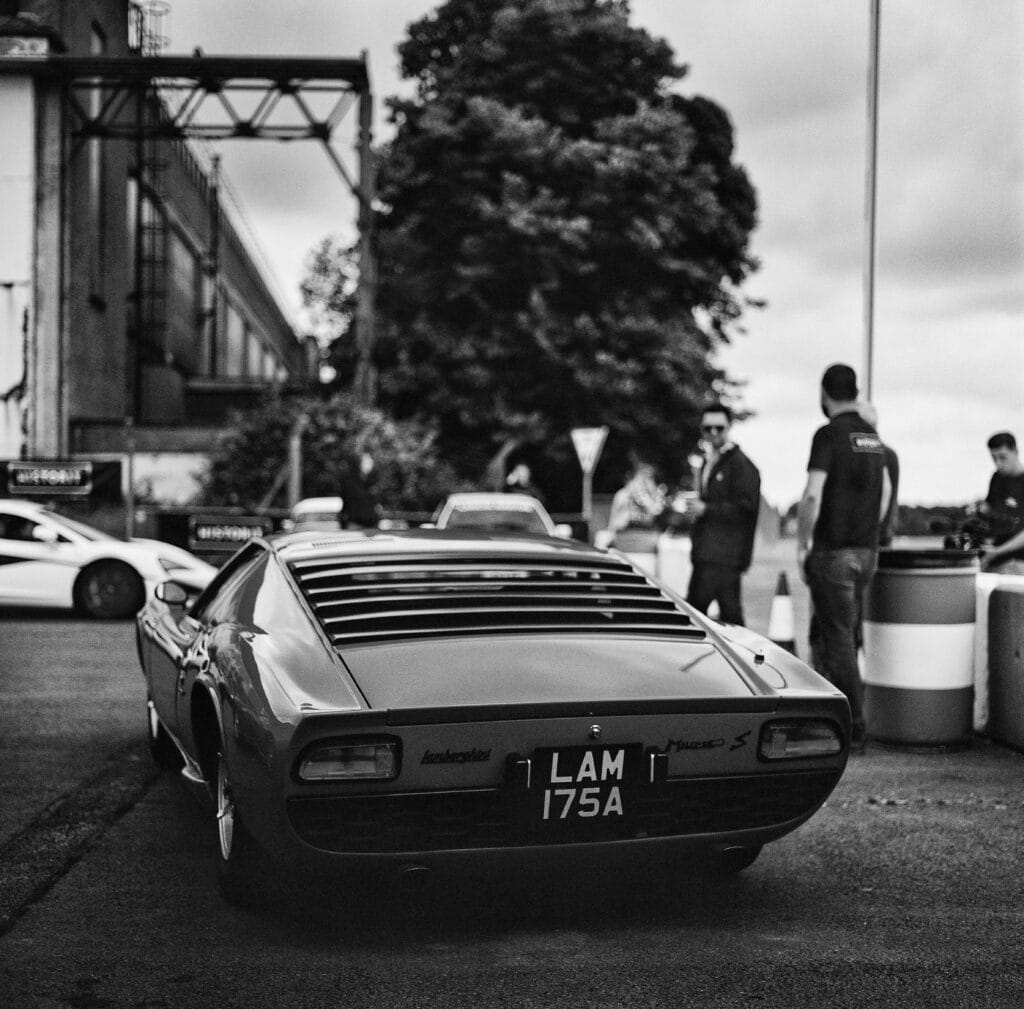
Lamborghini Miura at a Bicester Motion track day. Shot with the Hasselblad 203FE

The 2000 series cameras had a weakness in their thin titanium focal-plane shutter. Early cameras could have their curtains damaged remarkably easily when a film magazine was removed. As a result, Hasselblad introduced mechanisms that retracted the shutter when the rear of the camera was exposed. The 2003FCW of 1988 added a protective internal coating and Acute-Matte screen, but the vulnerability wasn’t eliminated.

The 200 Series

An extensive redesign came in the form of the 205TCC in 1991. TCC referred to Tone and Contrast Control. The fragile titanium curtains gave way to horizontally travelling fabric curtains, while the electronics were integrated better into the camera. The 205TCC introduced electronically communicating lenses and magazines, spot metering, automatic exposure and Hasselblad’s elaborate implementation of Zone System metering.

In 1994 came the slightly simpler 203FE and unmetered 201F. The F denotes the focal-plane system and the E for the electronic interface. The 205TCC evolved into the 205FCC in 1995, and finally the 202FA arrived in 1998 as a less expensive electronically metered model. When the terminology was revised in 1995, the camera became the 205FCC and the corresponding TCC lenses became FE lenses.

The principal 200 series models

Figures below are from Hasselblad’s service manuals, dated May 1997 and April 1998. I have included the 201F and 205TCC for completeness.

 201F202FA203FE205TCC205FCC
Introduced19941998199419911995
Built-in ambient meterNoYesYesYesYes
Meter typenoneSelective, about 20% of frameSelective, about 20% of frameSpot, about 1% of frameSpot, about 1% of frame
Metering range at ISO 100, f/2.8noneEV 0.5 to 21.5EV 0.5 to 21.5EV −1 to 20EV −1 to 20
Aperture-priority AENoYesYesYesYes
Manual exposureYesYesYesYesYes
Differential meteringNoYesYesYesYes
Exposure adjustmentnone±5 EV in 1/3 EV±5 EV in 1/3 EV±5 EV in 1/4 EV±5 EV in 1/4 EV
Zone System modeNoNoNoYesYes
Auto bracketingNoNoYesNoYes
Maximum focal-plane speed1/10001/10001/20001/20001/2000
Slowest automatic speed1 s90 s90 s16 s90 s
Longest manual exposure1 s34 min34 minnot stated34 min
Focal-plane flash sync1/901/901/901/901/90
Leaf-shutter operationYesNoYesYesYes
FE electronic aperture couplingNoYesYesYesYes
E-magazine ISO couplingNoYesYesYesYes
Battery-independent with shutter lensYesNoYesYesYes
Shutter-speed controlBody dialElectronic controlsConventional body dial + electronicsConventional body dial + electronicsConventional body dial + electronics
Hasselblad 203FE
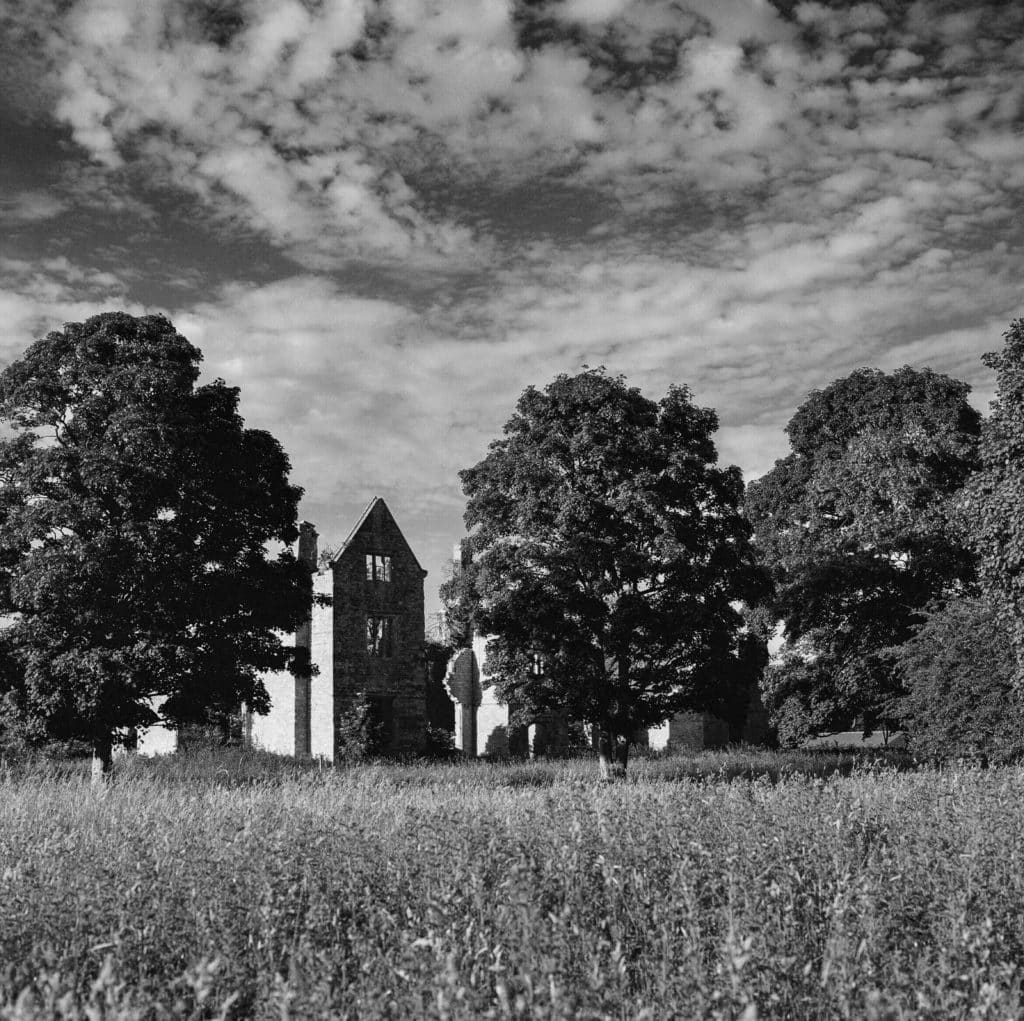
The ruined manor at Hampton Gay, shot with the Hasselblad 203FE

203FE

Hasselblad described the 203FE as a camera for professional photographers working under unpredictable available light and rapidly changing conditions. This is true, as the built-in TTL light meter and aperture-priority automation make it a relatively fast machine. It also features clever differential exposure measurement, auto bracketing and a shutter capable of both fast 1/2000 second and extremely long electronically timed exposures — up to around 34 minutes in manual operation.

The light meter is superb. One reviewer referred to it as supernatural, and whilst that might be slightly overstating it, is by far the best meter I have ever used on any film camera. The electronics require small 6V PX28L lithium or 4LR44 alkaline batteries. The difference is that the lithium version delivers a consistent 6V output until it is nearly depleted, while the more readily available alkaline 4LR44 battery’s voltage drops gradually as it drains.

205FCC

The 205FCC’s centrepiece is a sensitive spot meter integrated with Hasselblad’s zone system implementation in Z mode. Rather than simply telling the photographer whether an exposure is correct, it lets you assign selected areas of the scene to zones and evaluate the tonal range. This is described in more detail later.

It also has differential measurement, aperture-priority AE, manual operation and programmable automatic bracketing. In the mid 1990s, this was a technical tour-de-force. However, its price and complexity inevitably limited its appeal.

The service manual describes the size of the spot meter: approximately 1% of the image area, an angle of between one and seven degrees depending on the lens. The 203FE’s patch is about 20%, so the 205 measures roughly twenty times finer.

202FA

What Hasselblad removed from the 202FA was principally the 203FE’s 1/2000 speed, automatic bracketing and its ability to operate the shutters inside leaf-shutter lenses. That last decision explains much of the 202FA’s relatively poor reputation.

A CF or CFE lens can be mounted, but it must be set to F mode, leaving its leaf shutter open while the camera’s focal-plane shutter makes the exposure. Hasselblad’s manual states that the leaf shutters of C and CF lenses cannot be used on the 202FA.

As a result, it sacrifices one of the greatest advantages of the 203FE and 205FCC: the ability to choose between focal-plane and leaf shutters.
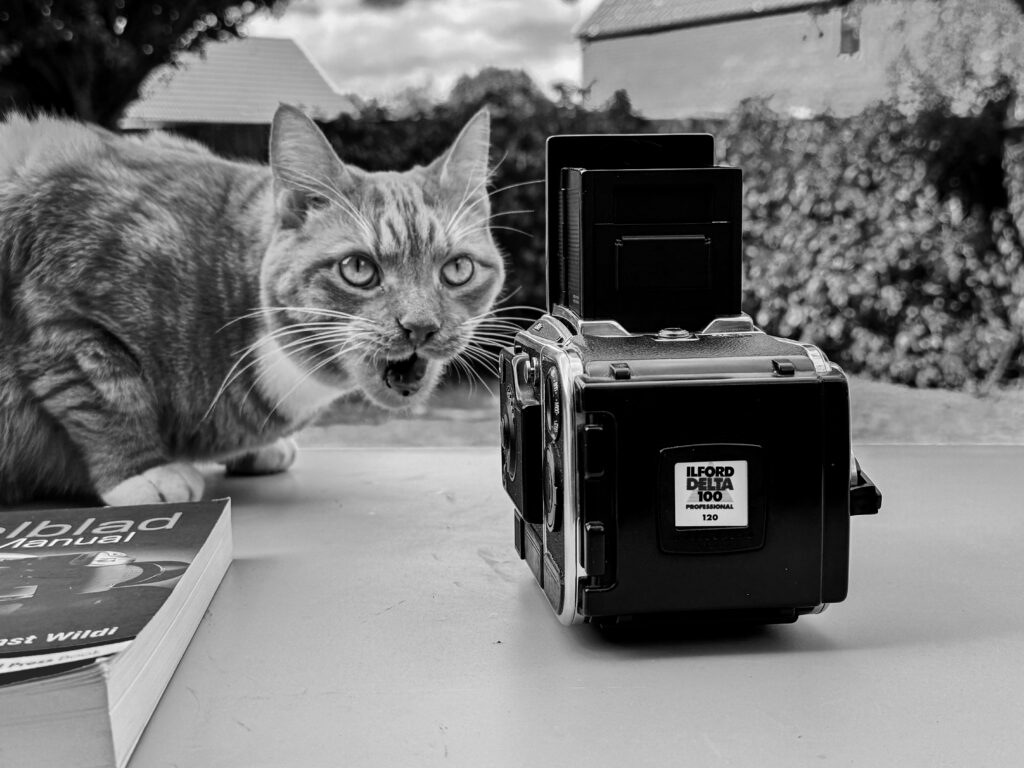
Is that a Hasselblad 203FE? Benji investigates…

Shooting with the 203FE

Shooting with the 203FE is the most satisfying and straightforward aspect of 203FE ownership. The main complexity whilst shooting is differential mode, which I will come to.

With the waist-level finder open, you compose on the large ground-glass screen, then flip up the built-in magnifying loupe for critical focusing. Bringing your eye close to the loupe also makes the illuminated exposure display beneath the focusing screen easy to read. Focusing can cause a bit of composition drift and I lower the loupe to shoot. I mostly operate in aperture-priority mode.

Winding the crank advances the film and cocks the shutter in one movement. It is, to my mind, the classic waist-level finder Hasselblad experience, but with metering and auto exposure capabilities.

Differential Mode

The 203FE’s Differential mode (D) had me scratching my head at first, but after using it on a few rolls of film, I think of it as AE lock with contrast measurement.

To use it, you point the camera’s selective TTL meter at a part of the subject that you want to use as your reference and press the AE-lock, and the camera stores that light value. From then on, as you move the metering area across other parts of the scene, the finder continuously reports how much brighter or darker each area is than the stored reference. It is a clever way to get a really accurate exposure, but it does require a photographer who is prepared to take the time to use it. If the light is good, but likely to change, or if the subject might move, I like to get a quick shot in with Aperture mode and then be more thoughtful about the exposure.

Z Mode

The 205FCC also has Differential mode, but it reports differences in 1/4 EV rather than the 203FE’s 1/3 EV, and allows exposure adjustment in 1/4-EV increments.

However, the 205FCC has a separate Z—Zone mode. This changes what the meter tells you from “this area is +2 EV relative to your reference” in D mode, to “this area will fall on Zone VII.” This actually predicts the tonal placement in the eventual photograph; it is not just a measurement of scene brightness differences. Hasselblad states that “zone” in this mode refers to zones in the final print or slide.

N+/N− development

If that wasn’t enough, the 205FCC goes another step further with its FCC film magazine. This has not only an ISO setting but also boasts film-contrast control! This lets you tell the camera that the film will receive altered development intended to contract or expand its tonal range.

For example, if your measured scene range is too great for normal development, you might decide on reduced development, which is the Zone System’s N− idea.

The camera can then modify its calculations so that the zones displayed in the finder represent the expected tonal relationships after that development correction. Hasselblad states that Zone mode provides “automatic compensation of the exposure and the zone display indication when planned film development corrections are made”.

The implementation has a limitation. In Ansel Adams’ Zone System, film development decisions are applied to individual sheet-film negatives. A Hasselblad magazine contains an entire roll, so an N− or N+ development decision applies to the whole roll, unless you were to dedicate separate magazines to different development regimes.

Identifying the models

Physically, all three models retain the familiar Hasselblad cube, detachable waist-level finder and interchangeable magazine. There is a model designation on each body and the body, lens and back carry a pair of blue stripes.

Dating a body from its serial number

VHPICTURES
1234567890

Hasselblad uses the ten-letter word VHPICTURES to encode the manufacturing year. Each letter maps to a digit from 1 to 0. From 1990 a two-digit product code sits in front of the letters, so a full number can read, as mine does, like this: 18EC10748. Mine is a 1995 example. The table below shows the coded letters across the 203FE’s production run from 1994 to 2004:

YearCodeYearCode
1994EI2000SS
1995EC2001SV
1996ET2002SH
1997EU2003SP
1998ER2004SI
1999EE  

Backs and insert serial numbers

The Hasselblad 203FE works best with an E-type back (E12 in my case), which has an ISO dial and electronic contacts to transfer the ISO setting you set to the camera. It will also work with A-type backs. ECC or TCC backs have an additional dial for use with Z mode and zone system.

It’s worth knowing that backs and their film inserts have serial numbers that should line up. According to the excellent Hasselblad Manual by Ernst Wildi (7th Edition), ‘Magazine shells have serial numbers on the plate that attaches to the camera; film inserts have a three-digit number engraved between the film spools. These three numbers should correspond to the last three digits as they were matched in the factory to produce maximum film flatness.’ The Hasselblad manual goes on to explain that inserts that have been switched still work, but spacing between images might be affected. When I learned that, I was pleased to see that the two lined up as they should.

Film loading tips

There are plenty of good YouTube videos on how to load a Hasselblad, but the Hasselblad guide mentioned above provides some good tips, which I’ve reproduced here in full.
Hasselblad 203FE
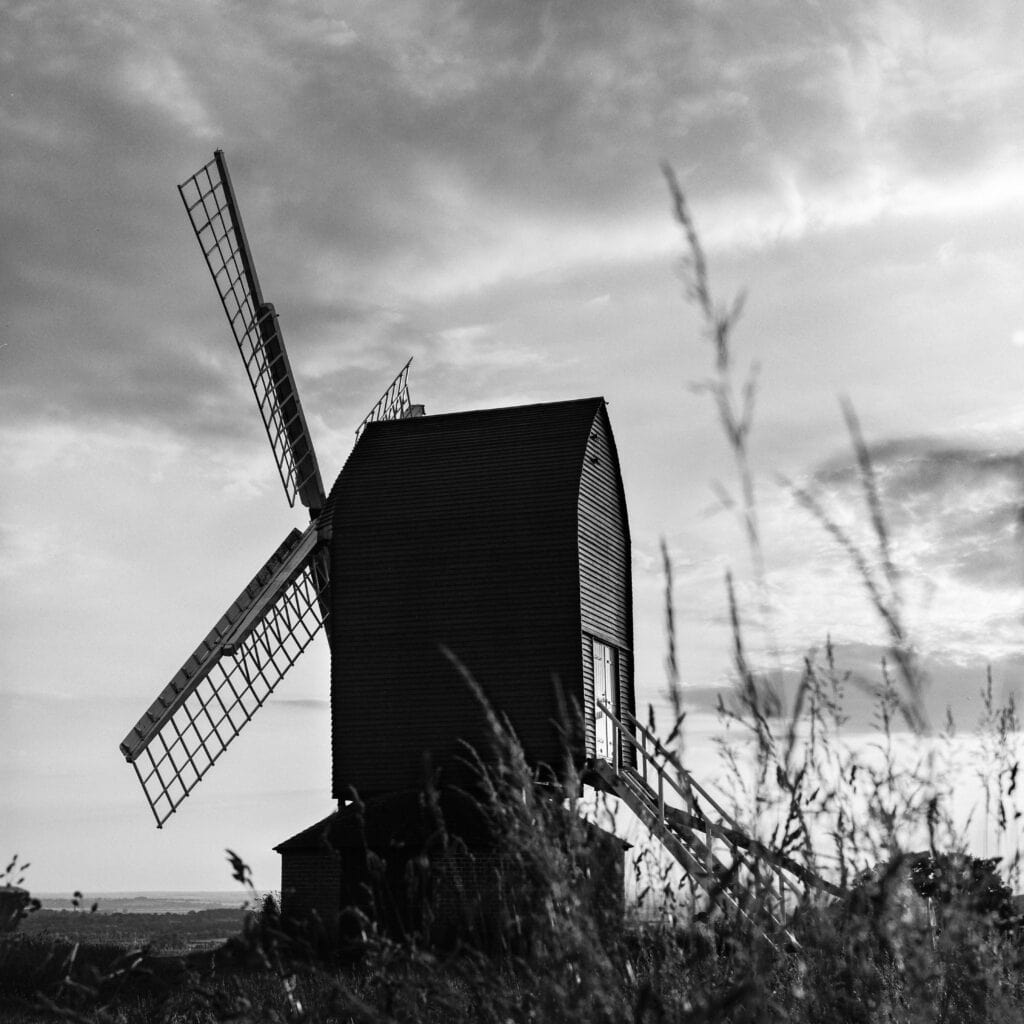
The Post Mill at Brill, shot with the Hasselblad 203FE
  1. The take-up side on the insert is easily distinguished by the knurled knob.
  2. Make certain the film comes off the spool so that the black side is outermost; the emulsion faces the lens. The film needs to curl the opposite way from the way it is wound on the spool.
  3. Make certain the film rides under the side guide, not over it. I press my thumb against the paper next to the guide to keep it under the guide. It eliminates the need for using the insert lock.
  4. For proper spacing, the black arrow on the paper must be placed opposite the red triangle. Most film has only one arrow going across the paper backing. Some 220 film has a black dotted line followed by an unbroken black arrow a few inches later. Advance the film to the line with arrow.
  5. Before placing the insert into the magazine, ascertain once more that the edge of the film is underneath the side guide.
  6. Make certain to turn the magazine’s winding crank until it stops and the number 1 is in the frame counter window before you start to take pictures. At this point, the crank is locked and cannot be turned again until after the first exposure. Do not turn the film winding crank until the end of the film.

C and F Settings

Putting a CF or CFE lens on a 203FE or 205FCC and setting the lens to F uses the body’s focal-plane shutter, and you gain the body shutter’s high speeds and automatic exposure. Alternatively, you can set the body to C, activate the shutter in the lens, and the camera largely behaves as a 500 series. The focal-plane curtains cease to function as the exposure shutter and instead act as a protective auxiliary curtain. You regain full leaf-shutter flash synchronisation and can make exposures even when the camera battery is unavailable.

The 202FA can’t do this. It must make the exposure with its focal-plane shutter even when a CF or CFE lens is attached.

Lens compatibility

When I first started to get familiar with Hasselblad cameras, I found the terminology confusing. Below is just a very short summary of a large and complex series of lens ranges. For a more detailed account, head to the Emulsive articles.

  • FE lenses contain no shutter and communicate the selected aperture electronically to the camera. These lenses carry the double blue stripe that identifies the 200 series cameras with databus electronics.
  • CFE lenses combine a leaf-shutter with Databus electronics. On the 203FE, they allow electronic aperture communication and the choice of focal-plane or leaf shutter.
  • F lenses were designed for the 2000 F series of bodies, and lack electronic aperture communication.
  • CF lenses contain a leaf shutter. Unlike C lenses, they offer F mode which locks the lens’s internal leaf shutter fully open so you can mount the lens on 200 series camera bodies and use the body’s built-in focal plane shutter.
  • C lenses were developed for the 1957 500C camera. According to Emulsive: ‘C lenses cannot be used with the 202FA body. When using these lenses with other 200 or 2000 series bodies, simply set them to “B” mode to use them in conjunction with the camera’s focal plane shutter.

The 202FA requires a bit of caution. Hasselblad approved F, FE, CF and CFE lenses, but CF lenses must remain in F mode.

I have the 80mm f/2.8 FE Planar, which is a good general-purpose lens and reasonably compact. I briefly owned a 150mm f/2.8 FE Sonnar, but I had to return it to the seller because of a fault. The 110mm f/2 Planar FE is high on a short list of lenses I would like to own, but it is extremely expensive, and hard to come by.

 LensApertureClosest focusFilter
50mm Distagon FLEf/2.8 to f/220.32 mM 86 x 1
80mm Planarf/2.8 to f/220.6 mBay 50
110mm Planarf/2 to f/160.8 mB 77
150mm Sonnarf/2.8 to f/221.4 mB 77
250mm Tele-Tessarf/4 to f/322.5 mB 77
300mm Super-Chromatf/2.8 to f/222.5 mBarrel slot
350mm Tele-Tessarf/4 to f/321.9 mM 96 x 1
The FE lens range

Flash sync

For flash users, flash synchronisation is slower than regular V system cameras. The focal-plane shutter has to travel across the 6 x 6 cm image aperture, so flash synchronisation is only 1/90 second. The leaf shutters in CF/CFE lenses synchronise throughout their shutter-speed range.

200 series cautions

As with other V-system Hasselblads, never force a lens, as these cameras depend on the body and lens mechanisms being correctly synchronised. If a lens is fitted or removed when one mechanism is cocked and the other is not, the two can become jammed. On the 500-series cameras this can sometimes be corrected from the rear of the body with a Hasselblad unjamming tool, which reaches through the open shutter path to recock the lens drive. That approach is not available on the 200 series because the focal-plane shutter prevents access to the mechanism. As a result 200 series cameras require a different reset procedure or professional attention rather than use of the 500-series tool. I experienced this, and needed to call Classic V Hasselblad service and repair for help. They managed to talk me through unjamming the camera, for which I am most grateful.
Hasselblad 203FE
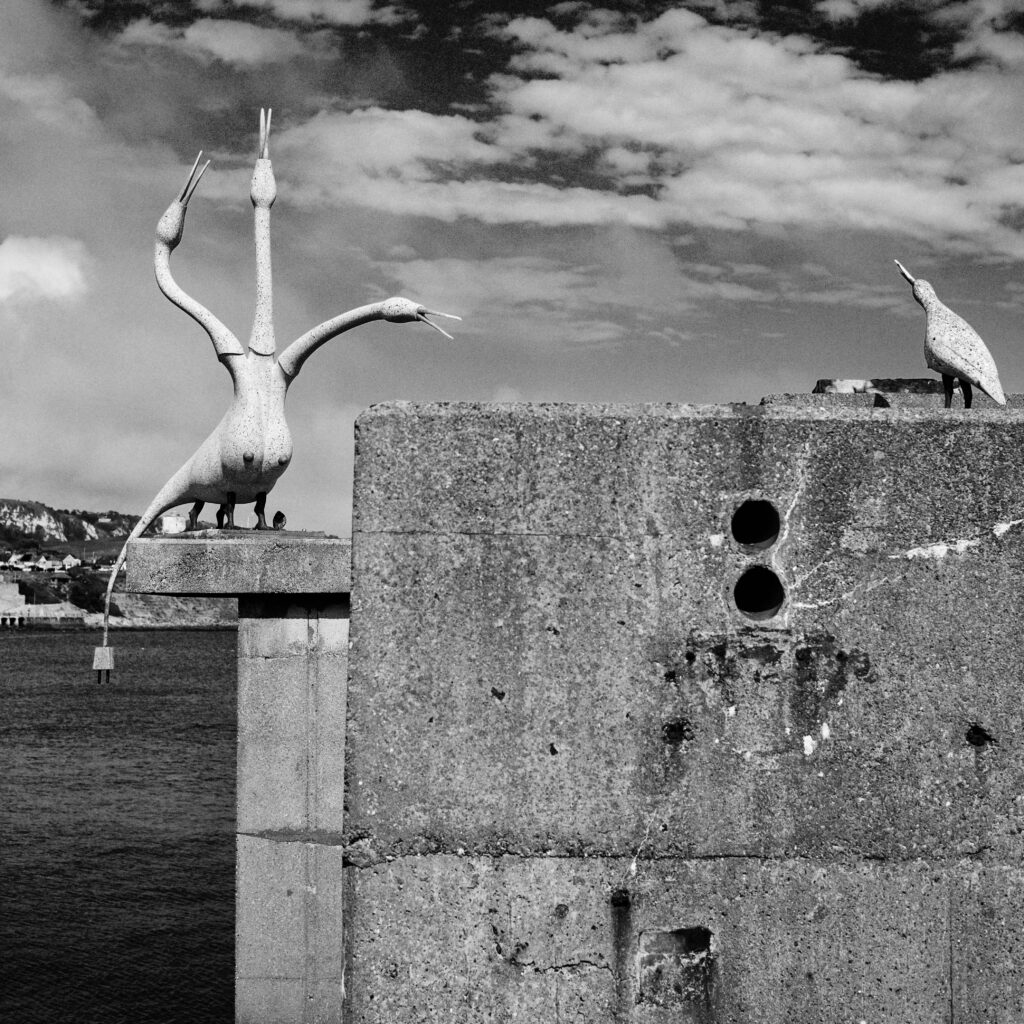
Laure Prouvost’s Above Front Tears, Oui Connect, Folkestone

With a 203FE or 205FCC and a CF lens, be certain whether you have selected F operation or C operation. The body and lens must be configured for the shutter you intend to use.

The biggest worry with the 200 series cameras is their complexity. A 500C/M is a mechanical camera body with relatively simple servicing requirements. A 203FE contains electronic metering, displays, data communications, solenoids and an electronically controlled shutter. Parts are hard to come by, and few Hasselblad repairers will touch them. I wouldn’t say they are unrepairable, but they come perilously close.

There are also some known ageing problems, such as the upper mirror/light baffle problem. This is a rubberised light-sealing strip which can deteriorate or detach. I have experienced this and found a black line across a roll of film, but I was able to remove the material, and the camera, surprisingly, has stayed light tight without a replacement.

Buying a 203FE – what to test

I bought my 203FE from a reputable dealer (Coeln Cameras) online, but this is what occurs to me if you are able to test the camera before purchasing.

As with any film camera, run the camera through every shutter speed. Check that both curtains complete their travel consistently and that the mirror returns correctly. I would test the meter against one you know is accurate. Attach an FE lens and confirm that changing aperture is recognised electronically. If an E magazine is available, change its ISO and verify that the body responds. Inspect the rear curtains carefully without touching them. Look inside the mirror box for loose or deteriorated black light-baffle material. Test a CF/CFE lens both ways: once using the focal-plane shutter and once using the lens shutter with the body on C.

Digital afterlife

Hasselblad’s CFV II 50C and CFV 100C are unusual among modern digital backs because they were designed not just for the contemporary 907X camera, but for use with classic Hasselblad V-System bodies. The CFV II 50C, introduced with the 907X in 2019, uses a 50-megapixel sensor and provides up to 14 stops of dynamic range.

The CFV 100C, introduced in 2024, retains the same sensor dimensions but doubles resolution to 100 megapixels, uses a back-illuminated CMOS sensor and increases the dynamic range to 15 stops. Hasselblad lists the 200 series among the V-System cameras that can be used with the CFV 100C. I would love to try this!

Conclusion

The 203FE is an extraordinary camera. It preserves everything I love about the classic Hasselblad: interchangeable backs and finders; the square 6×6 negative, waist-level viewing and superb Zeiss lenses, while adding capabilities that make it easier and faster to respond to changing conditions: 1/2000-second exposure, aperture-priority automation, TTL metering and lenses as fast as f/2. I just hope it lasts…

Other Medium Format Camera Articles

The Voigtländer Perkeo E (III) Compact Medium Format Camera
The Kodak No 2 Folding Autographic Brownie

The Kodak No 2 Folding Pocket Brownie

The Voigtländer Perkeo Compact Medium Format Cameras

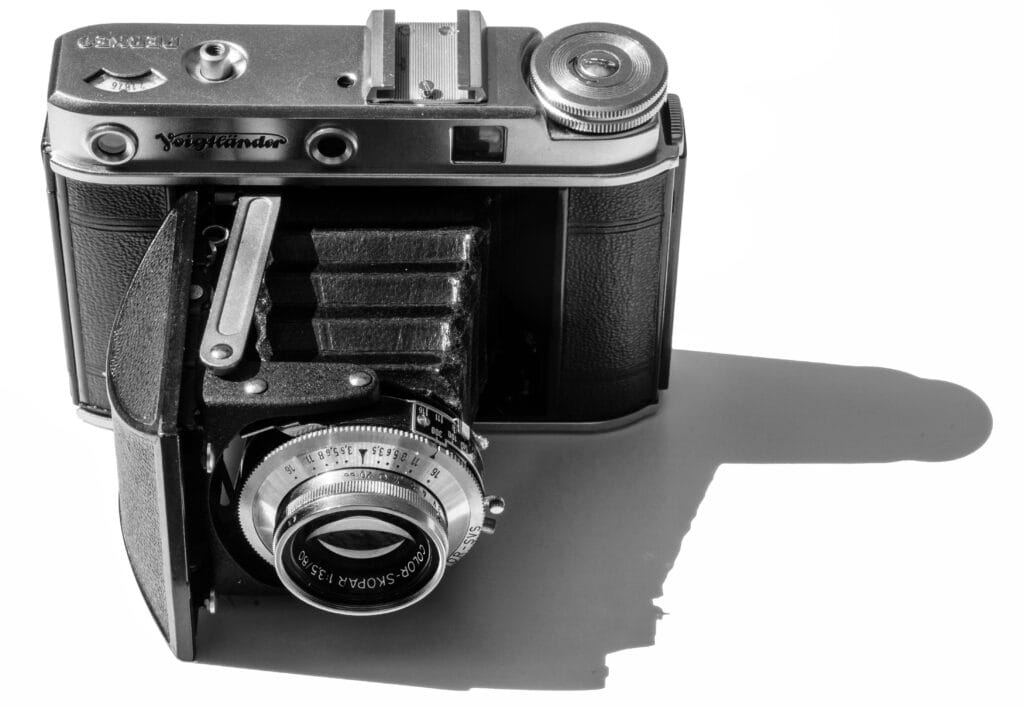
If you want to take a medium format camera somewhere where size and weight matter, in my case, the Goodwin Sands, the Voigtländer Perkeo is ideal. It is among the smallest, lightest 6×6 folders ever built. With this camera, Voigtländer managed to miniaturise roll-film photography without miniaturising the negative. As a result, compared to most other medium-format cameras, it is extremely light and compact.  Equipped with its best lens option, the Color-Skopar 80mm f/3.5, and fitted with one of the faster leaf shutters, the Perkeo is a practical proposition and perfectly capable of taking excellent pictures with plenty of detail.

Voigtlander Perkeo
Voigtländer Perkeo E (III) (1955)

Origins

The name Perkeo first appeared on a compact magazine camera called the Perkeo N°140, produced by Rudolf Krügener, a chemist, in the late 19th century. He had experience in developing small cameras, as one of his models was Dr Krügener’s pocketbook camera, one of the smallest cameras of its time at 45×100×140mm. 

Voigtländer’s first Perkeos were a range of small 3×4 cm self-erecting folders for 127 film in the early 1930s. The company resurrected the name for a series of 120-film 6×6 folders in 1950.

Perkeo = Small

The name Perkeo is associated with diminutive proportions.  It is most often associated with the nickname of Clemens Pankert (AKA Giovanni Clementi), who lived from 1702 to 1735. He served as court jester and wine steward at Heidelberg Castle, and was a man of short stature.  The nickname was apparently derived from his response perché no? (“why not?”) when offered more wine, which he seldom declined.  He was celebrated for his prodigious wine consumption despite his small figure, and became a local legend.  Ironically, he was in charge of the largest wine barrel in the world, the massive Heidelberg Tun. Perkeo is not German for dwarf, as is frequently suggested. I have also seen it attributed to the Pygmy Batis (Batis perkeo), which is not a bat, but a tiny bird from the savannahs of north-eastern Africa. Whatever the origin, we can be sure it is intended to convey smallness.

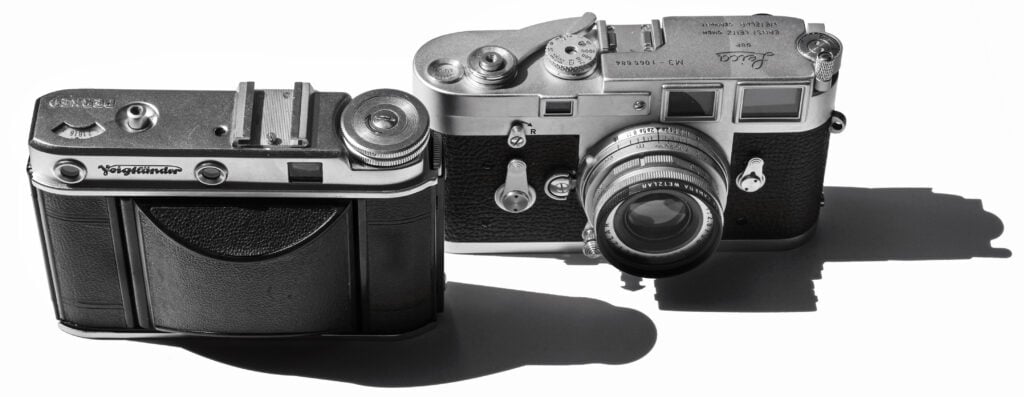
The post-war Perkeo cameras are the subject of this article. I own a Perkeo I, II and the uncoupled rangefinder model, known variously as the E, III or IIIE.  I’ve also seen IIIe. The Perkeos are compact vertical folders made by Voigtländer of Braunschweig in the early to mid 1950s, taking 6×6 cm exposures on 120 film.  All models use a small reverse-Galilean telescopic finder in a metal top housing with a cold shoe. 

Dimensions and Weight

Measurements depend on whether controls are included, but the ranges in the table below are a fairly safe bet.  

ModelWidthHeightDepth, folded
Perkeo I125–127 mm85–89 mm40–43 mm
Perkeo II125–127 mm85–89 mm40–43 mm
Perkeo E125–128 mm91–96 mm42–48 mm

Weights vary by lens and shutter, with the light end of the spectrum being a triplet Vaskar with a Pronto shutter.  At the other end is a four-element Color-Skopar with a Prontor-SVS shutter with a rangefinder housing on top. The spread across the range is 480-560 grams.

Alternatives

Zeiss Ikon’s Super Ikonta and Balda’s Super Baldax are probably the closest lightweight alternatives, though both 6×6 folders offer a coupled rangefinder. The 6×6 Super Ikonta weighs around 660 grams and measures about 138 × 103 × 43 mm folded; the Super Baldax is a little heavier at 700 grams and 135 × 101 × 47 mm.

Voigtlander Perkeo
Voigtländer Perkeo E closed with the Leica M3 for size comparison.

The Perkeo I, II and E (III) models

The design appears to descend from the Bessa 66 of 1938.  Despite the light weight, the cameras feel very solid in the hand. The sources for the many lens and shutter options available for three models occasionally contradict each other, but I have done my best to get these as accurate as I can.

Voigtlander Perkeo I and E
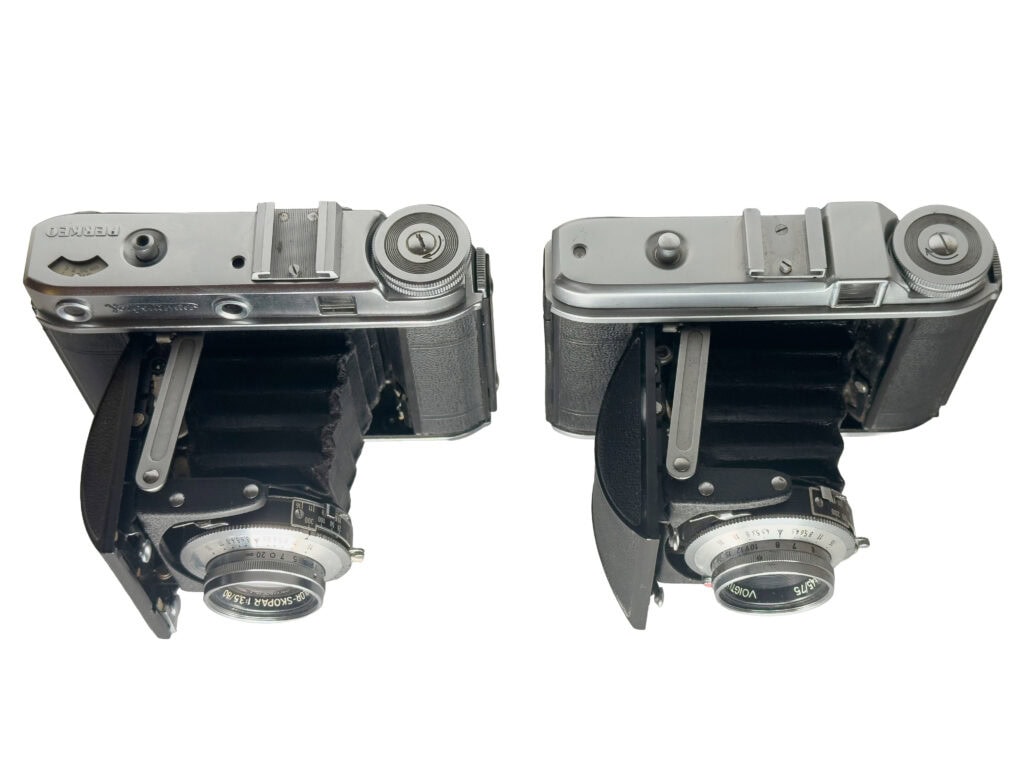
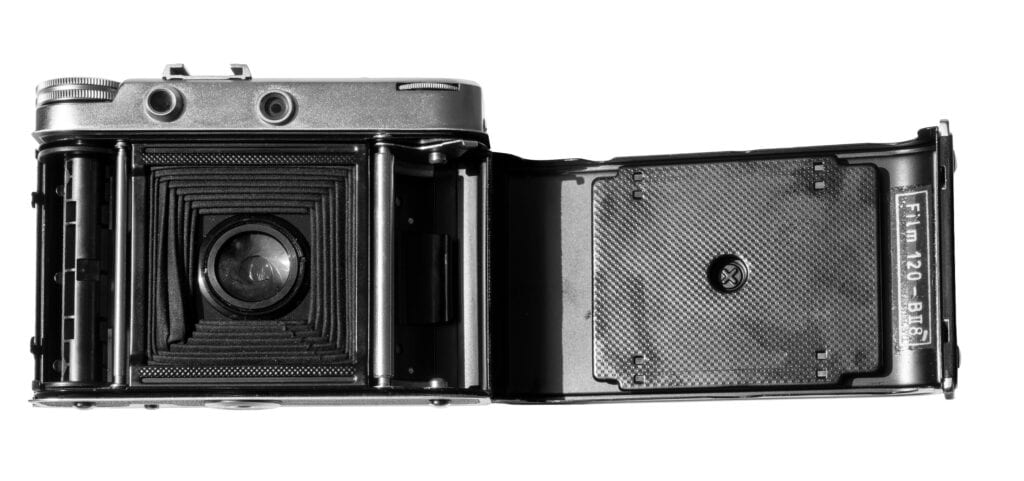
Top view of the Voigtländer Perkeo E (left) and I open.

Perkeo I. This is the simplest model. It provides a finder, scale focusing, and double-exposure prevention interlock (except for the early models).  The film is advanced manually with the winding knob and observing the numbers through the red window on the back of the camera. Lens options were the Vaskar 75mm f/4.5, the Vaskar 80mm f/4.5, or the faster Color-Skopar 80mm f/3.5.

The Perkeo I was offered with a wide range of shutter combinations, including the Vario, Pronto, Prontor-S, Prontor-SV, Prontor-SVS and Synchro-Compur. Compur-Rapid examples are also reported, particularly with the Color-Skopar, although whether this was a regular factory option is not clear.

Perkeo II. Adds an automatic frame counter and wind stop. The red window is needed only to set frame one; after that, the winding knob stops itself at each frame. The film passes over a measuring roller beside the film gate, whose rotation determines the film movement. Once frame 1 has been established through the red window and the automatic system is engaged, the counter and wind stop take over.  Although this sounds simple, the camera is more complex than the other two models.

This arrangement produces tight, consistent spacing, which is why a Perkeo II may yield an additional thirteenth frame on a modern roll of film. The Perkeo II was normally fitted with the Color-Skopar 80mm f/3.5. Documented shutters include the Prontor-S, Prontor-SV, Prontor-SVS, Compur-Rapid and Synchro-Compur.

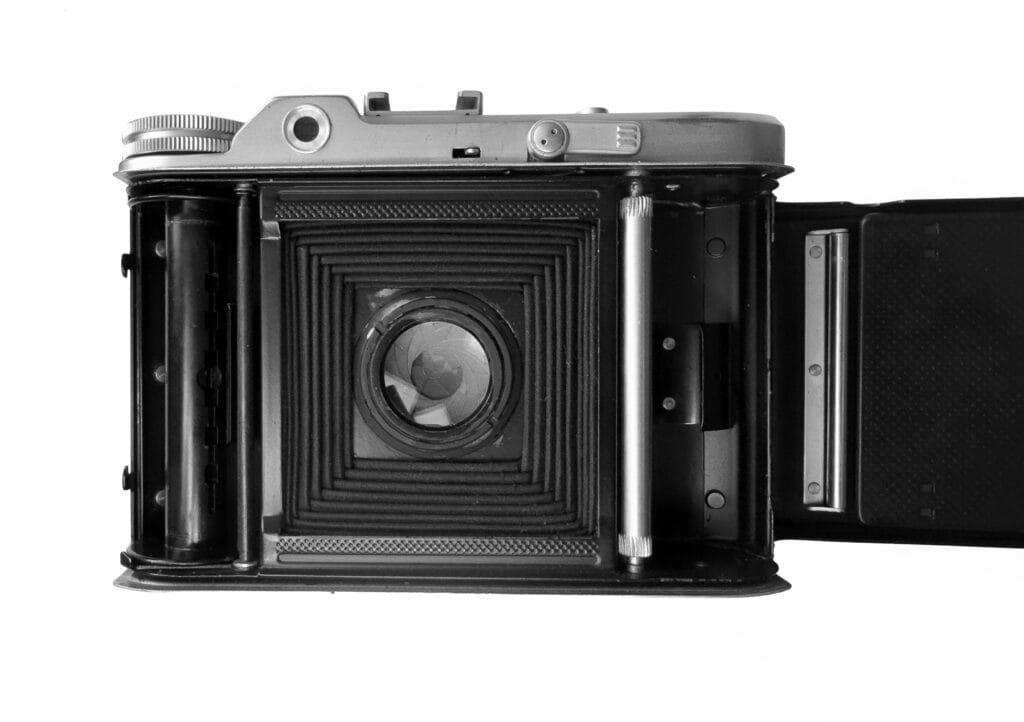
Perkeo E (AKA III and IIIE): This is the final, less common variant, which adds an uncoupled rangefinder in the top housing and moves the Voigtländer name to the front of the body. To my eyes, this is the best-looking design. Once the rangefinder patch is aligned, you read the range from the top scale and then transfer it to the focusing scale.

With the rangefinder fitted, there wasn’t enough space for the automatic counter in the E, so you need to wind on using the red window. However, although the Perkeo E returned to the Perkeo I’s red-window film advance, Voigtländer did not simply reuse its film chamber. Instead, the loading arrangement featured swing-out spool carriers on both sides and guide rollers at both ends of the film gate. This was an upgrade on the Perkeo I, which featured a single roller and swing-out spool carrier on the take-up side.

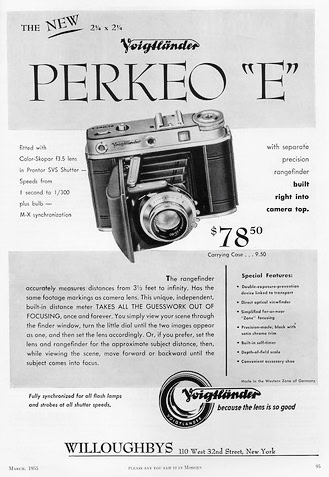
The Perkeo E was offered with either the three-element Vaskar 80mm f/4.5 or the superior four-element Color-Skopar 80mm f/3.5. Documented shutters include the Pronto, Prontor-S and Prontor-SVS; the latter, with a top speed of 1/300 second, is commonly found paired with the Color-Skopar.

Feature Comparison

FeatureEarly Perkeo ILater Perkeo IPerkeo IIPerkeo E
Double-exposure preventionNoYesYesYes
Red-window film advanceYesYesFirst frame onlyYes
Automatic frame counterNoNoYesNo
Automatic film advance stopNoNoYesNo
Film-loading assistanceSwing-out take-up spool carrierSwing-out take-up spool carrierSwing-out take-up spool carrierSwing-out carriers for both spools
Film transport / guidanceSingle rollerSingle rollerToothed measuring roller for automatic frame spacingGuide rollers on both sides of film gate
Uncoupled rangefinderNoNoNoYes
Perkeo feature comparison

A comparison of the Perkeo models

The majority of the differences between the Perkeo I, II and E are on the top plate of the cameras and inside the body.

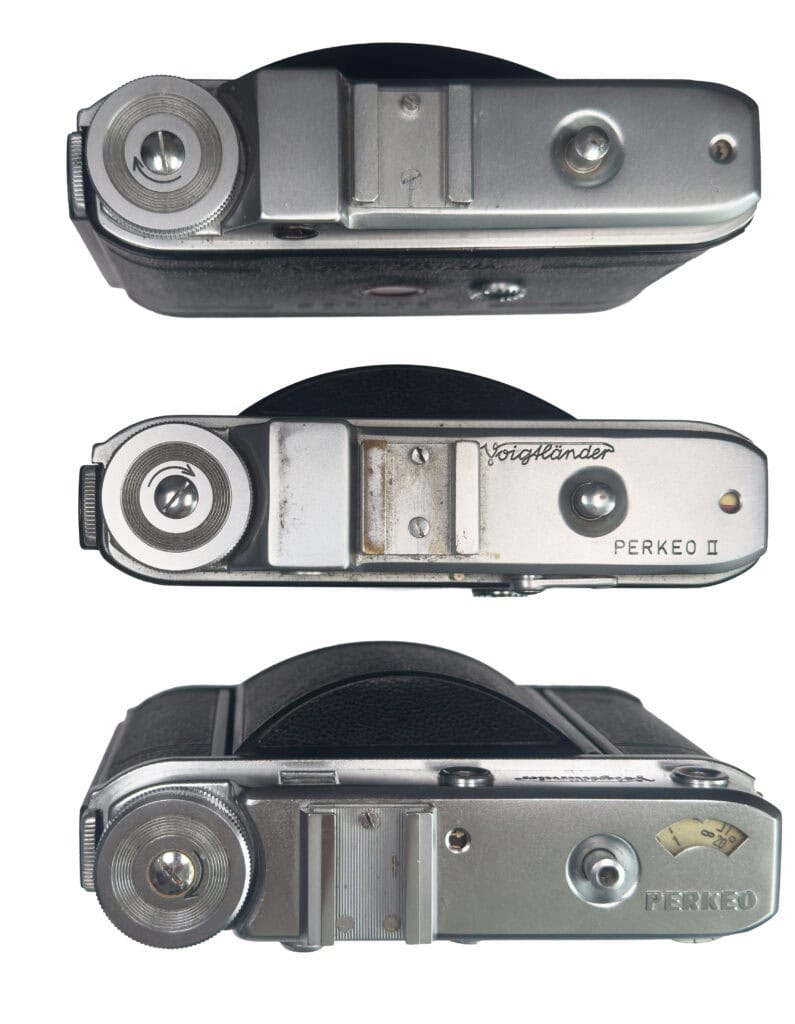
The Perkeo I has an uninscribed top plate with a single viewfinder window. The shutter release button does not have a screw fitting for a cable release and the small top plate window showing an arrow (the double exposure prevention indicator) is on the far right of the top plate. On the Perkeo I Voigtländer calls this a “Checkwindow for Exposure lock”. The Perkeo I has the make and model inscribed in the leatherette on the rear of the camera.

Voigtländer Perkeo
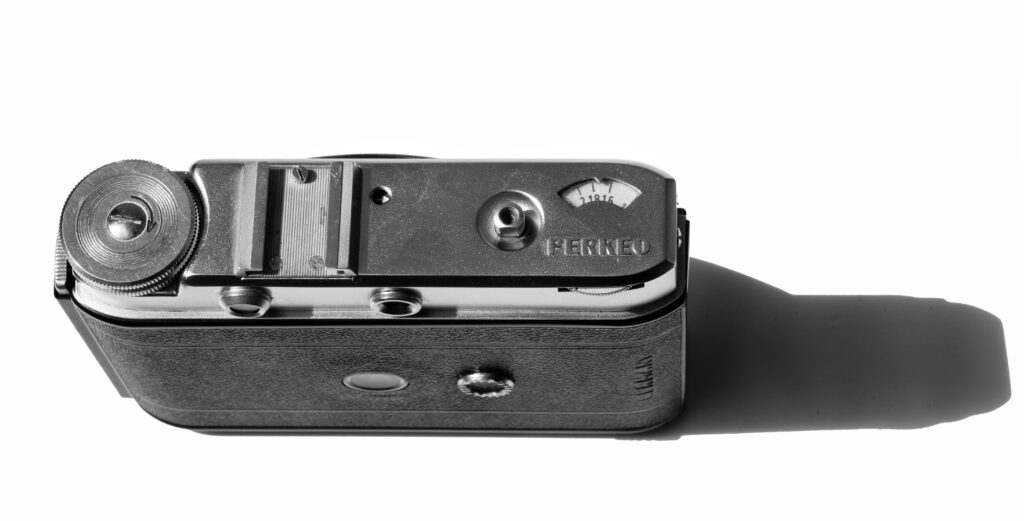
Top view of the three Perkeo models

The Perkeo II has ‘Voigtländer’ and ‘Perkeo II’ inscribed on the top plate near the shutter release button. There is a lever on the rear of the Perkeo II’s top plate which is used to engage or disengage the Perkeo II’s automatic frame-counting and film-stop mechanism. Voigtländer calls it the “locking lever”. The frame counter is on the top plate, on the far right of the camera.

The E model has the additional rangefinder windows with ‘Voigtländer’ inscribed between them and ‘PERKEO’ in raised text near the shutter release button, which will take a cable release. On the E the small window that displays an arrow is a “Signal window for double exposure lock”. This indicates to the photographer whether exposure or winding is required.

All models have ‘GERMANY’ inscribed vertically on the right-hand side of the leatherette at the back. The bottom plate and camera opening button mechanisms appear identical.

There are some less obvious differences inside the cameras. The Perkeo I has a conventional fixed chamber for the fresh roll, while only the take-up spool is carried in a swing-out holder to make loading easier; it also uses a single guide roller on the take-up side of the film gate. The Perkeo II has a roller each side of the gate and another next to the film flatness plate. The roller on the supply side is fluted top and bottom. In the later Perkeo E, both spool holders swing out for loading, and there are two guide rollers, one on each side of the film gate.

The complexity of the Perkeo II interlock

The contrast between the mechanisms of the Perkeo I and E and the more complex Perkeo II is strongest when operating the shutters of all three without film. Testing the Perkeo I and E like this couldn’t be simpler. Open the camera front, set the shutter speed and aperture, cock the shutter and fire it. Turn the wind knob until it clicks and repeat.

Perkeo Voigtlander
Interior of the Perkeo II, showing the fluted roller to the right of the film gate and the locking lever on the rear of the top plate.

The Perkeo II is less straightforward and, when I first bought mine, I struggled to get the sequence right. This is because its film transport incorporates the more elaborate frame-counting and double-exposure interlock, operated by the fluted roller inside the camera.

To test the camera, first move the rear locking lever to the left and turn the fluted metering roller until the mechanism stops and the frame counter reaches frame 1. Set the shutter to a moderate speed such as 1/50, cock it manually and press the top-plate release. After firing, turn the metering roller again to simulate advancing the film to the next frame; this resets the interlock and allows the shutter to be released again.

Loading and shooting with the camera is considerably simpler!

Dating the Perkeo models

The best dates I can find for the range are 1951 to 1955 for the Perkeo I, 1952 to 1955 for the Perkeo II, and 1955 to 1957 for the Perkeo E. No factory production records survive, so all dates come from catalogues and price lists. The bodies don’t carry a serial number, though the shutter and lenses do. The serial number on my Perkeo E is on the outer edge of the lens. As far as I can tell, the lens was made in 1954 for a camera introduced in 1955. My Perkeo I’s Vaskar was made in 1951.

Voigtländer Perkeo
An American Ad for the Perkeo E from 1955

The rise and fall of the 6×6 Folder

The square 6×6 became popular in the mid-1930s. It was simpler to use, since there was no distinction between landscape and portrait orientation, and it suited contact printing and small enlargers. However, by the late 1950s the 6×6 folder’s day was over. Coated lenses and improved emulsions had made 35mm negatives ‘good enough’ and folders were costly to build. Professionals and serious amateurs moved to twin lens reflexes and the Hasselblad 500C, and the rest of the market moved to 35mm. The Perkeo E was one of the last generation of folders and arrived just as the market had moved on.

The Lenses

My Perkeo E and Perkeo II both have the Color (spelled thus) Skopar lens.  Skopar was Voigtländer’s name for their four-element Tessar-type lens. Color refers to the lens coating, which was considered better for colour photography.  It is a quality, sharp lens, with just a bit of softness in the corners wide open.

My Perkeo I has the Vaskar f/4.5 75mm lens. This is a coated three-element Cooke-type triplet, which was the basic lens offering in the range and about 41mm equivalent on a 35mm camera. It is by no means a bad lens, but definitely benefits from stopping down to f/8.

Opening and Closing

Open the front door by pressing a small button on the base of the camera. Next, pull the door open until it gives a loud, positive click after it erects the lens.   To close the door, depress the two buttons on the inside of the door at the front.  If you need it, there is a small stand at the base of the door, marked with a red arrow.

Loading the Perkeo E and I

These are for the E, which has the most advanced loading functions, but the procedure is very similar for the I, except that their is only one hinged cradle.

Open the back by depressing the two buttons on the left (wind) side of the camera and pulling out the film advance knob, then swing the hinged cradle on the right-hand side (lens away from you) out.

Voigtlander Perkeo
Interior of the Perkeo E (III) Medium Format Uncoupled Rangefinder.

Move the empty take-up spool, usually in the camera, into the cradle on the wind side, and put the fresh roll into the opposite chamber. Pull the paper leader across the film gate and slot its tip into the take-up spool, then turn the knob a couple of times until the paper is straight and taut.

Swing the cradle back in and close the back until it latches.  Lastly, open the red window cover and wind steadily, watching for the warning dots and then the figure 1. Stop the moment it sits centred in the window.  

Unloading the I and E

After taking the 12th exposure, continue turning the film-wind knob to wind the remaining film and backing paper completely onto the take-up spool. Continue winding until the backing paper has passed completely through the red window and onto the take-up spool. Then open the camera back, remove the exposed roll, keep it tightly wound and secure it with the adhesive tab.

Loading the Perkeo II

Before opening the camera, move the rear locking lever to the right. In this position the automatic frame counter and film-stop mechanism are disengaged, so the film can wind freely during loading.

Open the camera back and load as for the E and I above. The Perkeo II uses a spring clip on the supply side: push the fresh 120 roll under it, draw the backing paper across the film gate and make sure it is correctly positioned against the film-metering roller before securing the leader in the take-up spool. Wind sufficiently to ensure that the paper is running straight and securely onto the take-up spool, then close the camera back.

Open the red-window cover and slowly turn the film-wind knob. Watch for the backing-paper markings; you will see warning circles before the number. Stop when the number 1 for the 6×6 track is centred in the window. Wind slowly as you approach it, as there is nothing to prevent you overshooting while the locking lever is to the right.

Close the red-window cover and move the rear locking lever to the left, towards the film-wind knob. This engages the automatic frame-counting and film-stop mechanism, and the top-plate frame counter should now indicate 1.

Once the camera is loaded, do not move the rear locking lever again during the roll, as doing so will reset the counting mechanism. After each exposure, turn the film-wind knob until it reaches its automatic stop; from this point onwards the metering mechanism, rather than the red window, determines the position of each frame.

Underloading the Perkeo II

After taking the 12th exposure, turn the film-wind knob again until the frame counter reaches the red indication. If the film will not advance from 12, make sure the shutter has been cocked and the top-plate release has been operated fully, as the body interlock must complete its cycle before the transport is released.

Once the counter shows red, move the rear locking lever to the right to disengage the automatic film stop, then continue winding until all the backing paper has passed onto the take-up spool. Then open the camera back, remove the exposed roll, keep it tightly wound and secure it with the adhesive tab.

Setting the exposure

With no built-in light meter, you’ll need to use a handheld meter, a phone app, or the Sunny 16 rule, after which you can set the exposure on the shutter housing at the front of the camera. The speed ring runs round the barrel, giving you one second to 1/300 plus B on my E’s Prontor-SVS, and one second to 1/500 on the Perkeo II’s Syncho-Compur. The aperture has its own small lever near the bellows, running f/3.5 to f/16 on those models and you read it against the scale on the lens barrel. 

There is a third ring on the camera on the SVS, which is a synchro switch for flash:

  • M for M-type flashbulbs, which you can use at speeds between 1/50 and 1/300.
  • X for electronic flash at any speed, and for bulbs at 1/25 or slower.
  • V for the self-timer, which also works with electronic flash up to 1/300 and bulbs up to 1/25. Its synchronisation matches X.

I’ve never used flash with the camera and leave the ring on X.  If needed, a flash plugs into the PC socket on the shutter barrel.

Focusing

The Perkeo I and Perkeo II are both scale-focusing cameras. To focus, you estimate or measure the distance to the subject and rotate the front focusing ring until that distance is opposite the index mark on the lens. Both cameras also provide zone-focus markings, intended to make rapid shooting easier: at f/8, presetting the lens to the appropriate mark gives sufficient depth of field for groups or more distant subjects without having to judge the distance precisely. For more critical work, particularly at close distances or wide apertures, an uncoupled accessory rangefinder can be fitted to the accessory shoe; the measured distance is then transferred manually to the lens scale.

Focusing the Perkeo E involves using an uncoupled rangefinder, which was new to me, and I didn’t find it particularly easy.  Being uncoupled, it requires two separate movements. First, you focus the rangefinder by aligning the images in the rangefinder patch from the rangefinder window.  This has higher magnification than the viewfinder to help achieve focus.

Next, you read the distance from the indicator on the top of the camera, and then finally transfer that figure to the lens.  Composition is done through the second window, which has lower magnification.  I couldn’t find accurate figures for magnification online, but after a fairly quick-and-dirty home test, I estimate 0.7 for the viewfinder and 1.1 for the rangefinder.

Voigtlander Perkeo
Top rear view of the Perkeo E (III)

The rangefinder patch isn’t particularly bright, so I’ve moved to zone focusing witht the aid of a LiDAR rangefinder app on the iPhone.

As with the Perkeo I and II, there are focusing aids that assist with focusing. On the E set the aperture to f/8, then rotate the lens barrel to the triangle symbol on the lens, which is set just past the 3 metre mark (3.35m). Everything from 2.5m to 5m should be sharp. Set the focus to the circle symbol at 10.06m, and everything will be sharp from 5.05m to infinity. The circle is particularly useful for landscapes.

My Perkeo I’s Vaskar is calibrated in feet, rather than metres. The recommended aperture for the focusing aids is f/8. The distances are 11 feet (sharp 8½–18 ft) for the triangle and about 33 feet (sharp 18 ft–∞) for the circle.

Setting and Firing the Shutter

The shutter is cocked using the cocking lever on the shutter housing beside the lens and fired with the button on the top plate.  For the I and E, open the red window cover to wind on to 2, and repeat for the rest of the roll.  At the end (12 or 13 frames), wind on until the paper trailer clears, then open the back in the shade and seal the roll.

The Red Window

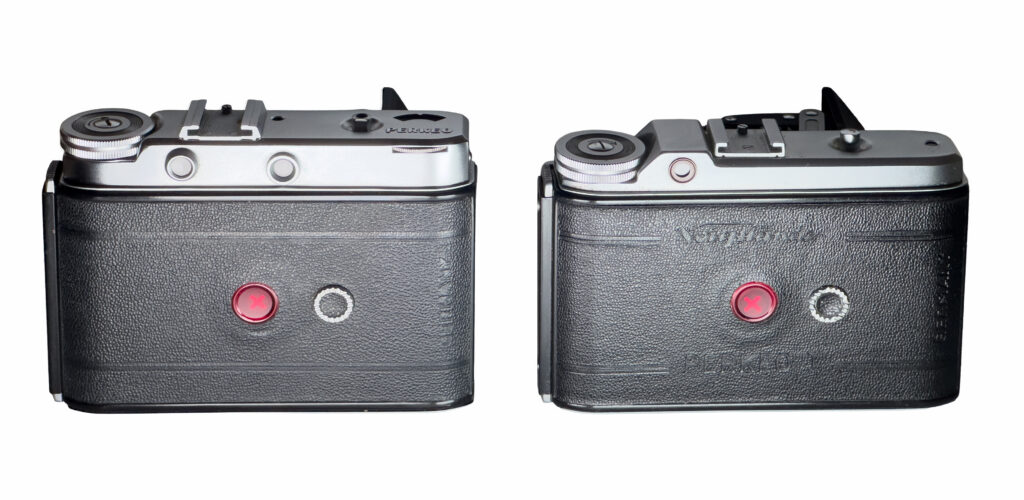
The Perkeo I and E both count frames through a small red window in the back door, and all but the earliest Perkeo I models are fitted with a rotating cover, marked with an X when closed. The II alone has a top plate frame counter.

Voigtlander Perkeo
Rear views of the Perkeo E (left) and Perkeo I showing their red rear windows.

The purpose of the red window is to keep light from fogging the film. The ruby-coloured glass passes only red light, which the orthochromatic and slow panchromatic stocks were less sensitive to.  Our faster modern emulsions and thinner backing papers are less forgiving, and a window left open throughout the roll may well fog the roll through the paper. On the Perkeo II, the cover is needed only briefly because the window is used only to position the first frame before the auto-stop advance takes over.  The Perkeo I and the rangefinder-equipped Perkeo E have no frame counter, and the cover needs to be opened each time you wind on.  This is common on early cameras and I find it mildly tedious. However, whether the complexity of the Perkeo II is a good trade off in alleviating this is another question.

Double-Exposure Prevention

Every Perkeo has double-exposure prevention apart from the earliest Perkeo I bodies. The Perkeo I and E use a relatively simple double-exposure interlock: after an exposure the body release is locked until the film wind has been operated, while an indicator shows whether the camera is ready to expose or needs to be wound on. The Perkeo II goes considerably further, combining double-exposure prevention with a film-driven metering roller, automatic frame counter and film-advance stop.

ModelDouble-exposure prevention mechanismIndicatorFilm advance/spacing
Perkeo I (later versions)Exposure locks the body release; winding on resets itArrow forward/towards the subject = ready to expose; arrow towards camera back = wind/lockedManual. Continue to next number in red window
Perkeo IIBody release and film transport are interlocked. Exposure releases transport and reaching the next measured frame restores the exposure state.Frame counter, no window with arrowAutomatic. Measuring roller, counter and wind stop
Perkeo EExposure locks the body release; winding on  resets itArrow towards the subject/away from the photographer = ready/unlocked; arrow towards camera back = wind/locked. Viewed normally on your camera, the ready position appears to point rightManual. Continue to next number in red window
Double Exposure Prevention Mechanisms

An Excursion to the Goodwin Sands 

I took the Perkeo E on a trip to the Goodwin Sands.  We were taken to the sands (and back!) by Dover Sea Safari, who were excellent.  The crew were both extremely professional and personable, and the boat was well equipped.  The journey from Dover takes about 30 minutes in clear weather, which is what we enjoyed.   All my gear had to fit into a small Peli-type watertight case, and I had a Nikon Zf, a 24-120 mm zoom, and a 100-400 mm zoom to take.  The Perkeo was the only option for medium format.  

Voigtlander Perkeo E
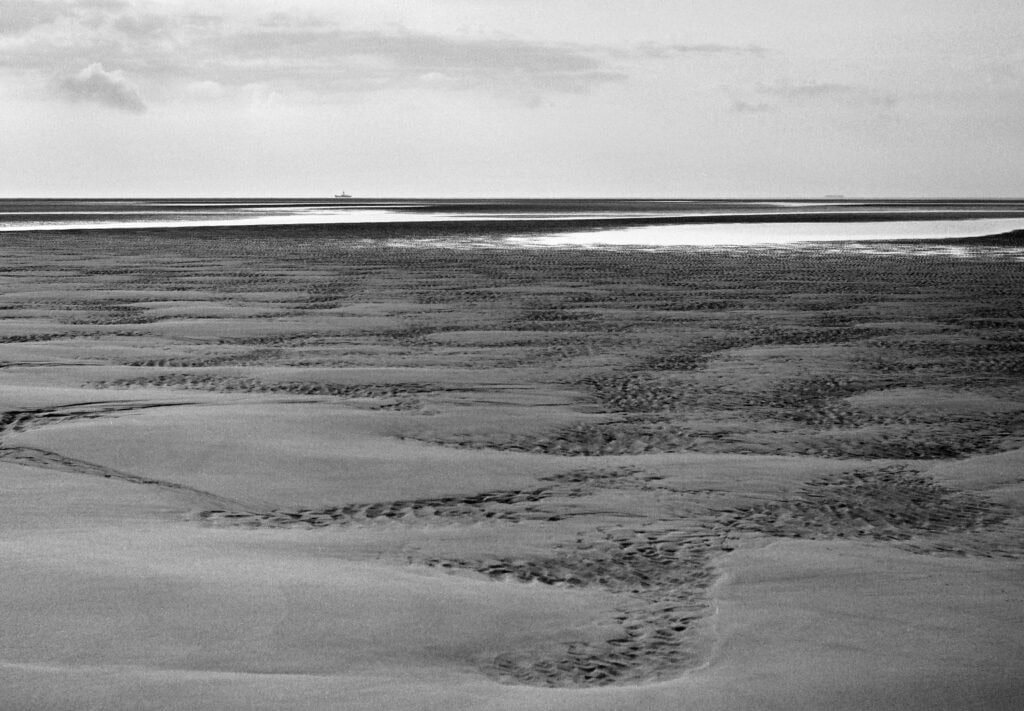
The Goodwin Sands, with the East Goodwin Lightvessel on the horizon. Shot with a Voigtländer Perkeo E (cropped)

Shooting the Voigtländer Perkeo E out on the Goodwin Sands was easy enough.  I didn’t have to worry about focus as I was always set to infinity, as I needed the horizon as sharp as possible for the East Goodwin Lightvessel, which you can see as a distant speck. We visited on the 1st of August 2026, just before she was permanently withdrawn by Trinity House on August 14th – the last of the historic lightship station markers on the Goodwins. It was an event we wanted to mark, and the reason I took Nikon’s excellent 100-400mm zoom on my Nikon Zf.

Shooting with the Perkeo E at f/8, the light meter on my phone told me I needed about 1/500 most of the time, and 1/300 was the fastest shutter speed I had available. However, with black and white film, this proved to be fine for the shots I took. The only drawbacks of shooting with the Perkeo were the slow wind-on and the need to remember to cover the red window between frames.  I was glad I took it.

Further Reading