If you are familiar with early rangefinder cameras, the Konica I (1947-1951) will look and feel familiar enough. If not, and it is your first encounter with a rangefinder, or if you are used to modern rangefinders, the little Konica offers a distinct shooting experience.
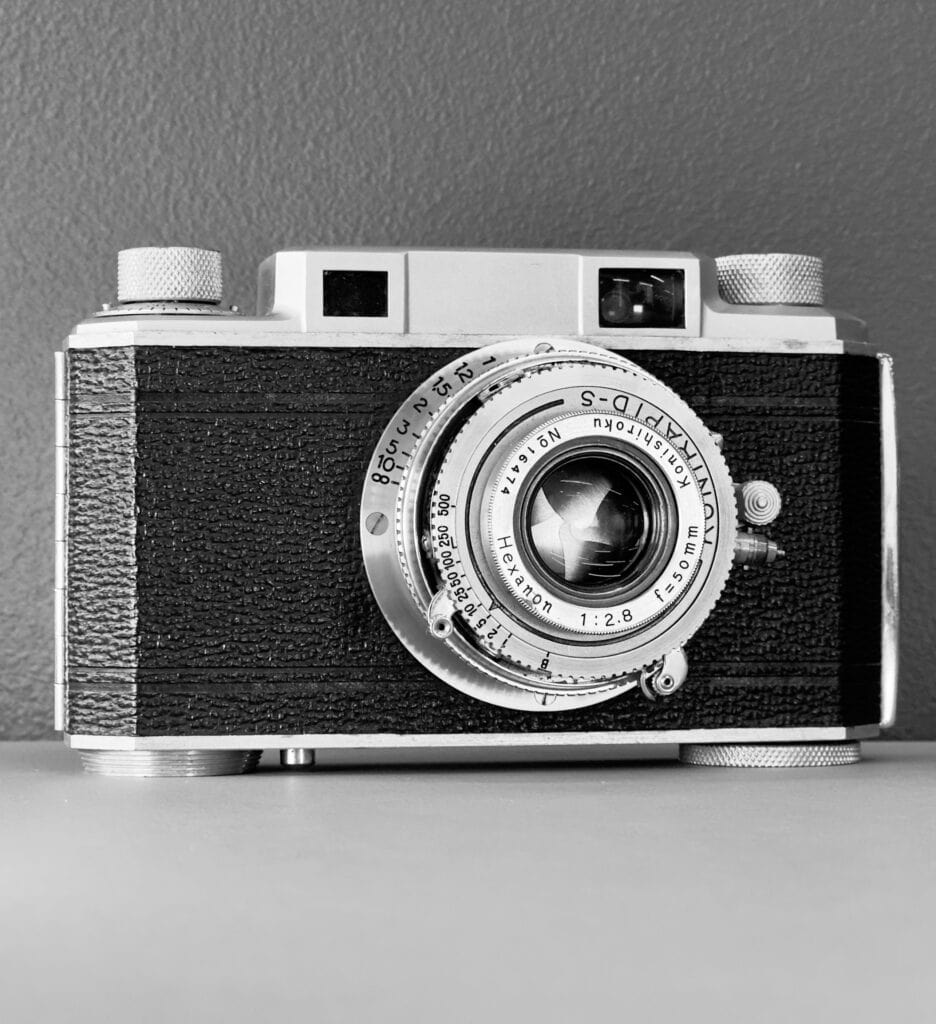
The Konica I is based on the design of a late 1930s 35mm prototype called Rubikon, which was re-purposed for X-ray photography during WWII. After the war, Konishiroku (the company name at that time) returned the Rubikon to its original design and renamed it ‘Konica’. This was derived from ‘Konishiroku’ and ‘camera’, a similar naming convention to ‘Leica’ and ‘Yashica’. The result was the 1947 Konica I rangefinder, the company’s first 35mm camera.
Whilst researching the Konica rangefinder, I discovered that Konica has a long and fascinating history with many firsts and wrote a short article on it, which you can find here.
Early Rangefinder Development
The first rangefinder cameras, sometimes referred to as “telemeters” – a pleasingly futuristic sounding term – appeared early in the twentieth century. Kodak was first to market with a coupled rangefinder camera in 1916 with the Kodak 3A Autographic Special. Kodak’s pioneering autographic feature creates another interesting diversion – you can read about it in my review of The Kodak No. 2 Autographic Brownie.
The Leica I of 1925, not itself a rangefinder camera, popularised the use of accessory rangefinders. A few years later in 1932, The Leica II and Zeiss Contax I were launched and gained popularity. In 1936 the Contax II integrated the rangefinder into the viewfinder, an innovation that was introduced by Leica only in 1954 with the legendary M3.
The Konica I Rangefinder
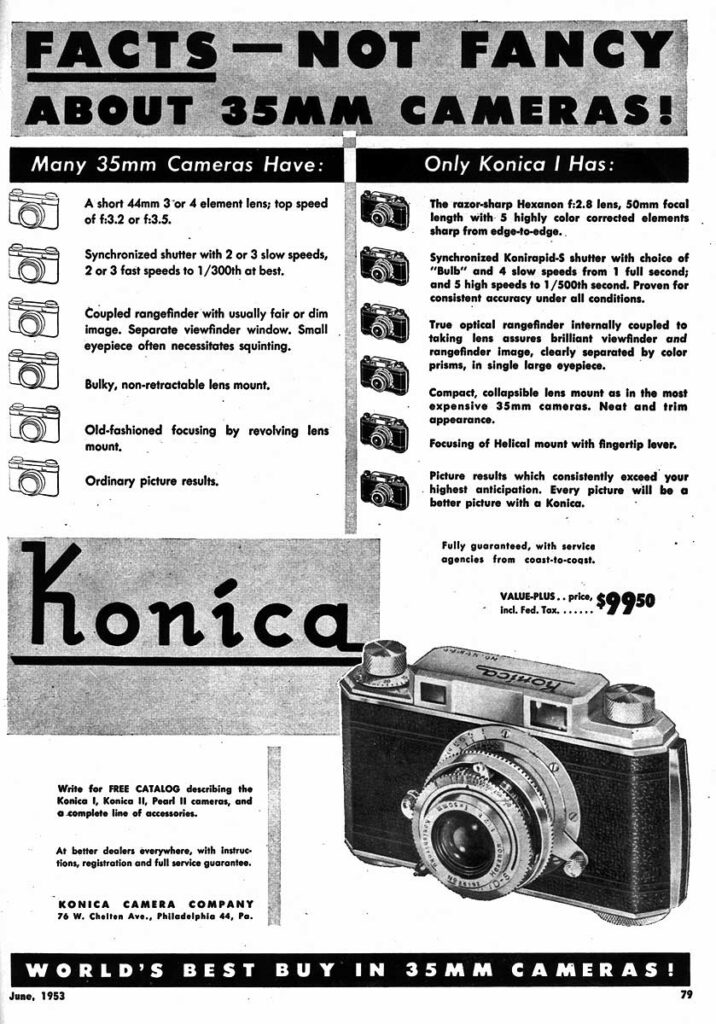
The Konica I is a coupled rangefinder film camera with a single eyepiece and an excellent 50mm Konishiroku Hexanon coated 50mm f/2.8 lens. The Hexanon is a Heliar type with 5 elements in 3 groups and the Konirapid-S leaf shutter offers speeds of 1–500 second and Bulb (B).
First Impressions
The first thing you are likely to notice about the Konica I is how solid it feels. While it doesn’t have quite the ‘milled from solid steel’ feel of a Leica M3, it has a real quality feel to it.
Significantly, the rangefinder is bright, which is another hallmark of quality. Moreover, unlike many early rangefinder cameras, there is a single window rather than two separate rangefinder and viewfinder windows – like the Leica M3 of 1954. Unlike later Konica rangefinder models, there are no framelines and no parallax compensation, which is reflected in some poor framing on the first roll of film I shot.
Like many cameras with leaf shutters in the first half of the twentieth century, most of the controls including the shutter cocking lever, shutter release, shutter setting ring (and scale) are on the lens barrel. Right at the front is the shutter speed dial. The lens itself is retractable and requires pulling out and turning to lock in place, which is the same as on the Leica I.
A Closer Look
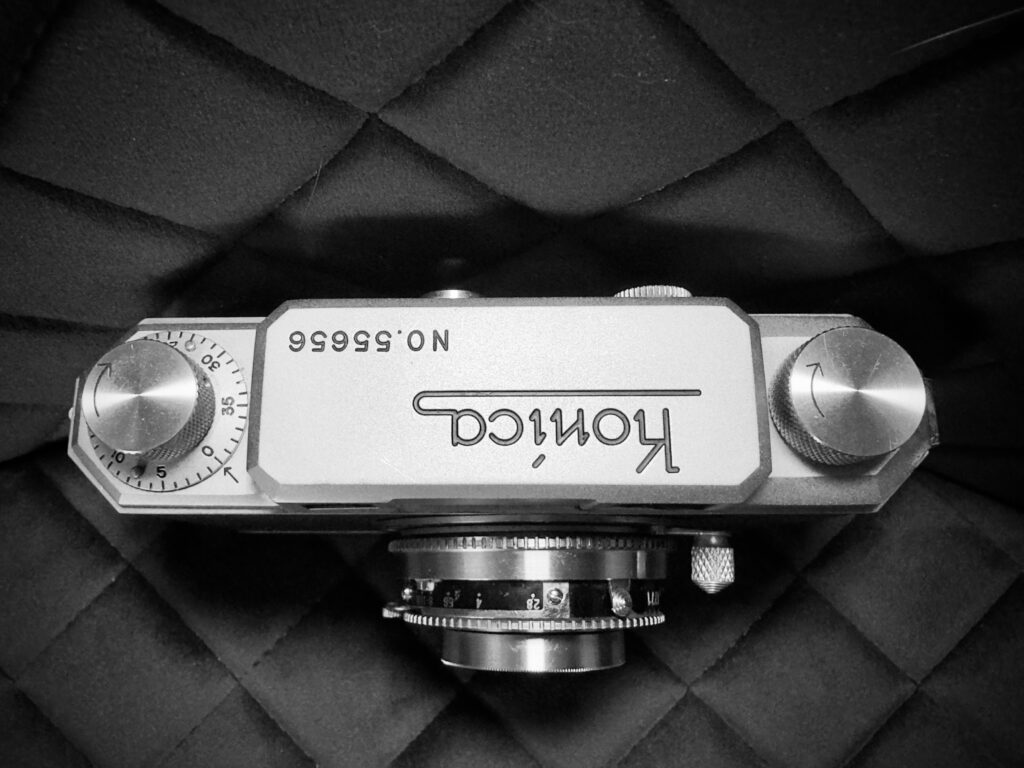
The top plate is engraved ‘Konica’ with the serial number (see variants below), and there is a winding knob, rewinding knob and a frame counter. On the rear of the top plate is a single rangefinder/viewfinder eyepiece and an unmarked, initially mysterious, button. Below, the bottom plate has a locking disk for opening and closing the camera back, a small silver film rewind button and a tripod socket.
Like many rangefinders, the Konica I uses helicoid focusing. This system rotates the lens element along a helical thread and moves it closer or further from the film plane. It was adopted by Oscar Barnack of Leica for the precise and repeatable focus in a short throw that it offered. Focus is operated via a ‘fingertip lever’ on the lens barrel, where the distance and (tiny) Depth of Field scales are engraved. The focus range on my model is 1-10m and infinity.
A useful cable release can be found on on the lens barrel along with a less useful (for me) and rather obtrusive flash connection post (or plug), which is marked bright red. The flash sync speed for those models that have it is 1/50 second.
I don’t know what the rangefinder base of the Konica I is (though I could measure it), nor could I find the viewfinder magnification. Accordingly, I can’t work out the rangefinder’s Effective Base Length. However, as the Konica I features a fixed 50mm lens that’s not too much of a concern; long lenses or ultra fast lenses make this a more important consideration.
Loading
Loading the Konica is simple enough. You open the camera back by turning the locking wheel on the bottom plate from ‘C’ to ‘O’ in the direction of the marked arrows. Insert the film canister into the camera, and pull the film leader across to the take-up spool in the normal fashion, engaging the film perforations onto the sprocket. You can then advance the film with the wind on knob on the top plate and reset the exposure counter to zero.
Shooting with the Konica I
Shooting is slower and requires a few more steps than later rangefinders, as the controls are not connected in the way that they are on later models. The shutter is not cocked by the film advance – this came with the Konica III in 1956; the shutter has separate levers for cocking and firing, and the winding knob needs a separate winding button (the mystery revealed!) to drive the exposure counter.
In a charming review of the Leica I Model A: First review of the new 1930 model the reviewer ‘Cyclops’ describes this feature as a film advance computer. He goes on to remark that “this intelligent and pioneering system clicks along, frame by frame, so you always know exactly where you are. What will they think of next? The same review describes the shooting process as Having wound on your film set your aperture, decided on exposure time, calculated the distance to the subject and framed the scene you are ready to go“. This is similar to what you will experience with the Konica, though with the luxury of a single window.
Preparing to Shoot
Before taking a picture, firstly pull out the lens and twist left until it locks in place. Failure to do this will result in very blurred pictures. There is only one true locking position, but it can feel like it is locked in others.
Secondly, make sure you have removed the lens cap. This is obvious, I know, but rangefinders can’t ‘see’ through the lens, so if you leave it on, you won’t notice any difference in the viewfinder.
Thirdly, you’ll need a light meter reading or use the Sunny 16 rule – there is no built-in light meter. I am OK at estimating lighting, but I prefer to confirm with a meter. I use an app on my iPhone (myLightmeter Pro), which works really well and is very convenient.
Shooting Steps
Here are the shooting steps. As you will see, there are a couple more than you would find on later rangefinders like the Leica M3.
- Set the required aperture using the iris adjustment tab at the bottom of the lens barrel. It is quite small and is marked with concentric rings.
- Set the required shutter speed with the shutter speed dial at the front of the lens barrel.
- Focus the lens using the knurled focus lever. It has a nice smooth action.
- Cock the shutter using the lever on the lens barrel. If the shutter is uncocked the lever is visible in the viewfinder window. The back of the lever is painted red to act as a flag.
- Fire the shutter using the shutter release trigger using your index finger. This felt natural to me after just a few frames.
- Press the frame counter button
- Wind on the film (full turn) to the next frame.
I noticed a couple of things when I took my first roll of film. Firstly, the shutter release is very sensitive and so has a finger support to prevent accidental releases. Secondly, there is no automatic double exposure prevention, as you can always cock and release the shutter. Perhaps unsurprisingly, this was corrected by the Konica II, but for Konica I users this combination can lead to wasted frames.
The overall experience is satisfying if you enjoy slow photography and the quality of the images is excellent. However, the wind on button does take some getting used to.
Manufacturer’s Instruction Manual
If you are looking for more information on shooting the Konica I, you can find a scanned copy of the Konica I Rangefinder manual at Mike Butkus’s site.
Identifying Model Variants
During my research, I found that my Konica I (which I purchased from the excellent Coeln Cameras) is a Type F. I also discovered that the camera was originally known just as The Konica and only gained the designation Konica I, or Konica Standard later.
Type Ab and As models had ‘Made in Occupied Japan’ engraved on the top plate, whilst B and Type C models had this embossed in the bottom leatherette. Type C can be distinguished form the B as the name ‘Konishiroku’ is omitted from the back door. Subsequently, the Type Cs introduced the Konirapid-S Shutter, whilst the Type D updates the text on the camera bottom to read ‘Made in Japan.’ Type E introduced the Hexanon f/2.8 lens. Finally, the Type F can be identified by the ‘Made in Japan’ engraving on the metal door lock wheel on the bottom plate.
Lens Variations and Serial Numbers
Konica I Ab and As models were fitted with the f3.5 Hexar lens. With the Type B and C models a Hexar f2.8 version became available and the superior Hexanon f2.8 was introduced with the E model. According to the Konica Collector website, the f3.5 Hexar serial numbers run up to 37,600, the 2.8 Hexar to 46,000 and the 2.8 Hexanon to 68,700.
Pros and Cons
Pros
- Combined viewfinder and rangefinder with bright rangefinder patch
- High quality construction
- Excellent f2.8 Hexanon lens
- Compact with retractable lens
- Inexpensive to purchase
Cons
- No double exposure prevention
- Need to remember to press the wind on button before advancing the film
- No strap lugs
- No parallel compensation
- Highly sensitive shutter trigger easy to release accidentally
Thoughts and Further Reading
If you have thoughts or experiences you’d like to share on the Konica I, I’d be delighted to hear from you – please leave me a comment below. There is more to read on classic cameras, the history of photography and travel on this site. You might be interested in these articles:
- The History of Konica – A history of firsts
- The Nikon F – Nikon’s first SLR
- The Nikon F3 – Back to film
- The Nikon FM3A – Nikon’s last manual SLR
- The Nikon F6 – Nikon last film camera
- Ten Days in Japan – Travel in Japan
- The Kodak Folding No 2 Autographic Brownie
- When Photos Looked Like Paintings – Pictorialism
- From Chemistry to Computation (Photography timeline)
- Timeline of Early Cameras